|
TOP CARINE
english version


This tutorial was created with Corel19 and translated with Corel17, but it can also be made using other versions of PSP.
Since version PSP X4, Image>Mirror was replaced with Image>Flip Horizontal,
and Image>Flip with Image>Flip Vertical, there are some variables.
In versions X5 and X6, the functions have been improved by making available the Objects menu.
In the latest version X7 command Image>Mirror and Image>Flip returned, but with new differences.
See my schedule here
Italian translation here
French translation here
Your versions here
For this tutorial, you will need:
Material here
TubeNaraPamplona.218.psp
2281-luzcristina.pspimage
(here the sites of the tubemakers)
Plugins
consult, if necessary, my filter section here
Alien Skin Eye Candy 5 Impact - Glass here
Mura's Meister - Copies here
Mura's Meister - Perspective Tiling here
Filters Unlimited 2.0 here

Copy the Gradient in the Gradients Folder.
Copy the Mask in the Masks Folder.
1. Set your foreground color to #e5e0da
Set your background color to #381710.
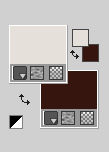
2. Set your foreground color to Gradient and select the Gradient SuiGrad044, style Linear.
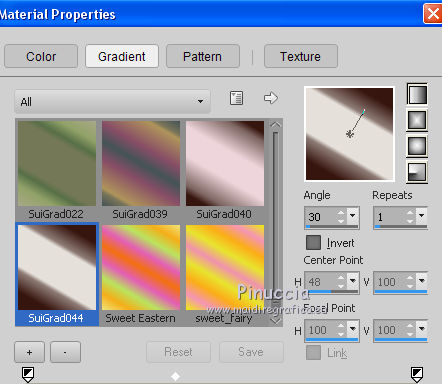
if you use other colors, also the gradient will change color
3. Open a new transparent image 1000 x 750 pixels,
Flood Fill  with your background color #381710. with your background color #381710.
4. Layers>New Raster Layer.
Flood Fill  with your Gradient. with your Gradient.
5. Effects>Geometric Effects>Perspective horizontal.
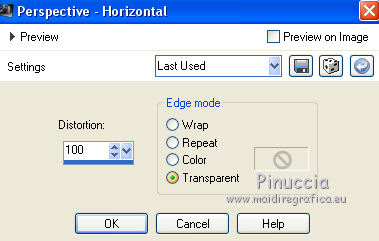
Image>Mirror.
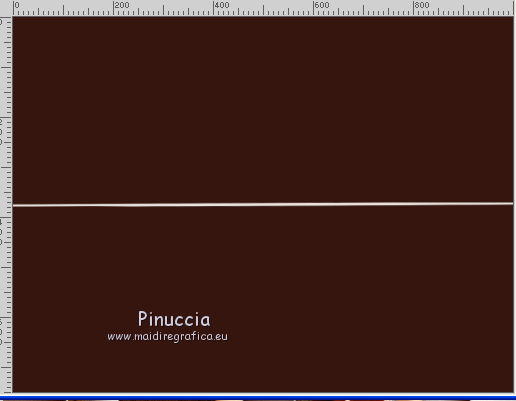
Again Effects>Geometric Effects>Perspective horizontal, same settings.

You'll get this
6. Effects>Distortion Effects>Pinch.

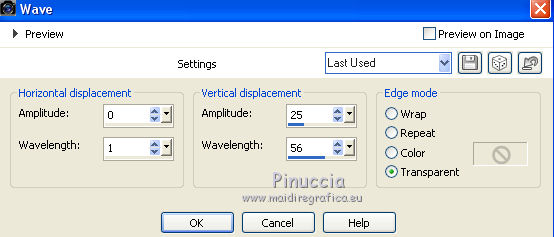
7. Effects>Distortion Effects>Vagues.
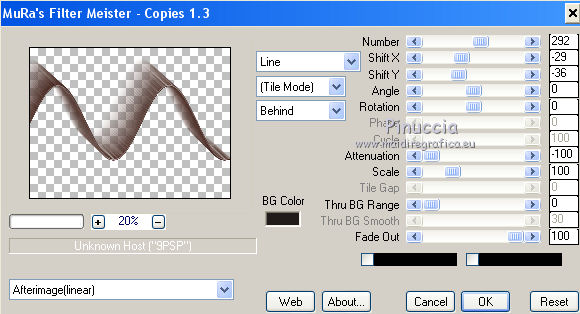
8. Effects>Plugins>Mura's Meister - Copies.
9. Layers>Duplicate.
Image>Flip.
Layers>Merge>Merge down.
10. Activate the layer Raster 1.
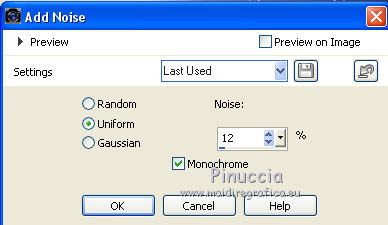
Adjust>Add/Remove Noise>Add Noise
11. Open the tube 2281-luzcristina.pspimage - Edit>Copy.
Go back to your work and go to Edit>Paste as new layer.
12. Effects>Image Effects>Seamless Tiling.

13. Layers>Duplicate.
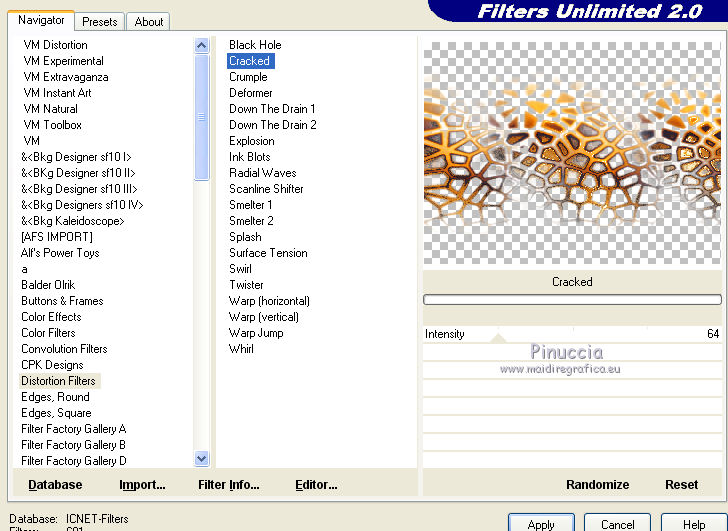
Effects>Plugins>Filters Unlimited 2.0 - Distortion Filters - Cracked.
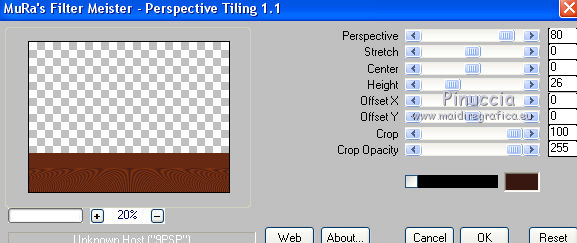
14. Effects>Plugins>Mura's Meister - Perspective Tiling.
15. Layers>Load/Save Mask>Load Mask from Disk.
Look for and load the mask !!!.mask.ket-fadesuave-1.
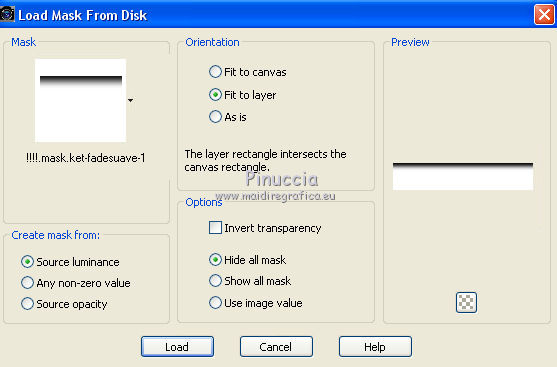
Layers>Merge>Merge Group.
16. Activate the layer Raster 1.
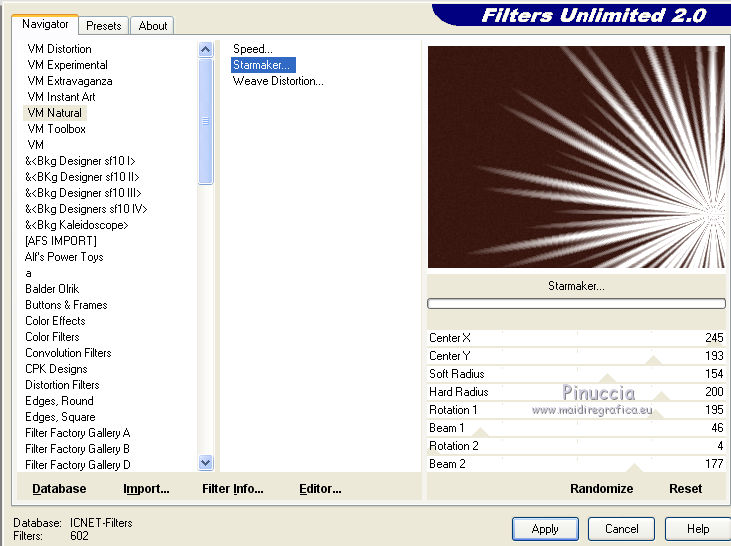
Effects>Plugins>Filters Unlimited 2.0 - VM Natural - Starmaker.
17. Activate the top layer.
Open the tube TubeNaraPamplona.218.psp - Edit>Copy.
Go back to your work and go to Edit>Paste as new layer.
Image>Resize, to 90%, resize all layers not checked.
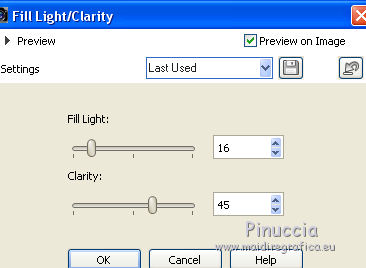
18. Adjust>Brightness and Contrast>Fill Light/Clarity
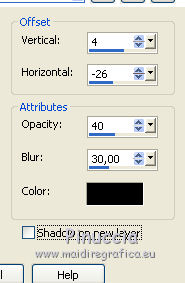
19. Effects>3D Effects>Drop Shadow.
20. Layers>Merge>Merge All.
Sign your work and save as jpg.
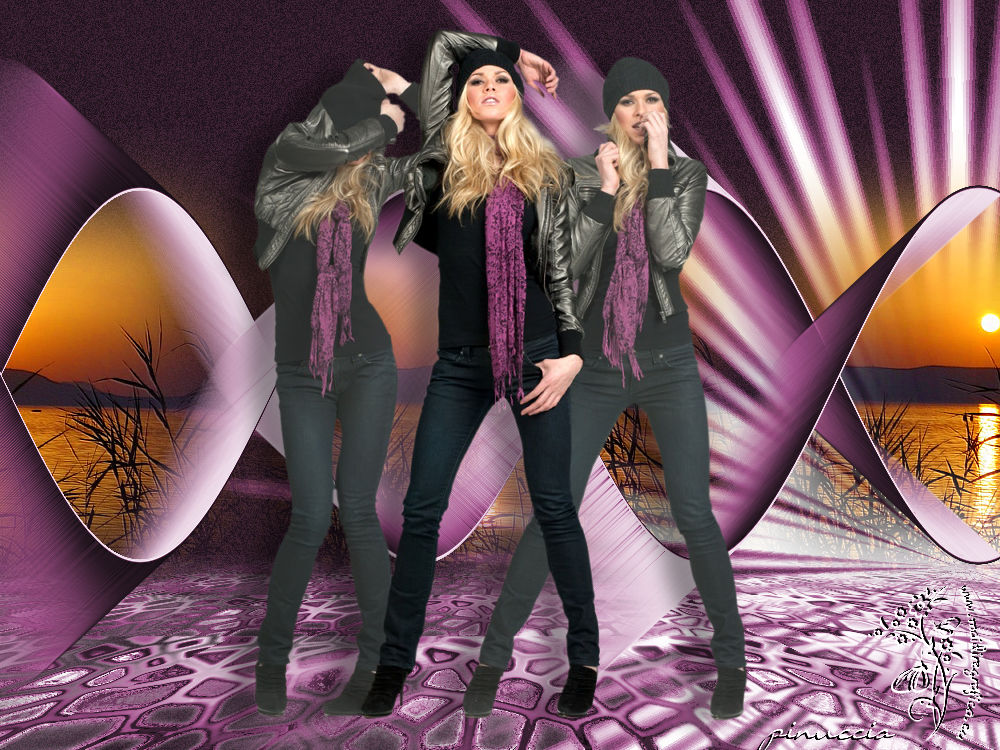
The tube of this version is by Beatriz

If you have problems or doubt, or you find a not worked link, or only for tell me that you enjoyed this tutorial, write to me.
21 May 2017
|


