|
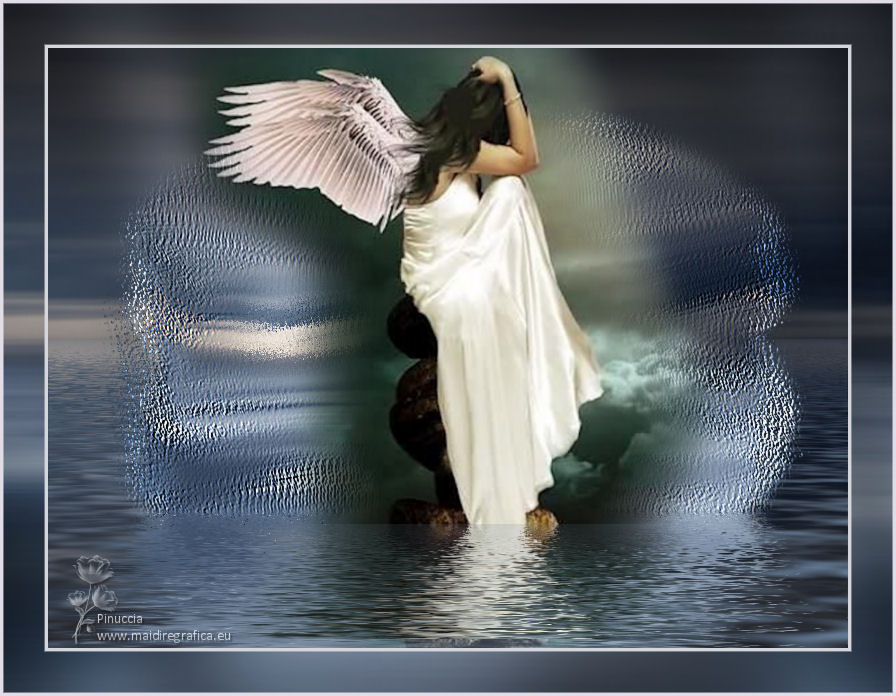
ANGEL

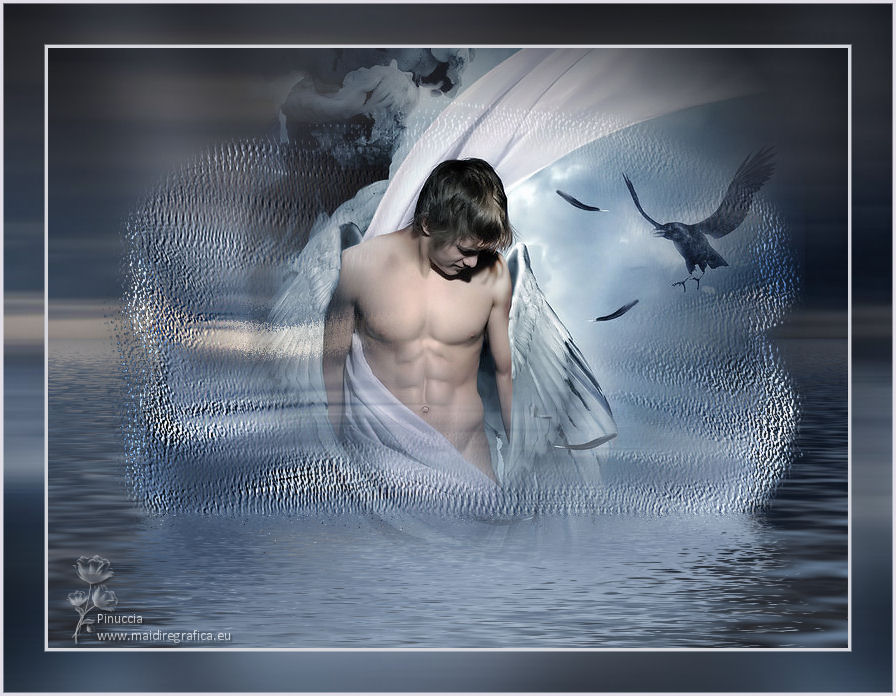
Thanks Joanne for the invitation to translate your tutorials:

This tutorial was translated with PSPX3 but it can also be made using other versions of PSP.
Since version PSP X4, Image>Mirror was replaced with Image>Flip Horizontal,
and Image>Flip with Image>Flip Vertical, there are some variables.
In versions X5 and X6, the functions have been improved by making available the Objects menu.
In the latest version X7 command Image>Mirror and Image>Flip returned, but with new differences.
See my schedule here
 Italian translation here Italian translation here
For this tutorial, you will need:
Material here
Thanks for the angel Claudia Viza and for the landscape Phil McKey.
(The links of the tubemakers sites here).
Plugins
consult, if necessary, my filter section here
Filters Unlimited 2.0 - here
Graphics Plus - Graphics Plus here
Flaming Pear - Flood here
Filters Graphics Plus can be used alone or imported into Filters Unlimited.
(How do, you see here)
If a plugin supplied appears with this icon  it must necessarily be imported into Unlimited it must necessarily be imported into Unlimited

You can change Blend Modes according to your colors.
Copy the preset Emboss 3 in the Presets Folder.
Copy the Selection in the Selection Folder.
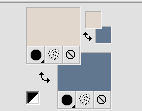
1. Set your foreground color to #e1d7cd,
and your background color to #61768f.
2. Open a new transparent image 800 x 600 pixels.
Selections>Select All.
3. Open the image by Phil McKay and go to Edit>Copy.
Go back to your work and go to Edit>Paste into Selection.
Selections>Select None.
4. Layers>Duplicate.
Close this layer and activate the layer below of the original.
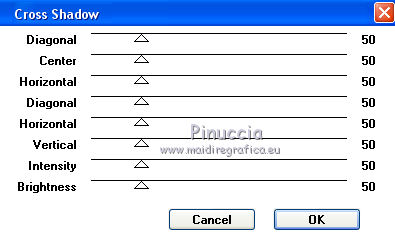
5. Effects>Plugins>Graphics Plus - Cross Shadow.
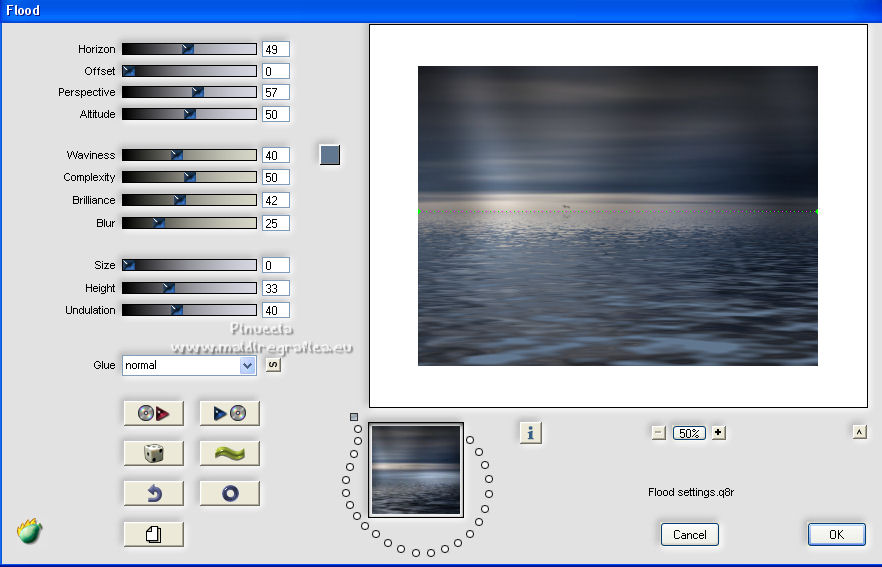
6. Effects>Plugins>Flaming Pear - Flood - color #61768f.
Close this layer.
7. Open and activate the top layer.
Image>Resize, to 70%, resize all layers not checked.
8. Activate your Smudge Tool 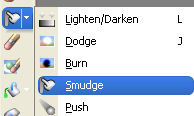 , with these settings. , with these settings.

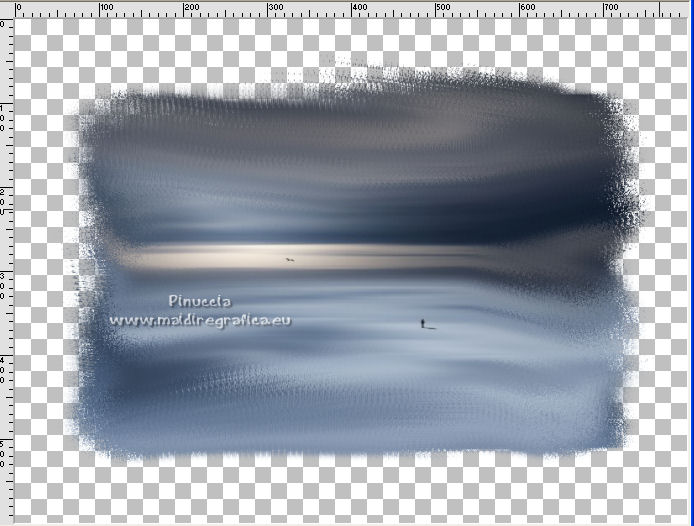
Apply the brush over all the image.
Any result will be different according to the choosen image.
My result
9. Effects>User Defined Filter - select the preset Emboss 3 and ok.

Edit>Repeat User Defined Filter.
10. Selections>Load/Save Selection>Load Selection from Disk.
Look for and load the selection Selection_Joanne-Angel
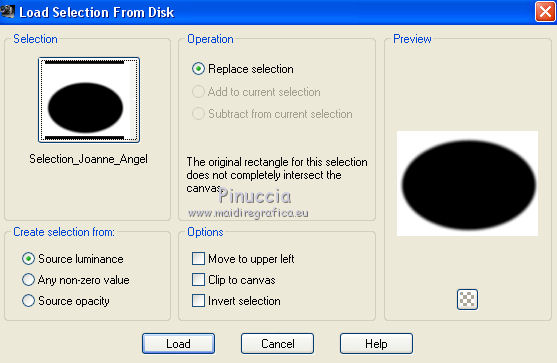
Press CANC on the keyboard 
Selections>Select None.
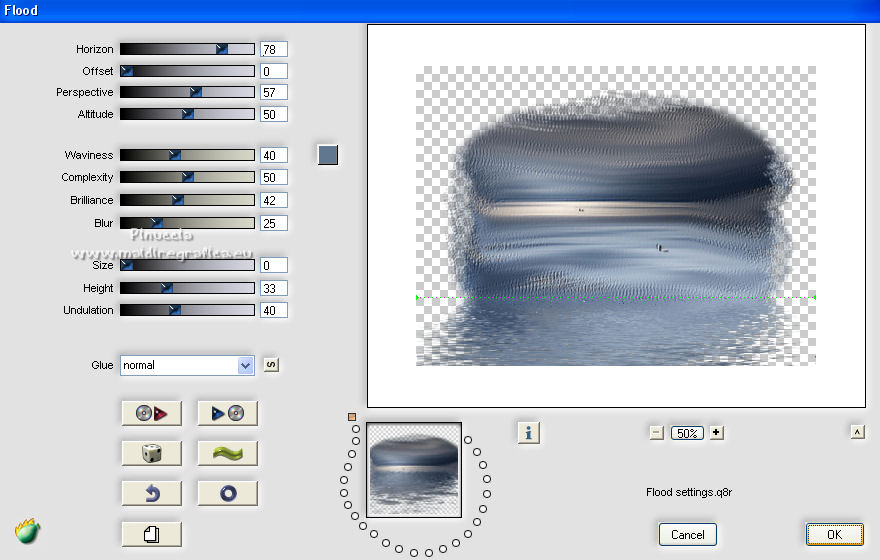
11. Effects>Plugins>Flaming Pear - Flood - change Horizon with 78 and ok.
12. Open the angel tube and go to Edit>Copy.
Go back to your work and go to Edit>Paste as new layer.
Move  the tube higher, as in my example. the tube higher, as in my example.
13. Layers>View>All
14. Sign your work on a new layer.
If you add the author watermark (to put in mode Soft Light),
don't forget to add also the translator watermark.
15. Layers>Merge>Merge All.
16. Image>Add borders, 4 pixels, symmetric, light foreground color.
Image>Add borders, 40 pixels, symmetric, blue background color.
Image>Add borders, 4 pixels, symmetric, light foreground color.
17. Activate your Magic Wand Tool 
and click on the 40 pixels border to select it.
18. Activate again the landscape tube and go to Edit>Copy.
Go back to your work and go to Edit>Paste into Selection.
19. Effects>Plugins>Graphics Plus - Cross Shadow, same settings.

Selections>Select None.
23. Save as jpg.
For the tube of this version thanks A PSP Devil

If you have problems or doubts, or you find a not worked link,
or only for tell me that you enjoyed this tutorial, write to me.
17 Marzo 2022

|


