|
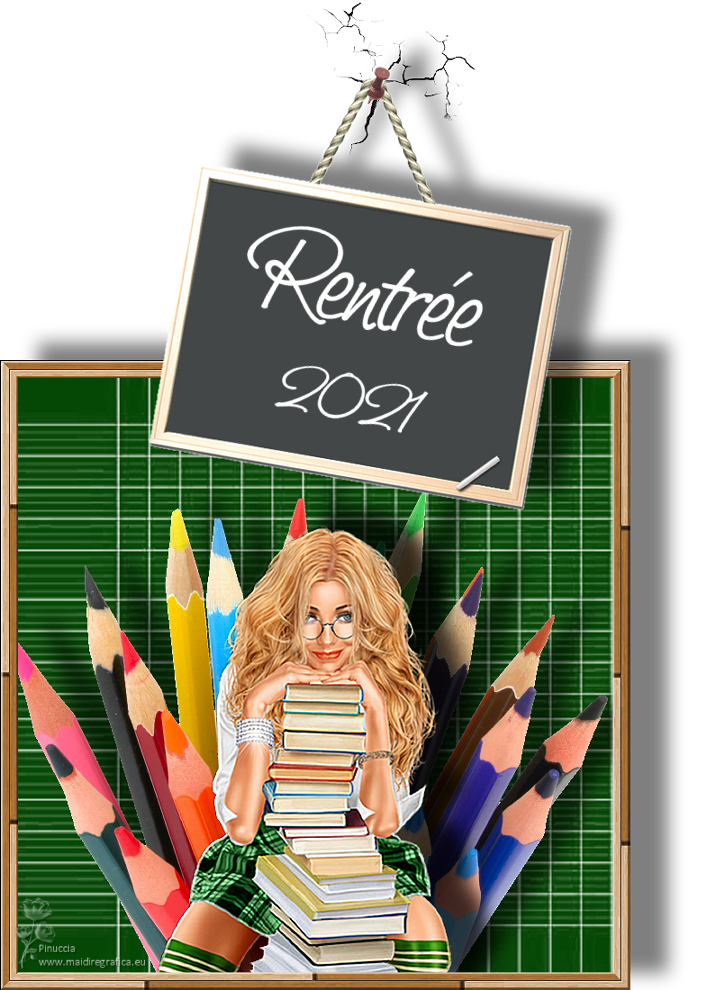
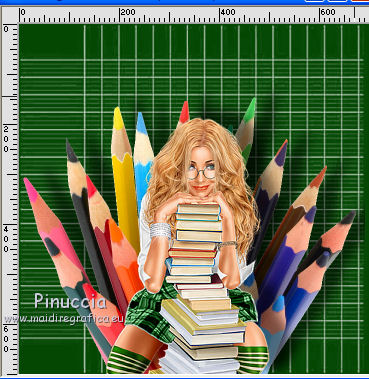
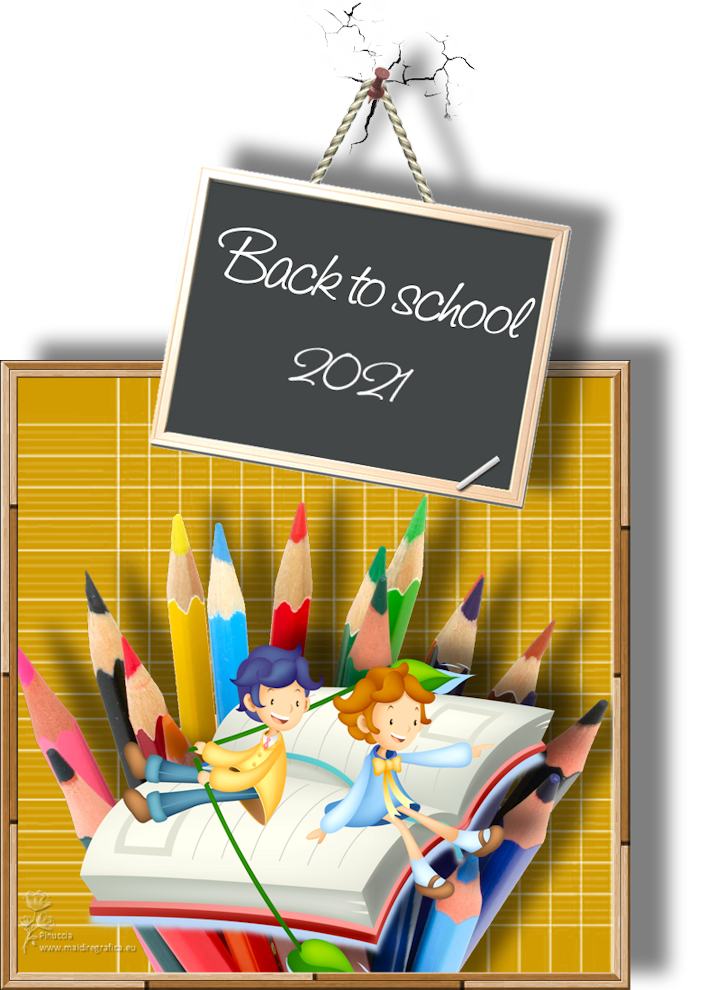
C'EST LA RENTRÉE

Thanks Joanne for the invitation to translate your tutorials:

This tutorial was translated with PSPX3 but it can also be made using other versions of PSP.
Since version PSP X4, Image>Mirror was replaced with Image>Flip Horizontal,
and Image>Flip with Image>Flip Vertical, there are some variables.
In versions X5 and X6, the functions have been improved by making available the Objects menu.
In the latest version X7 command Image>Mirror and Image>Flip returned, but with new differences.
See my schedule here
 Italian translation here Italian translation here
 Your versions Your versions
For this tutorial, you will need:
Material here
The material is not signed.
(The links of the tubemakers sites here).
Plugins
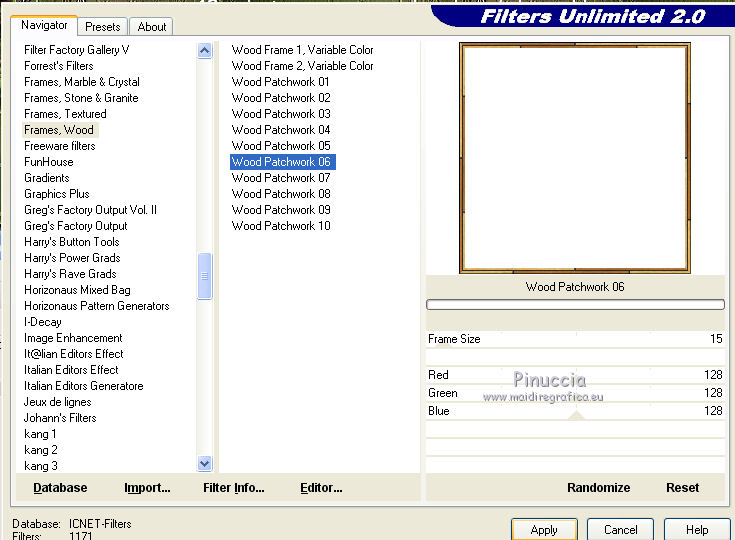
consult, if necessary, my filter section here
Filters Unlimited 2.0 here

You can change Blend Modes according to your colors.
Open the font and minimize. You'll find it in the list of fonts available when you need it.
With the most recent o.s., this is no longer possible.
To use a font, you must copy it into the Fonts folder in Windows.
Open the mask in PSP and minimize it with the rest of the material.
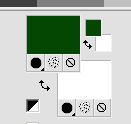
1. Set your foreground color to #054705,
and your background color to white.
2. Open a new transparent image 700 x 700 pixels,
Flood Fill  with your foreground color. with your foreground color.
3. Layers>New Raster Layer.
Flood Fill the layer with color white.
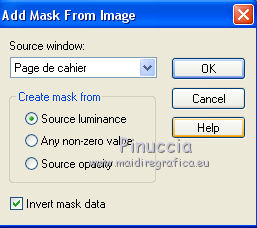
4. Layers>New Mask layer>From image
Open the menu under the source window and you'll see all the files open.
Select the mask page de cahier.
Layers>Merge>Merge Group.
Layers>Duplicate.
5. Layers>Merge>Merge visible.
6. Open the pencil tube and go to Edit>Copy.
Go back to your work and go to Edit>Paste as new layer.
Image>Resize, to 50%, resize all layers not checked.
Move  the tube down. the tube down.
7. Effects>3D Effects>Drop Shadow.

8. Open the woman tube and go to Edit>Copy.
Go back to your work and go to Edit>Paste as new layer.
Image>Resize, to 120%, resize all layers not checked.
9. Adjust>Sharpness>Sharpen More.
10. Effects>3D Effects>Drop Shadow, same settings.
11. Move the tube down.
Layers>Duplicate.
12. Layers>Merge>Merge visible.
13. Layers>New Raster Layer.
Flood Fill the layer with color white.
14. Effects>Plugins>Filters Unlimited 2.0 - Frames Wood.
15. Activate your Magic Wand Tool 
and click in the frame to select it.
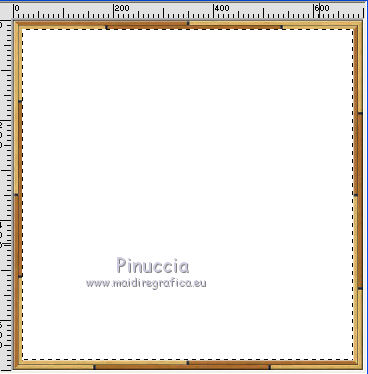
Press CANC on the keyboard 
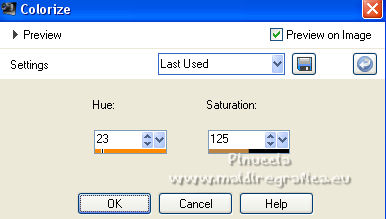
16. Sélections>Invert.
Adjust>Hue and Saturation>Colorize.
Selections>Select None.
17. Layers>Merge>Merge visible.
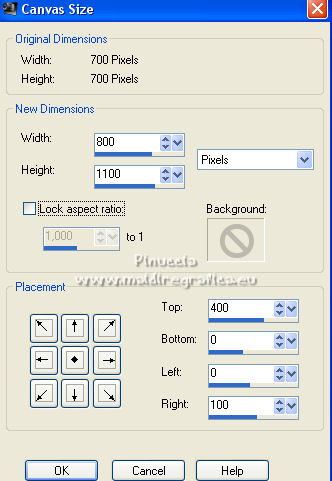
18. Image>Canvas Size - 800 x 1100 pixels.
19. Effects>3D Effects>Drop Shadow, same settings.
20. Open the tube "craquelure" and go to Edit>Copy.
Go back to your work and go to Edit>Paste as new layer.
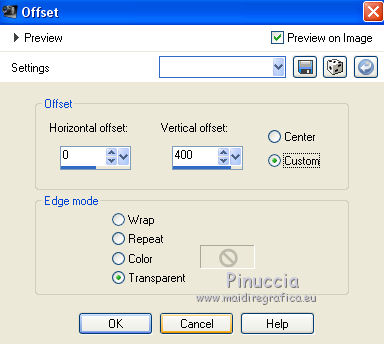
21. Effects>Image Effects>Offset.
22. Open the blackboard tube and go to Edit>Copy.
Go back to your work and go to Edit>Paste as new layer.
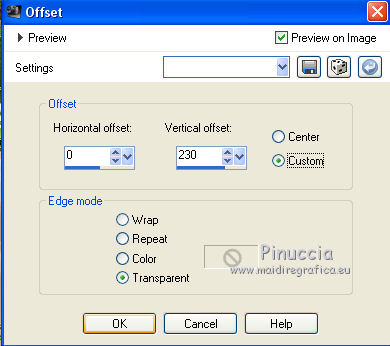
23. Effects>Image Effects>Offset.
24. Effects>3D Effects>Drop Shadow, same settings.
25. Layers>Merge>Merge visible.
26. Layers>New Raster layer.
Activate your Text Tool 
font Saginaw - adapt the size according to your text and your PSP version.

Close your foreground color.
Write the word "Rentrée".
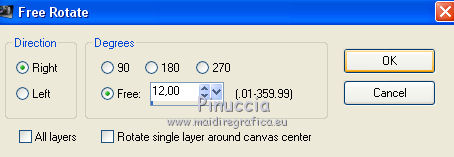
27. Image>Free Rotate - 12 degrees to right.
Selections>Select None.
28. Change the settings of your font

29. Layers>New Raster Layer.
Write "2021".
30. Image>Free Rotate, same settings.
Selections>Select None.
Place correctly the two texts on the blackboard.
31. Sign your work on a new layer.
If you add the author watermark (to put in mode Soft Light),
don't forget to add also the translator watermark.
32. Layers>Merge>Merge visible.
Image>Resize, to 90%, resize all layers checked.
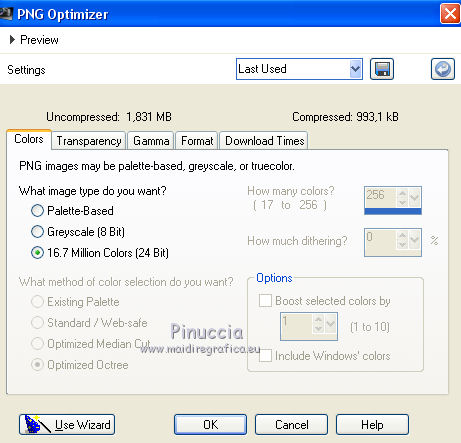
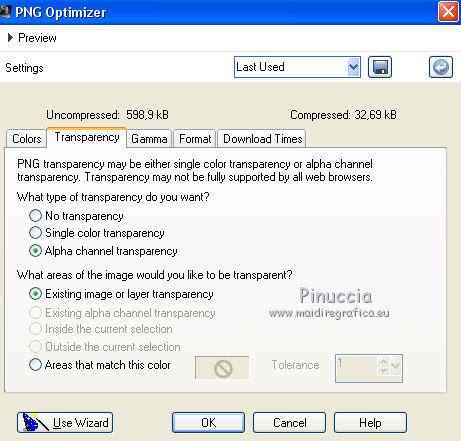
Save as png, to keep the transparence of your background:
File>Export>PNG Optimizer

Your versions Thanks
If you have problems or doubts, or you find a not worked link,
or only for tell me that you enjoyed this tutorial, write to me.
31 August 2021

|