|
FANTAISIE PRINTANÈRE
 ENGLISH VERSION ENGLISH VERSION
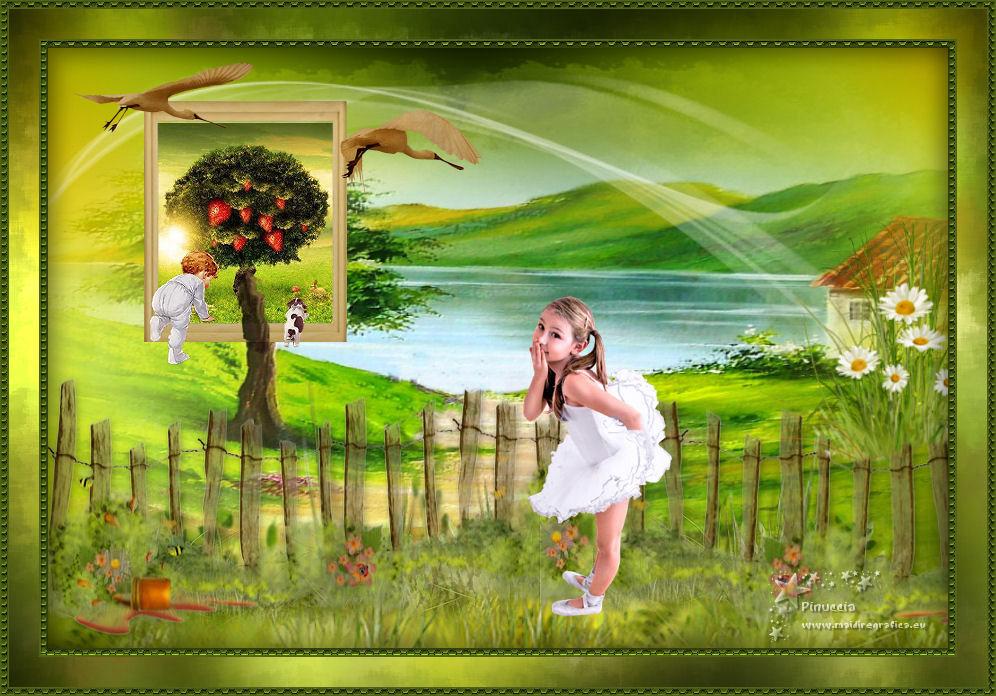
Thanks Alyciane for your invitation to translate your tutorial.

This tutorial was created with PSP2019 and translated with PSPX3 but it can also be made using other versions of PSP.
Since version PSP X4, Image>Mirror was replaced with Image>Flip Horizontal,
and Image>Flip with Image>Flip Vertical, there are some variables.
In versions X5 and X6, the functions have been improved by making available the Objects menu.
In the latest version X7 command Image>Mirror and Image>Flip returned, but with new differences.
See my schedule here
Italian translation here
Material here
Plugins
Graphics Plus here
Brush Strokes here

Open the mask in PSP and minimize it with the rest of the material.
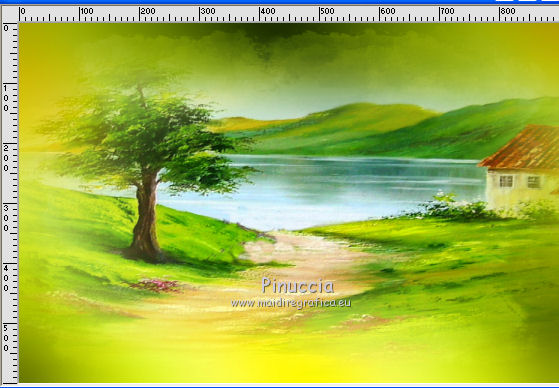
1. Open a new transparent image 900 x 600 pixels.
Selections>Select All.
Open the image "fond" and go to Edit>Copy.
Go back to your work and go to Edit>Paste into Selection.
Selections>Select None.
2. Open the tube "image arbre" and go to Edit>Copy.
Go back to your work and go to Edit>Paste as new layer.
Move  the tube a bit to the right. the tube a bit to the right.
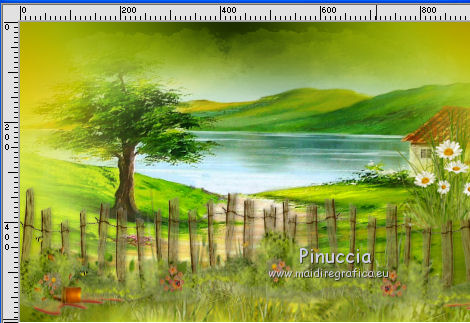
3. Open the tube "herbe" and go to Edit>Copy.
Go back to your work and go to Edit>Paste as new layer.
Move  the tube down. the tube down.
4. Open the tube barrière and go to Edit>Copy.
Go back to your work and go to Edit>Paste as new layer.
Move  the tube down. the tube down.
5. Open the tube herbe fleur and go to Edit>Copy.
Go back to your work and go to Edit>Paste as new layer.
Move  the tube to the right side, see my example. the tube to the right side, see my example.
6. Open the frame "cadre" and go to Edit>Copy.
Go back to your work and go to Edit>Paste as new layer.
Place  the tube over the tree of the background. the tube over the tree of the background.
Activate your Magic Wand Tool 
and click into the frame to select it.
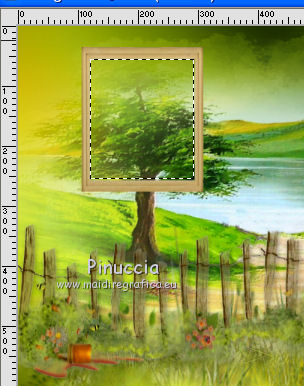
Selections>Modify>Expand - 2 pixels.
7. Layers>New Raster Layer.
Open the image "arbre" and go to Edit>Copy.
Go back to your work and go to Edit>Paste into Selection.
Selections>Select None.
Layers>Arrange>Move Down.
Activate the top layer.
Layers>Merge>Merge Down.
8. To join the tree trunk to the frame,
activate your Selection Tool 
et select a piece of the trunk
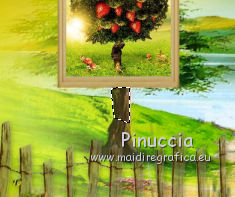
Edit>Copy.
Selections>Select None.
Edit>Paste as new layer.
Place  rightly the trunk, rightly the trunk,
and, if necessary, adapt it with your Smudge Tool 
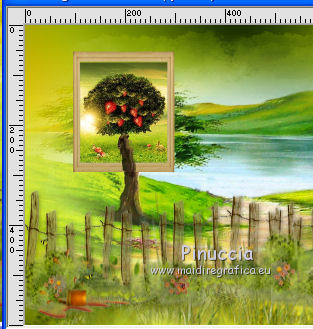
in this case, after doing that, merge the two layer
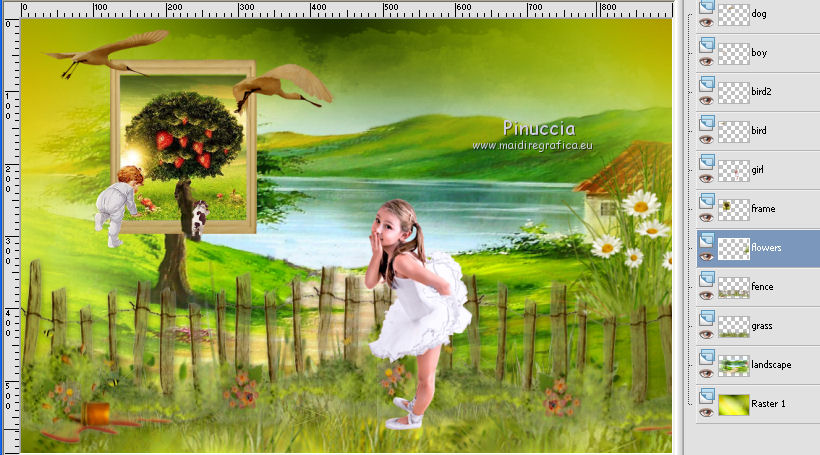
9. Copy/Paste as new layer the various tubes.
Image>Resize, if necessary, resize all layers not checked.
Place  the tubes at your choice or see my example. the tubes at your choice or see my example.
10. Activate the layer under the frame.
11. Set your foreground color to white.
Layers>New Raster Layer.
Flood Fill  with color white. with color white.
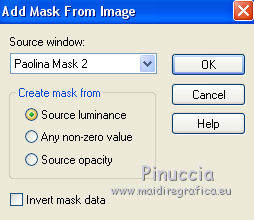
Layers>New Mask Layer>From Image
Layers>New Mask layer>From image
Open the menu under the source window and you'll see all the files open.
Select the mask Paolina.
Layers>Merge>Merge Group.
Image>Flip.
Move  the mask a little higher. the mask a little higher.
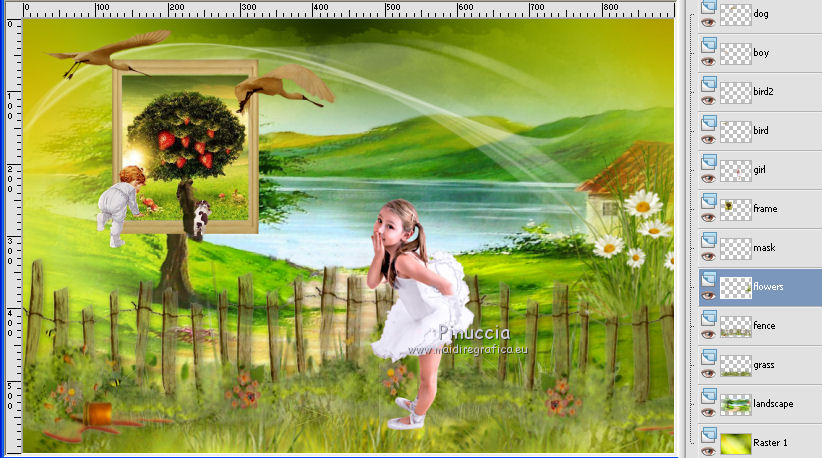
12. Set your foreground color with a dark color of your background, for me #516319,
and your bachground color to a light color, for me #a1cf27.
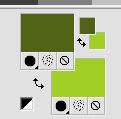
Image>Add borders, 2 pixels, symmetric, dark color.
Edit>Copy.
13. Image>Add borders, 5 pixels, symmetric, light color.
Activate your Magic Wand Tool 
and click on the border to select it.
14. Effects>Texture Effects>Tiles
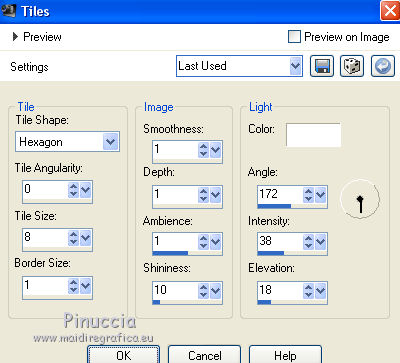
Selections>Invert.
15. Effects>3D Effects>Cutout.
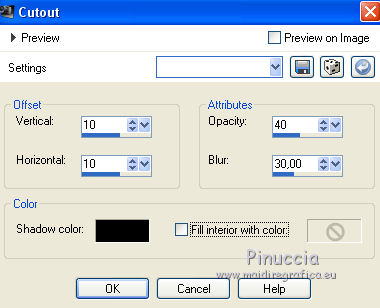
Layers>New Raster Layer.
Repeat Effects>3D Effects>Cutout, vertical and horizontal -10.
Selections>Select None.
16. Image>Add borders, 2 pixels, symmetric, dark color #516319.
Layers>Promote Background Layer.
17. Image>Canvas Size - 978 x 678 pixels.
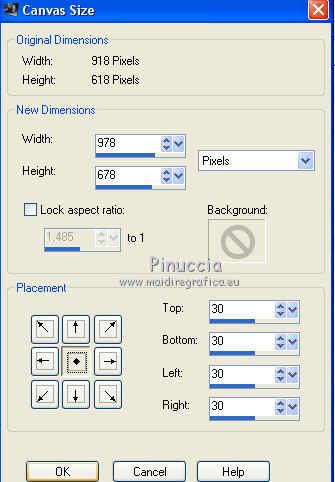
Layers>New Raster Layer.
Layers>Arrange>Send to bottom.
Edit>Paste into Selection (the image in memory from step 12)
18. Adjust>Blur>Gaussian Blur - radius 15.

Selections>Select None.
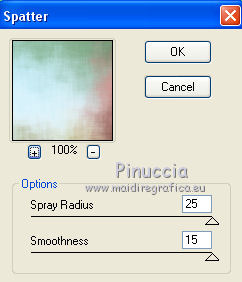
19. Effects>Plugins>Brush Strokes - Spatter - 2 times with these settings.
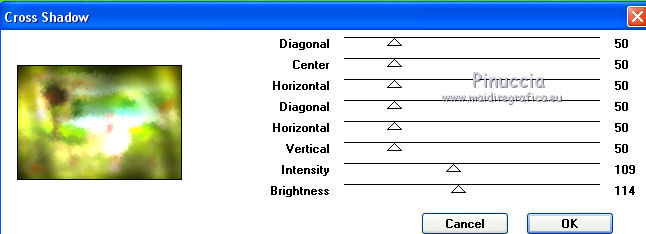
20. Effects>Plugins>Graphics Plus - Cross Shadow.
21. Image>Add borders, 2 pixels, symmetric, dark color #516319.
Image>Add borders, 5 pixels, symmetric, light color #a1cf27.
Image>Add borders, 2 pixels, symmetric, dark color #516319.
Select the light border with your Magic Wand Tool 
Effects>Texture Effects>Tiles, same settings.
Selections>Select None.
22. Sign your work and save as jpg.

If you have problems or doubts, or you find a not worked link, or only for tell me that you enjoyed this tutorial, write to me.
3 June 2019
|
 ENGLISH VERSION
 ENGLISH VERSION