|
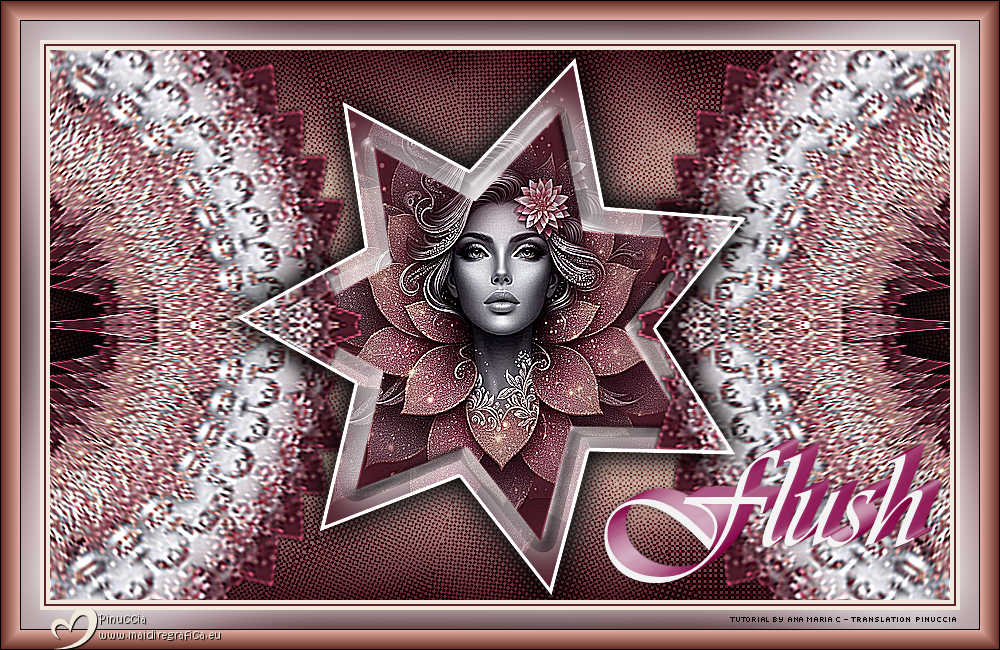
FLUSH


Thanks SIM PSP Group for your invitation to translate your tutorials into english

This tutorial was written and translated with Psp2020, but it can also be made using other versions of PSP.
Since version PSP X4, Image>Mirror was replaced with Image>Flip Horizontal,
and Image>Flip with Image>Flip Vertical, there are some variables.
In versions X5 and X6, the functions have been improved by making available the Objects menu.
In the latest version X7 command Image>Mirror and Image>Flip returned, but with new differences.
See my schedule here

|
Special Note
PSP SIM and its Tutorial Authors ask the public:
- Please, we request that we maintain the originality of the tutorial,
refraining from adding or including unsolicited effects;
- The use of other images is permitted and encouraged,
but please don't modify the content of the original tutorial;
- Please acknowledge and attribute the valuable credits to those who write tutorials, make translations and create materials.
Carefully,
PSP SIM - Ana Maria C
|

For this tutorial, you will need:

The material is by Ana Maria C.
(The links of the tubemakers here).

Filters Unlimited 2.0 here
Alien Skin Eye Candy 5 Impact - Glass here
Flaming Pear - Flexify 2 here
Flaming Pear - Flood here
VM Natural - Weave Distortion here
Simple - Top Left Mirror here
AAA Frames - Frame Works here
Filters Simple and VM Natural plus can be used alone or imported into Filters Unlimited.
(How do, you see here)
If a plugin supplied appears with this icon  it must necessarily be imported into Unlimited it must necessarily be imported into Unlimited

You can change Blend Modes according to your colors.
In the newest versions of PSP, you don't find the foreground/background gradient (Corel_06_029).
You can use the gradients of the older versions.
The Gradient of CorelX here

1. Choose 2 colors to work.
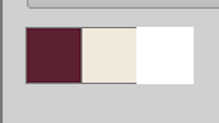
Foreground color #5c2231
Background color #f1e9dc
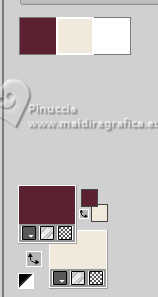
extra color 3: #ffffff
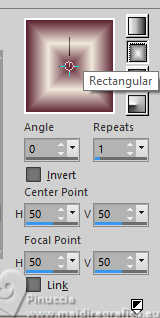
Set your foreground color to a Foreground/Background Gradient, style Rectangular.
2. Open Flush_AlphaChannel_byAnaMariaC.
This image, that will be the basis of your work, is not empty,
but contains the selections saved to alpha channel.
Flood Fill  the transparente image with your Gradient. the transparente image with your Gradient.
3. Effects>Image Effects>Seamless Tiling - Side by Side.

Layers>Duplicate.
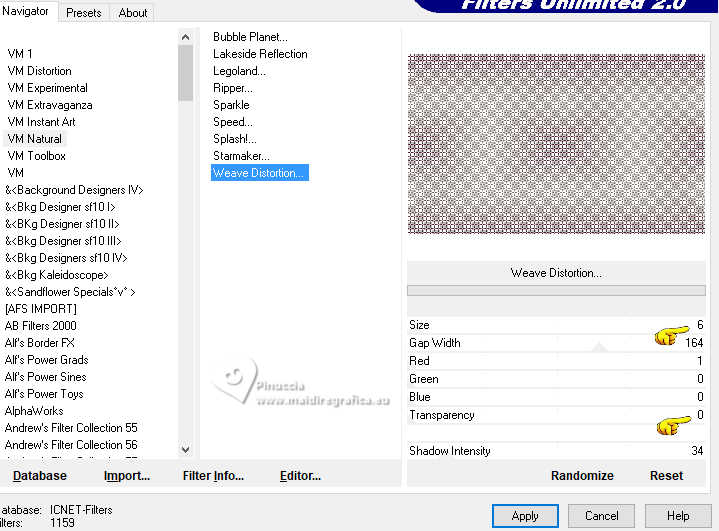
4. Effects>Plugins>VM Natural - Weave Distortion
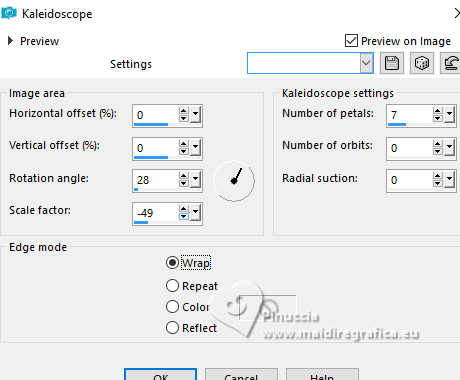
5. Effects>Reflection Effects>Kaleidoscope.
6. Layers>Properties>General>Blend Mode: Burn>Opacity: 100%
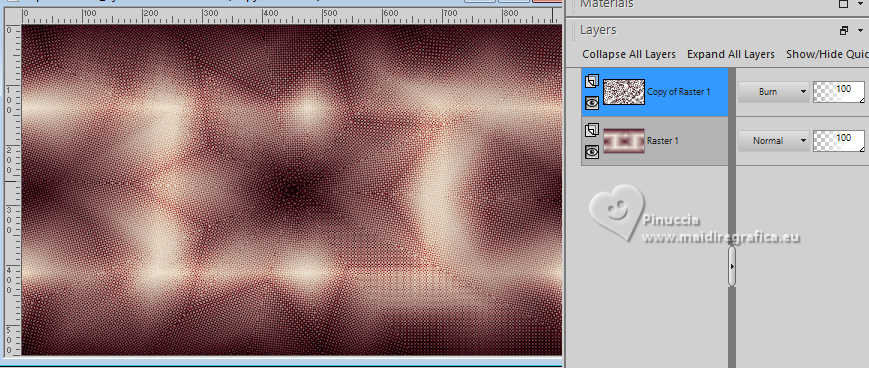
Layers>Merge>Merge Down.
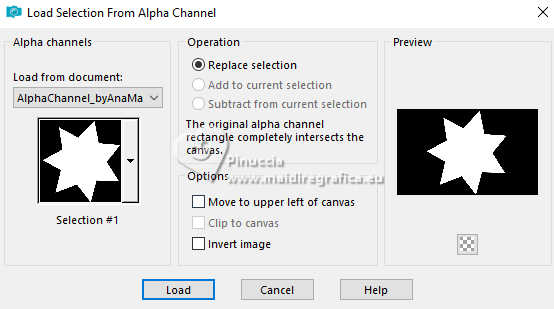
7. Selections>Load/Save Selections>Load Selection from Alpha Channel.
The selection Selection #1 is immediately available. You just have to click Load.
8. Set your foreground color to Color.
Layers>New Raster Layer.
Flood Fill  the layer with your foreground color #5c2231. the layer with your foreground color #5c2231.
9. Open misted_mulher_flor02_byAnaMariac 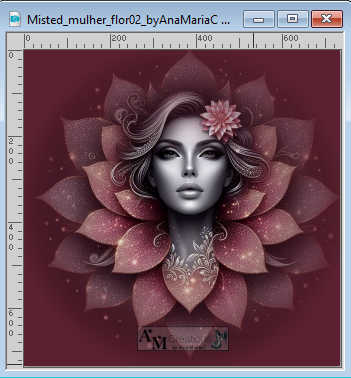
Edit>Copy.
Go back to your work and go to Edit>Paste Into Selection.
Adjust>Sharpness>Sharpen More.
10. Selections>Modify>Select Selections Borders.
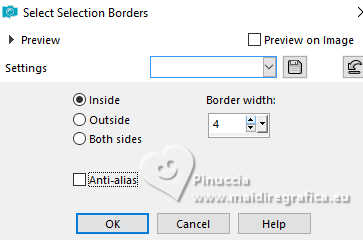
11. Layers>New Raster Layer.
Set your foreground color to white #ffffff.
Flood Fill  the selection with your foreground color #ffffff. the selection with your foreground color #ffffff.
Selections>Select None.
12. Activate the layer Raster 2.
Layers>Duplicate.
Image>Resize, to 40%, resize all layers not checked.
Adjust>Sharpness>Sharpen More.
13. Effects>Plugins>Mura's Meister - Copies.
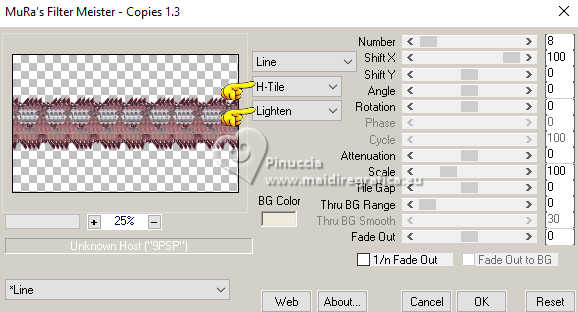
14. Activate your Pick Tool 
if you don't se the rulers go to View>Rulers.
Pull the top central node down until 240 pixels
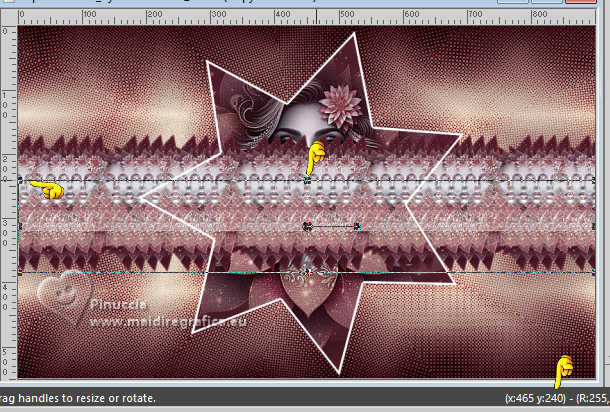
Pull the bottom central knot up until 320 pixels.
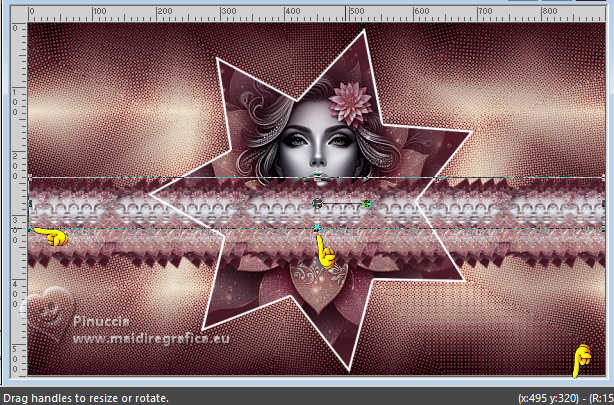
We have this
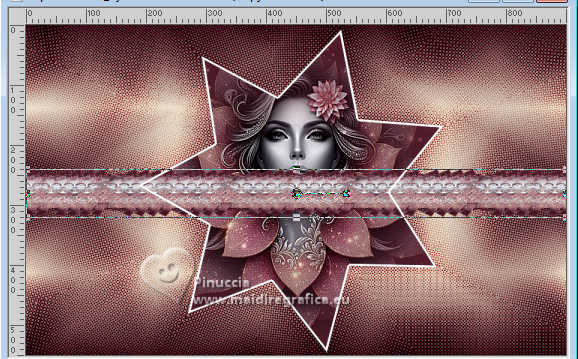
M key to deselect the Tool.
Please note that from here the result may be different depending on the colors and image used.
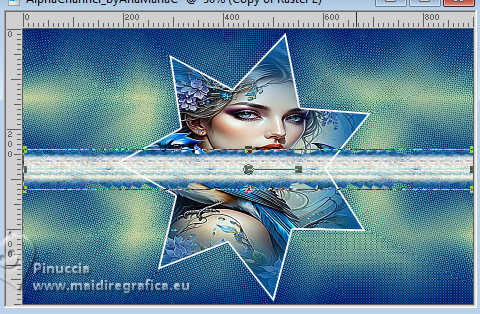
15. Effects>3D Effects>Drop Shadow, color black #000000.

16. Objects>Align>Top.
Layers>Duplicate.
17. Objects>Align>Bottom.
Layers>Merge>Merge Down.
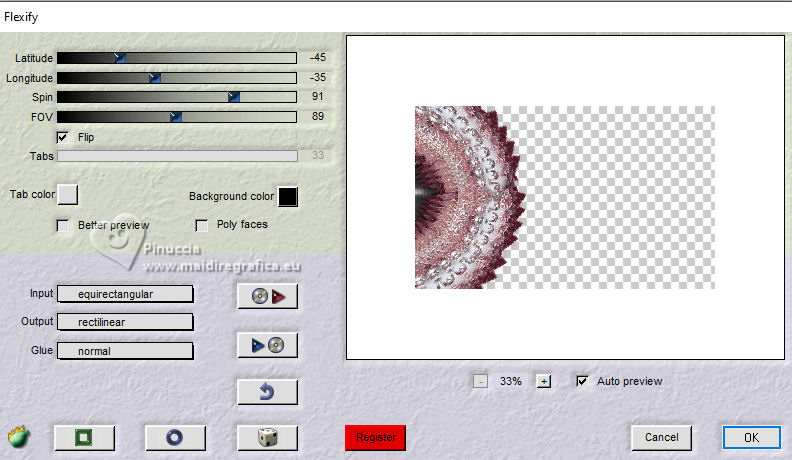
18. Effects>Plugins>Flaming Pear - Flexify
***Note of the author: If the effect doesn't look like the screenshot below, check your Flexify version.
The correct version for this effect is Flexify-120, which we provide for download at the beginning of the tutorial.
Note of the translator: I download the filter from this link and add it to the material
***
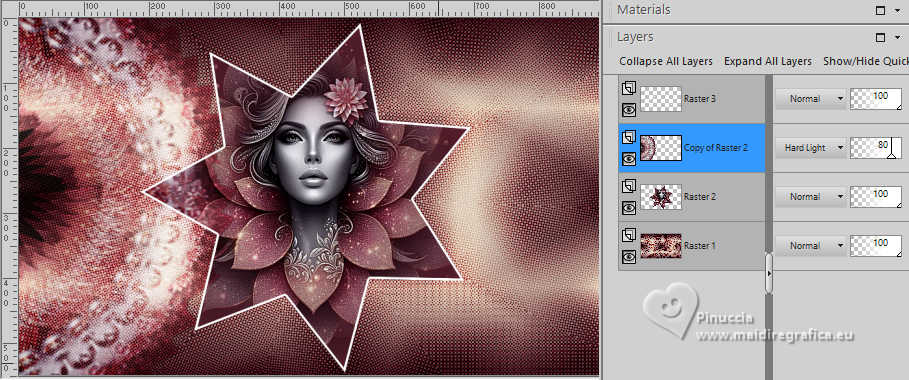
19. Layers>Properties>General>Blend Mode: Hard Light - Opacity: 80%
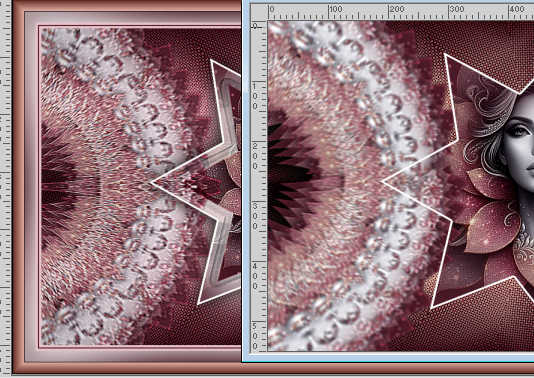
Note of the translator:
After checking the author's result (left) with mine (right)
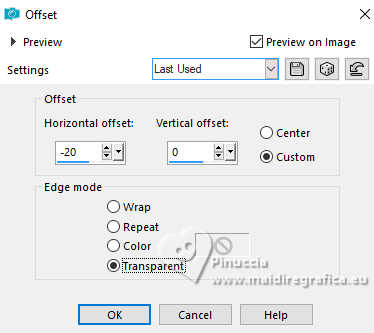
I moved the image,
Effects>Image Effects>Offset
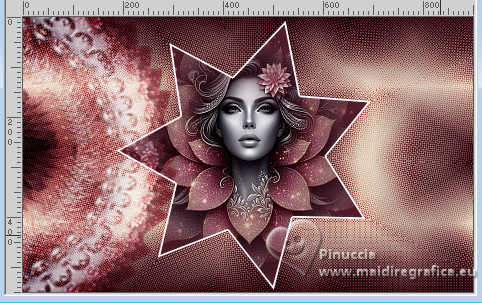
and I keep the Blend Mode from Hard Ligh (left) to Normal (right)
 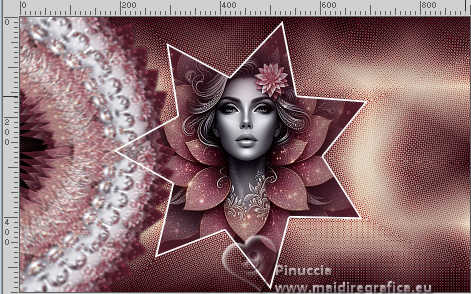
According to my colors and my image, I didn't do it for my second version
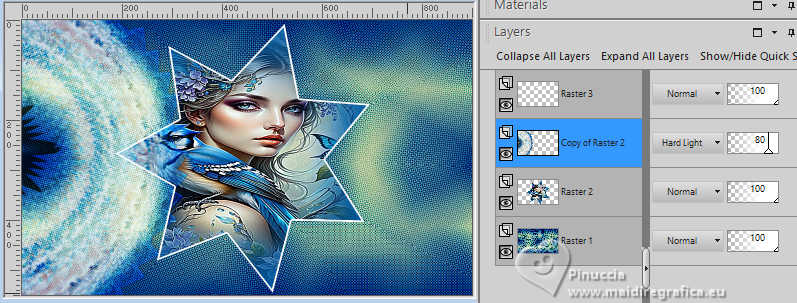
Effects>Edge Effects>Enhance More.
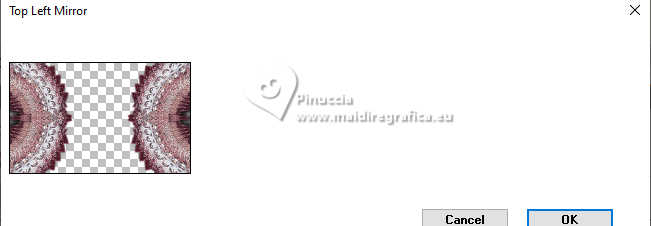
20. Effects>Plugins>Simple - Top Left Mirror.
21. Activate the layer Raster 2.
Layers>Duplicate.
Image>Resize, to 80%, resize all layers not checked.
Adjust>Sharpness>Sharpen More.
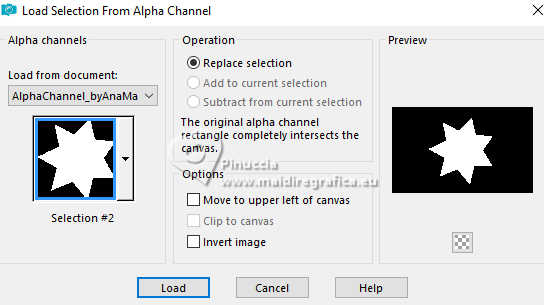
22. Selections>Load/Save Selections>Load Selection from Alpha Channel
Open the selections menu and load the selection Selection #2
23. Effects>Plugins>Alien Skin Eye Candy 5 Impact - Bevel.
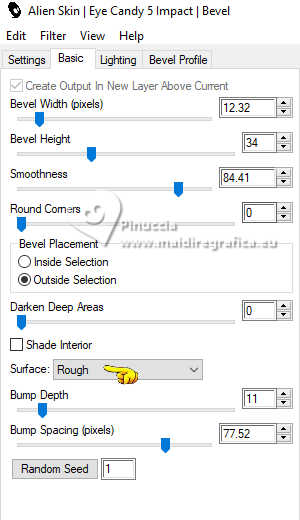
Selections>Select None.
24. Effects>3D Effects>Drop Shadow, color white #fffffff.
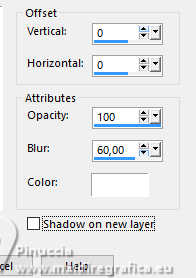
Edit>Repeat Drop Shadow.
25. Layers>Merge>Merge Down.
Adjust>Sharpness>Sharpen.
26. Activate your top layer, Raster 3.
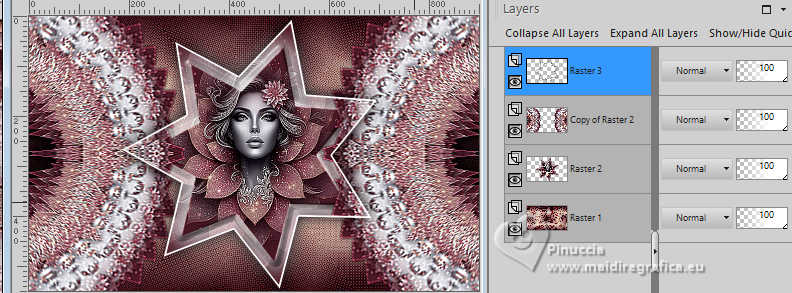
27. Selections>Load/Save Selections>Load Selection from Alpha Channel.
Load again the selection Selection 1#
28. Effects>3D Effects>Drop Shadow, color black #000000.

Selections>Select None.
29. Close the layer Raster 1.
Layers>Merge>Merge Visibile.
30. Open the layer Raster 1.
Edit>Copy Special>Copy Merged.
31. Image>Add Borders, 4 pixels, symmetric, background color #f1e9dc.
Image>Add Borders, 2 pixels, symmetric, foreground color #5c2231.
Image>Add Borders, 4 pixels, symmetric, background color #f1e9dc.
32. Selections>Select All.
Image>Add Borders, 40 pixels, symmetric, whatever color.
Selections>Invert.
Edit>Paste Into Selection
33. Adjust>Blur>Gaussian Blur - radius 60
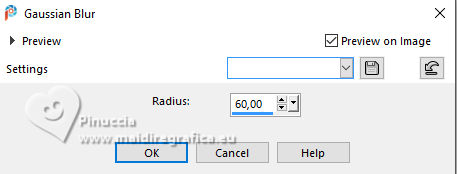
Selections>Invert.
34. Effects>3D Effects>Drop Shadow, color white #ffffff, or at your choice.

Selections>Invert.
35. Effects>Plugins>AAA Frames - Frames Works.
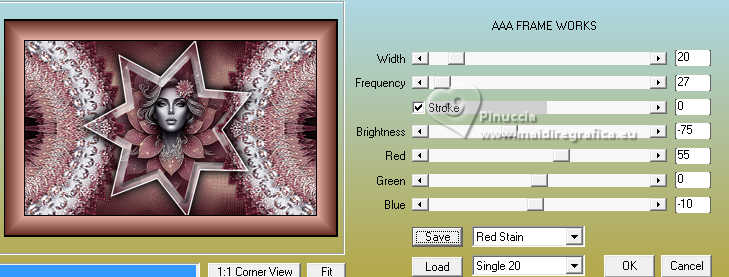
adapt the settings according to your colors: for my second version
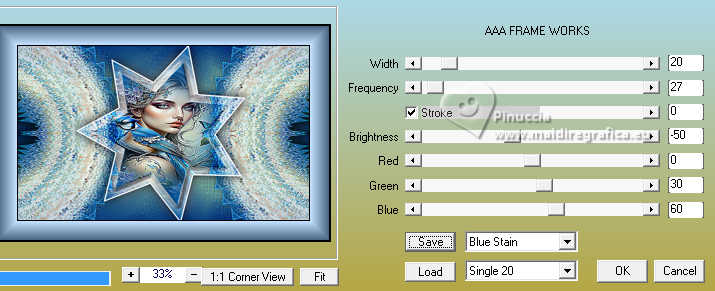
Selections>Select None.
36. Open título_flush_byAnaMariaC 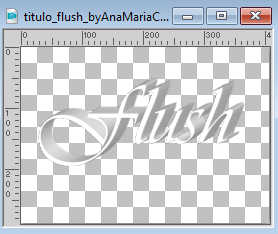
Edit>Copy.
Go back to your work and go to Edit>Paste As New Layer.
Move  the text to the right. the text to the right.
37. Adjust>Hue/Saturation>Hue/Saturation>Lightness
or according to your work.
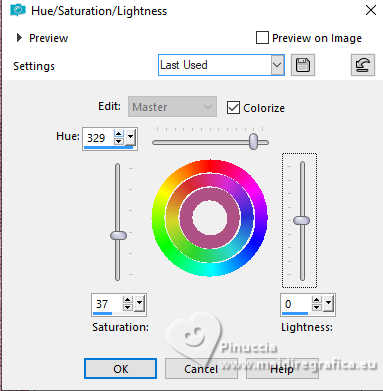
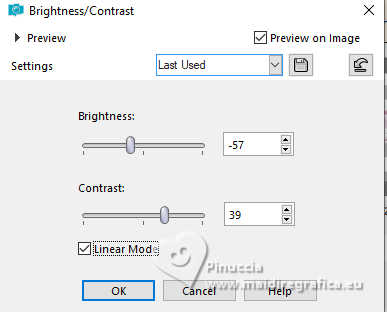
38. Adjust>Brightness and Contast>Brightness/Contrast.
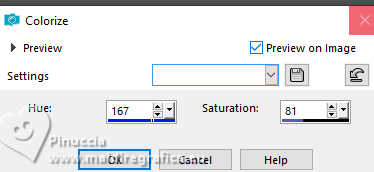
Nota of Anamaria: in my second version I applied Adjust>Hue and Saturation>Colorize...
Hue: 167 / Saturation: 81
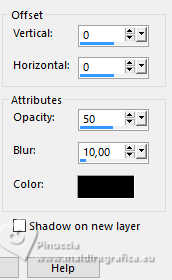
39. Effects>3D Effects>Drop Shadow, color #000000, or at your choice.
40. Image>Add Borders, 1 pixel, symmetric, color black #000000.
41. Image>Resize, if your want.
Sign your work and save as jpg.
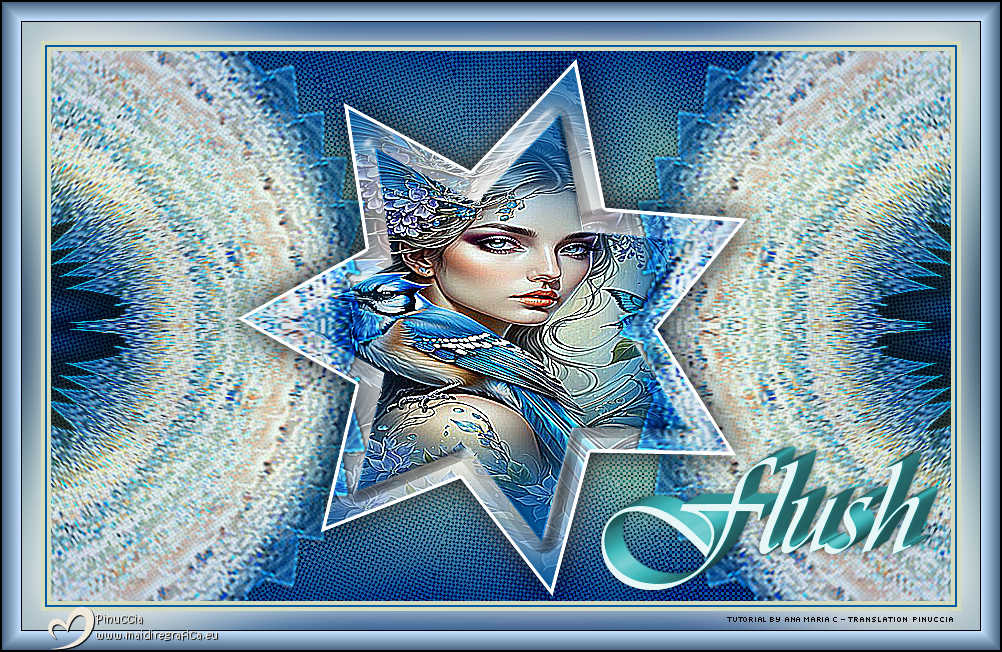

 Your versions.Thanks Your versions.Thanks

Aria


If you have problems or doubts, or you find a not worked link,
or only for tell me that you enjoyed this tutorial, write to me.
18 August 2025

|

