|
CHRISTMAS TIME


Thanks Cidaben and SIM PSP Group for your invitation to translate your tutorials into english

This tutorial was written with Psp2022 and translated with PspX9, but it can also be made using other versions of PSP.
Since version PSP X4, Image>Mirror was replaced with Image>Flip Horizontal,
and Image>Flip with Image>Flip Vertical, there are some variables.
In versions X5 and X6, the functions have been improved by making available the Objects menu.
In the latest version X7 command Image>Mirror and Image>Flip returned, but with new differences.
See my schedule here

For this tutorial, you will need:

For the mask thanks Narah.
The rest of the material is by Cidaben.
(The links of the tubemakers here).

consult, if necessary, my filter section here
Filters Unlimited 2.0 here
Mehdi - Wavy Lab 1.1. here
Mehdi - Sorting Tiles, Weaver here
Plugin Galaxy - Instant Mirror here
Mura's Meister - Perspective Tiling, Copies here
L&K's - L&K's Adonis here
Graphics Plus - Cross Shadow here
Filters Graphics Plus can be used alone or imported into Filters Unlimited.
(How do, you see here)
If a plugin supplied appears with this icon  it must necessarily be imported into Unlimited it must necessarily be imported into Unlimited
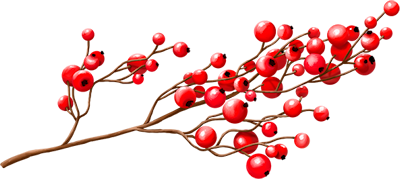
You can change Blend Modes according to your colors.
In the newest versions of PSP, you don't find the foreground/background gradient (Corel_06_029).
You can use the gradients of the older versions.
The Gradient of CorelX here

Copy the preset in the Presets Folder.
Copy the Selections in the Selections Folder.
Open the mask in PSP and minimize it with the rest of the material.
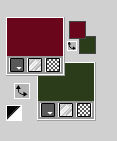
1. Choose two colors to work.
Set your foreground color to #69071d
and your background color to #2c3d1b
2. Open a new transparent image 900 x 500 pixels.
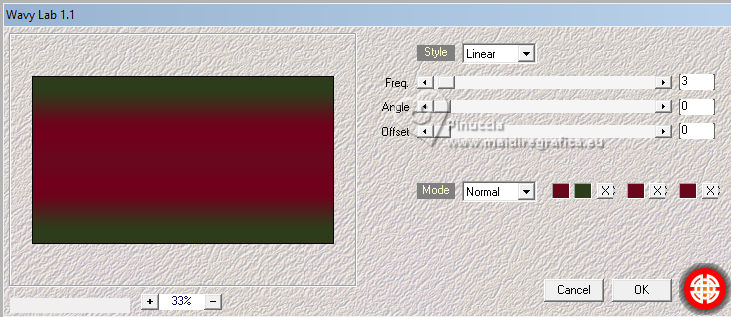
Effects>Plugins>Mehdi - Wavy Lab 1.1.
Colors: 1 - 3 et 4 foreground color #69071d; color 2 background color #2c3d1b.
3. Effects>Plugins>Mehdi - Sorting Tiles.
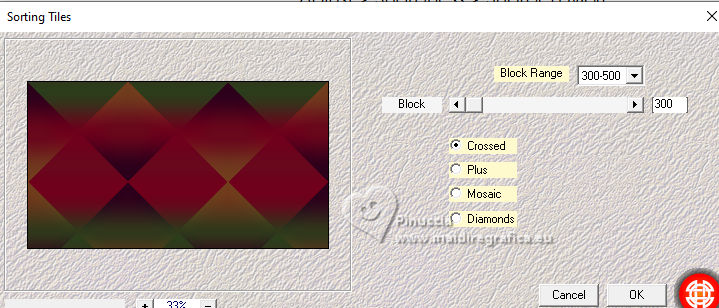
Adjust>Sharpness>Sharpen More.
4. Effects>Plugins>Plugin Galaxy - Instant Mirror.
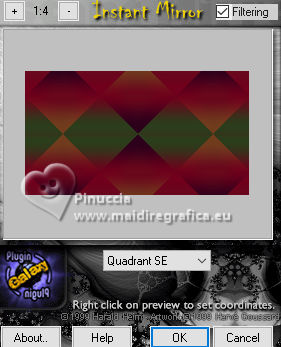
Adjust>Sharpness>Sharpen More.
5. Selection>Select All.
Selection>Modify>Contract - 25 pixels.
Selections>Promote Selection to Layer.
6. Selections>Modify>Select Selection Borders.
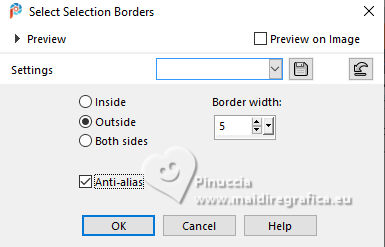
Set your foreground color to #2c3d1b,
and your background color to white #ffffff.
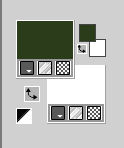
Set your foreground color to a Foreground/Background Gradient, style Lineare.
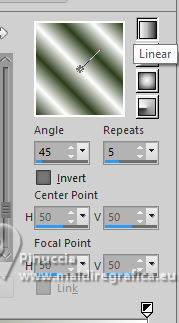
Flood Fill  the selection with your Gradient. the selection with your Gradient.
Effects>3D Effects>Inner Bevel.
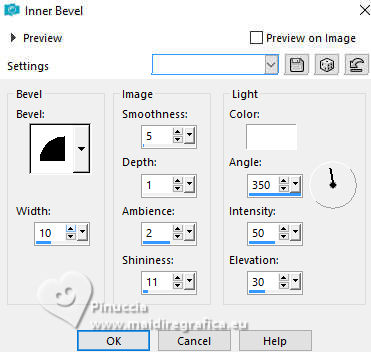
Selections>Select None.
Effects>3D Effects>Drop Shadow, color black #000000.
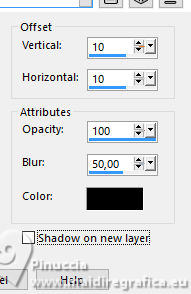
Repeat Drop Shadow, vertical and horizontal -10.

7. Effects>Plugins>L&K's - L&K's Adonis
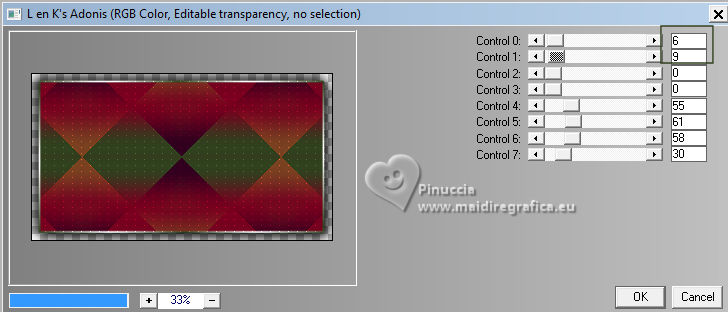
Repeat this Effect another time.
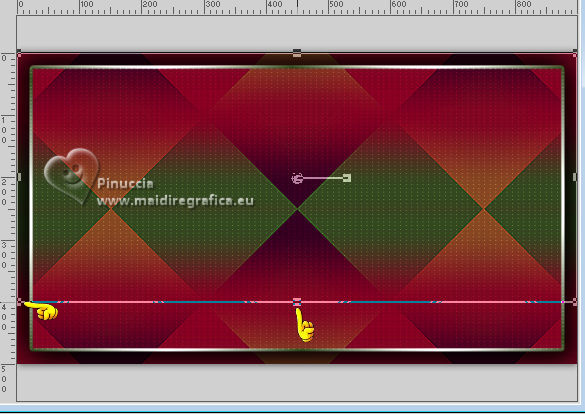
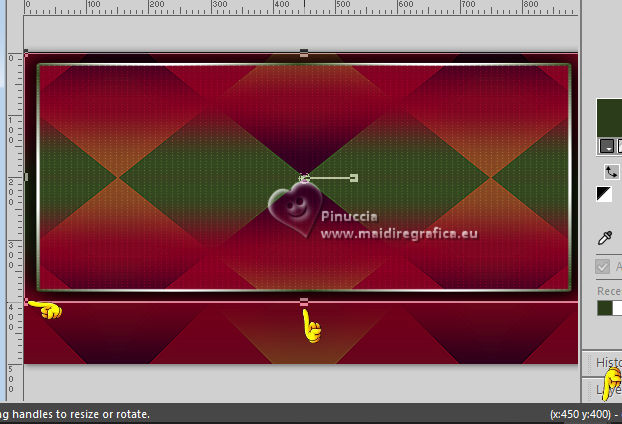
8. Activate your Pick Tool 
mode Scale 
pull the central bottom node
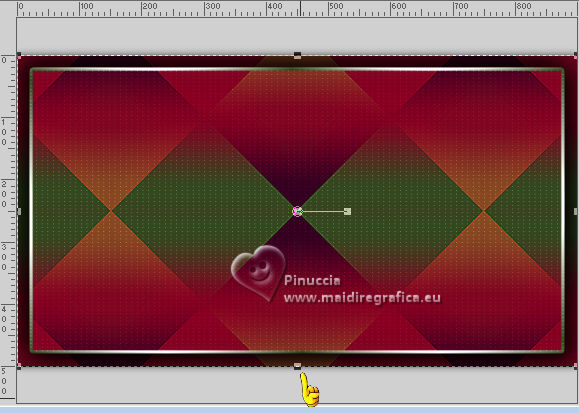
up, until 400 pixels
Set again your initial colors:
Foreground color to #69071d
Background color to #2c3d1b

9. Attiva il livello Raster 1.
Layers>Duplicate.
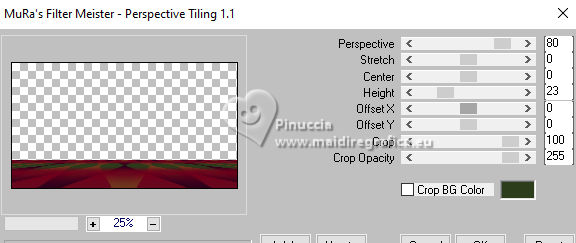
Effects>Plugins>Mura's Meister - Perspective Tiling.
Effects>Reflection Effects>Rotating Mirror.

10. Activate the layer Promoted Selection.
Layers>Duplicate.
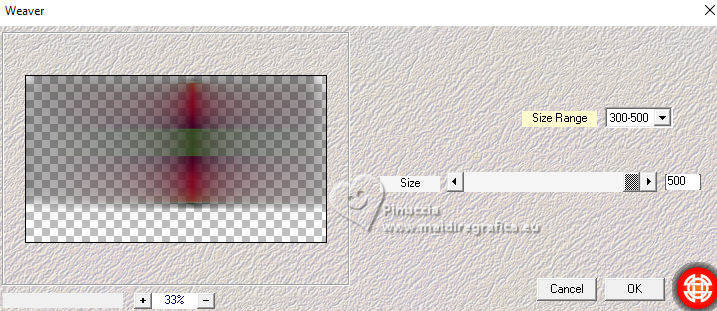
Effects>Plugin>Mehdi - Weaver.
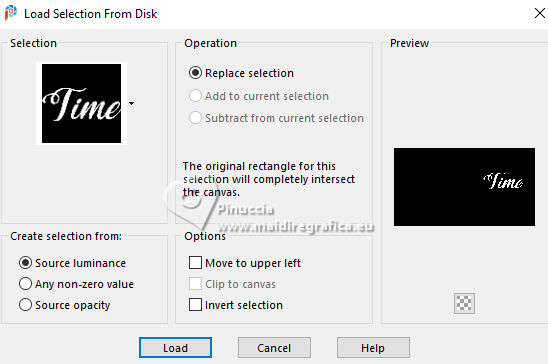
11. Selections>Load/Save Selections>Load Selection From Disk.
Look for and load the selection CTime_CBen
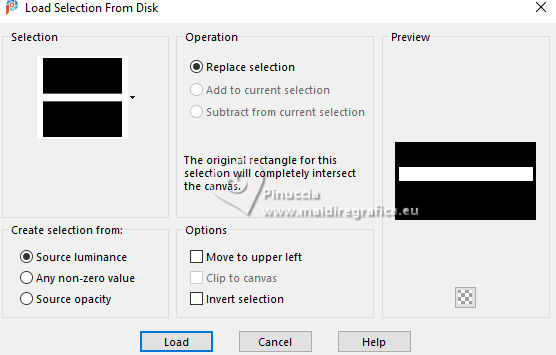
Selections>Promote Selection to Layer.
Selections>Select None.
12. Your tag and the layers.
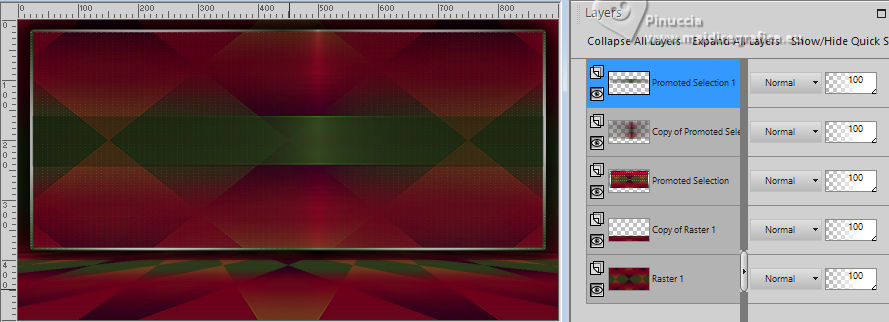
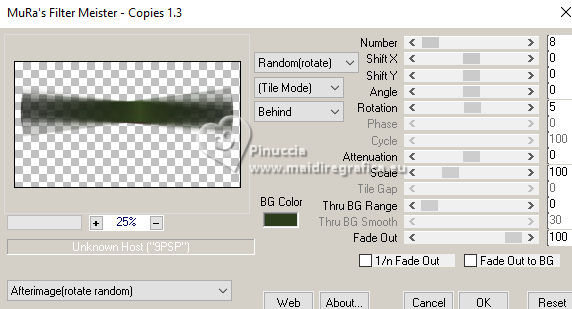
13. Stay on the layer Promoted Selection 1.
Effects>Plugins>Mura's Meister - Copies.
14. Layers>New Raster Layer.
Set again your foreground color to white #ffffff.
Flood Fill  the layer with the color white. the layer with the color white.
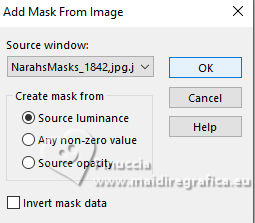
Layers>New Mask Layer>From Image.
Open the menu under the source window and you'll see all the files open.
Select the mask NarahsMasks_1842
Layers>Merge Group.
Layers>Properties>General>Blend mode: Soft Light - Opacity: 100%.
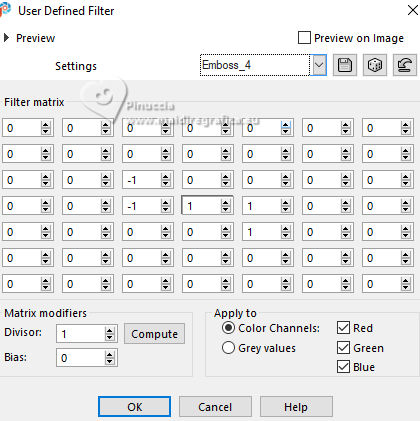
Effects>User Defined Filter - Emboss 4
Pick Tool 
Position X: -6,00 - Position Y: 17,00.

Adjust>Sharpness>Sharpen More.
15. Layers>New Raster Layer.
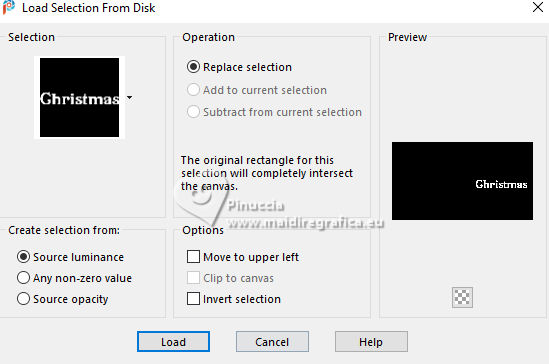
Selections>Load/Save Selections>Load Selection From Disk.
Look for and load the selection CTime_CBen1
With your colors, set your foreground color to a Foreground/Background Gradient, style Linear.
 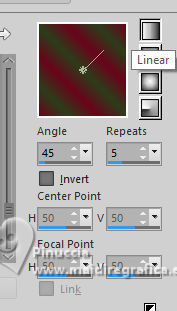
Flood Fill  the selection with you Gradient. the selection with you Gradient.
Selections>Select None.
Pick Tool 
Position X: 485,00 - Position Y: 123,00.

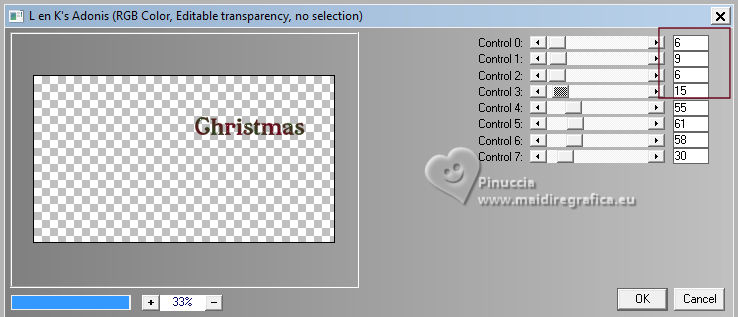
Effects>Plugins>L&K's - L&K's Adonis.
Effects>3D Effects>Drop Shadow, color black #000000.

Adjust>Sharpness>Sharpen.
16. Layers New Raster Layer.
Selections>Load/Save Selections>Load Selection From Disk.
Look for and load the selection CTime_CBen2
Set your foreground color to Color.
Flood Fill  the selection with your foreground color #69071d. the selection with your foreground color #69071d.
Selections>Select None.
Pick Tool 
Position X: 538,00 - Position Y: 154,00.

Effects>Plugins>L&K's - L&K's Adonis.
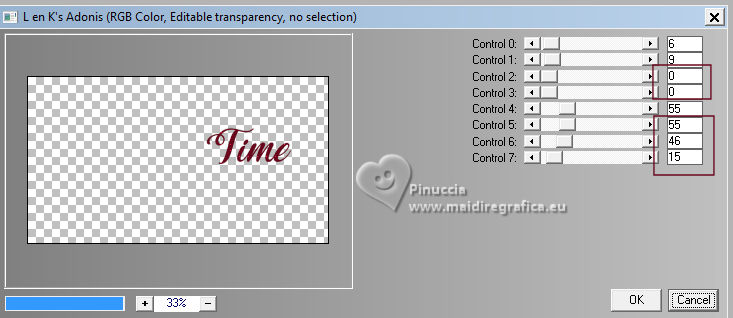
Effects>3D Effects>Drop Shadow, color black #000000.

Adjust> Sharpness>Sharpen.
Layers>Merge>Merge Down.
17. Open DecorCTime2_CBen 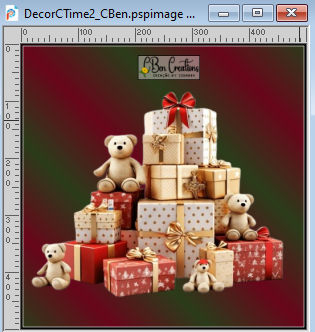
Edit>Copy.
Go back to your work and go to Edit>Paste As New Layer.
Image>Resize, to 68%, resize all layers not checked.
Pick Tool 
Position X: 499,00 - Position Y: 252,00.

Adjust>Sharpness>Sharpen
Effects>3D Effects>Drop Shadow, color black #000000.

18. Open DecorCTime1_CBen 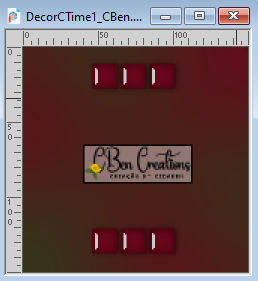
Edit>Copy.
Go back to your work and go to Edit>Paste As New Layer.
Pick Tool 
Position X: 443,00 - Position Y: 95,00.

Layers>Duplicate.
Position X: 805,00 - Position Y: 102,00.

Layers>Merge>Merge Down.
Effects>3D Effects>Drop Shadow, color black #000000.
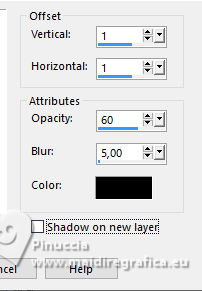
Adjust>Sharpness>Sharpen
19. Image>Add Borders, 1 pixel, symmetric, background color.
Image>Add Borders, 3 pixels, symmetric, foreground color.
Image>Add Borders, 1 pixel, symmetric, background color.
Image>Add Borders, 3 pixels, symmetric, foreground color.
Image>Add Borders, 1 pixel, symmetric, background color.
20. Selections>Select All.
Image>Add Borders, 40 pixels, symmetric, whatever color.
Selections>Invert.
Change the Settings of your Gradient, style Radial.
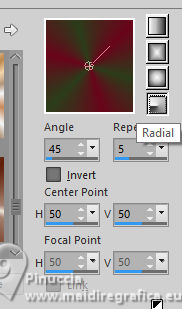
Flood Fill  the selection with your Gradient. the selection with your Gradient.
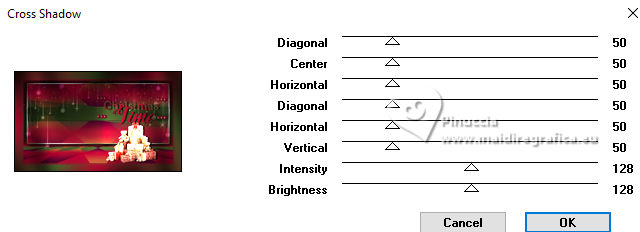
Effects>Plugin>Graphics Plus - Cross Shadow.
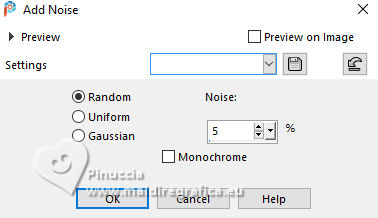
Adjust>Add/Remove Noise>Add Noise.
Selections>Invert.
Effects>3D Effects>Drop Shadow, color black #000000.
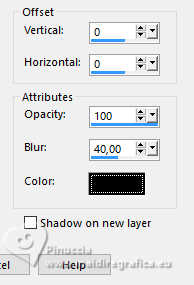
Selections>Select None.
21. Open TubeCTime_CBen 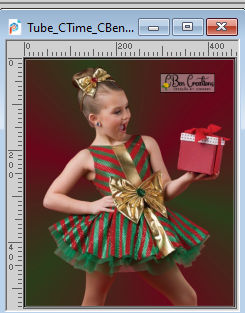
Edit>Copy.
Go back to your work and go to Edit>Paste As New Layer.
Image>Resize, for the provided tube to 110%, resize all layers not checked.
Move  the tube to the left. the tube to the left.
Effects>3D Effects>Drop Shadow, color black #000000.
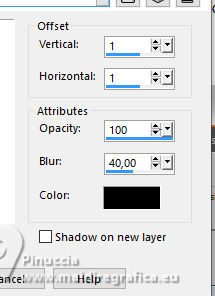
Adjust>Sharpness>Sharpen.
22. Image>Add Borders - 1 pixel, symmetri, background color #2c3d1b.
23. Optional: Adjust>Hue and Saturation>Vibrancy.
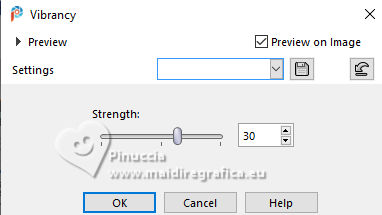
24. Add the creditos of author and translator.
Sign your work and save as jpg.
Version with my tubes from Pinterest images


 Your versions. Thanks Your versions. Thanks

Irene


If you have problems or doubts, or you find a not worked link, or only for tell me that you enjoyed this tutorial, write to me.
23 November 2023

|


