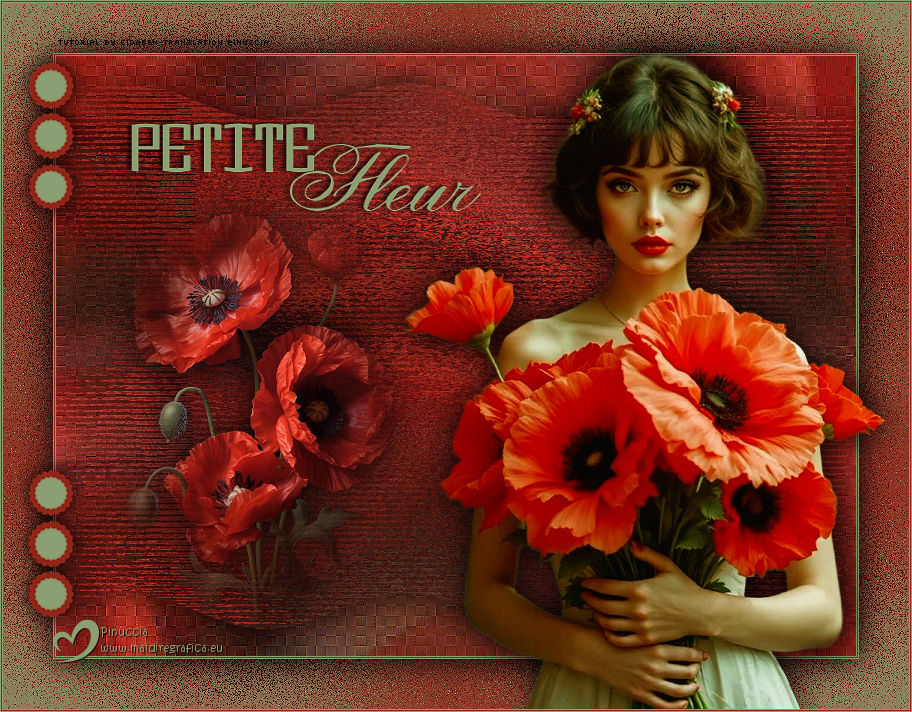
|
PETITE FLEUR


Thanks Cidaben and SIM PSP Group for your invitation to translate your tutorials into english

This tutorial was written and translated with Psp2022, but it can also be made using other versions of PSP.
Since version PSP X4, Image>Mirror was replaced with Image>Flip Horizontal,
and Image>Flip with Image>Flip Vertical, there are some variables.
In versions X5 and X6, the functions have been improved by making available the Objects menu.
In the latest version X7 command Image>Mirror and Image>Flip returned, but with new differences.
See my schedule here
|
Special Note
PSP SIM and its Tutorial Authors ask the public:
- Please, we request that we maintain the originality of the tutorial,
refraining from adding or including unsolicited effects;
- The use of other images is permitted and encouraged,
but please don't modify the content of the original tutorial;
- Please acknowledge and attribute the valuable credits to those who write tutorials,
make translations and create materials.
Carefully,
PSP SIM and Cidaben
|

For this tutorial, you will need:

For the mask thanks Narah.
The rest of the material is by CidaBen
(The links of the tubemakers here).

consult, if necessary, my filter section here
Filters Unlimited 2.0 here
Mehdi. Sorting Tiles, Melt here
Simple. Pizza Slice Mirror here
Toadies. Blast'em here
Filters Simple and Toadies can be used alone or imported into Filters Unlimited.
(How do, you see here)
If a plugin supplied appears with this icon  it must necessarily be imported into Unlimited it must necessarily be imported into Unlimited

You can change Blend Modes according to your colors.
In the newest versions of PSP, you don't find the foreground/background gradient (Corel_06_029).
You can use the gradients of the older versions.
The Gradient of CorelX here

1. Choose 2 colors to work.
Set your foreground color to #8a9f72
and your background color to #912518.
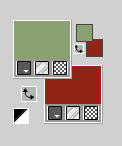
Set your foreground color to a Foreground/Background Gradient, style Linear.
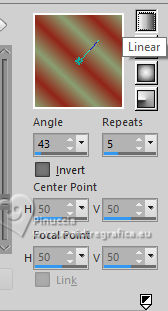
2. Open a new transparent image 800 x 600 pixels.
Flood Fill  the transparent image with your Gradient. the transparent image with your Gradient.
3. Adjust>Blur>Gaussian Blur - radius 30.

Effects>Plugins>Simple - Pizza Slice Mirror.
4. Layers>Duplicate.
Image>Mirror>Mirror Horizontal.
Layers>Properties>General>Opacity: 50%.
Layers>Merge>Merge Down.
Effects>Edge Effect>Enhance.
5. Layers>New Raster Layer.
Selections>Select All.
6. Activate your flower misted Misted_PetiteFleur_CBen 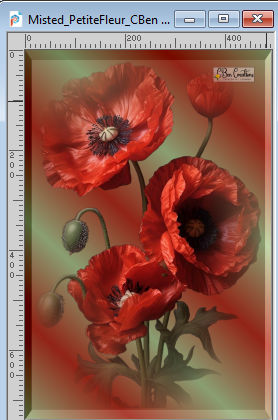
Edit>Copy.
Go back to your work and go to Edit>Paste Into Selection.
Selections>Select None.
Effects>Image Effects>Seamless Tiling, default settings

Adjust>Blur>Radial Blur
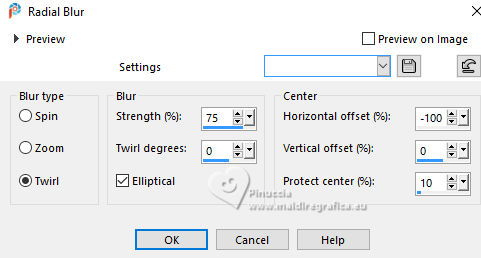
7. Layers>Duplicate.
Image>Mirror>Mirror Horizontal.
Layers>Merge>Merge Down.
Effects>Edge Effects>Enhance More.
8. Layers>Duplicate.
Close the layer Copy of Raster 2.
Activate the layer Raster 2.
Effects>Plugins>Mehdi - Sorting Tiles
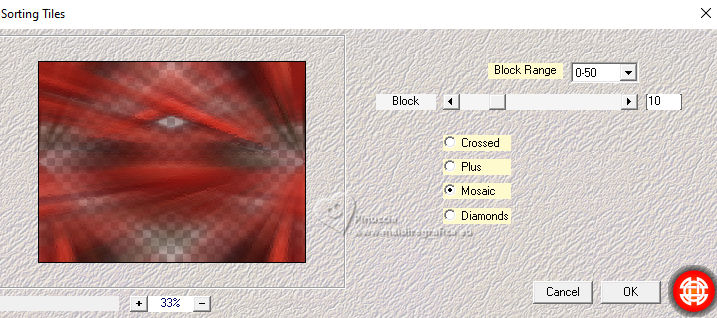
9. Effects>Edge Effects>Enhance.
Open and activate the layer above Copy of Raster 2.
Effects>Plugins>Mehdi - Melt
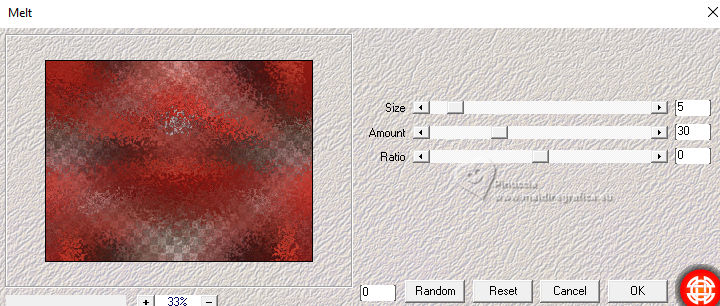
10. Effects>Edge Effects>Enhance.
Image>Resize, to 85%, resize all layers not checked.
Effects>Distortion Effects>Wave
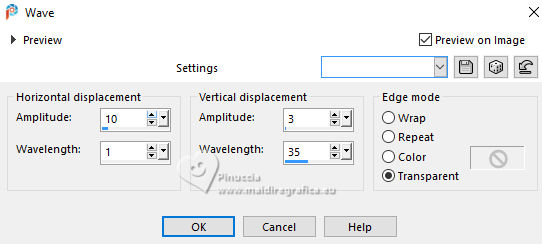
Effects>3D Effects>Drop Shadow, color black #000000.

11. Edit>Paste as new layer - the flower misted Misted_PetiteFleur_CBen is still in memory.
Image>Resize, to 60%, resize all layers not checked.
Pick Tool 
Position X: 68,00 - Position Y: 155,00.
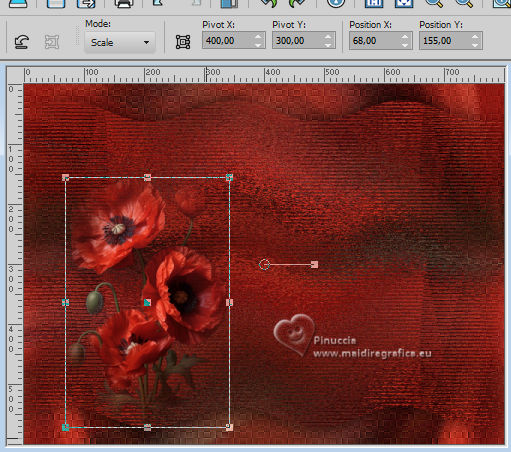
Effects>3D Effects>Drop Shadow, color black #000000.

Adjust>Sharpness>Sharpen.
12. Activate the layer Raster 1.
Edit>Copy
Image>Add Borders, 1 pixel, symmetric, foreground color #8a9f72.
Image>Add Borders, 1 pixel, symmetric, background color #912518.
Image>Add Borders, 1 pixel, symmetric, foreground color #8a9f72.
13. Selections>Select All.
Image>Add Borders, 50 pixels, symmetric, whatever color.
Selections>invert.
Edit>Paste Into Selection
Adjust>Blur>Gaussian Blur - radius 20.

Effects>Plugins>Filters Unlimited 2.0 - Toadies - Blast 'em!...
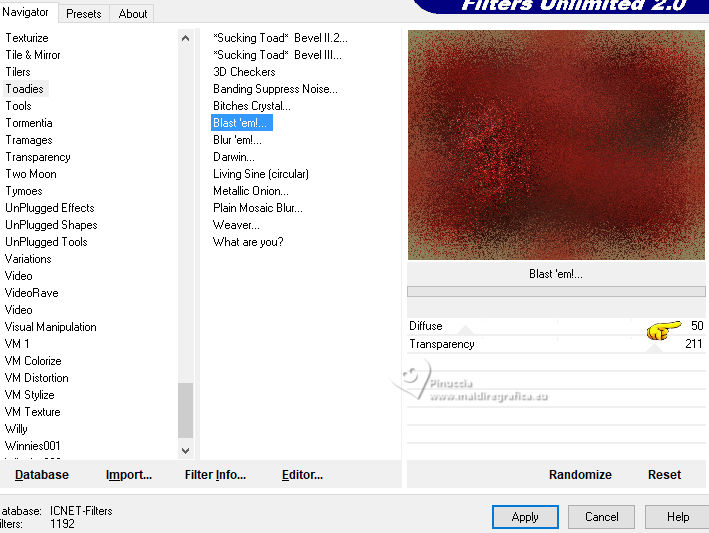
Adjust>Sharpness>Sharpen.
Selections>Invert.
Effects>3D Effects>Drop Shadow, color black #000000.

Selections>Select None.
14. Activate your person tube Tube_PetiteFleur_CBen 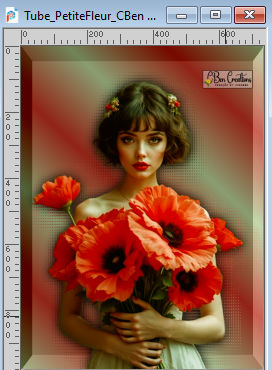
Edit>Copy.
Go back to your work and go to Edit>Paste As New Layer.
Image>Resize, if necessary - for the provided tube to 75%, resize all layers not checked.
Move  the tube to the right, the tube to the right,
or Pick Tool 
Position X: 399,00 - Position Y: 47,00.
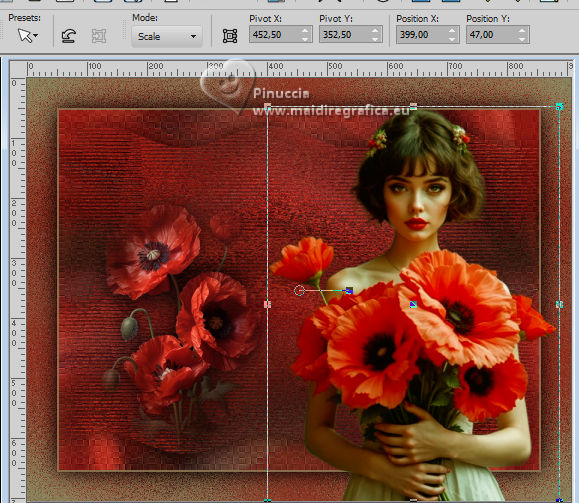
Effects>3D Effects>Drop Shadow, color black #000000.

Adjust>Sharpness>Sharpen.
15. Ouvrir Decor_PetiteFleur_CBen 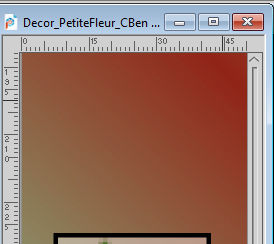
Edit>Copy.
Go back to your work and go to Edit>Paste As New Layer.
Pick Tool 
Position X: 23,00 - Position Y: 60,00.
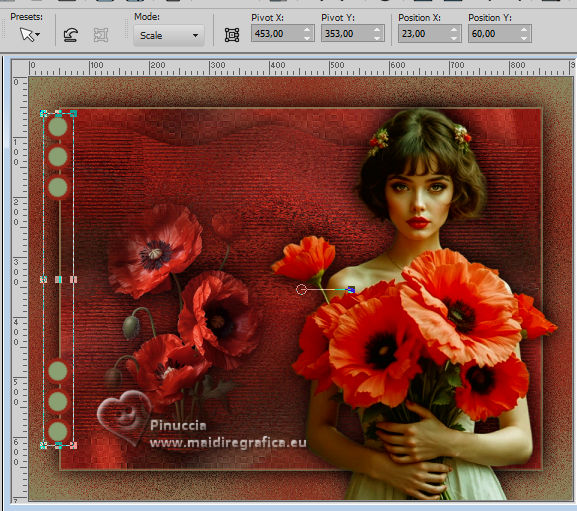
***Colorize, according to your work.
Effects>3D Effects>Drop Shadow, color black #000000.

Adjust>Sharpness>Sharpen.
16. Open Título_PetiteFleur_CBen 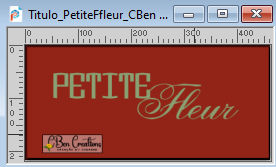
Edit>Copy.
Go back to your work and go to Edit>Paste As New Layer.
Pick Tool 
Position X: 128,00 - Position Y: 120,00.
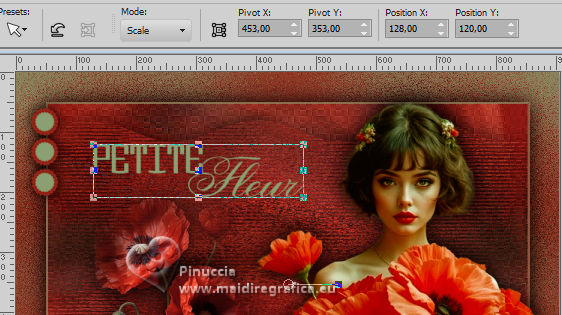
Place  the texte to your liking. the texte to your liking.
Colorize, according to your work.
Effects>3D Effects>Drop Shadow, color black #000000.

Adjust>Sharpness>Shapen.
17. Open Credit-Tutorial_byCidaBen and go to Edit>Copy.
Go back to your work and go to Edit>Paste As New Layer.
Place  this text to your liking. this text to your liking.
Don't forget the translator's credit.
18. Image>Add Borders, 1 pixel, symmetric, foreground color #8a9f72.
Image>Add Borders, 1 pixel, symmetric, background color #912518.
Image>Add Borders, 1 pixel, symmetric, foreground color #8a9f72.
19. Sign your work and save as jpg.
For the tubes of this version thanks PqnaAlice
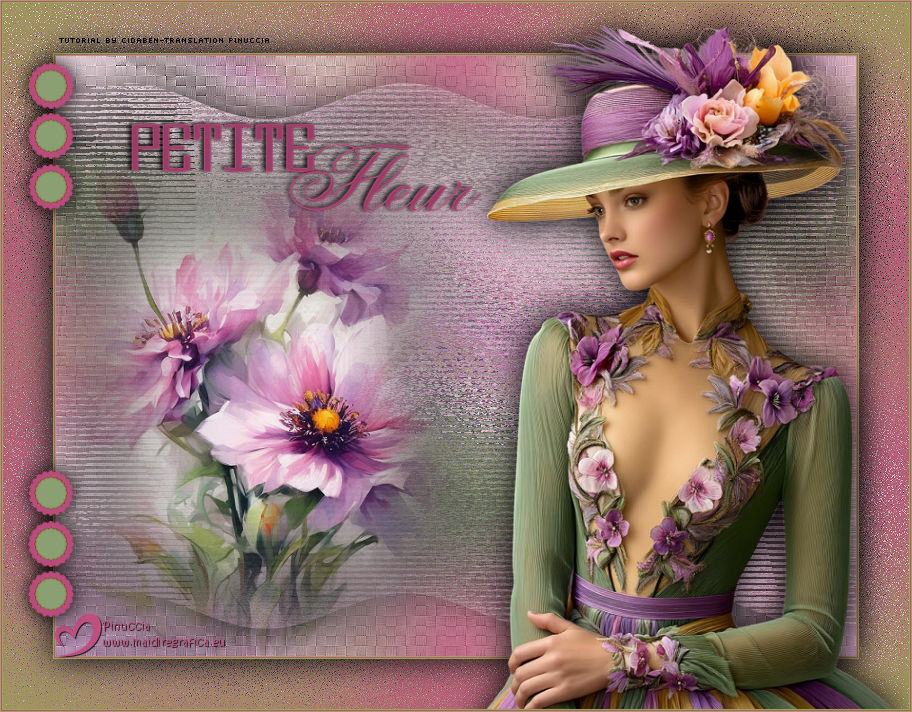

 Your versions. Thanks Your versions. Thanks
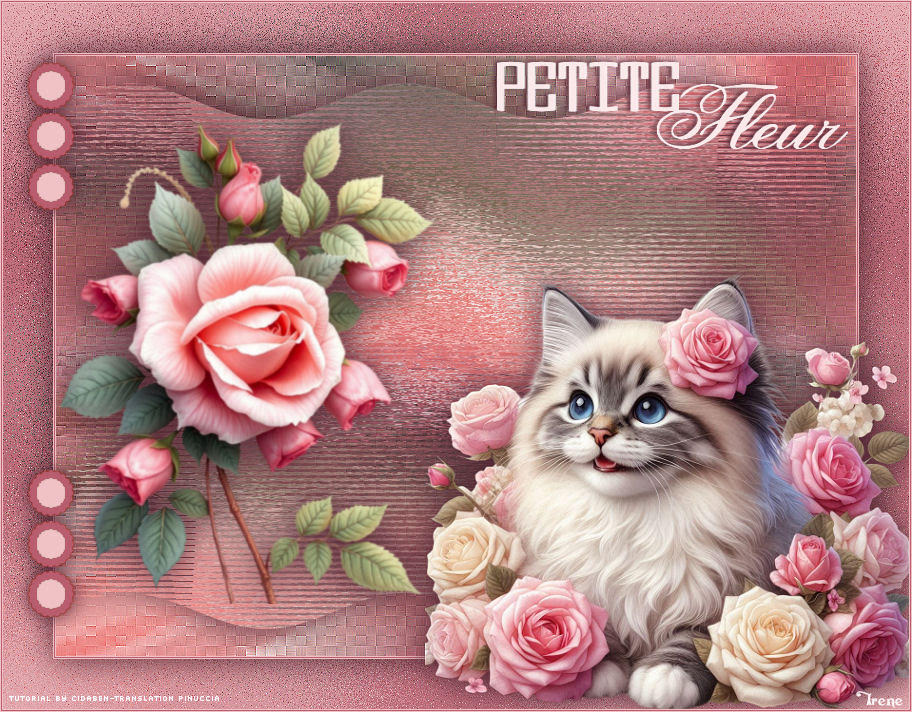
Irene


If you have problems or doubts, or you find a not worked link, or only for tell me that you enjoyed this tutorial, write to me.
1 Novembre 2025

|

