|
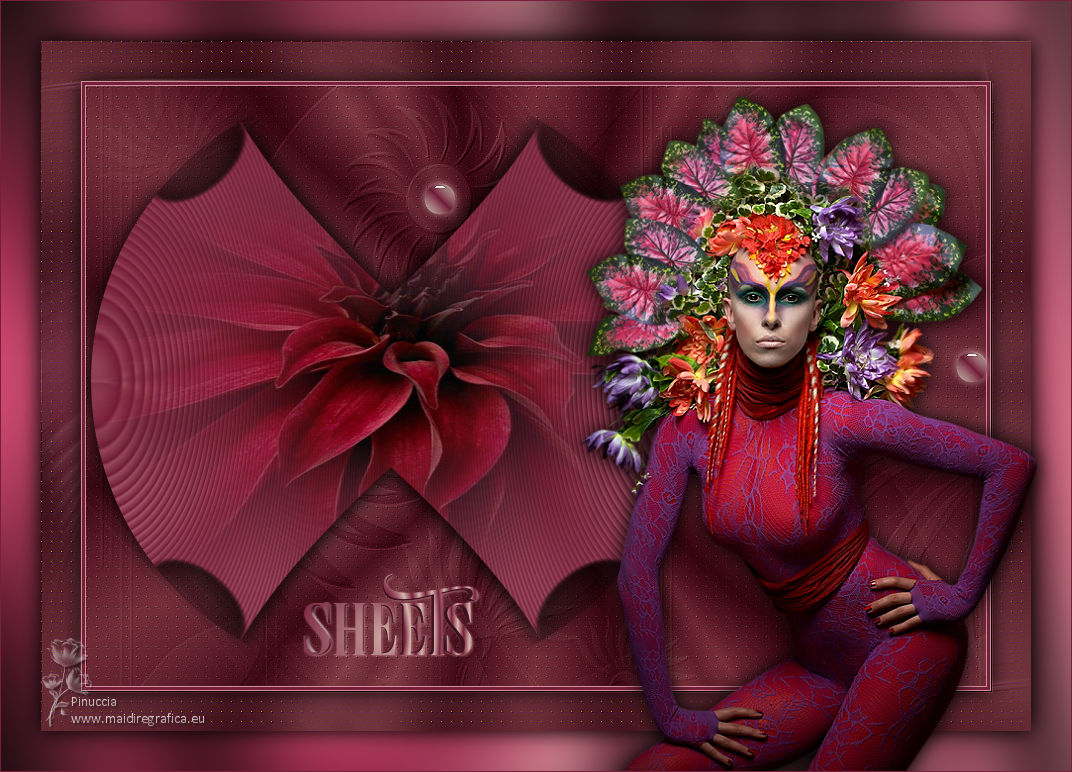
SHEETS


Thanks SIM PSP Group for your invitation to translate your tutorials into english

This tutorial was written with Psp2022 and translated with PspX17, but it can also be made using other versions of PSP.
Since version PSP X4, Image>Mirror was replaced with Image>Flip Horizontal,
and Image>Flip with Image>Flip Vertical, there are some variables.
In versions X5 and X6, the functions have been improved by making available the Objects menu.
In the latest version X7 command Image>Mirror and Image>Flip returned, but with new differences.
See my schedule here
For this tutorial, you will need:

Thanks for the tubes Mentali and Callitubes, and for the mask Silvie.
(The links of the tubemakers here).

consult, if necessary, my filter section here
Filters Unlimited 2.0 here
Flaming Pear - Flexify 2 here
AP [Lines] - Lines SilverLining here
FM Tile Tools - Blend Emboss here
Graphics Plus - Cross Shadow here
Filters Graphics Plus can be used alone or imported into Filters Unlimited.
(How do, you see here)
If a plugin supplied appears with this icon  it must necessarily be imported into Unlimited it must necessarily be imported into Unlimited

You can change Blend Modes according to your colors.
In the newest versions of PSP, you don't find the foreground/background gradient (Corel_06_029).
You can use the gradients of the older versions.
The Gradient of CorelX here

Copy the Selection in the Selections Folder.
Open the mask in PSP and minimize it with the rest of the material.
1. Choose 3 colors from your material.

Set your foreground color to #751f3b
and your background color to #d29090
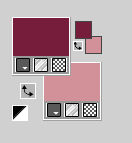
Set your foreground color to a Foreground/Background Gradient, style Sunburst.
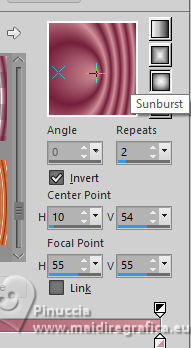
2. Open a new transparent image 900 x 600 pixels.
Flood Fill  the transparent image with your Gradient. the transparent image with your Gradient.
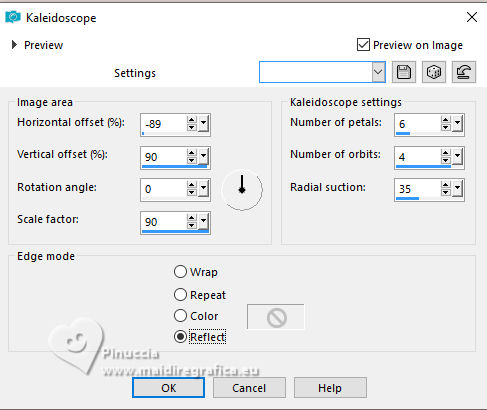
3. Effects>Reflection Effects>Kaleidoscope.
4. Layers>Duplicate.
5. Adjust>Blur>Gaussian Blur - radius 30.

Edit>Repeat Gaussian Blur.
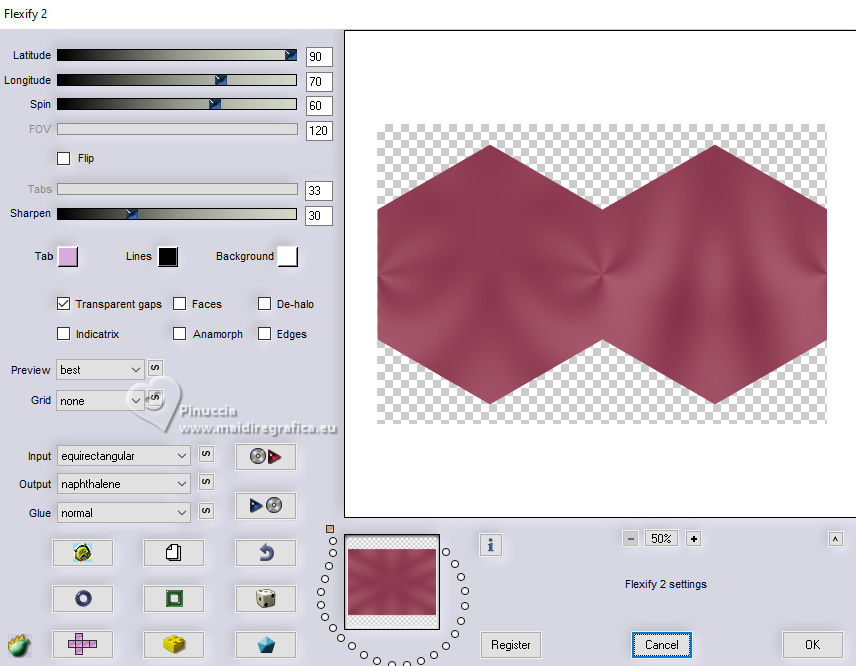
6. Effects>Plugin>Flaming Pear - Flexify 2.
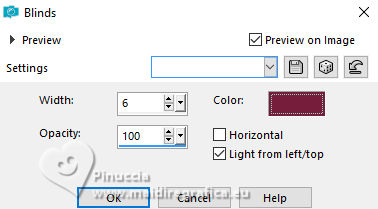
7. Effects>Texture Effects>Blinds - foreground color.
8. Activate the layer Raster 1.
Layers>Duplicate.
9. Set your background color to the third color #e6e5d0.
Layers>New Raster Layer.
Flood Fill  the layer with your foreground color. the layer with your foreground color.
10. Layers>New Mask layer>From image
Open the menu under the source window and you'll see all the files open.
Select the mask Silvie_Mask_Flowers-abstract .
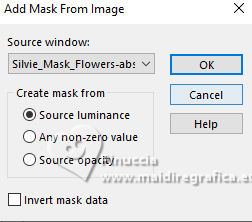
Layers>Merge>Merge Group.
Adjust>Sharpeness>Sharpen.
Reduce the opacity of this layer to 70%.
Layers>Merge>Merge Down.
Change the Blend Mode of this layer to Multiply, or according to your colors.
11. Activate the layer Copy of Raster 1.
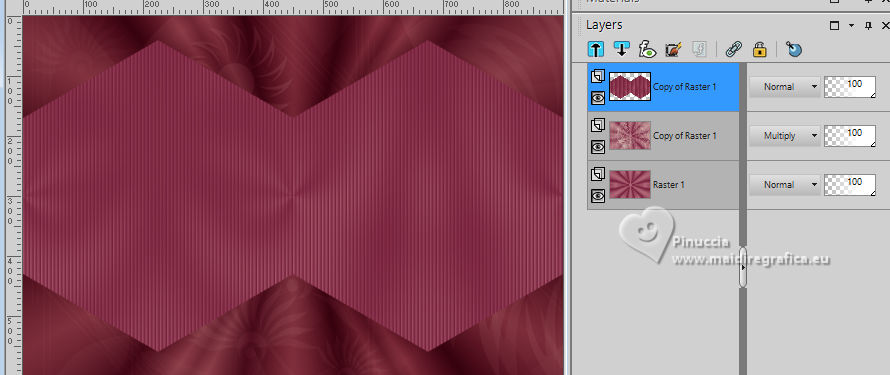
Layers>New Raster Layer.
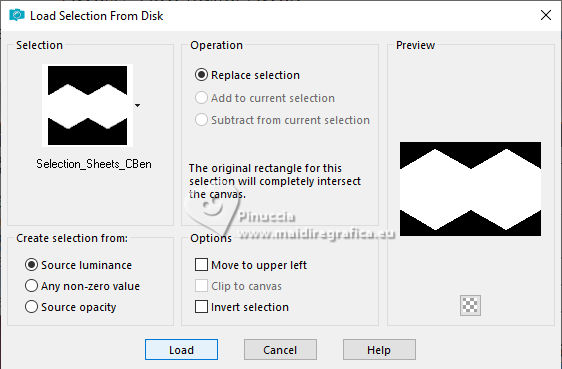
Selections>Load/Save Selection>Load Selection from Disk.
Look for and load the selection Selection_Sheets_CBen
12. Open your misted Callitubes-186flores 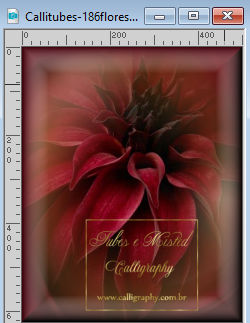
Edit>Copy.
Go back to your work and go to Edit>Paste into Selection.
Adjust>Sharpness>Sharpen More.
Selections>Select None.
Layers>Merge>Merge Down.
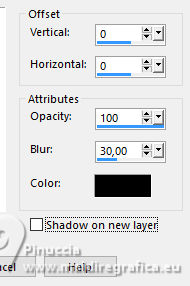
Effects>3D Effects>Drop Shadow, color black.
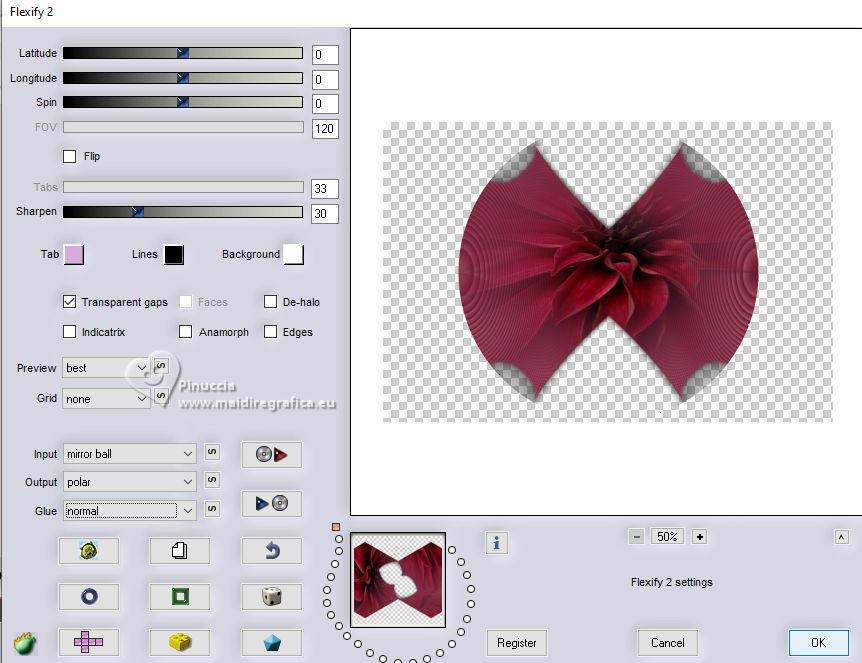
13. Effects>Plugin>Flaming Pear - Flexify 2.
14. Activate your Pick Tool 
and set Position X: 5,00 and Position Y: 20,00.
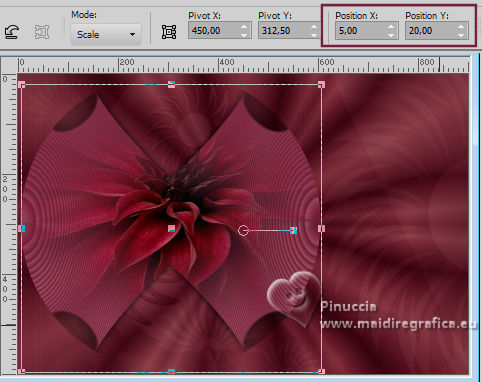
Effects>3D Effects>Drop Shadow, color black.

15. Activate the layer below, Copy of Raster 1.
16. Effects>Plugins>AP [Lines] - Lines SilverLining - Dotty Grid.
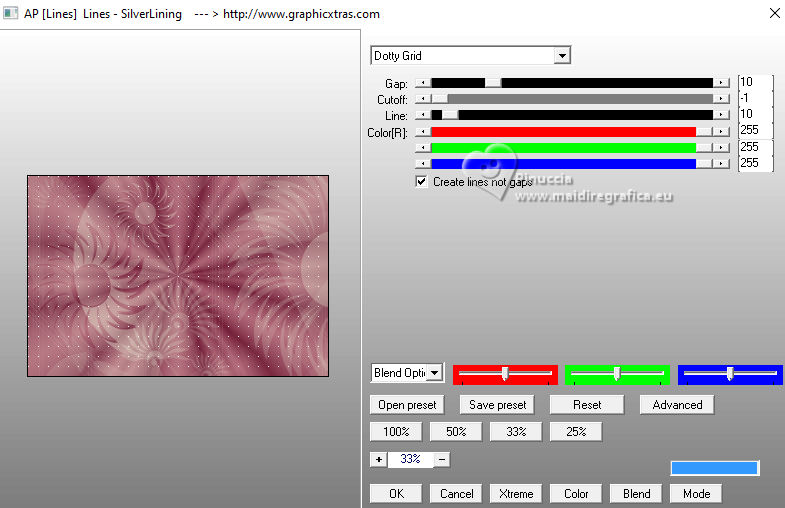
17. Effects>Plugins>FM Tile Tools - Blend Emboss, default settings.

Repeat Blend Emboss another time.
18. Edit>Copy Special>Copy Merged
19. Image>Add borders, 1 pixel, symmetric, background color.
Image>Add borders, 3 pixels, symmetric, foreground color.
Image>Add borders, 1 pixel, symmetric, background color.
Selections>Select All.
Image>Add Borders, 40 pixels, symmetric, whatever color.
Selections>Invert.
Edit>Paste into Selection
20. Adjust>Blur>Radial Blur.
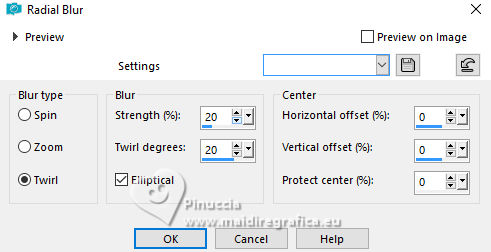
21. Effects>Plugins>AP [Lines] - Lines SilverLining - Dotty Grid.
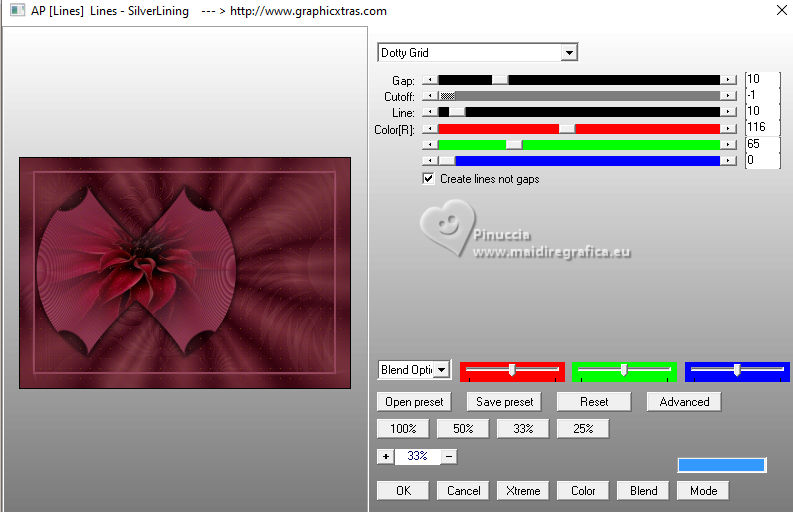
22. Effects>Plugins>FM Tile Tools - Blend Emboss, default settings.

Repeat Blend Emboss another time.
23. Selections>Invert.
Effects>3D Effects>Drop Shadow, color black.

24. Selections>Select None.
25. Selections>Select All.
Image>Add borders, 40 pixels, symmetric, whatever color.
Selections Invert.
Set again your background color to #d29090, to get your gradient
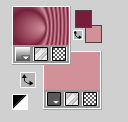
Flood Fill  the selection with your Gradient. the selection with your Gradient.
Adjust>Blur>Gaussian Blur - radius 25.

26. Selections>Invert.
Effects>3D Effects>Drop Shadow, color black.

27. Selections>Invert.
Effects>Plugins>Graphics Plus - Cross Shadow, default settings.
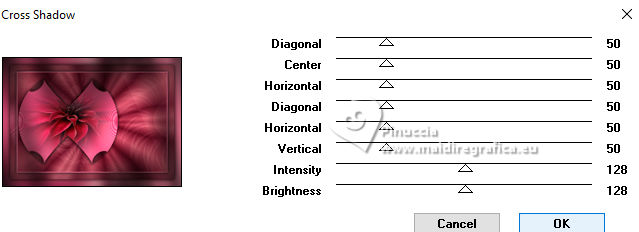
28. Selections>Select None.
29. Open Decor_Sheets_CBen 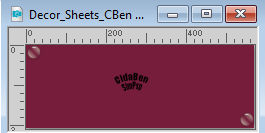
Edit>Copy.
Go back to your work and go to Edit>Paste as new layer.
Activate your Pick Tool 
and set Position X: 419,00 and Position Y: 180,00.

Note: for my second version I change the Blend Mode of this layer to Luminance (legacy).
Adjust>Sharpness>Sharpen.
Effects>3D Effects>Drop Shadow, background color.
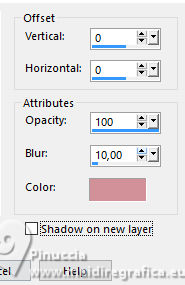
30. Open your main tube mentali-femme1282 
Edit>Copy.
Go back to your work and go to Edit>Paste as new layer.
Image>Mirror.
Image>Resize, if necessary, for the supplied tube it is not.
Move  the tube to the right. the tube to the right.
Adjust>Sharpness>Sharpen.
Effects>3D Effects>Drop Shadow, at your choice.
31. Open one of the two Titulo_Sheets_CBen 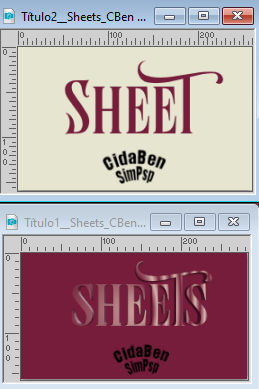 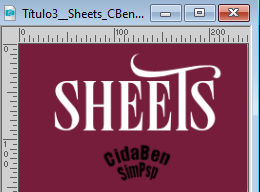
I used Titulo1
Edit>Copy.
Go back to your work and go to Edit>Paste as new layer.
Pick Tool 
and set Position X: 302,00 and Position Y: 573,00.

Effects>3D Effects>Drop Shadow, background color.
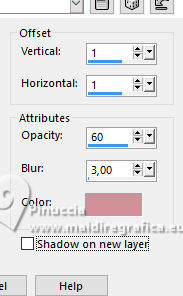
32. Image>Add borders, 1 pixel, symmetric, foreground color.
33. Sign your work and save as jpg.
For the tubes of this version thanks Suizabella and Ema


Your versions. Thanks

Lynnette

Silvie
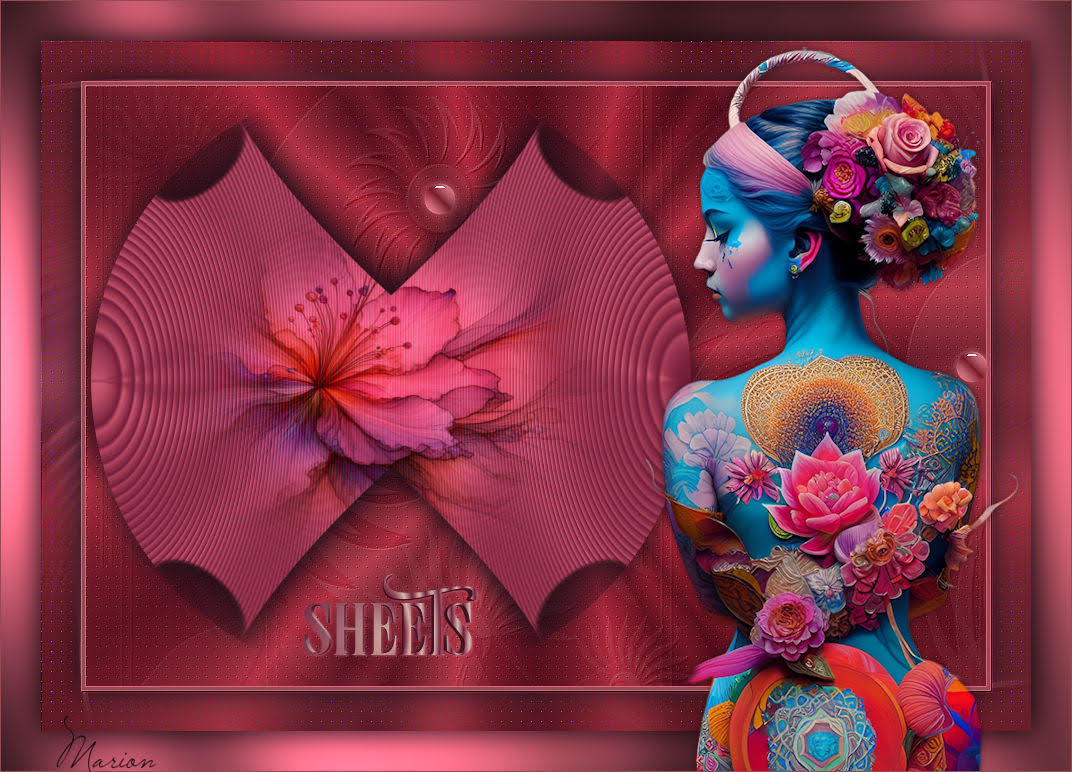
Marion


If you have problems or doubts, or you find a not worked link, or only for tell me that you enjoyed this tutorial, write to me.
30 September 2023

|

