CHLOÉ

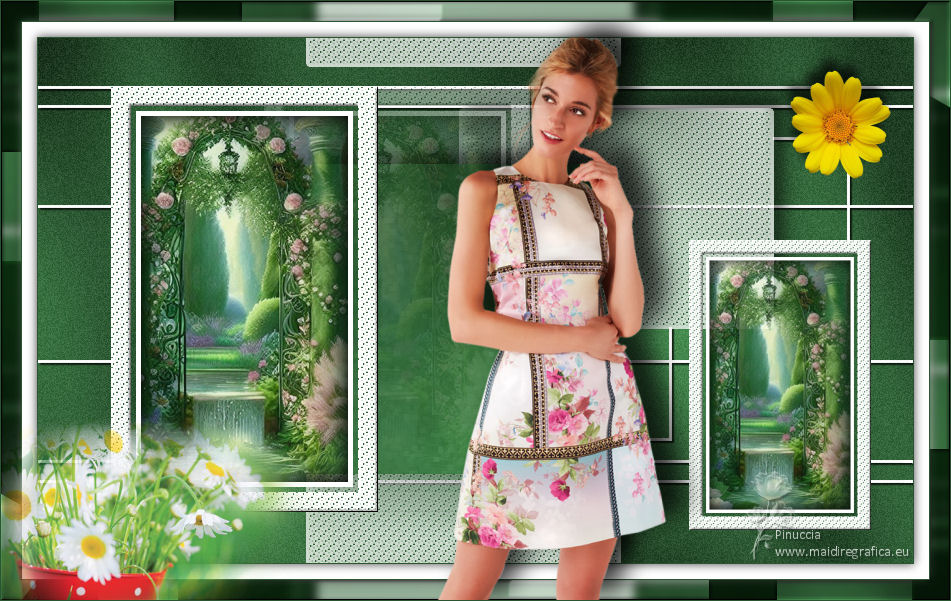
Thanks Colybrix for your invitation to translate

Clic and move the brush to follow the tutorial.

To print


|
This tutorial was translated with PSPX and PSPX3, but it can also be made using other versions of PSP.
Since version PSP X4, Image>Mirror was replaced with Image>Flip Horizontal,
and Image>Flip with Image>Flip Vertical, there are some variables.
In versions X5 and X6, the functions have been improved by making available the Objects menu.
In the latest version X7 command Image>Mirror and Image>Flip returned, but with new differences.
See my schedule here
 italian translation here italian translation here
 your versions here your versions here
Necessary

(The links of the tubemakers here).

consult, if necessary, my filter section here
Filters Unlimited 2.0 here
Graphics Plus - Cross Shadow here
Filters Graphics Plus can be used alone or imported into Filters Unlimited.
(How do, you see here)
If a plugin supplied appears with this icon  it must necessarily be imported into Unlimited it must necessarily be imported into Unlimited

You can change Blend Modes according to your colors.

Copy the Selections in the Selections Folder.
Set your foreground color to #2b5531,
and your background color to white #ffffff

1. Open a new transparent image 875 x 525 pixels.
Flood Fill  the transparent image with your dark foreground color. the transparent image with your dark foreground color.
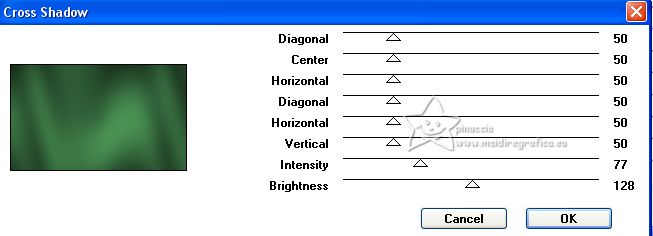
Effects>Plugins>Graphics Plus - Cross Shadow
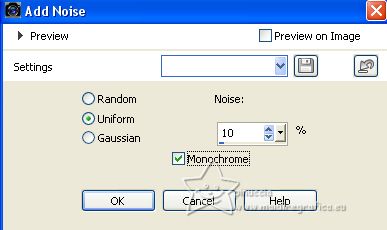
Adjust>Add/Remove Noise>Add Noise.
2. Layers>New Raster Layer.
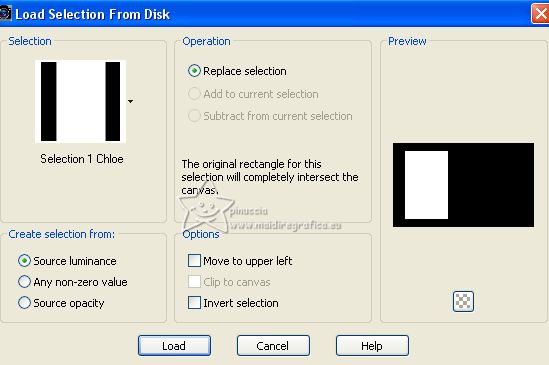
Selections>Load/Save Selection>Load Selection from Disk.
Look for and load the selection Selection 1 Chloe
Flood Fill the selection with color white.
Selections>Modify>Contract - 20 pixels.
Press CANC on the keyboard 
3. Selections>Modify>Contract - 5 pixels.
Flood Fill again with color white.
Selections>Modify>Contract - 5 pixels.
Press CANC on the keyboard.
4. Open the landscape tube printemps13-coly 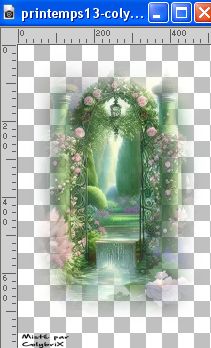
Erase the watermark.
Image>Mirror.
Edit>Copy.
Go back to your work and go to Edit>Paste as new layer.
Image>Resize, to 68%, resize all layers not checked.
Place  the tube on the selection. the tube on the selection.
Selections>Invert.
Press CANC on the keyboard.
5. Again Selections>Invert.
Layers>New Raster Layer.
Effects>3D Effects>Cutout.
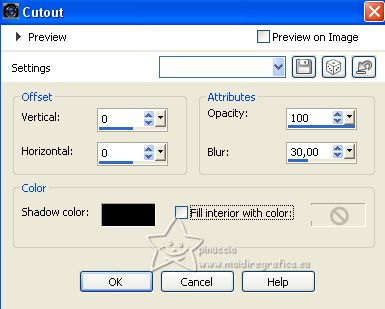
Selections>Select None.
Layers>Merge>Merge Down - 2 times.
6. Activate your Magic Wand Tool  , tolerance and feather 0, , tolerance and feather 0,
and click on the 20 pixels white border to select it.
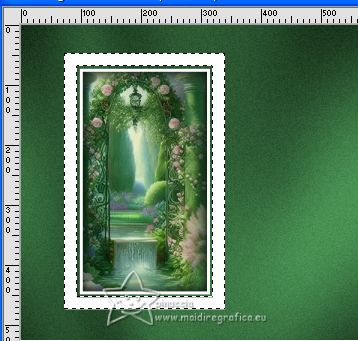
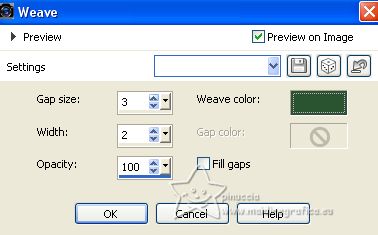
Effects>Texture Effects>Weave
Weave color: dark foreground color
Effects>3D Effects>Inner Bevel.
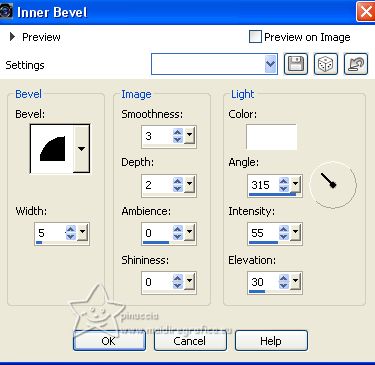
Selections>Select None.
7. Layers>Duplicate.
Activate the layer below of the original.
Effects>Image Effects>Seamless Tiling.
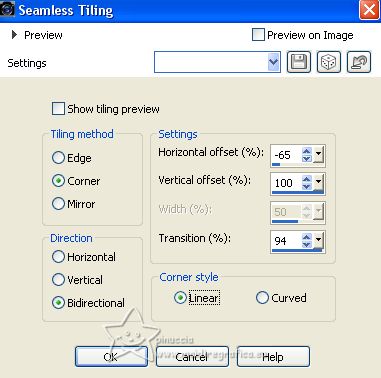
Reduce the opacity of this layer to 50%.
8. Activate again your top layer.
Layers>Duplicate.
Image>Resize, to 68%, resize all layers not checked.
K key on the keyboard to activate your Pick Tool 
set Position X: 651,00 and Position Y: 202,00.

Layers>Merge>Merge Down.
9. Layers>New Raster Layer.
Selections>Load/Save Selection>Load Selection from Disk.
Look for and load the selection Selection 2 Chloe
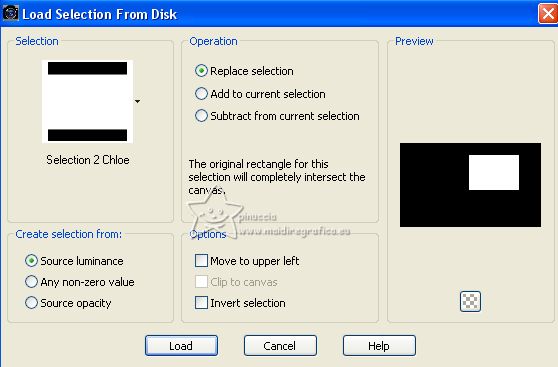
Flood Fill the selection with color white.
Effects>Texture Effects>Weave, same settings.
10. Selections>Modify>Select Selection Borders.
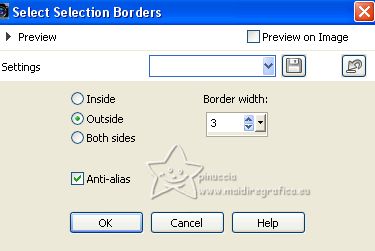
Flood Fill the selection with color white.
Selections>Select None.
11. Effects>Image Effects>Seamless Tiling.
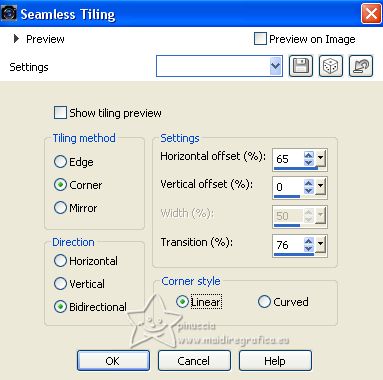
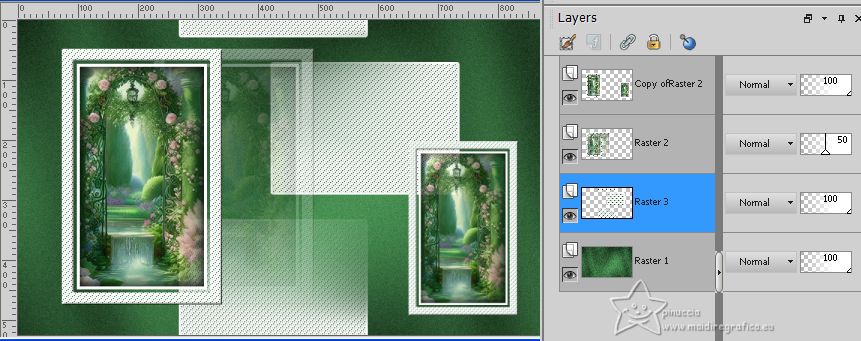
Layers>Arrange>Move Down - 2 times.
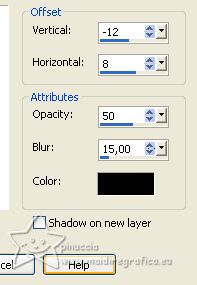
Effects>3D Effects>Drop Shadow, color black.
Reduce the opacity of this layer to 75%.
12. Activate the layer Raster 1.
Selections>Load/Save Selection>Load Selection from Disk.
Look for and load the selection Selection 3 Chloe
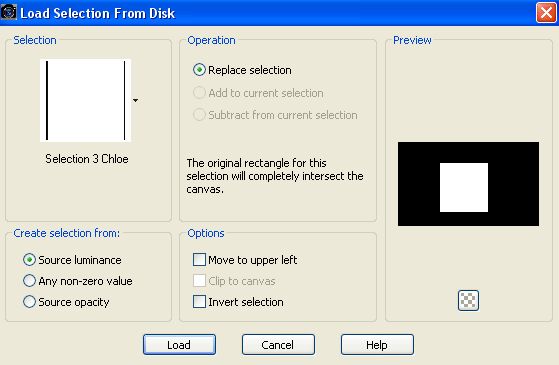
Selections>Promote Selection to Layer.
Effects>Edge Effects>Erode.
Effects>Edge Effects>Dilate - 2 times.
Effects>3D Effects>Drop Shadow, same settings.
Layers>Arrange>Move Up.
Selections>Select None.
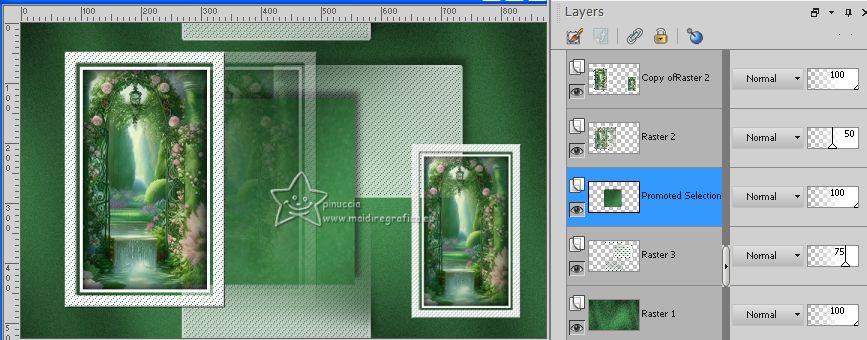
13. Activate the layer below of the two frames.
Effects>3D Effects>Drop Shadow, same settings.

14. Activate again the layer Raster 1.
Layers>New Raster Layer.
Selections>Load/Save Selection>Load Selection from Disk.
Look for and load the selection Selection 4 Chloe
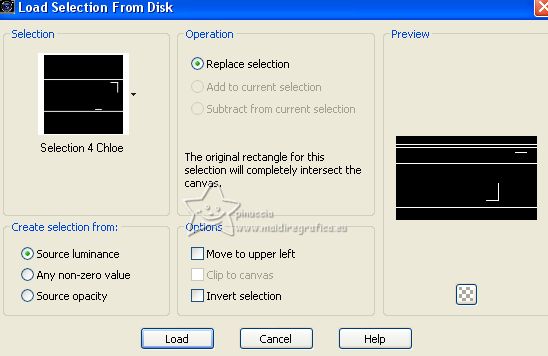
Flood Fill the selection with color white.
Selections>Select None.
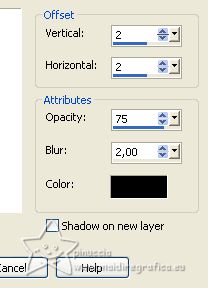
Effects>3D Effects>Drop Shadow, color black.
15. Selections>Load/Save Selection>Load Selection from Disk.
Look for and load the selection Selection 5 chloe
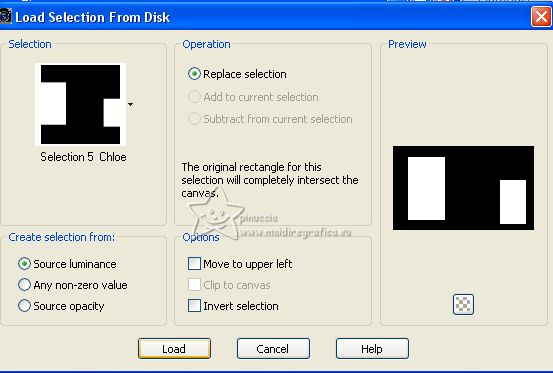
Press CANC on the keyboard
Selections>Select None.
16. Edit>Copy Special>Copy Merged
17. Image>Add borders, 1 pixel, symmetric, dark color.
Selections>Select All.
Image>Add borders, 15 pixels, symmetric, color white.
Effects>3D Effects>Drop Shadow, color black.
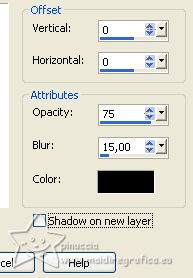
Selections>Select None.
18. Image>Add borders, 1 pixel, symmetric, dark color.
Selections>Select All.
Image>Add borders, 20 pixels, symmetric, color white.
Selections>Invert.
19. Layers>New Raster Layer.
Edit>Paste into Selection.
Adjust>Blur>Gaussian Blur - radius 5.
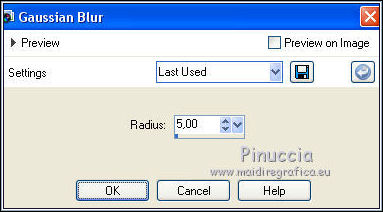
Selections>Select None.
20. Selections>Load/Save Selection>Load Selection from Disk.
Look for and load the selection Selection 6 Chloe

Press CANC on the keyboard.
Selections>Select None.
Effects>3D Effects>Inner Bevel, same settings.

21. Layers>Duplicate.
Image>Mirror.
Image>Flip.
Change the Blend Mode of this layer to Multiply.
Layers>Merge>Merge visible.
22. Selections>Select All.
Selections>Modify>Contract - 20 pixels.
Effects>3D Effects>Drop shadow, same settings.
Selections>Select None.
23. Open the tube Fleur 84 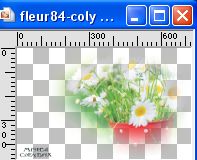
Erase the watermark and go to Edit>Copy.
Go back to your work and go to Edit>Paste as new layer.
Image>Mirror.
Image>Resize, to 55%, resize all layers not checked.
Move  the tube at the bottom left. the tube at the bottom left.
Layers>Duplicate.
24. Open the tube fleurs80 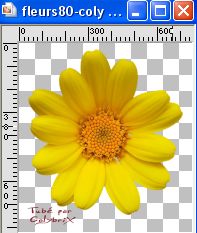
Erase the watermark and go to Edit>Copy.
Go back to your work and go to Edit>Paste as new layer.
Image>Resize, to 15%, resize all layers not checked.
Move  the tube at the upper right. the tube at the upper right.
Effects>3D Effects>Drop Shadow, color black.
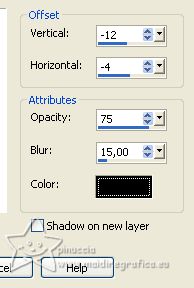
25. Open the woman tube femme520-coly 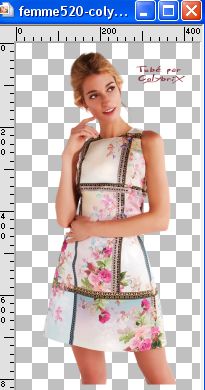
Erase the watermark and go to Edit>Copy.
Go back to your work and go to Edit>Paste as new layer.
Image>Mirror.
Image>Resize, to 72%, resize all layers not checked.
Place  the tube in the center. the tube in the center.
Effects>3D Effects>Drop Shadow, color black.
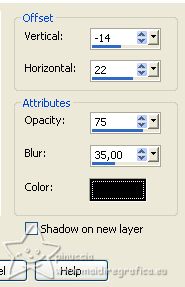
26. Sign your work.
Image>Add borders, 1 pixel, symmetric, dark color.
Save as jpg.
For the tubes of this version thanks Luz Cristina, Jewel and Coly
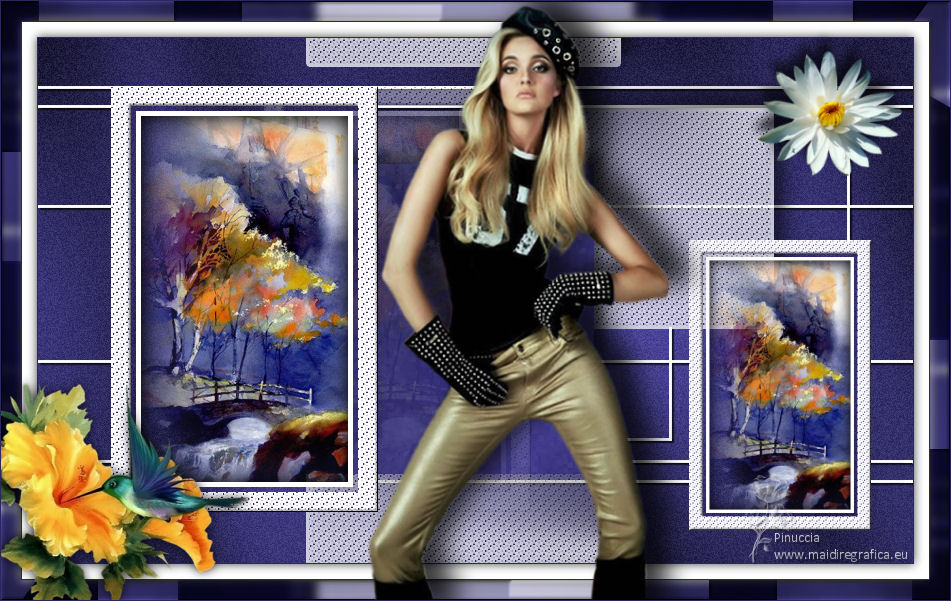

If you have problems or doubts, or you find a not worked link, or only for tell me that you enjoyed this tutorial, write to me.
13 March 2023

|

