|
NATURALEZA

Thanks Emilieta for your invite to translate your tutorials into english.
Here you can find the original tutorial.

This tutorial has been translated with PSPX2, but it can also be made using other versions of PSP.
Since version PSP X4, Image>Mirror was replaced with Image>Flip Horizontal,
and Image>Flip with Image>Flip Vertical, there are some variables.
In versions X5 and X6, the functions have been improved by making available the Objects menu.
In the latest version X7 command Image>Mirror and Image>Flip returned, but with new differences.
See my schedule here
french translation here
your versions here
Material here
The woman tube is by Castorke.
The rest of the material is by Emilieta
(The links of the tubemakers here).
Plugins
consult, if necessary, my filter section here
FM Tile Tools - Blend Emboss here
Alien Skin Eye Candy 6 - Text-Selection (nello zip)

You can change Blend Modes according to your colors.
In the newest versions of PSP, you don't find the foreground/background gradient (Corel_06_029).
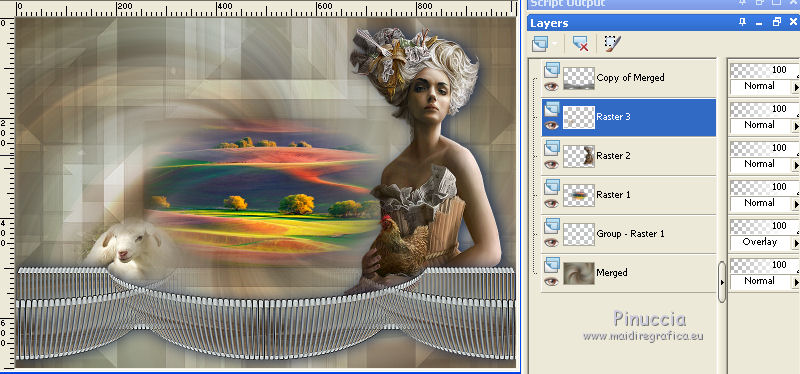
You can use the gradients of the older versions.
The Gradient of CorelX here
Copy the Selection in the Selections Folder.
Open the mask in PSP and minimize it with the rest of the material.
1. Open a new transparent image 1000 x 700 pixels.
2. Selections>Select all.
Open the woman tube, erase the watermark and go to Edit>Copy.
Go back to your work and go to Edit>Paste into Selection.
Selections>Select None.
3. Effects>Image Effects>Seamless Tiling, default settings.

4. Adjust>Blur>Radial Blur.
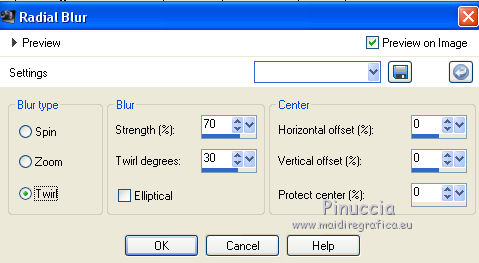
Effects>Edge Effects>Enhance.
5. Layers>New Raster Layer.
Set your foreground color to #849273,
and your background color to #eff7f7.
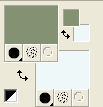
Set your foreground color to a Foreground/Background Gradient, style Sunburst.
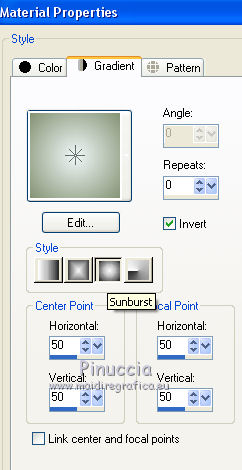
Flood Fill  the layer with your Gradient. the layer with your Gradient.
Layers>Arrange>Send to Bottom.
6. Layers>Merge>Merge visible.
7. Layers>Duplicate.
Edit>Cut (to keep the image in your memory and get a new layer empty)
Selection Tool 
(no matter the type of selection, because with the custom selection your always get a rectangle)
clic on the Custom Selection 
and set the following settings.
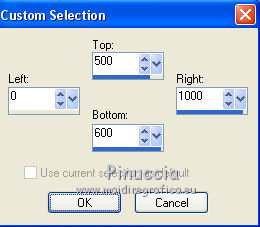
Edit>Paste into Selection.
Selections>Select None.
8. Activate the Erase Tool  with these settings with these settings

Place the mouse at the beginning of the line
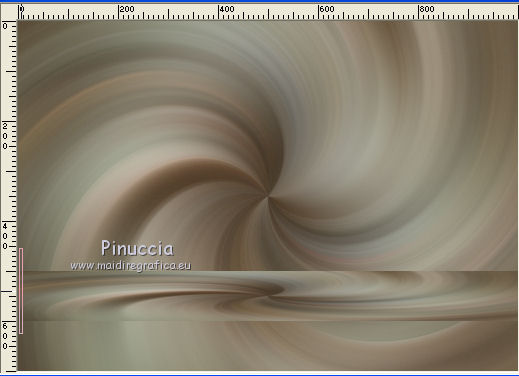
without moving it apply the erase tool from left to right
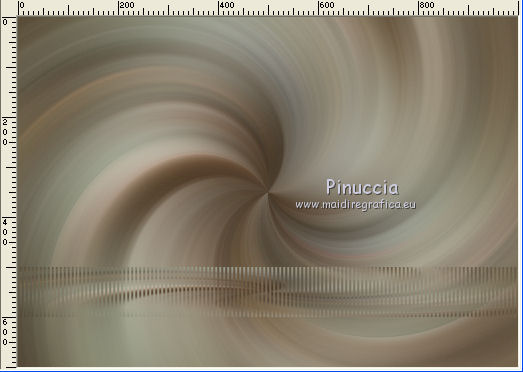
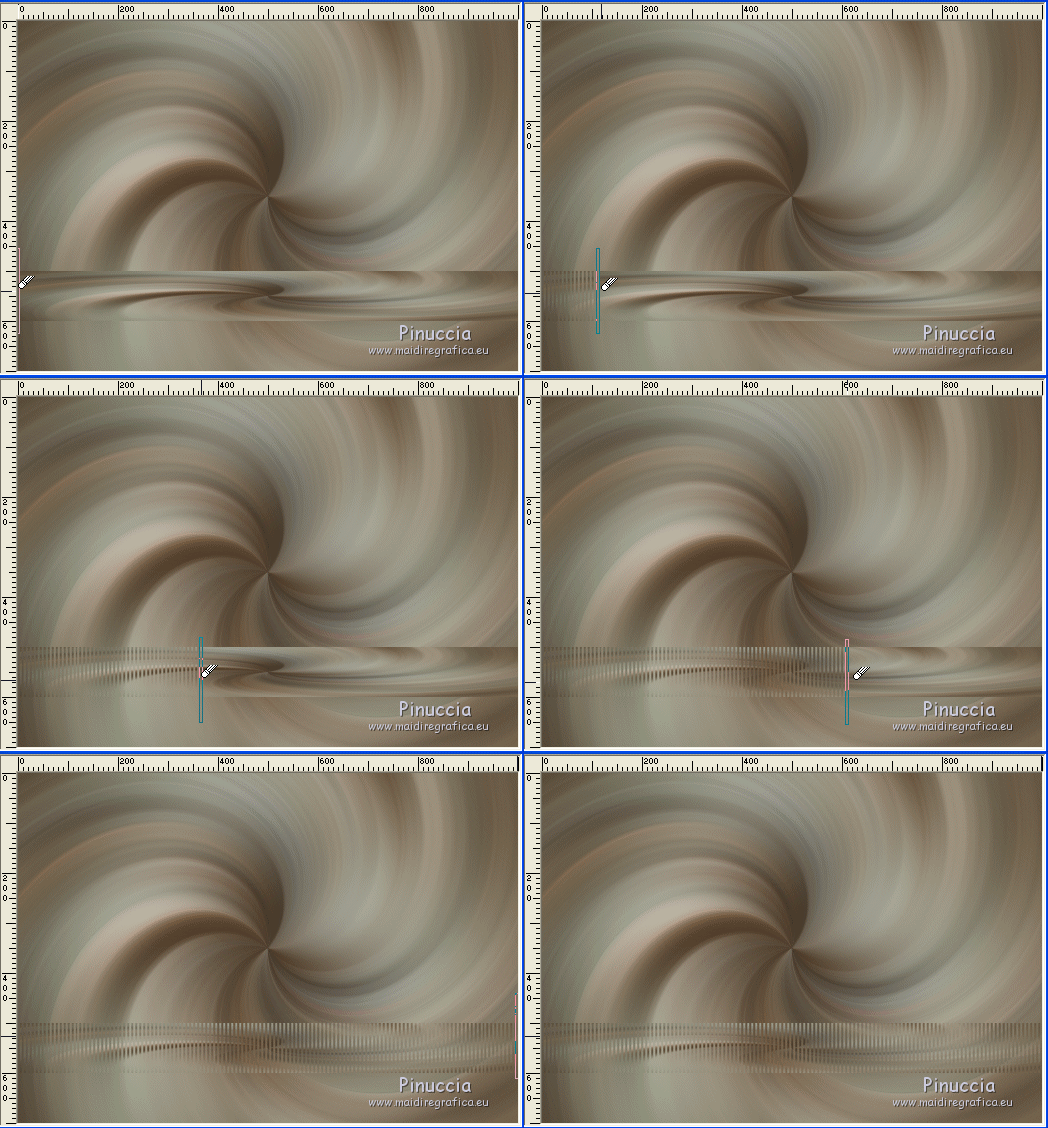
9. Effects>3D Effects>Drop Shadow, color #273450.
10. Effects>Plugins>Alien Skin Eye Candy 6 - Text_Selection - Extrude
both colors: background color
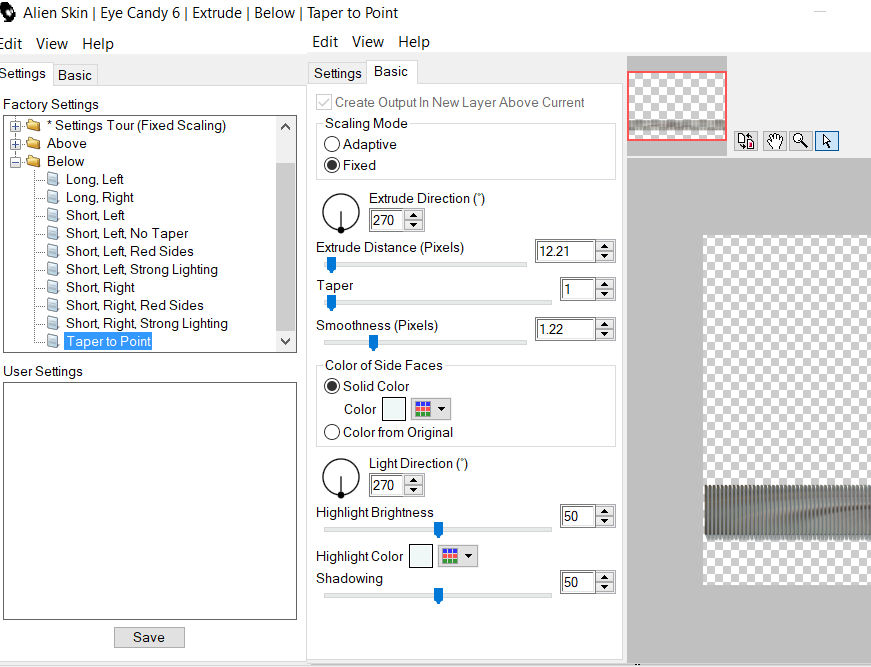
11. Image>Flip.
Repeat the Extrude Effect.
Again Image>Flip.
with Windows XP and previous s.o. this filtre doesn't work.
If you don't have the plugin, copy/paste as new layer my calque "livello extrude", that I joined in the material.
12. Effects>Geometric Effects>Spherize
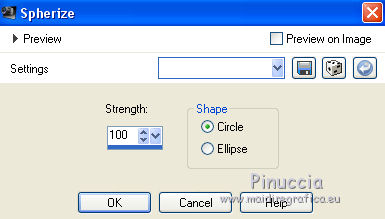
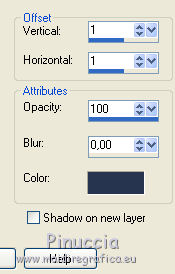
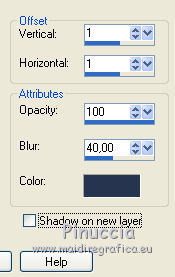
13. Effects>3D Effects>Drop Shadow, same settings.

Repeat Drop Shadow, but vertical and horiziontal -1.
14. Layers>Duplicate.
Effects>Image Effects>Seamless Tiling.

Layers>Merge>Merge Down.
Effects>Edge Effects>Enhance.
15. Effects>3D Effects>Drop Shadow, color #273450.
16. Activate the layer Merged.
Layers>New Raster Layer.
Flood Fill  with your background color. with your background color.
Layers>New Mask layer>From image
Open the menu under the source window and you'll see all the files open.
Select the mask Lia-122
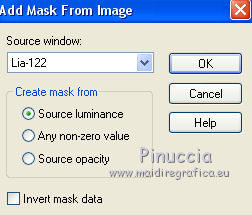
Layers>Merge>Merge group.
Effects>Edge Effects>Enhance.
Change the Blend Mode of this layer to Overlay.
17. Selections>Load/Save Selection>Load Selection from Disk.
Look for and load the selection tuto-naturaleza.
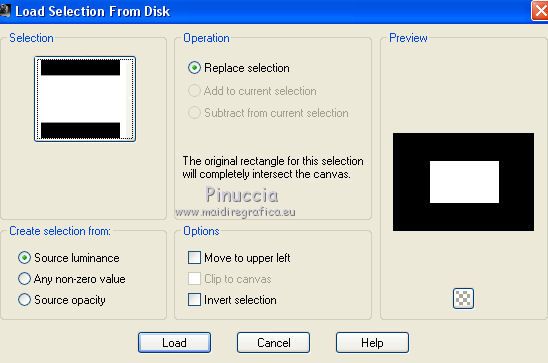
Layers>New Raster Layer.
Open the landscape tube, erase the watermark and go to Edit>Copy.
Go back to your work and go to Edit>Paste into Selection.
Layers>Duplicate.
Effects>Plugins>FM Tile Tools - Saturation Emboss, default settings.

Layers>Merge>Merge Down.
Selections>Select None.
18. Activate again the woman tube and go to Edit>Copy.
Go back to your work and go to Edit>Paste as new layer.
Image>Resize, to 50%, resize all layers not checked.
Image>Mirror.
Adjust>Sharpness>Sharpen - 2 times.
Effects>3D Effects>Drop Shadow, color #273450.
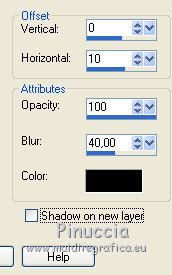
19. Effects>Image Effects>Offset.
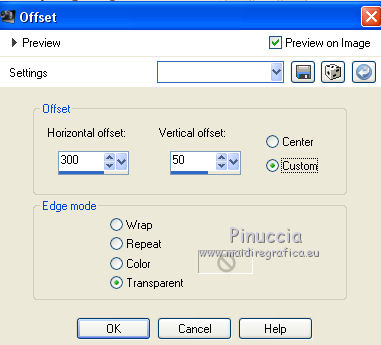
20. Activate the layer Copy of Merged (the Extrude layer).
Effects>Image Effects>Offset.

21. Open the sheep tube, erase the watermark and go to Edit>Copy.
Go back to your work and go to Edit>Paste as new layer.
Image>Resize, to 50%, resize all layers not checked.
Adjust>Sharpness>Sharpen - 2 times.
Move  the tube to the left side. the tube to the left side.
22. You should have this

23. Layers>Merge>Merge All.
Image>Resize, to 90%, resize all layers checked.
24. Image>Add borders, 2 pixels, symmetric, foreground color.
Image>Add borders, 10 pixels, symmetric, background color.
Image>Add borders, 2 pixels, symmetric, foreground color.
Image>Add borders, 50 pixels, symmetric, background color.
Image>Add borders, 2 pixels, symmetric, foreground color.
25. Open the tube "esquinero" and go to Edit>Copy.
Go back to your work and go to Edit>Paste as new layer.
26. Open Pincel Naturaleza and go to Edit>Copy.
Go back to your work and go to Edit>Paste as new layer.
Déplacer  le texte at the upper left. le texte at the upper left.
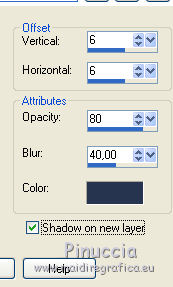
Effects>3D Effects>Drop Shadow, color #273450,
shadow on new layer checked.

26. Sign your work on a new layer.
Adjust>Sharpness>Sharpen.
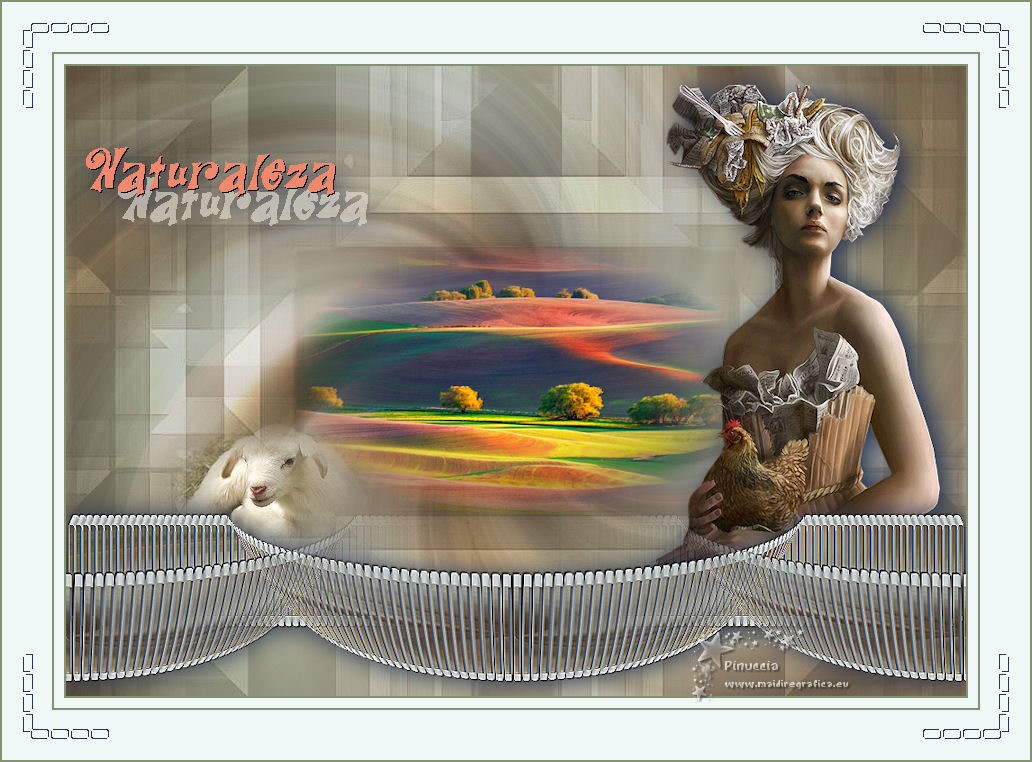
Save as jpg.
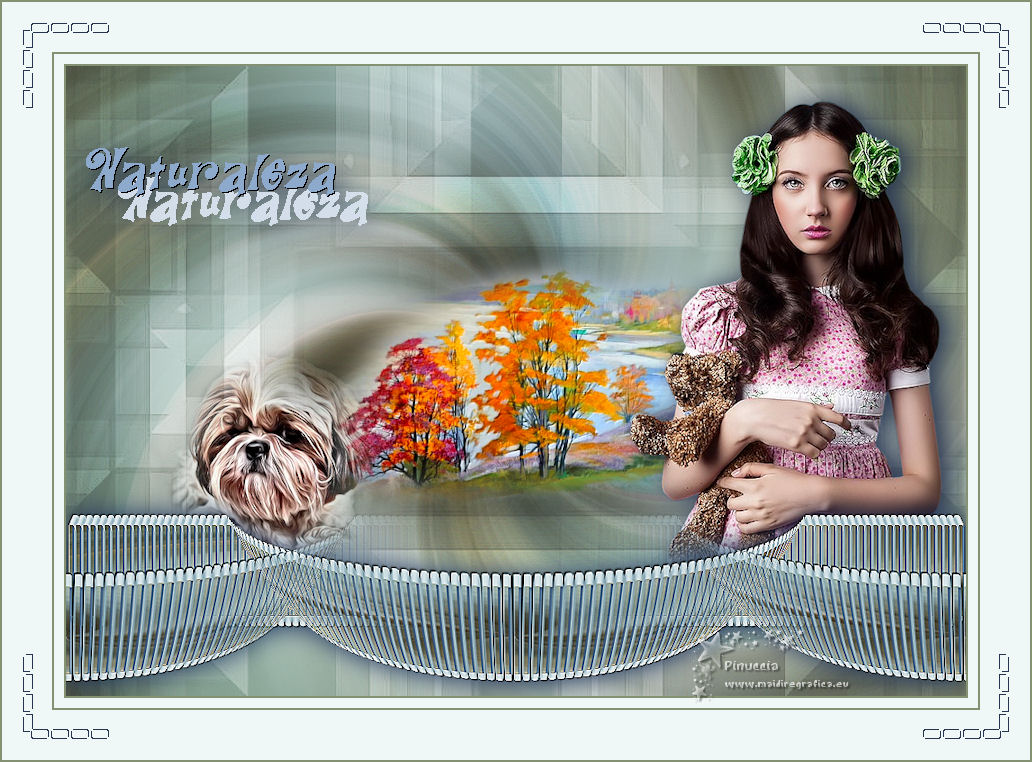
The tubes of this version are by Karine and Jewel


If you have problems or doubts, or you find a not worked link, or only for tell me that you enjoyed this tutorial, write to me.
20 September 2018
|


 the layer with your Gradient.


 with these settings


 the tube to the left side.