|
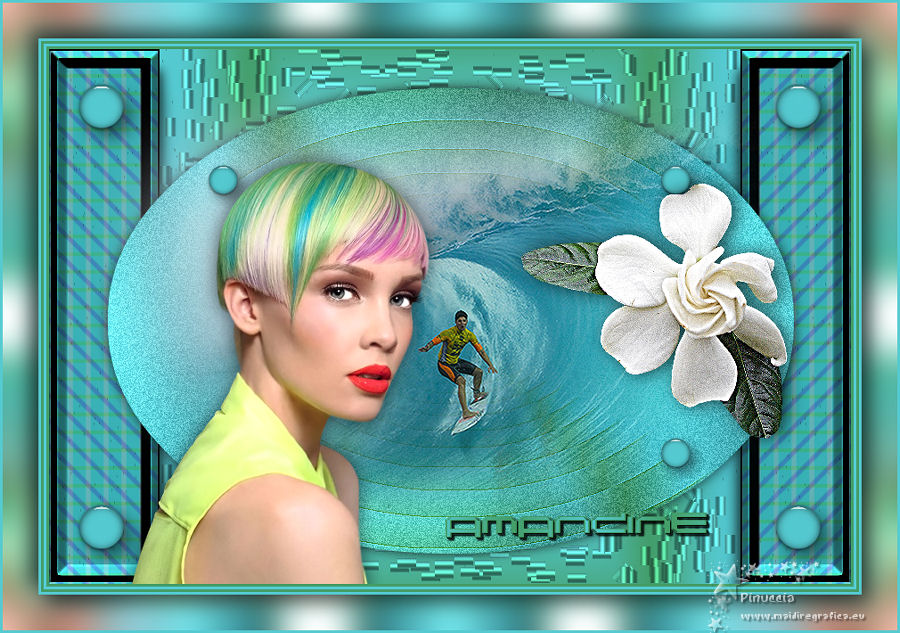
AMANDINE


Thanks Evalynda for the invitation to translate your tutorials

This tutorial was written with PSPX8 and translated with PSPX7 and PSPX3, but it can also be made using other versions of PSP.
Since version PSP X4, Image>Mirror was replaced with Image>Flip Horizontal,
and Image>Flip with Image>Flip Vertical, there are some variables.
In versions X5 and X6, the functions have been improved by making available the Objects menu.
In the latest version X7 command Image>Mirror and Image>Flip returned, but with new differences.
See my schedule here
italian translation here
le vostre versioni/your versions qui/here
For this tutorial, you will need:
Material here
Thanks: for the tubes ValyScrapPassion, Nikita and Colybrix.
(The links of the tubemakers here).
Plugins:
consult, if necessary, my filter section here
Graphics Plus - Cross Shadow, Quick Tile II here
Alien Skin Eye Candy 5 Impact - Glass here
Filters Unlimited 2.0 here
Filters Graphics Plus can be used alone or imported into Filters Unlimited.
(How do, you see here)
If a plugin supplied appears with this icon  it must necessarily be imported into Unlimited it must necessarily be imported into Unlimited

You can change Blend Modes according to your colors.
In the newest versions of PSP, you don't find the foreground/background gradient (Corel_06_029).
You can use the gradients of the older versions.
The Gradient of CorelX here
Set your foreground color to light color #55cad1,
and your background color to dark color #439c65.
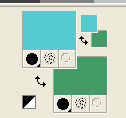
Set your foreground color to a Foreground/Background Gradient, style Rectangular.
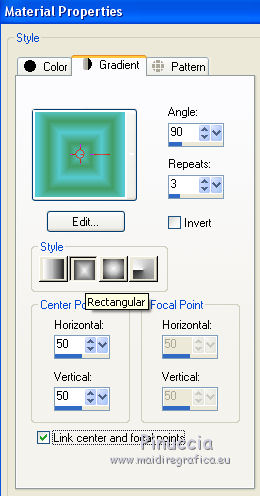
1. Open Alpha-Amandine.
Window>Duplicate or, on the keyboard, shift+D to make a copy.
Close the original.
The copy, that will be the basis of your work, is not empty,
but contains the selections saved on the alpha channel.
Flood Fill  the transparent image with your Gradient. the transparent image with your Gradient.
Effects>Reflection Effects>Feedback.
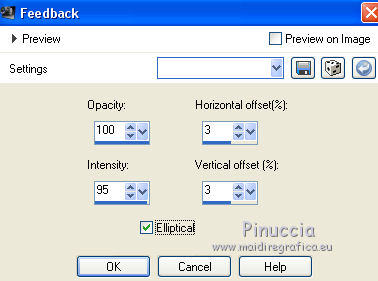
Effects>Edge Effects>Enhance More.
2. Selections>Load/Save Selection>Load Selection from Alpha Channel.
The selection #1 is immediately available. You just have to click Load.
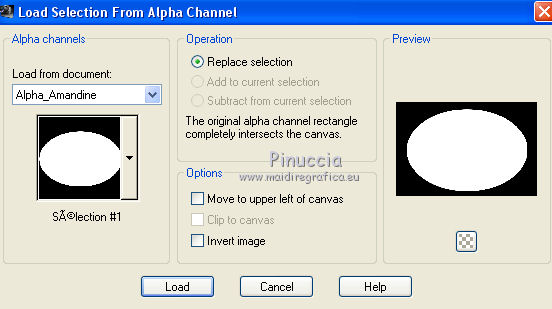
Selections>Promote Selection to layer.
Effects>Plugins>Graphics Plus - Cross Shadow.
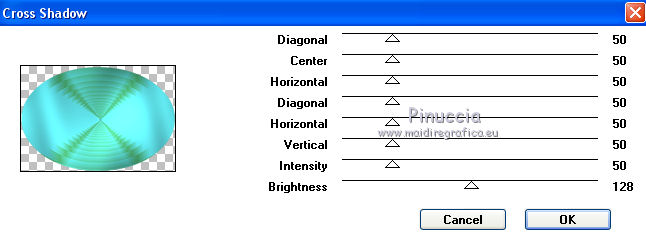
Selections>Select None.
Effects>3D Effects>Drop Shadow, color black.
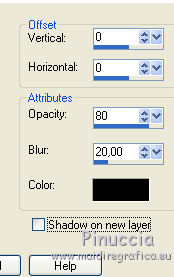
3. Activate the bottom layer.
Effects>Texture Effects>Straw Wall.
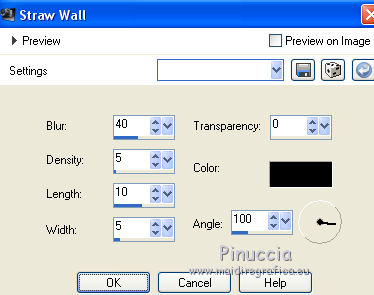
The result could be different from mine:
the effect changes according to the used colors/gradients.
Selections>Load/Save Selection>Load Selection from Alpha Channel.
Open the Selections Menu and load the selection #2.
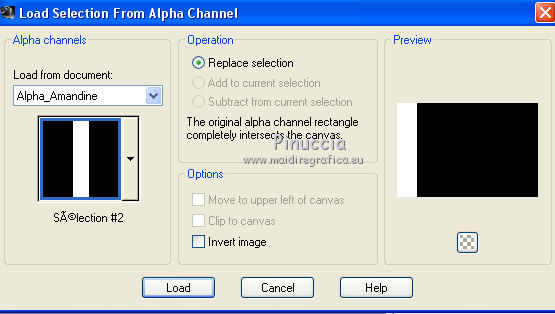
Selections>Promote Selection to Layer.
Effects>Artistic Effects>Halftone, Colored Lines.
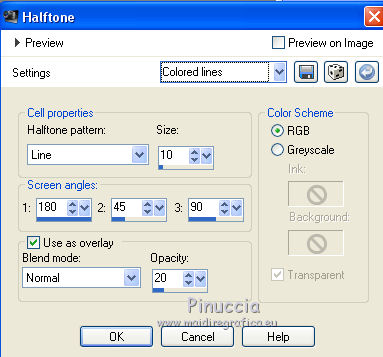
if you are using other colors, adapt the setting to your colors.
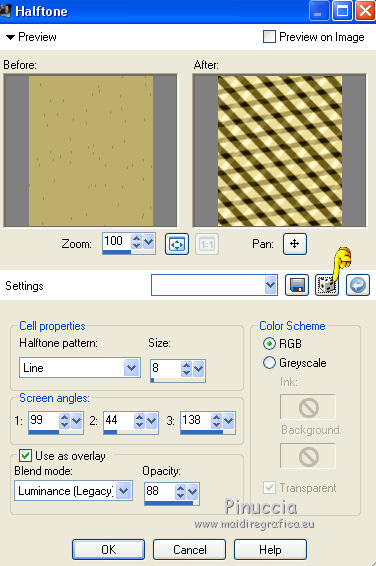
For my second version, I clicked on the die until I choosed this
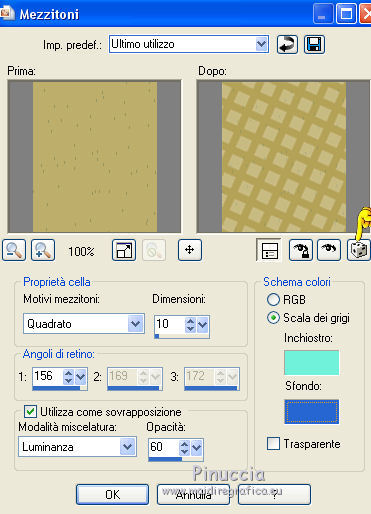
With CorelX I choosed this
Keep selected.
4. Effects>3D Effects>Inner Bevel.
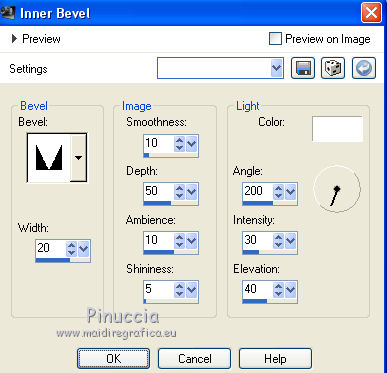
Selections>Select None.
Layers>Duplicate.
Image>Mirror.
Layers>Merge>Merge Down.
Effects>3D Effects>Drop Shadow, color black.
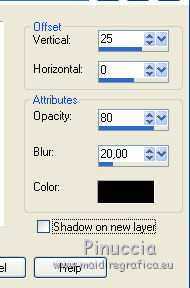
Edit>Repeat Drop Shadow.
5. Layers>New Raster Layer.
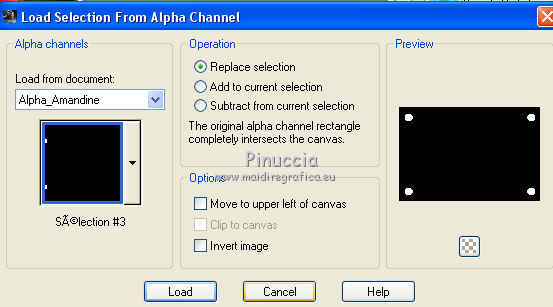
Selections>Load/Save Selection>Load Selection from Alpha Channel.
Open the Selections Menu and load the selection #3.
Set your foreground color to Color

Flood Fill  the selection with your foreground color. the selection with your foreground color.
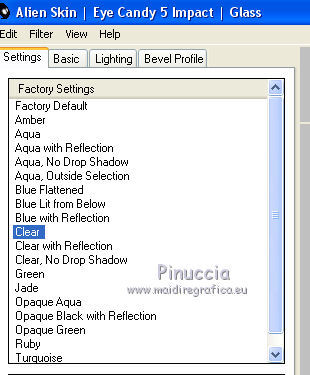
Effects>Plugins>Alien Skin Eye Candy 5 Impact - Glass.
Select the preset Clear and ok.
Selections>Select None.
Effects>3D Effects>Drop Shadow, color black.
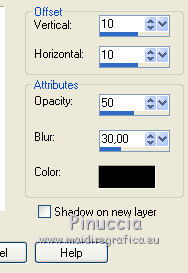
6. Activate the top layer.
Adjust>Add/Remove Noise>Add Noise.
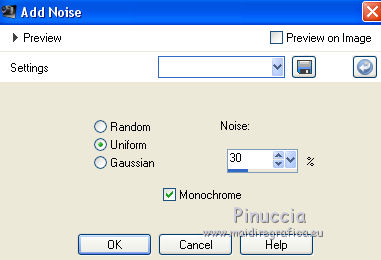
Open the tube by Colybrix, erase the watermark and go to Edit>Copy.
Go back to your layer and go to Edit>Paste as new layer.
Image>Resize, to 120%, resize all layers not checked.
Adjust>Sharpness>Sharpen.
7. Activate the 4 buttons layer, Raster 2.
Layers>Duplicate.
Image>Resize, to 65%, resize all layers not checked.
Layers>Arrange>Bring to Top.
8. Open the tube by ValyScrapPassion, erase the watermark and go to Edit>Copy.
Go back to your layer and go to Edit>Paste as new layer.
Image>Resize, to 60%, resize all layers not checked.
K key on the keyboard to activate your Pick Tool 
and set Position X: 90,00 and Position Y: 125,00.

Effects>3D Effects>Drop Shadow, color black.
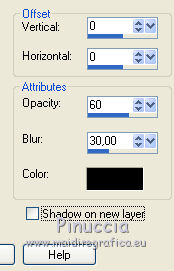
9. Open the tube by Nikita, erase the watermark and go to Edit>Copy.
Go back to your layer and go to Edit>Paste as new layer.
Image>Resize, to 30%, resize all layers not checked.
Adjust>Sharpness>Sharpen.
Pick Tool 
and set Position X: 530,00 and Position Y: 150,00.

Effects>3D Effects>Drop Shadow, color black.
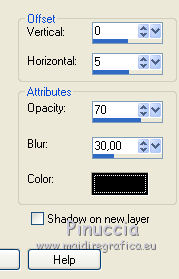
10. Open the tube titre and go to Edit>Copy.
Go back to your layer and go to Edit>Paste as new layer.
Pick Tool 
and set Position X: 445,00 and Position Y: 520,00.

Effects>3D Effects>Drop Shadow, color black.
11. Image>Add borders, 3 pixels, symmetric, background color.
Image>Add borders, 3 pixels, symmetric, foreground color.
Image>Add borders, 3 pixels, symmetric, background color.
Image>Add borders, 3 pixels, symmetric, foreground color.
Selections>Select All.
Image>Add borders, 40 pixels, symmetric, color white.
Selections>Invert.
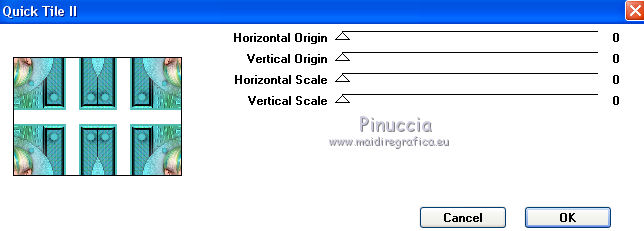
Effects>Plugins>Graphics Plus - Quick Tile II, default settings.
12. Adjust>Blur>Gaussian Blur, radius 20.

Selections>Invert.
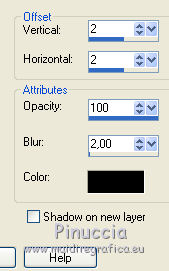
Effects>3D Effects>Drop Shadow, color black.

Repeat Drop Shadow, vertical and horizontal -10.
Selections>Select None.
Sign your work on a new layer.
Image>Add borders, 3 pixels, symmetric, background color.
13. Image>Resize, 900 pixels width, resize all layers checked.
Save as jpg.
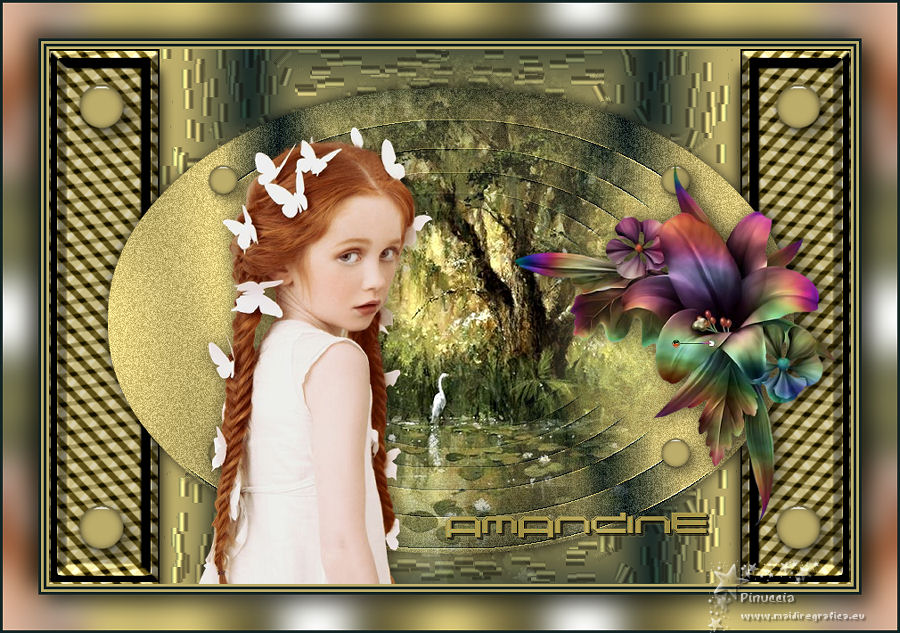
Version with tubes by Jeanne and Thafs .

If you have problems or doubts, or you find a not worked link, or only for tell me that you enjoyed this tutorial, write to me.
27 July 2019
|

