|
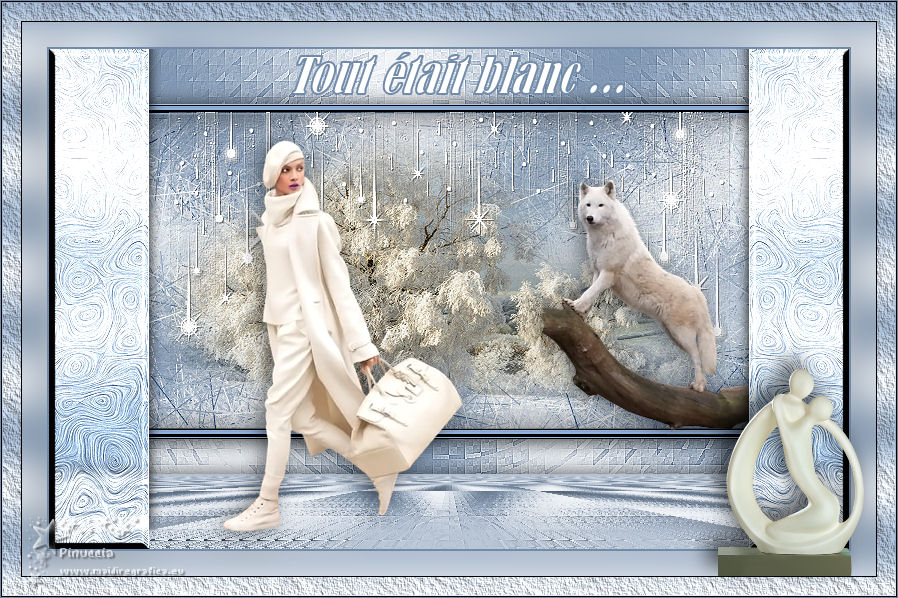
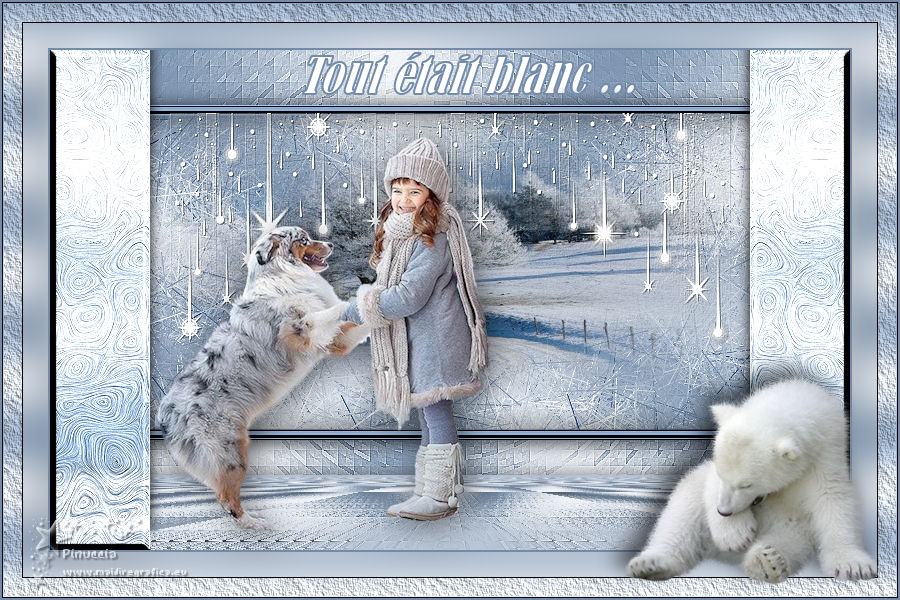
TOUT ÉTAIT BLANC

Thanks Evalynda for the invitation to translate your tutorials

This tutorial was written with PSPX8 and translated with PSPX7 and PSPX3, but it can also be made using other versions of PSP.
Since version PSP X4, Image>Mirror was replaced with Image>Flip Horizontal,
and Image>Flip with Image>Flip Vertical, there are some variables.
In versions X5 and X6, the functions have been improved by making available the Objects menu.
In the latest version X7 command Image>Mirror and Image>Flip returned, but with new differences.
See my schedule here
 italian translation here italian translation here
 Your versions Your versions
For this tutorial, you will need:
Material here
Thanks for the tubes and the mask Colybrix, ValyScrapPassion and Narah.
(The links of material creators here).
Plugins:
consult, if necessary, my filter section here
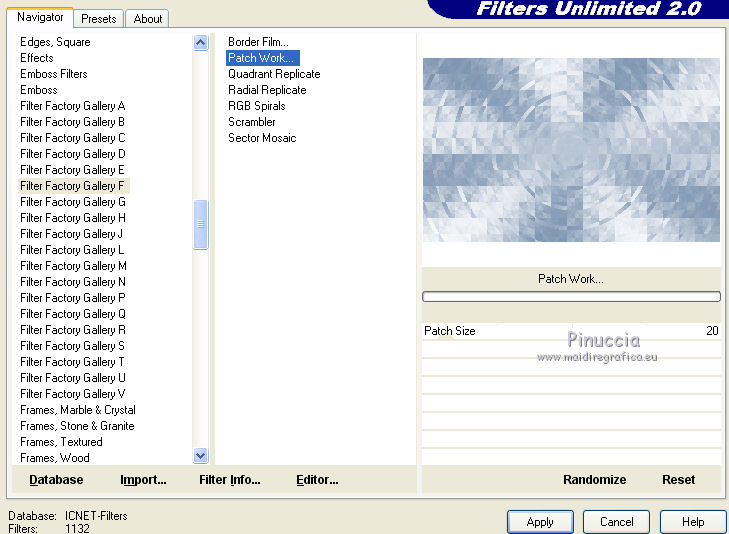
Filters Unlimited 2.0 here
Filter Factory Gallery F - Patch Work here
Mehdi - Fur here
Alien Skin Eye Candy 5 Texture - Swirl here
AAA Frames - Texture Frame here
Filters Factory Gallery can be used alone or imported into Filters Unlimited.
(How do, you see here)
If a plugin supplied appears with this icon  it must necessarily be imported into Unlimited it must necessarily be imported into Unlimited

You can change Blend Modes according to your colors.
In the newest versions of PSP, you don't find the foreground/background gradient (Corel_06_029).
You can use the gradients of the older versions.
The Gradient of CorelX here
(Don't forget to erase the watermarks of the tubes and don't save the modifications when you'll close them)
Open the mask in PSP and minimize it with the rest of the material.
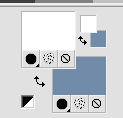
1. Set your foreground color to white #ffffff,
and your background color to #728ba9.
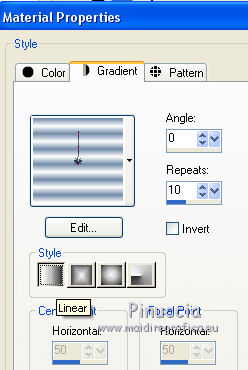
Set your foreground color to a Foreground/Background Gradient, style Radial.
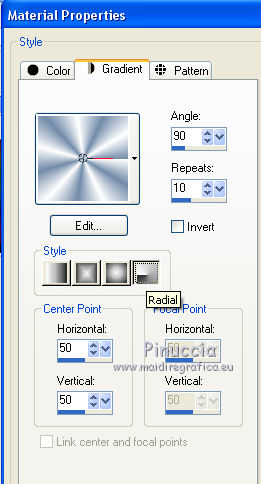
Open a new transparent image 800 x 500 pixels,
Flood Fill  the transparent image with your Gradient. the transparent image with your Gradient.
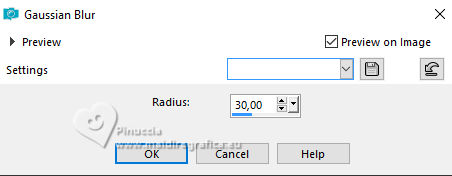
Adjust>Blur>Gaussian Blur - radius 30.
Effects>Plugins>Filters Unlimited 2.0 - Filter Factory Gallery F - Patch Work.
Effects>Edge Effects>Enhance More.
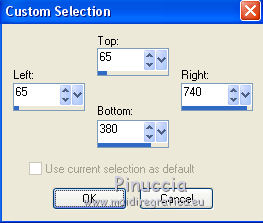
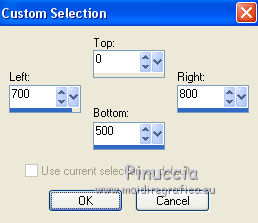
2. Selection Tool 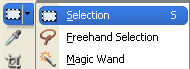
(no matter the type of selection, because with the custom selection your always get a rectangle)
clic on the Custom Selection 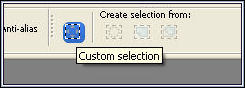
and set the following settings.
Selections>Promote Selection to Layer.
Effetti>Plugins>Mehdi - Fur.

Open the tube paysghiver23-Coly and go to Edit>Copy.
Go back to your work and go to Edit>Paste into Selection.
Adjust>Sharpness>Sharpen.
Keep selected.
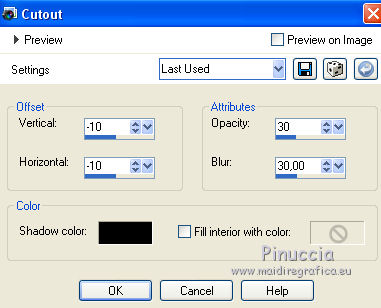
3. Layers>New Raster Layer.
Effects>3D Effects>Cutout.

Layers>New Raster Layer.
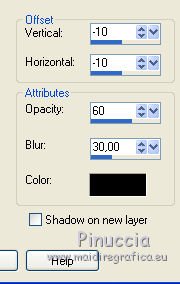
Repeat Effects>3D Effects>Cutout, vertical and horizontal -10
Keep toujours selected.
4. Layers>Merge>Merge Down - 2 times.
Selections>Modify>Select Selection Borders.
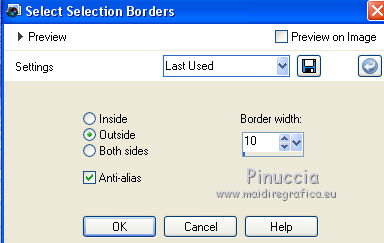
Flood Fill the selection with your background color.
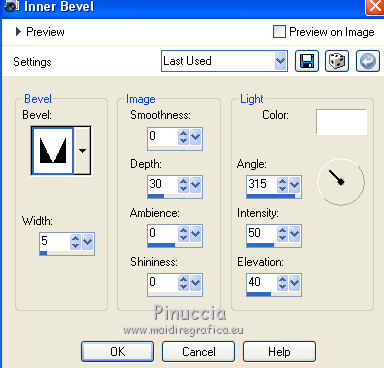
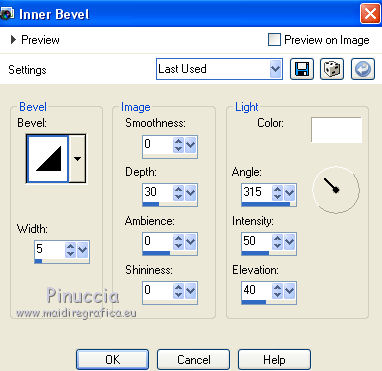
Effects>3D Effects>Inner bevel.
5. Selections>Select All.
Selections>Float
Selections>Defloat.
Selections>Modify>Contract - 10 pixels.
Layers>New Raster Layer.
Set your foreground color to Color.
Flood Fill the selection with color white.
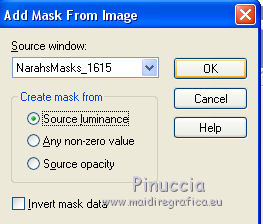
Layers>New Mask layer>From image
Open the menu under the source window and you'll see all the files open.
Select the mask NarahsMasks_1615
Image>Resize, to 70%, resize all layers not checked.
Effects>Edge Effects>Enhance more.
Layers>Merge>Merge Group.
Selections>Select None.
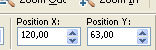
6. Activate your Pick Tool 
keep Position X to 120,00 and set Position Y: 63,00
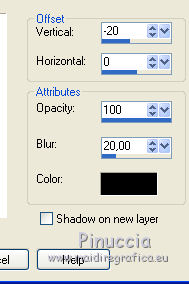
Effects>3D Effects>Drop Shadow, color black.

Layers>Merge>Merge Down.
Effects>3D Effects>Drop Shadow, color black.

7. Activate your bottom layer.
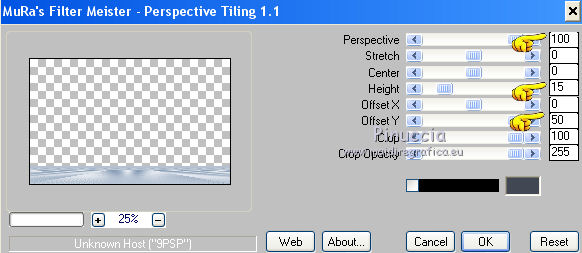
Layers>Duplicate.
Effects>Plugins>Mura's Meister - Perspective Tiling.
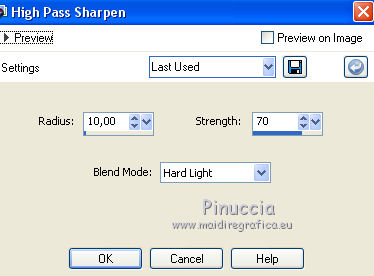
Adjust>Sharpness>High Pass Sharpen
Layers>Merge>Merge Down.
8. Stay on the bottom layer, Raster 1.
Custom Selection
Selections>Promote Selection to layer.
Layers>Arrange>Bring to Top.
Keep selected.
9. Effects>Plugins>Alien Skin Eye Candy 5 Textures - Swirl.
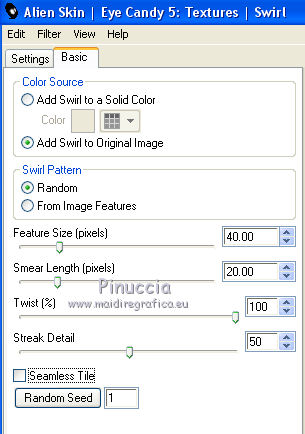
remember that when a setting is random, the result is never the same as another
Selections>Select None.
Effects>Edge Effects>Enhance.
Effects>3D Effects>Inner Bevel, same settings, but Bevel n.1.
Adapt Intensity according to your colors.
Effects>3D Effects>Drop Shadow, color black.
10. Layers>Duplicate.
Image>Mirror.
Layers>Merge>Merge Down.
11. Copy/Paste as new layer the tubes of the woman and the animal.
Image>Resize, according to your tube, resize all layers not checked,
and place  the tube at your choice. the tube at your choice.
Apply a Drop Shadow at your choice.
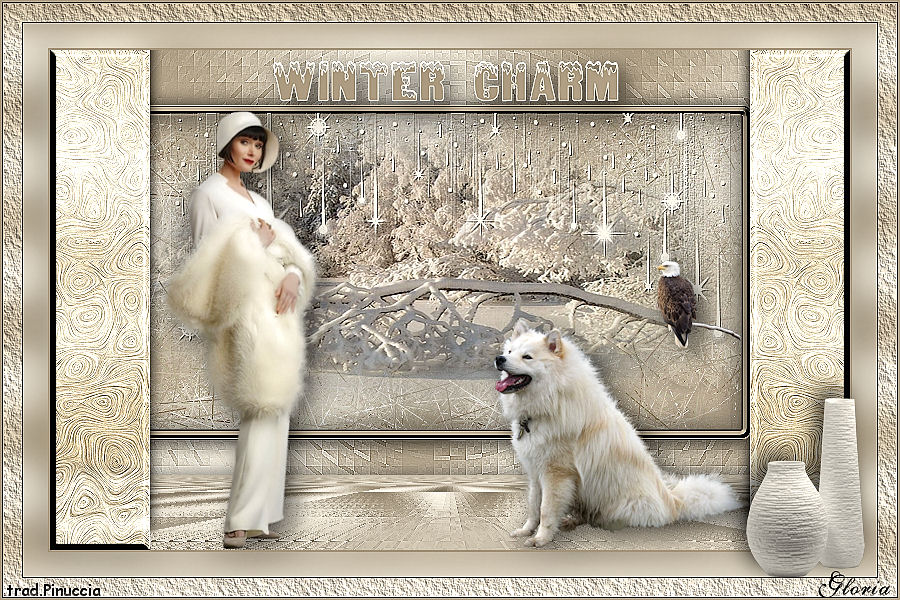
If you use the tube of the white wolf by Valy,
move this layer under the rectangles layer.
12. Image>Add borders, 2 pixels, symmetric, background color.
Selections>Select All.
Image>Add borders, 46 pixels, symmetric, color white.
Selections>Invert.
Change the Gradient settings, style Linear.
Flood Fill the selection with your Gradient.
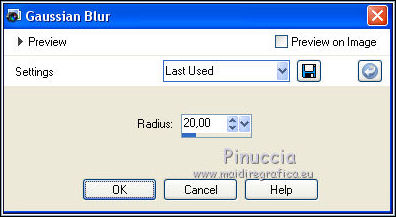
Adjust>Blur>Gaussian Blur, radius 20.
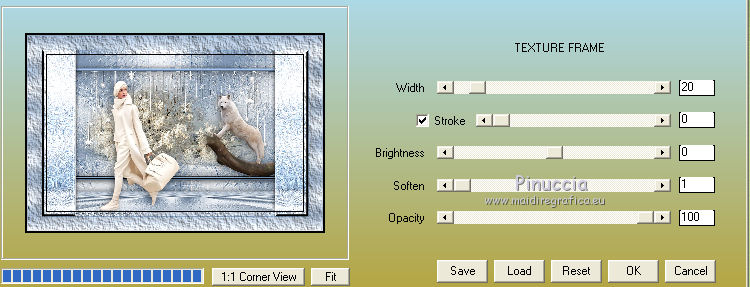
Effects>Plugins>AAA Frames - Texture Frame.
Selections>Select None.
13. Open the tube statuette-deco 15-coly and go to Edit>Copy.
Go back to your work and go to Edit>Paste as new layer.
Image>Resize, 50%, resize all layers not checked.
Activate your Pick Tool
and set Position X: 717,00 and Position Y: 367,00

Effects>3D Effects>Drop Shadow, color black.
14. Open the text and go to Edit>Copy.
Go back to your work and go to Edit>Paste as new layer.
Move the text at the top, as in my example.
Image>Add borders, 2 pixels, symmetric, background color.
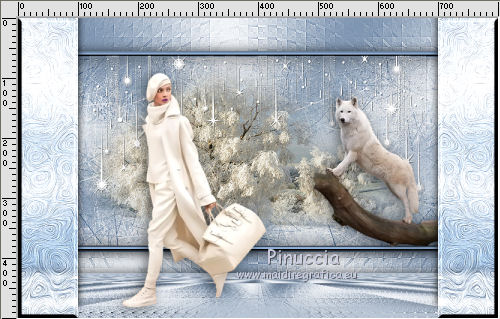
Sign your work and save as jpg.
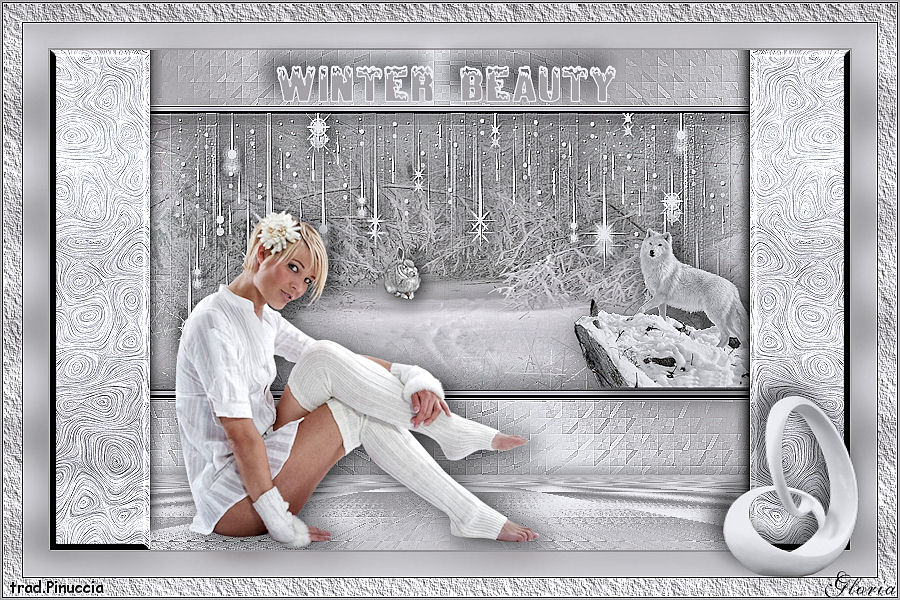
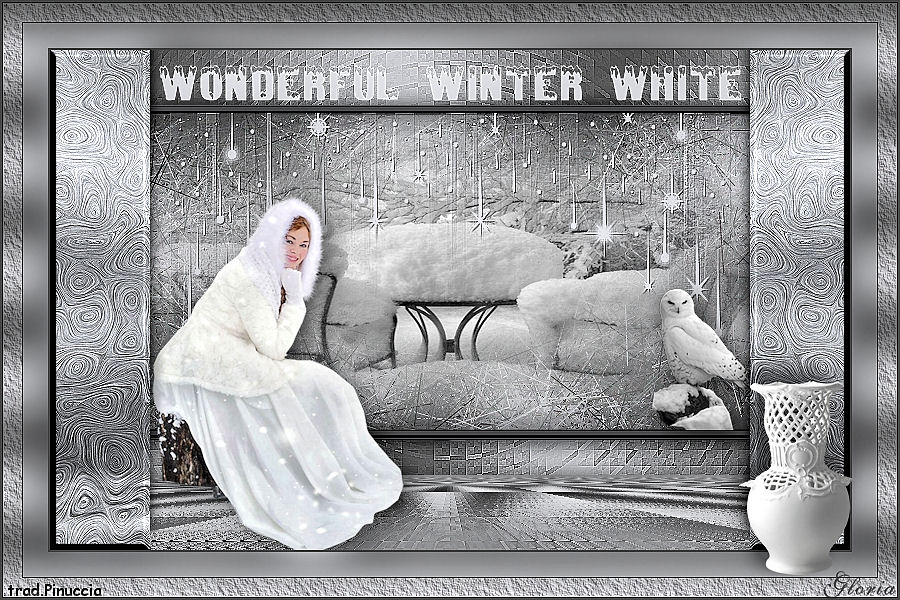
Version with tubes by Tigre Blanc and Valy
Your versionsThanks
Thanks
Gloria
If you have problems or doubts, or you find a not worked link,
or only for tell me that you enjoyed this tutorial, write to me.
22 February 2021
|