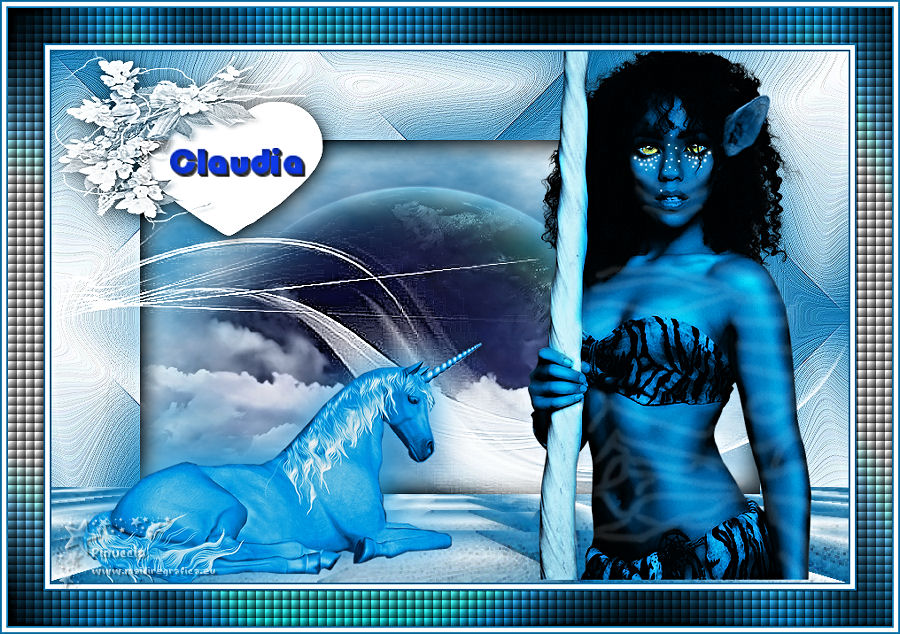
|
CLAUDIA


Thanks Evalynda for the invitation to translate your tutorials

This tutorial was written with PSPX8 and translated with PSPX7 and PSPX3, but it can also be made using other versions of PSP.
Since version PSP X4, Image>Mirror was replaced with Image>Flip Horizontal,
and Image>Flip with Image>Flip Vertical, there are some variables.
In versions X5 and X6, the functions have been improved by making available the Objects menu.
In the latest version X7 command Image>Mirror and Image>Flip returned, but with new differences.
See my schedule here
italian translation here
For this tutorial, you will need:
Material here
Thanks for the tubes Colybrix and Nikita; for the masks ValyScrapPassion
(The links of the tubemakers here).
Plugins:
consult, if necessary, my filter section here
Mehdi - Sorting Tiles here
Mura's Meister - Cloud here
Mura's Meister - Perspective Tiling here
Graphics Plus - Cross Shadow here
Filters Unlimited 2.0 here
Filters VM Extravaganza can be used alone or imported into Filters Unlimited.
(How do, you see here)
If a plugin supplied appears with this icon  it must necessarily be imported into Unlimited it must necessarily be imported into Unlimited

You can change Blend Modes according to your colors.
In the newest versions of PSP, you don't find the foreground/background gradient (Corel_06_029).
You can use the gradients of the older versions.
The Gradient of CorelX here
Open the masks in PSP and minimize them with the rest of the material.
Don't forget to erase the watermark before copying the tubes.
1. Set your foreground color to #0976b1,
and your background color to white.
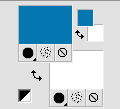
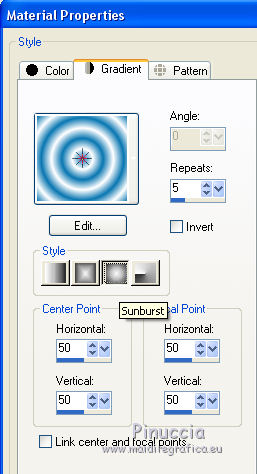
Set your foreground color to a Foreground/Background Gradient, Style Sunburst.
1. Open a new transparent image 900 x 600 pixels,
Flood Fill  with your Gradient. with your Gradient.
Effects>Plugins>Mehdi - Sorting Tiles.
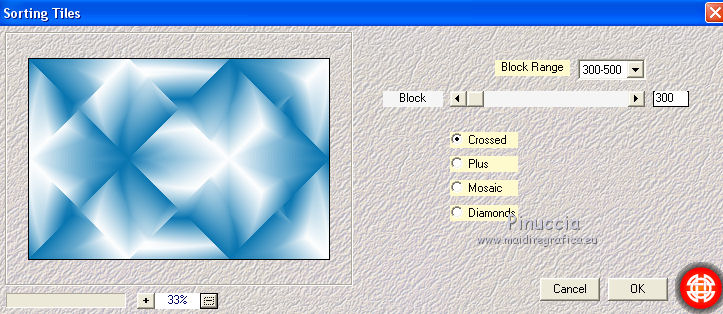
Effects>Edge Effects>Enhance More.
2. Selection Tool 
(no matter the type of selection, because with the custom selection your always get a rectangle)
clic on the Custom Selection 
and set the following settings.
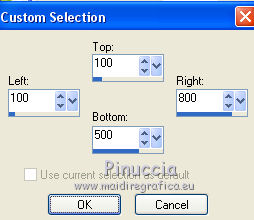
Layers>New Raster Layer.
Effects>Plugins>Mura's Meister - Cloud.
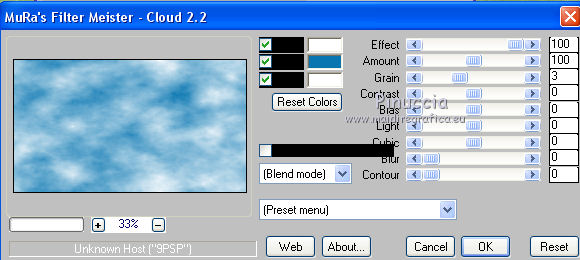
Selections>Invert.
Effects>3D Effects>Drop shadow, color black.
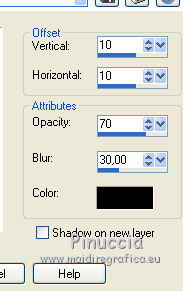
Repeat Drop Shadow, vertical and horizontal -10.
Keep selected.
3. Activate the bottom layer.
Selections>Promote Selection to Layer.
Effects>Artistic Effects>Enamel.
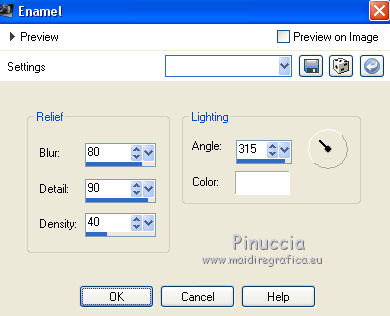
Selections>Select None.
Adjust>Sharpness>Sharpen.
Reduce the opacity of this layer to 60%.
Layers>Merge>Merge Down.
4. Activate the top layer.
Open your landscape tube and go to Edit>Copy.
Go back to your work and go to Edit>Paste as new layer.
Don't move it.
Layers>New Raster Layer.
Flood Fill  the layer with color white. the layer with color white.
Layers>New Mask layer>From image
Open the menu under the source window and you'll see all the files open.
Select the mask VSP147
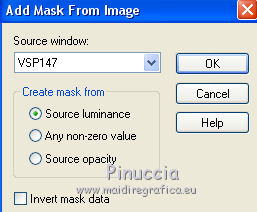
Effects>Edge Effects>Enhance More.
Layers>Merge>Merge group.
Layers>Duplicate.
Layers>Merge>Merge Down.
5. Activate your bottom Layer, Raster 1.
Custom Selection 
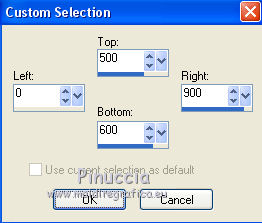
Selections>Promote Selection to Layer.
Selections>Select None.
Effects>Plugins>Mura's Meister - Perspective Tiling.
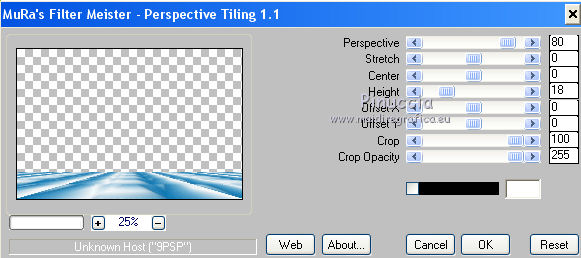
Effects>Edge Effects>Erode.
6. Activate the top layer.
Open your person tube and go to Edit>Copy.
Go back to your work and go to Edit>Paste as new layer.
Image>Resize, to 75%, resize all layers not checked.
Adjust>Sharpness>Sharpen.
Move  the tube to the right side. the tube to the right side.
I have not added voluntary the Drop Shadow, to better appreciate Colybrix's talent in tubing hair
7. Open the unicorn tube and go to Edit>Copy.
Go back to your work and go to Edit>Paste as new layer.
Image>Resize, to 85%, resize all layers not checked.
K key on the keyboard to activate your Pick Tool 
and set Position X: 34,00 and Position Y: 328,00.

Adjust>Hue and Saturation>Colorize.

Adjust>Brightness and Contrast>Brightness and Contrast.
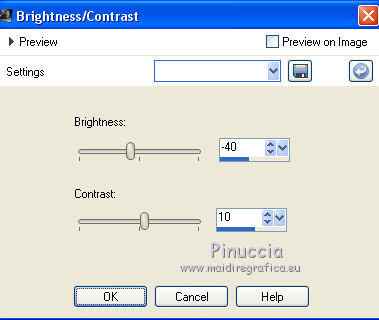
Layers>Duplicate.
Adjust>Blur>Gaussian Blur - radius 20

Layers>Arrange>Move Down.
8. Activate the topo layer.
Layers>New Raster Layer.
Flood Fill  the layer with color white. the layer with color white.
Layers>New Mask layer>From image
Open the menu under the source window
and select the mask vsp013
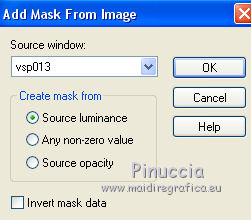
Image>Resize, 1 time to 50% and 1 time to 75%, resize all layers not checked.
Adjust>Sharpness>Sharpen More.
Layers>Merge>Merge group.
9. K key to activate your Pick Tool 
and set Position X: 0,00 and Position Y: 0,00.

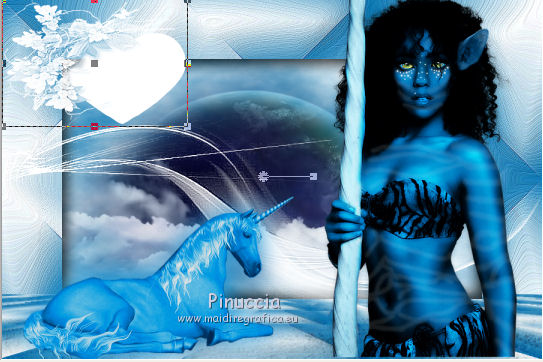
Effects>3D Effects>Drop shadow, color black.
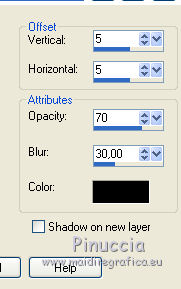
Open the tube titre and go to Edit>Copy.
Go back to your work and go to Edit>Paste as new layer.
Place  in in the middle of the heart. in in the middle of the heart.
Effects>3D Effects>Drop shadow, color black.
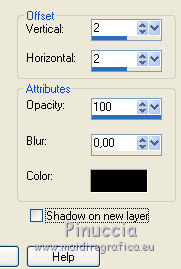
10. Image>Add borders, 2 pixels, symmetric, color bleu.
Image>Add borders, 5 pixels, symmetric, color white.
Image>Add borders, 2 pixels, symmetric, color bleu.
Selections>Select All.
Image>Add borders, 40 pixels, symmetric, color white.
Selections>Invert.
11. Change the settings of your Gradient, style Linear.
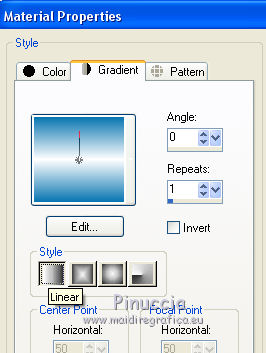
Flood Fill  the selection with your Gradient. the selection with your Gradient.
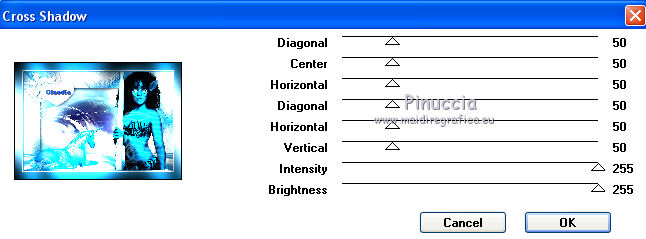
Effects>Plugins>Graphics plus - Cross Shadow.
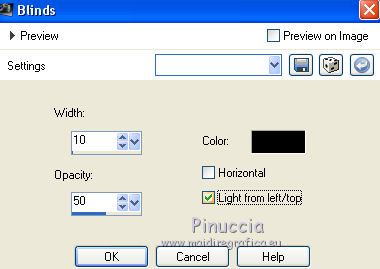
Effects>Texture Effects>Blinds.
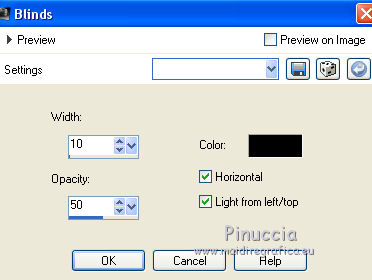
Repeat Effects>Texture Effects>Blinds.
Selections>Select None.
13. Image>Add borders, 2 pixels, symmetric, color bleu.
Image>Add borders, 5 pixels, symmetric, color white.
Image>Add borders, 2 pixels, symmetric, color bleu.
14. Image>Resize, 900 pixels width, resize all layers checked.
Adjust>Sharpness>Unsharp mask.
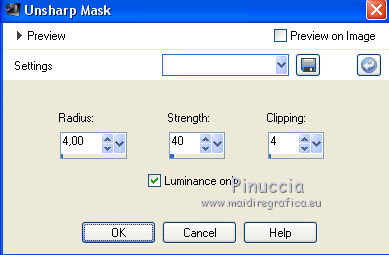
Sign your work and save as jpg.
Version with tubes by Lila and Macha
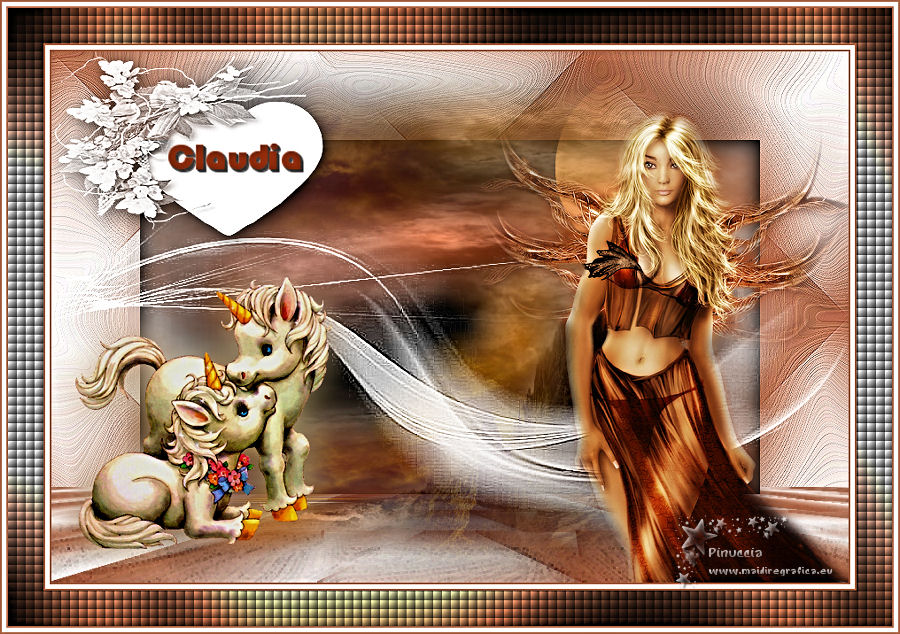

Your versions. Thanks
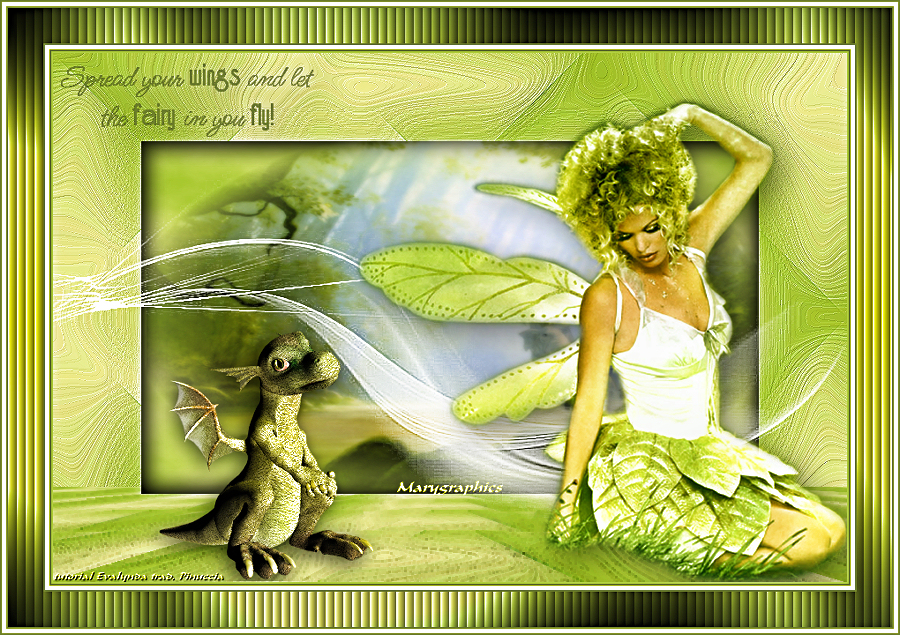
Marygraphics
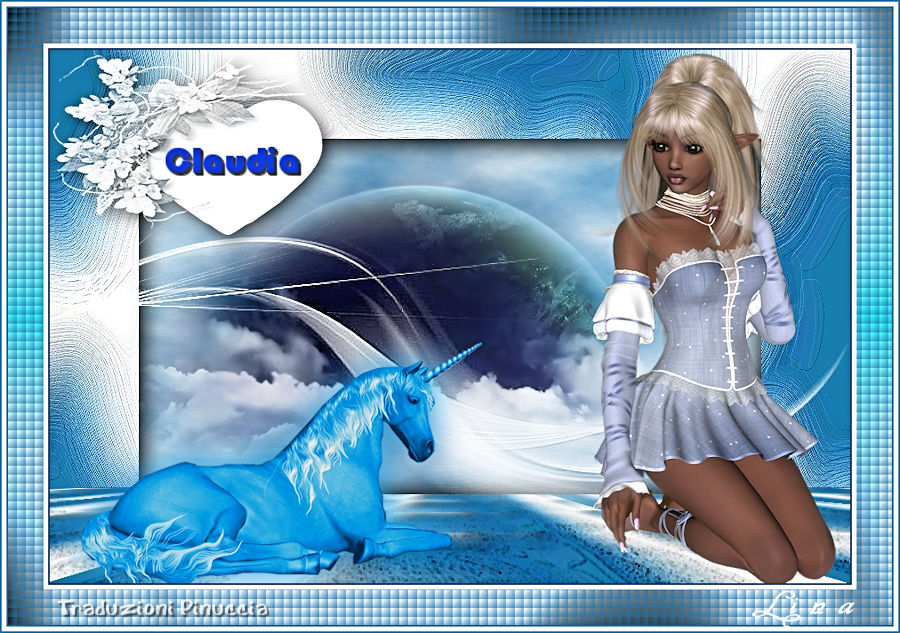
Lina

If you have problems or doubts, or you find a not worked link, or only for tell me that you enjoyed this tutorial, write to me.
14 May 2019
|

