|
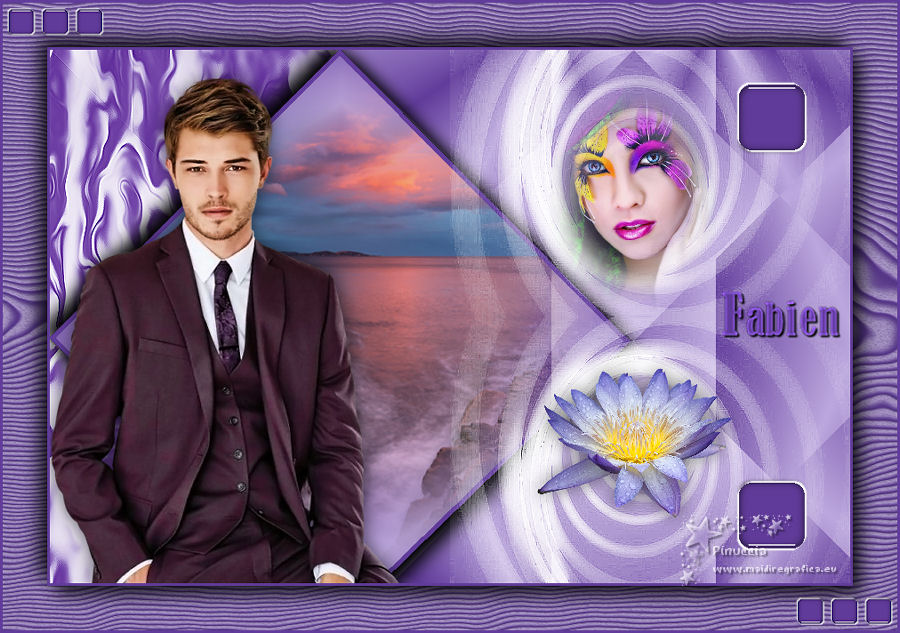
FABIEN


Thanks Evalynda for the invitation to translate your tutorials

This tutorial was written with PSPX8 and translated with PSPX7 and PSPX3, but it can also be made using other versions of PSP.
Since version PSP X4, Image>Mirror was replaced with Image>Flip Horizontal,
and Image>Flip with Image>Flip Vertical, there are some variables.
In versions X5 and X6, the functions have been improved by making available the Objects menu.
In the latest version X7 command Image>Mirror and Image>Flip returned, but with new differences.
See my schedule here
italian translation here
your versions here
For this tutorial, you will need:
Material here
Thanks for the tubes Colybrix and ValyScrapPassion.
For the mask thanks Narah
(The links of the tubemakers here).
Plugins:
consult, if necessary, my filter section here
Mura's Meister - Cloud here
VM Instant Art - Tripolis here
Alien Skin Eye Candy 5 Impact - Glass here
Alien Skin Eye Candy 5 Textures - Wood here
Filters Unlimited 2.0 here
Filters VM Instant Art can be used alone or imported into Filters Unlimited.
(How do, you see here)
If a plugin supplied appears with this icon  it must necessarily be imported into Unlimited it must necessarily be imported into Unlimited

You can change Blend Modes according to your colors.
In the newest versions of PSP, you don't find the foreground/background gradient (Corel_06_029).
You can use the gradients of the older versions.
The Gradient of CorelX here
Open the mask in PSP and minimize it with the rest of the material
(don't forget to erase the watermarks)
Set your foreground color to light color #bca7dd,
and your background color to dark color #613c9b.
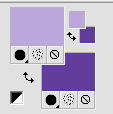
Set your foreground color to a Foreground/Background Gradient, style Radial.
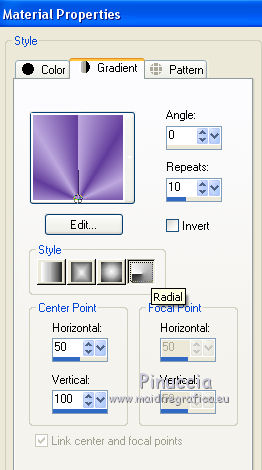
1. Open Calque Alpha.
Windows>Duplicate, or on your keyboard shift+D, to make a copy.
Close the original.
The copy, that will be the basis of your work, is not empty,
but contains the selections saved on the alpha channel.
Flood Fill  the transparent image with your gradient. the transparent image with your gradient.
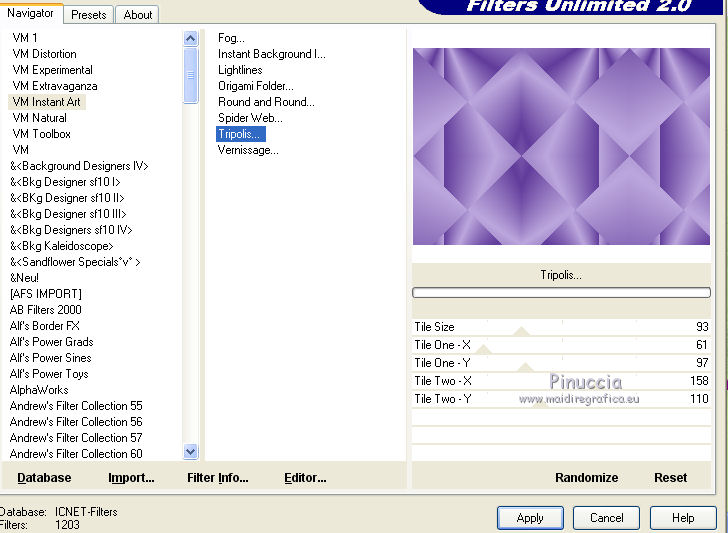
Effects>Plugins>VM Instant Art - Tripolis.
2. Set your foreground color to white.
Layers>New Raster Layer.
Flood Fill  the layer with color white. the layer with color white.
Layers>New Mask layer>From image
Open the menu under the source window and you'll see all the files open.
Select the mask Narah_Mask_1047
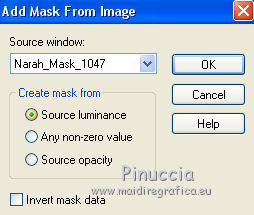
Effects>Edge Effects>Enhance More.
Layers>Merge>Merge Group.
3. Image>Resize, to 50%, resize all layers not checked.
Objects>Align>Bottom.
Objects>Align>Right.
Or K key on the keyboard to activate your Pick Tool 
and set Position X: 450,00 and Position Y: 300,00.

Layers>Duplicate.
Layers>Merge>Merge Down.
4. Layers>Duplicate.
Image>Flip.
Layers>Merge>Merge Down.
Layers>Duplicate.
Layers>Merge>Merge Down.
5. Open the face tube and go to Edit>Copy.
Go back to your work and go to Edit>Paste as new layer.
Image>Resize, 1 time to 75% and 1 time to 50%, resize all layers not checked.
Pick Tool 
and set Position X: 562,00 and Position Y: 30,00.

6. Open the flower tube and go to Edit>Copy.
Go back to your work and go to Edit>Paste as new layer.
Image>Resize, to 30%, resize all layers not checked.
Set Position X: 548,00 and Position Y: 358,00.

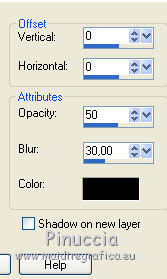
Effects>3D Effects>Drop Shadow, color black.
7. Activate your bottom layer.
Selections>Load/Save Selection>Load Selection from Alpha Channel.
The selection #1 is immediately available.
You just have to click Load.
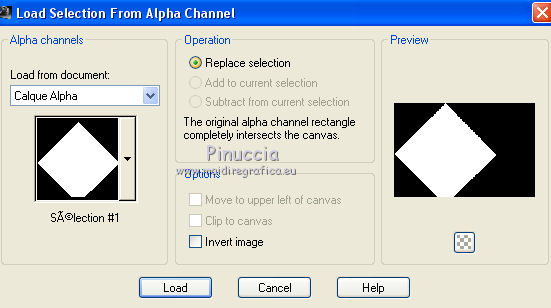
Selections>Promote Selection to layer.
Open the landscape misted and go to Edit>Copy.
Go back to your work and go to Edit>Paste into Selection.
Keep selected.
8. Selection>Modify>Select Selection Borders.
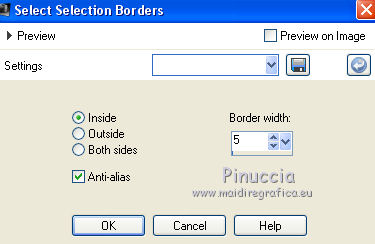
Layers>New Raster Layer.
Flood Fill  the selection with your dark background color. the selection with your dark background color.
Selections>Select None.
Layers>Merge>Merge Down.
9. Activate again your bottom layer.
Selections>Load/Save Selection>Load Selection from Alpha Channel.
Open the selections menu and load the selection #2.
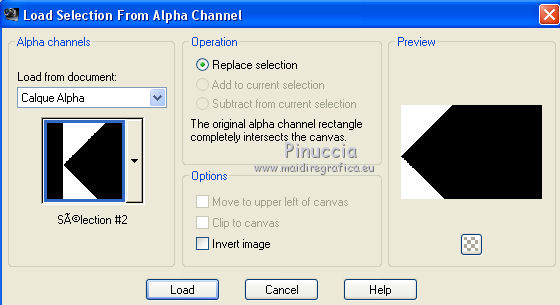
Selections>Promote Selection to layer.
Set again your foreground color to light color.
Effects>Plugins>Mura's Meister - Cloud
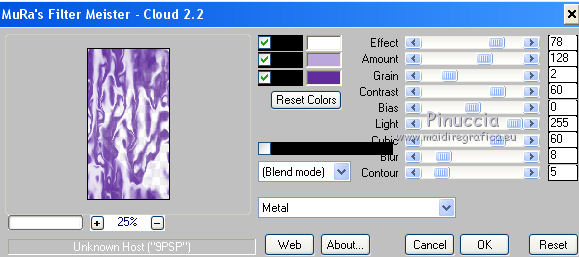
This plugin works with the colors of your material palette,
but when you select Metal, the plugin set the default colors of this preset.
Therefore you will have to set them manually: take note of the values before applying the filter:
light color#bca7dd - dark color #613c9b.
The result is random. If you want to change it, click on the preview window,
until you see the one you prefer.
Effects>Edge Effects>Enhance More.
Selections>Select None.
10. Activate the layer of the landscape.
Selections>Load/Save Selection>Load Selection from Alpha Channel.
Load again the selection #1.

Effects>3D Effects>Drop Shadow, color black.
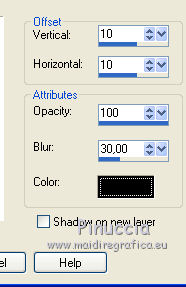
Repeat Drop Shadow, vertical and horizontal -10.
Selections>Select None.
11. Activate your top layer.
Layers>New Raster Layer.
Selections>Load/Save Selection>Load Selection from Alpha Channel.
Open the selections menu and load the selection #3.
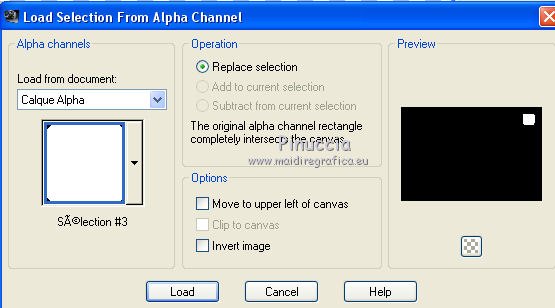
Flood Fill  the selection with your dark background color. the selection with your dark background color.
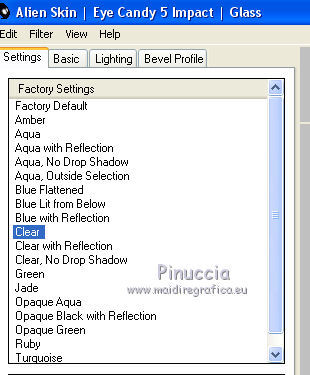
Effects>Plugins>Alien Skin Eye Candy 5 Impact - Glass.
Select the preset Clear and ok.
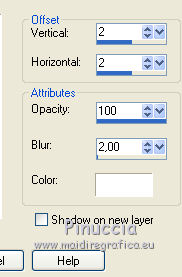
Effects>3D Effects>Drop Shadow, color white.
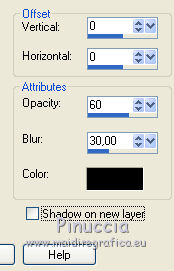
Repeat Drop Shadow, vertical and horizontal -2.
Selections>Select None.
Layers>Duplicate.
Image>Flip.
if necessario, resize and place  better the flower tube, better the flower tube,
and go back to the top layer
12. Open the man tube and go to Edit>Copy.
Go back to your work and go to Edit>Paste as new layer.
Image>Resize, to 80%, resize all layers not checked.
Image>Mirror.
Move  the tube at the bottom left. the tube at the bottom left.
Effects>3D Effects>Drop Shadow, color black.
Open the tube Titre and go to Edit>Copy.
Go back to your work and go to Edit>Paste as new layer.
Colorize and place  at your choice. at your choice.
13. Image>Add borders, 3 pixels, symmetric, dark color.
Selections>Select All.
Image>Add borders, 50 pixels, symmetric, light color.
Selections>Invert.
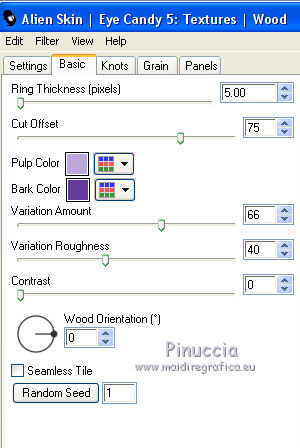
Effects>Plugins>Alien Skin Eye Candy 5 Textures - Wood
Pulp color: foreground color
Bark color: background color
Selections>Invert.
Effects>3D Effects>Drop Shadow, color black.
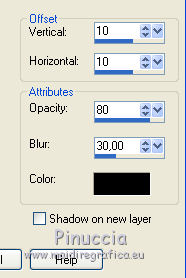
Repeat Drop Shadow, vertical and horizontal -10.
Selections>Select None.
Image>Add borders, 3 pixels, symmetric, dark color.
14. Image>Resize, 900 pixels width, resize all layers checked.
Open the tube Déco cadre Fabien, and go to Edit>Copy.
Go back to your work and go to Edit>Paste as new layer.
It is in place.
15. Sign your work and save as jpg.
Version with tubes by Beatriz, ClaudiaViza and Cal
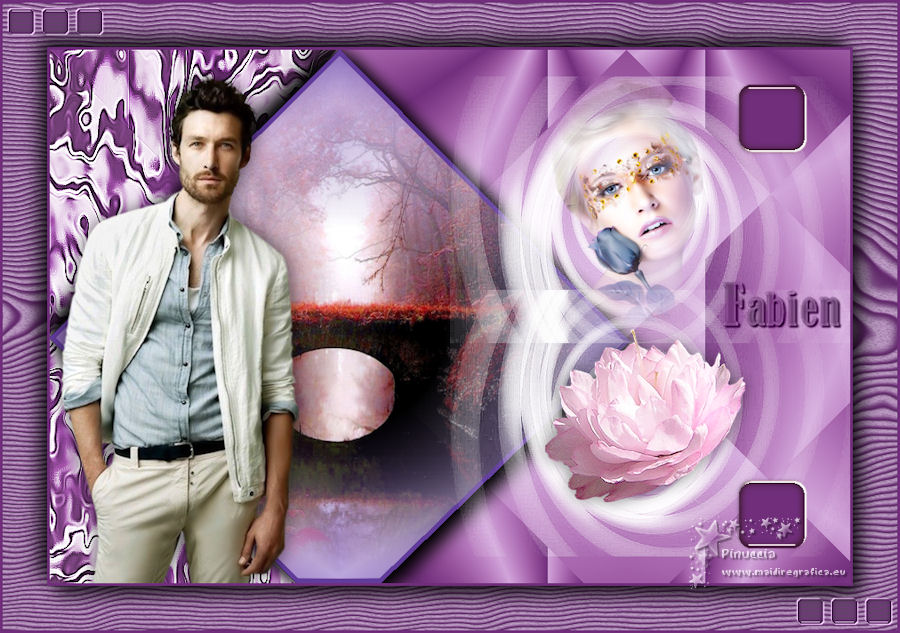

If you have problems or doubts, or you find a not worked link, or only for tell me that you enjoyed this tutorial, write to me.
5 November 2019
|

