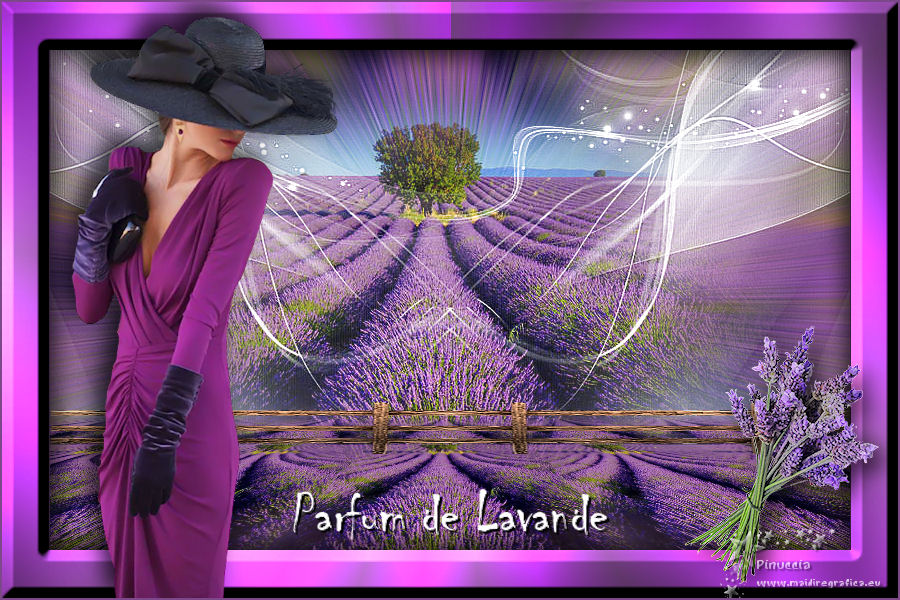
|
PARFUME DE LAVANDE


Thanks Evalynda for the invitation to translate your tutorials

This tutorial was written with PSPX8 and translated with PSPX7 and PSPX3, but it can also be made using other versions of PSP.
Since version PSP X4, Image>Mirror was replaced with Image>Flip Horizontal,
and Image>Flip with Image>Flip Vertical, there are some variables.
In versions X5 and X6, the functions have been improved by making available the Objects menu.
In the latest version X7 command Image>Mirror and Image>Flip returned, but with new differences.
See my schedule here
 italian translation here italian translation here
 Your versions Your versions
For this tutorial, you will need:
Material here
Thanks for the tube Colybrix et for the masks ValyScrapPassion et Narah
(The links of the tubemakers here).
Plugins:
consult, if necessary, my filter section here
Filters Unlimited 2.0 here
Graphics Plus - Cross Shadow here
Mura's Meister - Perspective Tiling here
Filters Graphics Plus can be used alone or imported into Filters Unlimited.
(How do, you see here)
If a plugin supplied appears with this icon  it must necessarily be imported into Unlimited it must necessarily be imported into Unlimited

You can change Blend Modes according to your colors.
In the newest versions of PSP, you don't find the foreground/background gradient (Corel_06_029).
You can use the gradients of the older versions.
The Gradient of CorelX here
(Don't forget to erase the watermarks)
Open the masks in PSP and minimize them with the rest of the material.
1. Open a new transparent image 800 x 500 pixels.
Open the landscape tube and go to Edit>Copy.
Go back to your work and go to Edit>Paste as new layer.
Effects>Image Effects>Seamless Tiling.
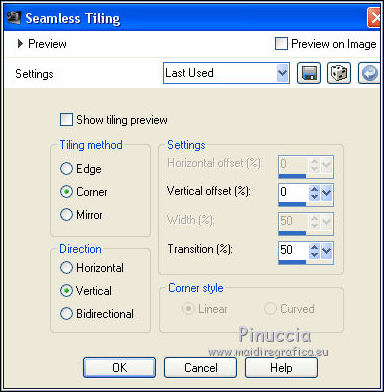
Effects>Image Effects>Seamless Tiling.

Layers>Merge>Merge All.
2. Adjust>Blur>Radial Blur.
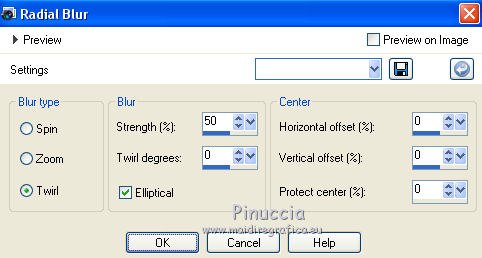
Effects>Edge Effects>Enhance More.
Adjust>Backlighting Filter
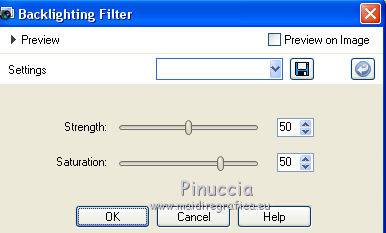
3. Edit>Paste as new layer (the landscape is still in memory).
Don't move it; is it at its place.
4. Layers>Duplicate.
Effects>Plugins>Mura's Meister - Perspective Tiling.
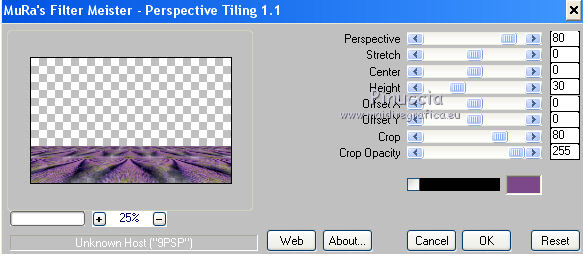
Activate the Selection Tool  , feather 20 , feather 20

et make a selection of the border of the image, as below
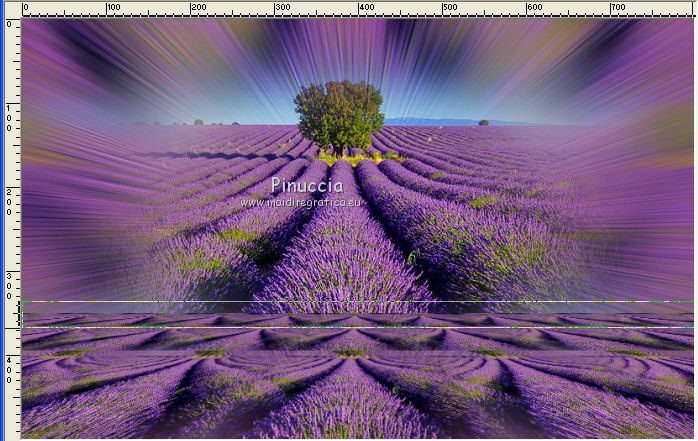
When the mouse button is released, the selection will widen due to the feather effect.
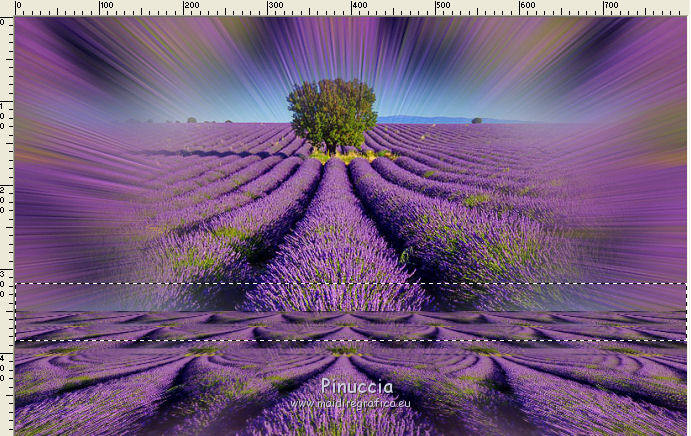
Press 2 times CANC on the keyboard 
Selections>Select None.
5. Set your foreground color to white.
Layers>New Raster Layer.
Flood Fill  the layer with color white. the layer with color white.
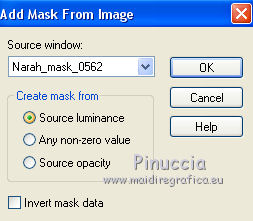
Layers>New Mask layer>From image
Open the menu under the source window and you'll see all the files open.
Select the mask Narah_Mask_0562
Effects>Edge Effects>Enhance More.
Layers>Merge>Merge Group.
6. Image>Resize, to 80%, resize all layers not checked.
K key on the keyboard to activate your Pick Tool 
and set Position X and Y to 0,00.

Layers>Duplicate.
Image>Mirror.
Layers>Merge>Merge Down.
Layers>Arrange>Move down.
7. Layers>New Raster Layer.
Flood Fill  the layer with color white. the layer with color white.
Layers>New Mask layer>From image
Open the menu under the source window
and select the mask VSP217
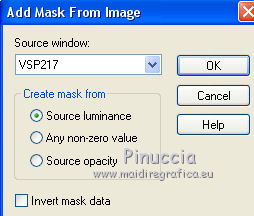
Effects>Edge Effects>Enhance More.
Layers>Merge>Merge Group.
8. Pick Tool 
and set Position X: 0,00 and Position Y: -230,00.

Activate your bottom layer.
Selections>Select All.
Image>Crop to selection.
9. Activate your top layer.
Open the tube barrière and go to Edit>Copy.
Go back to your work and go to Edit>Paste as new layer.
Pick Tool 
and set Position X: 390,00 and Position Y: 300,00.

Layers>Duplicate.
Image>Mirror.
Layers>Merge>Merge Down.
Activate your Pick Tool 
mode Scale 
push the top central node down to 350 pixels
(if you don't see the rules, go to View>Rules)
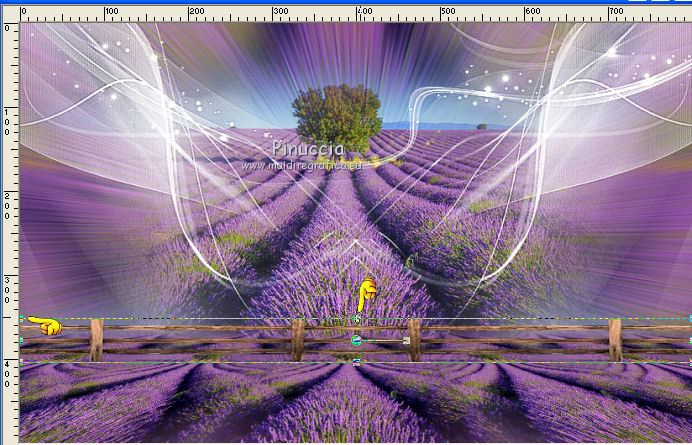
Adjust>Sharpness>Sharpen.
10. Set your foreground color to #be38f3,
and your background color to #7c488a.
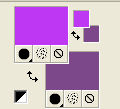
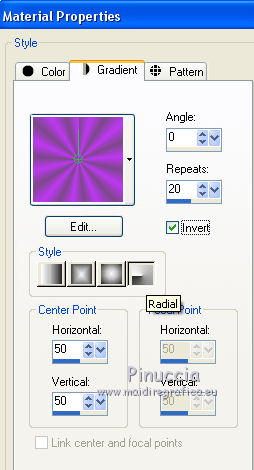
Set your foreground color to a Foreground/Background Gradient, style Radial.
11. Selections>Select All.
Image>Add borders, 48 pixels, symmetric, background color.
Selections>Invert.
Flood Fill  the selection with your gradient. the selection with your gradient.
Effects>Plugins>Graphics Plus - Cross Shadow.
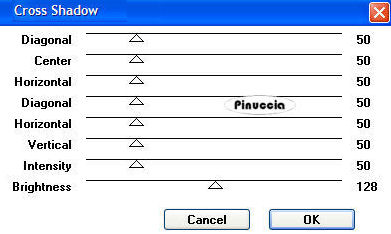
Repeat the Effect another time.
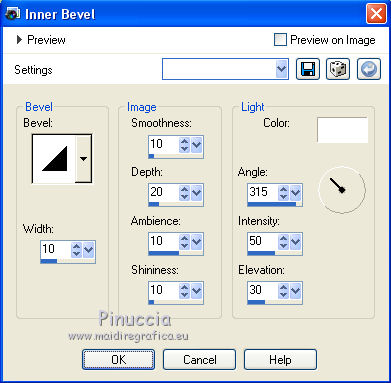
12. Effects>3D Effects>Inner Bevel.
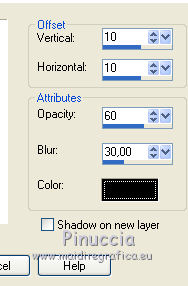
Effects>3D Effects>Drop Shadow, color black.
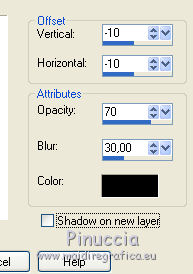
Repeat Drop shadow, vertical and horizontal -10.
Selections>Select None.
13. Open the woman tube and go to Edit>Copy.
Go back to your work and go to Edit>Paste as new layer.
Image>Resize, to 72%, resize all layers not checked.
Move  the tube at the bottom left. the tube at the bottom left.
Effects>3D Effects>Drop Shadow, color black.
14. Open the lavender tube and go to Edit>Copy.
Go back to your work and go to Edit>Paste as new layer.
Image>Resize, 2 times to to 75%, resize all layers not checked.
Move  the tube at the bottom right. the tube at the bottom right.
Adjust>Sharpness>Sharpen.
Effects>3D Effects>Drop Shadow, color black.
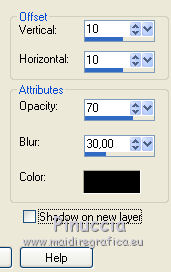
15. Open the tube titre (or add your text) and go to Edit>Copy.
Go back to your work and go to Edit>Paste as new layer.
Move  the text where you like better. the text where you like better.
Image>Add borders, 2 pixels, symmetric, background color.
16. Sign your work on a new layer.
Layers>Merge>Merge All and save as jpg.
Version with tube by Luz Cristina

 Your versionsThanks Your versionsThanks
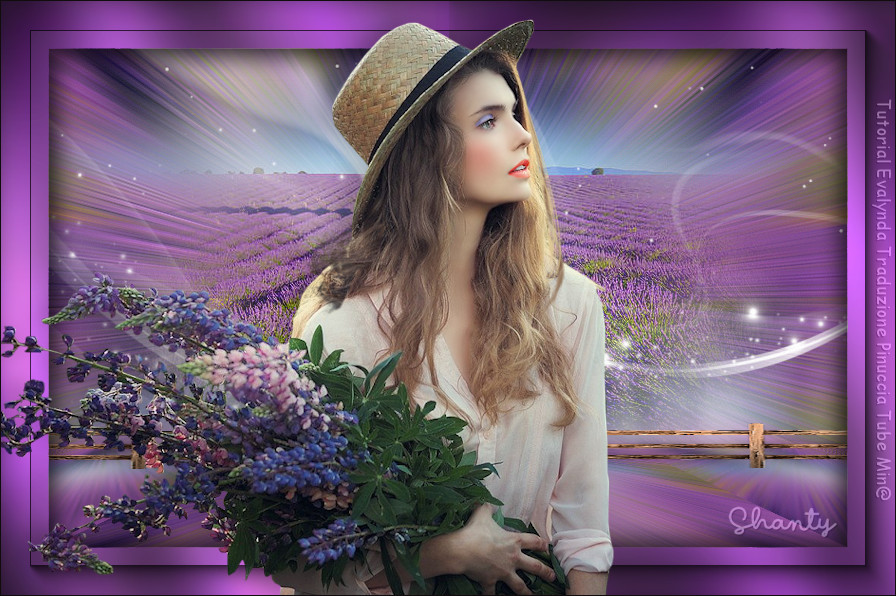
Shanty
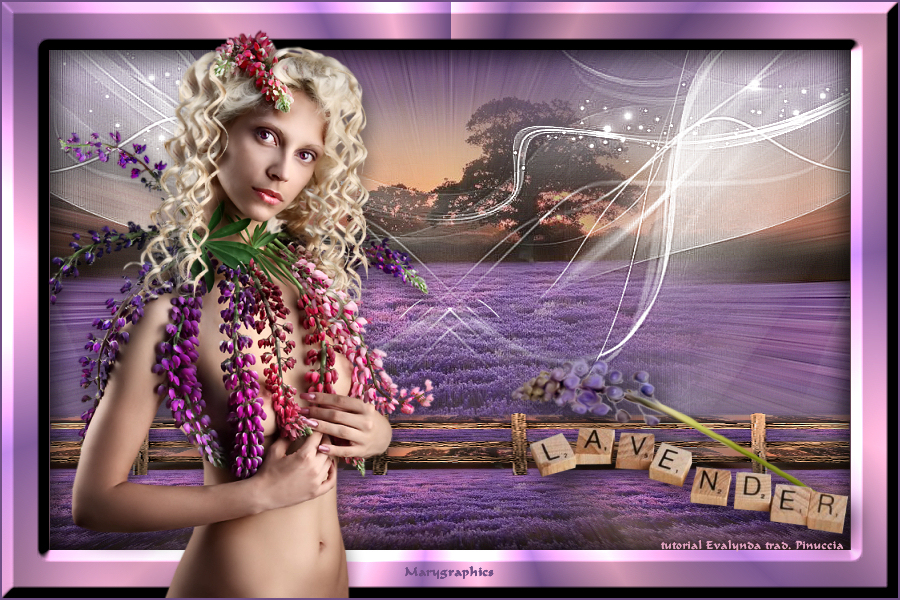
Marygraphics

If you have problems or doubts, or you find a not worked link, or only for tell me that you enjoyed this tutorial, write to me.
15 August 2020
|

