|
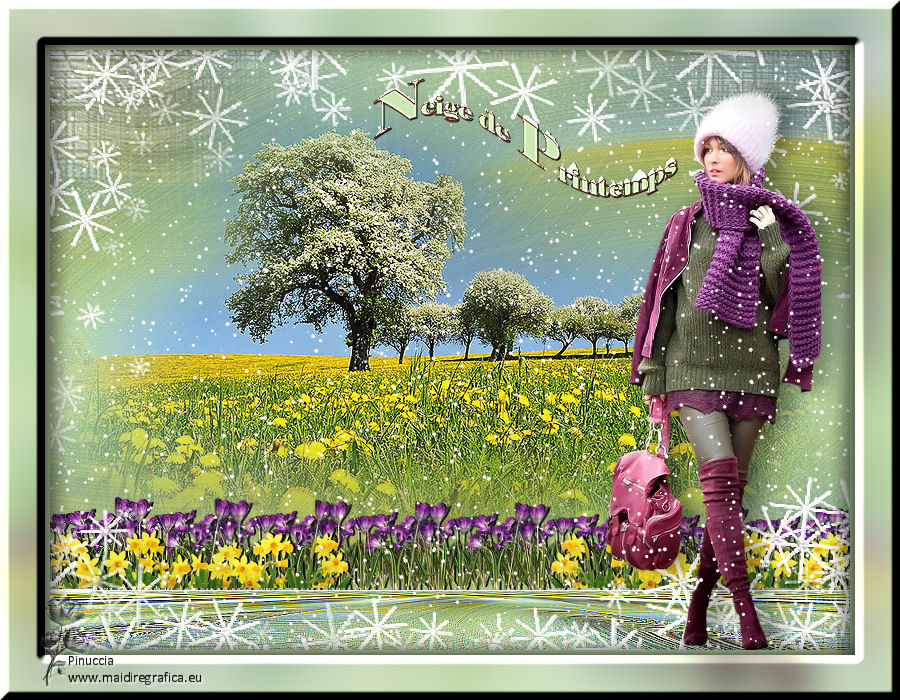
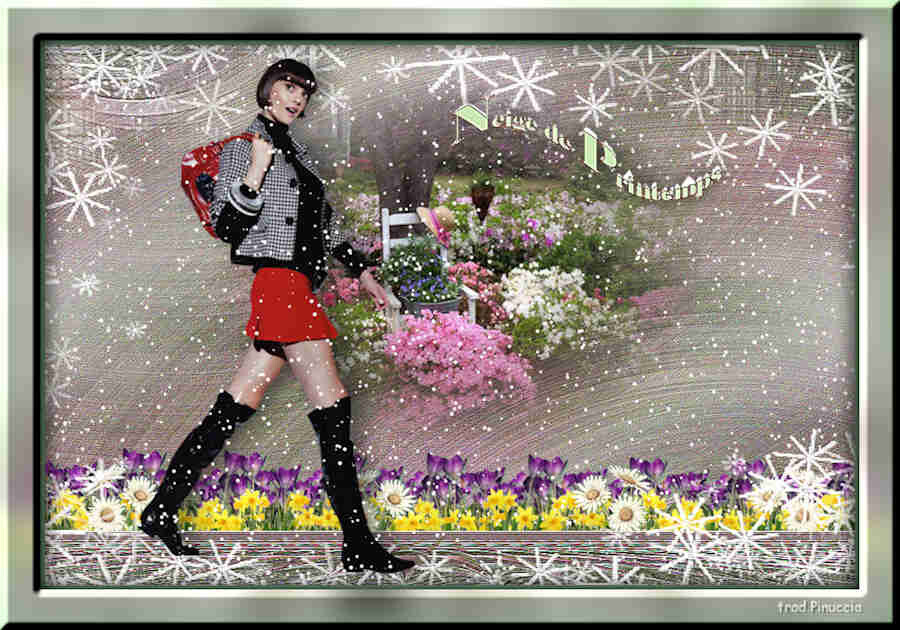
NEIGE DE PRINTEMPS


Thanks Evalynda for the invitation to translate your tutorials

This tutorial was written with PSPX8 and translated with PSPX7 and PSPX3, but it can also be made using other versions of PSP.
Since version PSP X4, Image>Mirror was replaced with Image>Flip Horizontal,
and Image>Flip with Image>Flip Vertical, there are some variables.
In versions X5 and X6, the functions have been improved by making available the Objects menu.
In the latest version X7 command Image>Mirror and Image>Flip returned, but with new differences.
See my schedule here
 italian translation here italian translation here
For this tutorial, you will need:
Material here
Thanks for the tubes Colybrix, Valy ScrapPassion and for the mask Nikita.
The flower is not signed.
(The links of material creators here).
Plugins
consult, if necessary, my filter section here
Mura's Meister - Perspective Tiling here
Mura's Meister - Copies here
VanDerLee - Snowflakes here

You can change Blend Modes according to your colors.
In the newest versions of PSP, you don't find the foreground/background gradient (Corel_06_029).
You can use the gradients of the older versions.
The Gradient of CorelX here

(Don't forget to erase the watermarks of the tubes and don't save the modifications when you'll close them)
Open the mask in PSP and minimize it with the rest of the material
Set your foreground color to a light color of your landscape; for me #cce8b5,
and your background color to #ffffff.

1. Open a new transparent image 900 x 600 pixels.
Flood Fill  the transparent image with your foreground color. the transparent image with your foreground color.
Layers>New Raster Layer.
Selections>Select All.
Open the landscape misted and go to Edit>Copy.
Go back to your work and go to Edit>Paste into Selection.
Selections>Select None.
2. Effects>Image Effects>Seamless Tiling.
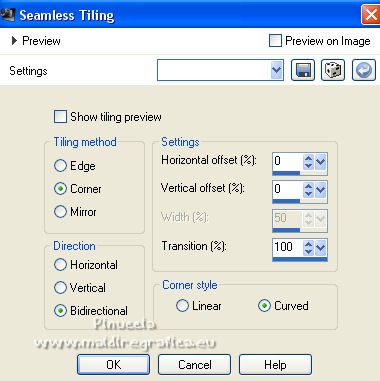
3. Adjust>Blur>Radial Blur.
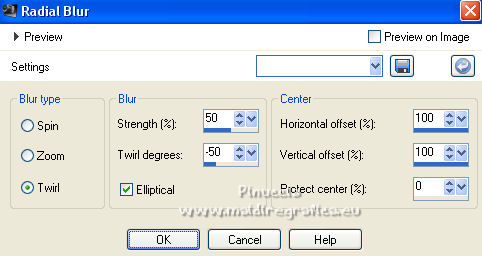
4. Layers>Duplicate.
Image>Mirror.
Image>Flip.
Reduce the opacity of this layer to 50%.
Layers>Merge>Merge visible.
Effects>Edge Effects>Enhance More.
5. Layers>Duplicate.
Effects>Plugins>Mura's Meister - Perspective Tiling.
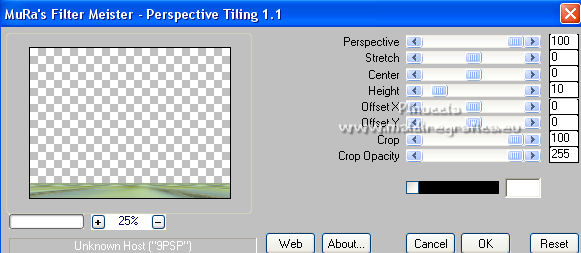
Effects>Edge Effects>Enhance More.
6. Activate the bottom layer, Merged.
Edit>Paste as new layer (the landscape is still in memory).
if you use another tube: about 850 x 500 pixels
Image>Resize, if necessary, resize all layers not checked.
Adjust>Sharpness>Sharpen.
7. K key on the keyboard to activate your Pick Tool 
and set Posizione X: -50,00 and Posizione Y: -70,00

8. Open the tube Crocus-PNG-File and go to Edit>Copy.
Go back to your work and go to Edit>Paste as new layer.
Image>Resize, to 75%, resize all layers not checked.
Set Position X: 0,00 and Position Y: 445,00.

9. Layers>Duplicate.
Layers>Merge>Merge Down.
Adjust>Sharpness>Sharpen.
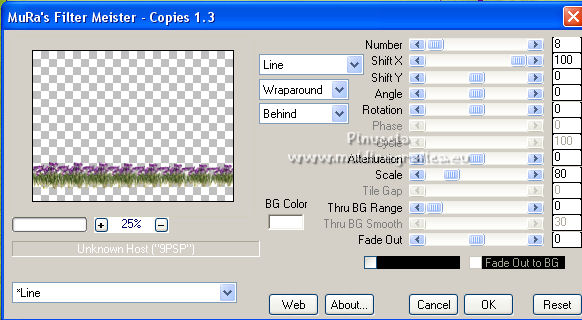
10. Effects>Plugins>Mura's Meister - Copies.
Effects>3D Effects>Drop Shadow, color black.
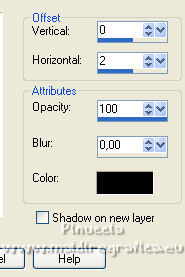
11. Open the tube Pixabay 10 and go to Edit>Copy.
Go back to your work and go to Edit>Paste as new layer.
Image>Resize, to 80%, resize all layers not checked.
Set Position X: 0,00 and Position Y: 480,00.

12. Layers>Duplicate.
Image>Mirror.
Layers>Merge>Merge Down.
Effects>3D Effects>Drop Shadow, same settings.

13. Activate your top layer.
Layers>New Raster Layer.
Flood Fill  the layer with color white. the layer with color white.
Layers>New Mask layer>From image
Open the menu under the source window and you'll see all the files open.
Select the mask 1217491051_masques.

Image>Resize, to 140%, resize all layers not checked.
Effects>Edge Effects>Enhance More.
Layers>Merge>Merge Group.
14. Effects>3D Effects>Drop Shadow, color white.
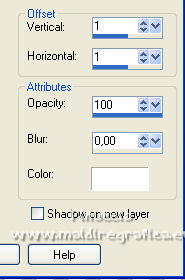
15. Open the woman tube and go to Edit>Copy.
Go back to your work and go to Edit>Paste as new layer.
Image>Resize, to 70%, resize all layers not checked.
Set Position X: 555,00 and Position Y: 20,00.

Adjust>Sharpness>Sharpen.
Effects>3D Effects>Drop Shadow, color black.
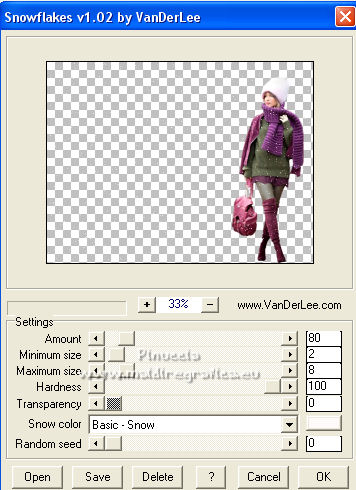
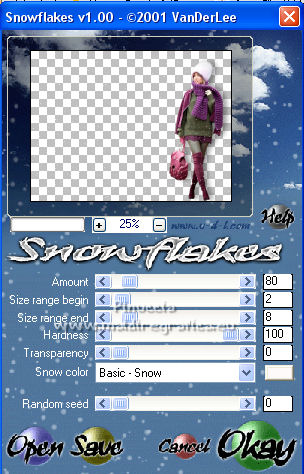
16. Effects>Plugins>VanDerLee - Snowflakes
if you use the previous version (the result doesn't change): VDL Adrenaline>Snowflakes
17. Image>Add borders, 5 pixels, symmetric, color white (or your foreground color).
Edit>Copy.
Selections>Select All.
Image>Add borders, 45 pixels, symmetric, color white.
Selections>Invert.
Edit>Paste into Selection.
Adjust>Blur>Gaussian Blur - radius 20.

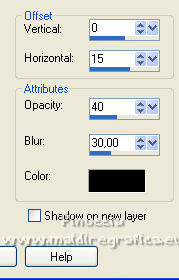
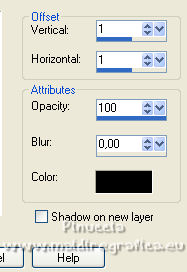
18. Effects>3D Effects>Drop Shadow, color black.
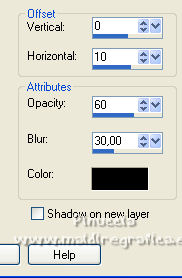
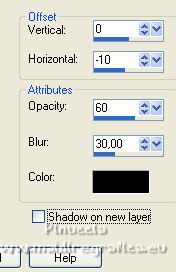
Repeat Effects>3D Effects>Drop Shadow, horizontal -10.
19. Effects>3D Effects>Inner Bevel.
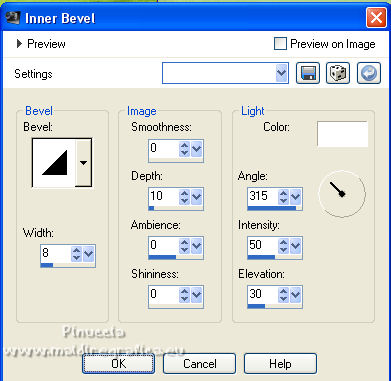
Selections>Select None.
20. Open the tube titre and go to Edit>Copy.
Go back to your work and go to Edit>Paste as new layer.
Colorize, if you want.
Effects>3D Effects>Drop Shadow, color black.
Place  the text to your liking. the text to your liking.
Sign your work on a new layer.
Layers>Merge>Merge All and save as jpg.
For the tube of this version thanks Luz Cristina (the misted and the decos are mine).
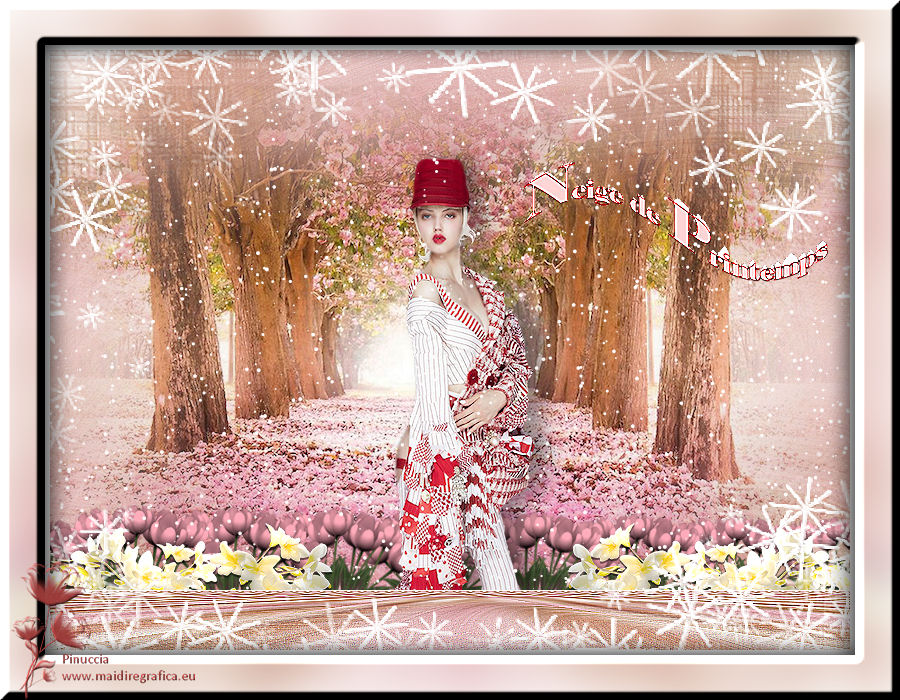

Your versions. Thanks
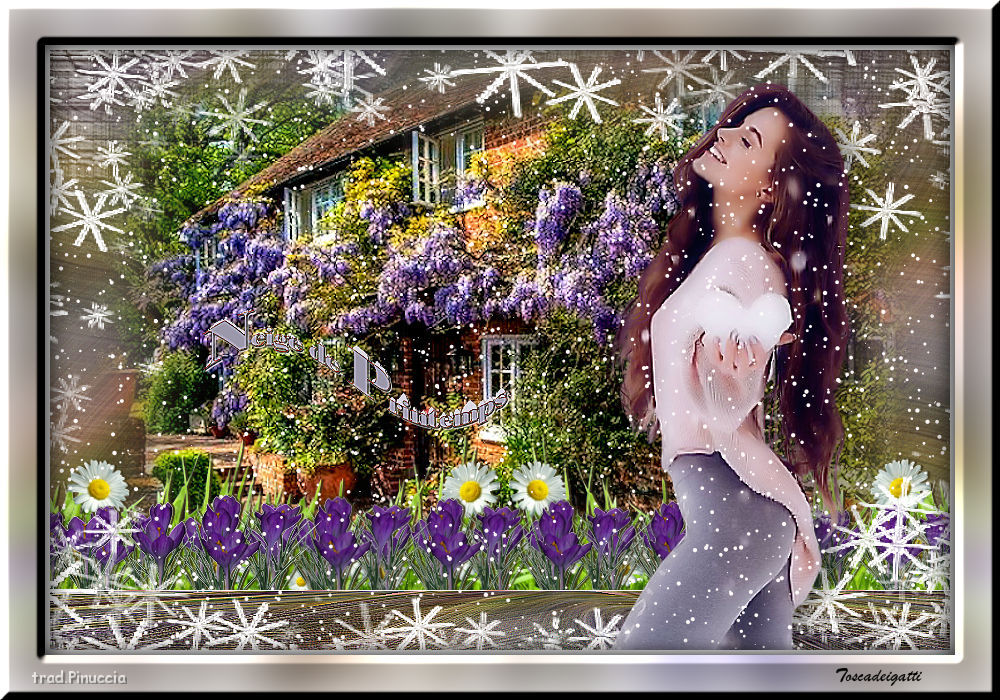
Tosca dei gatti
Vanpires

If you have problems or doubts, or you find a not worked link,
or only for tell me that you enjoyed this tutorial, write to me.
4 April 2022

|

