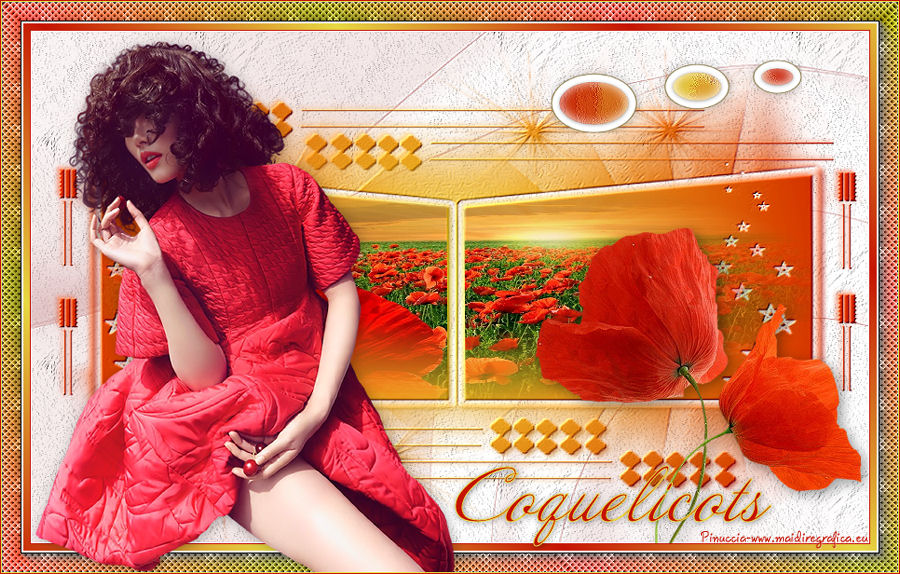
|
COQUELICOTS
 english version

Thanks Carine for your invitation to translate

This tutorial was written with CorelX17 and translated with CorelX17, but it can also be made using other versions of PSP.
Since version PSP X4, Image>Mirror was replaced with Image>Flip Horizontal,
and Image>Flip with Image>Flip Vertical, there are some variables.
In versions X5 and X6, the functions have been improved by making available the Objects menu.
In the latest version X7 command Image>Mirror and Image>Flip returned, but with new differences.
See my schedule here
italian translation here
Material here
Thanks for the tube Min@.
(The links of the tubemakers here).
Plugins
consult, if necessary, my filter section here
Filters Unlimited 2.0 here
Mura's Seamless - Emboss at Alpha here
L&K's - L&K's Andreas here
AAA Frames - Foto Frame here
Filters Mura's Seamless can be used alone or imported into Filters Unlimited.
(How do, you see here)
If a plugin supplied appears with this icon  it must necessarily be imported into Unlimited it must necessarily be imported into Unlimited

You can change Blend Modes according to your colors.
In the newest versions of PSP, you don't find the foreground/background gradient (Corel_06_029).
You can use the gradients of the older versions.
The Gradient of CorelX here

The texture Corel_15_039 is standard in PSP.
If you don't find it in your PSP, copy the supplied texture in the Textures Folder.
Copy the selection in the Selections Folder.
Open the mask and minimize it with the rest of the material.
La trama Corel_15_039 è standard nelle nuove versioni di PSP,
e corrisponde alla trama standard Pelliccia delle versioni precedenti.
Se non la trovi nel tuo Psp, metti quella fornita nella cartella Trame.
1. Set your foreground color to white #ffffff.
Open a new transparent image 900 x 550 pixels,
Flood Fill  the transparent image with color white. the transparent image with color white.
2. Effects>Texture Effects>Texture - select the Texture Corel_15_039.
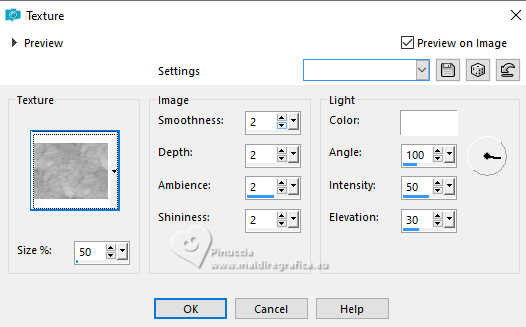
Adjust>Sharpness>Sharpen - 2 times.
3. Open the tube déco coquelicot 2, and go to Edit>Copy.
Go back to your work and go to Edit>Paste as new layer.
Don't move it. It is at its place.
4. Layers>Merge>Merge visible.
5. Set your foreground color to #e7d943,
and your background color to #c51402.
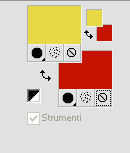
Set your foreground color to a Foreground/Background Gradient, style Sunburst.
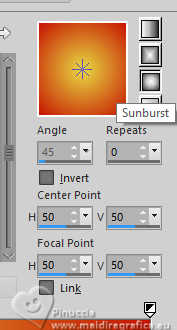
6. Layers>New Raster Layer.
Flood Fill  with your Gradient. with your Gradient.
7. Layers>New Mask layer>From image
Open the menu under the source window and you'll see all the files open.
Select the mask 05PsPMask.
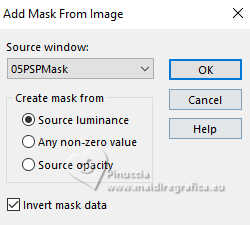
Layers>Merge>Merge Group.
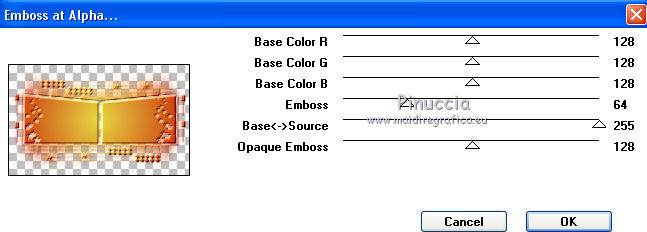
8. Effects>Plugins>Mura's Seamless - Emboss at alpha, default settings.
9. Layers>New Raster Layer.
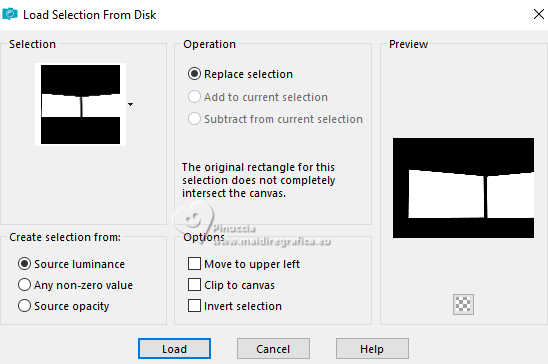
Selections>Load/Save Selection>Load Selection from Disk.
Look for and load the selection Sélection Coquelicots.
10. Open the tube Paysage Coquelicot and go to Edit>Copy.
Go back to your work and go to Edit>Paste into Selection.
Adjust>Sharpness>Sharpen.
Selections>Select None.
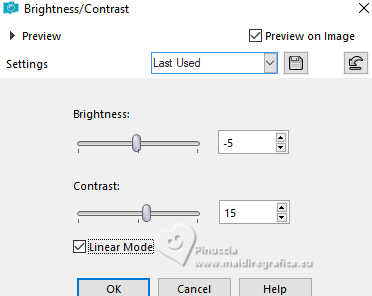
11. Optional: activate the layer of the mask:
Adjust>Brightness and Contrast>Brightness and Contrast.
12. Open the tube deco coquelicot.
Work on this tube:
Selections>Select All.
Selections>Float.
Selections>Modify>Contract - 15 pixels.
Layers>New Raster Layer.
Flood Fill  with your Gradient. with your Gradient.
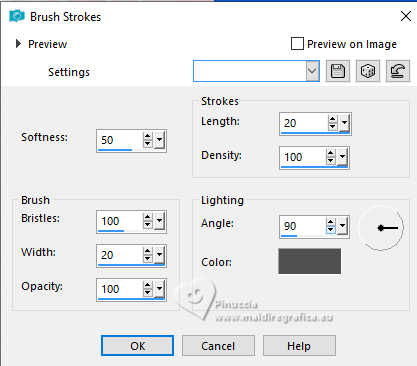
13. Effects>Art Media Effects>Brush Strokes - color #505050.
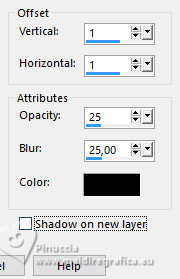
14. Effects>3D Effects>Drop shadow, color black.

Selections>Select None.
Layers>Merge>Merge Down.
Effects>3D Effects>Drop shadow, color black.
15. Edit>Copy.
16. Go back to your work.
Activate your top layer.
Edit>Paste as new layer.
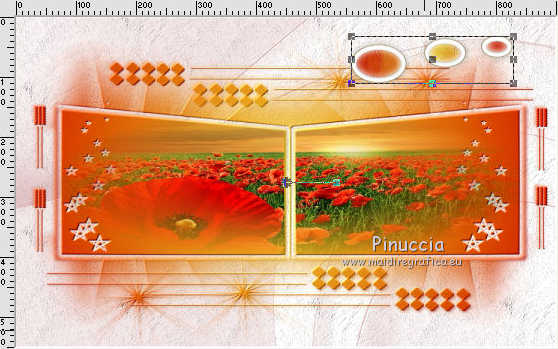
Image>Resize, to 60%, resize all layers not checked.
Activate your Pick Tool 
Position X: 558,00 - Position Y: 31,00.

17. Open the tube Xtreme-Flower-16_Poppy-Mar-2008, and go to Edit>Copy.
Go back to your work and go to Edit>Paste as new layer.
Image>Resize, to 65%, resize all layers not checked.
Pick Tool 
Position X: 540,00 - Position Y: 210,00.


18. Effects>3D Effects>Drop shadow, color black.

19. Layers>Merge>Merge visible.
20. Image>Add borders, 1 pixel, symmetric, color #c51402.
Image>Add borders, 30 pixels, symmetric, color white.
21. Activate your Magic Wand Tool 
and click in the white border to select it.
22. Change the settings of your Gradient, style Linear.
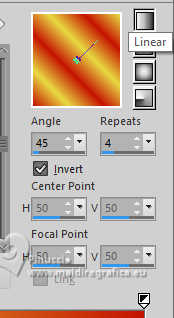
Flood Fill  the selection with your Gradient. the selection with your Gradient.
23. Effects>Plugins>AAA Frames - Foto Frame.
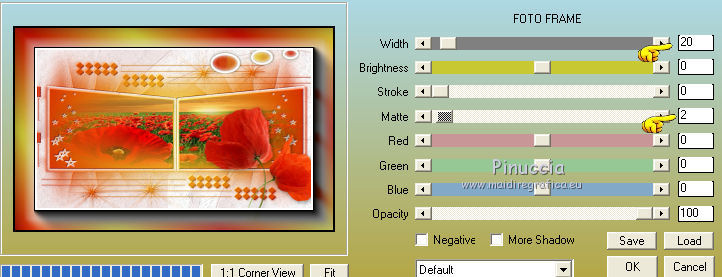
Selections>Select None.
24. Selections>Select All.
Selections>Modify>Contract - 20 pixels.
25. Effects>3D Effects>Drop shadow, color black.

26. Selections>Invert.
Selections>Promote Selection to Layer.
27. Effects>Plugins>L&K's - L&K's Andreas, default settings.
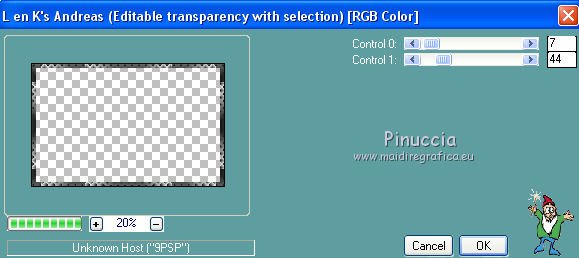
Change the blend Mode of this layer to Luminance (legacy).
Selections>Select None.
28. Open the woman tube and go to Edit>Copy.
Go back to your work and go to Edit>Paste as new layer.
Image>Resize, if necessary - for the supplied tube to 87%), resize all layers not checked.
Image>Mirror>Mirror Horizontal (for the supplied tube).
29. Effects>3D Effects>Drop shadow, color black.
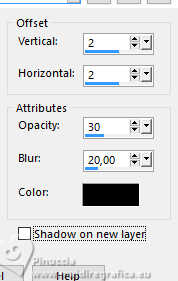
30. Activate your Text Tool  , font AnnabellaJF, , font AnnabellaJF,
size 72, stroke width 1 pixel,
foreground color #e7d943, background color #c51402.

Scrivi Coquelicots, or what you want.
Layers>Convert in Raster Layer.
Move  the text at the bottom right. the text at the bottom right.
31. Effects>3D Effects>Drop shadow, color black.

32. Image>Add borders, 1 pixel, symmetric, foreground color #e7d943.
Image>Add borders, 1 pixel, symmetric, background color #c51402.
33. Sign your work.
Image>Resize, 900 pixels width, resize all layers checked.

If you have problems or doubts, or you find a not worked link, or only for tell me that you enjoyed this tutorial, write to me.
20 November 2024
|
 english version

 english version