AMPLITUDE
 english version

Thanks Carine for your invitation to translate

Clic and move the brush to follow the tutorial.

To print


|
This tutorial was translated with PSPX and PSPX3, but it can also be made using other versions of PSP.
Since version PSP X4, Image>Mirror was replaced with Image>Flip Horizontal,
and Image>Flip with Image>Flip Vertical, there are some variables.
In versions X5 and X6, the functions have been improved by making available the Objects menu.
In the latest version X7 command Image>Mirror and Image>Flip returned, but with new differences.
See my schedule here
 italian translation here italian translation here
 your versions here your versions here
Material here
Thanks: for the tube Beatriz and for the mask OBG
(The links of the tubemakers here).
Plugins
consult, if necessary, my filter section here
Filters Unlimited 2.0 here
AP 01 [Innovations] - Lines SilverLining here
Mura's Meister - Copies here
Simple - Zoom out and flip qui
Carolaine and Sensibility - CS-Linear-H qui
Alien Skin Eye Candy 5 Impact - Glass qui
Filters Simple can be used alone or imported into Filters Unlimited.
(How do, you see here)
If a plugin supplied appears with this icon  it must necessarily be imported into Unlimited it must necessarily be imported into Unlimited

You can change Blend Modes according to your colors.

Copy the Gradient in the Gradients Folder.
Copy the Selections in the Selections Folder.
Open the mask in PSP and minimize it with the rest of the material.
1. Open a new transparent image 900 x 550 pixels.
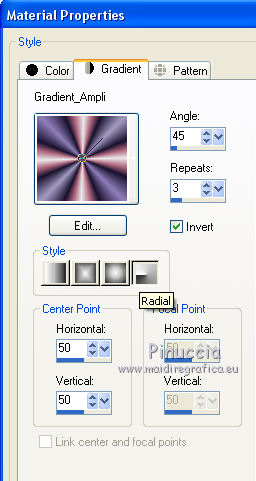
2. Set your foreground color to Gradient, and select the Gradient Gradient_Ampli, style Radial.
Set your background color to white
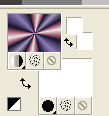
Flood Fill  the trasparent image with your Gradient. the trasparent image with your Gradient.
3. Adjust>Blur>Gaussian Blur - radius 30

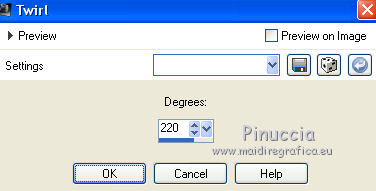
4. Effects>Distortion Effects>Twirl.
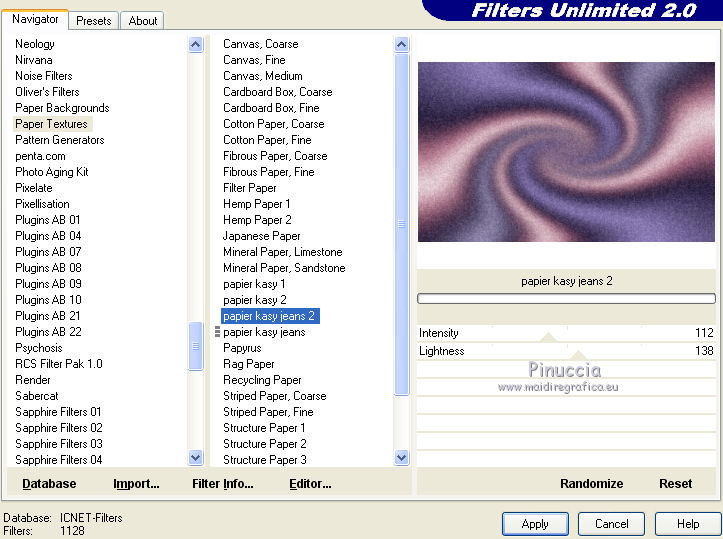
5. Effects>Plugins>Filters Unlimited 2.0 - Paper Textures - Papier Kazy Jeans 2, default settings.
6. Layers>New Raster Layer.
Flood Fill  the layer with color white. the layer with color white.
7. Layers>New Mask layer>From image
Open the menu under the source window and you'll see all the files open.
Select the mask OBG_MASK_136.
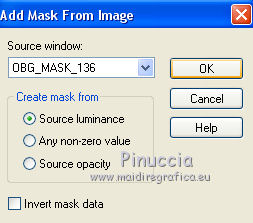
Layers>Merge>Merge Group.
8. Effects>3D Effects>Drop Shadow, color 382b52.

9. Activate the layer Raster 1.
Selections>Load/Save Selection>Load Selection from Disk.
Look for and load the selection SélectionFeli_01.
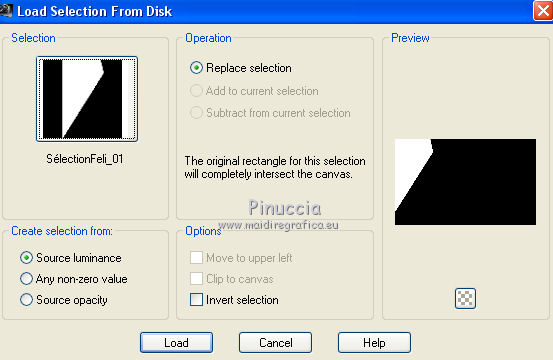
Selections>Promote Selection to layer.
Layers>Arrange>Move up.
10. Effects>Plugins>Carolaine and Sensibility - CS-Linear-H
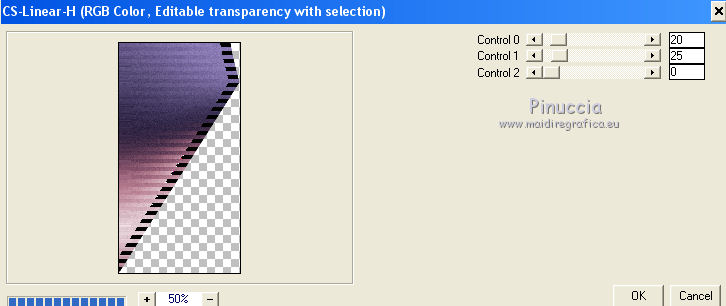
11. Change the Blend Mode of this layer to Overlay, opacity 100.
12. Effects>3D Effects>Drop Shadow, color black.
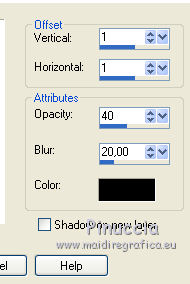
Selections>Select None.
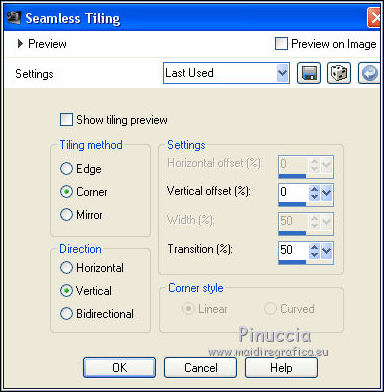
13. Effects>Image Effects>Seamless Tiling.
14. Open Deco 1 and go to Edit>Copy.
Go back to your work and go to Edit>Paste as new layer.
Don't move it.
15. Effects>Image Effects>Seamless Tiling.

16. Selection Tool 
(no matter the type of selection, because with the custom selection your always get a rectangle)
clic on the Custom Selection 
and set the following settings.
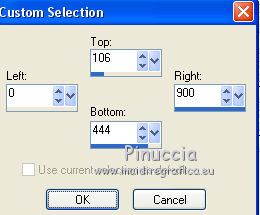
Press CANC on the keyboard 
Selections>Select None.
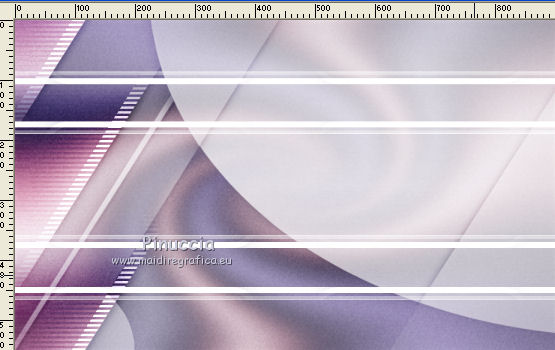
17. Effects>Plugins>Simple - Zoom out and flip.
This effect works without window; result
18. Activate the layer Raster 1.
Selections>Load/Save Selection>Load Selection from Disk.
Look for and load the selection SélectionFeli_02.
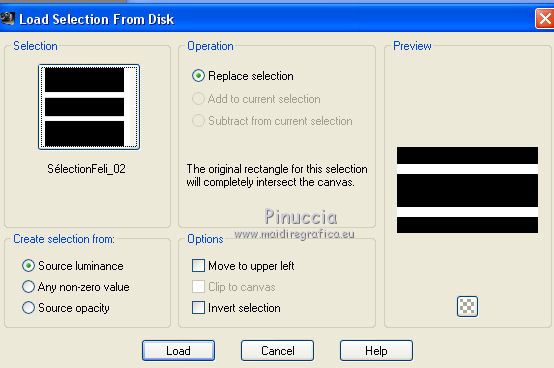
Selections>Promote Selection to Layer.
Move this layer under the layer Raster 2.
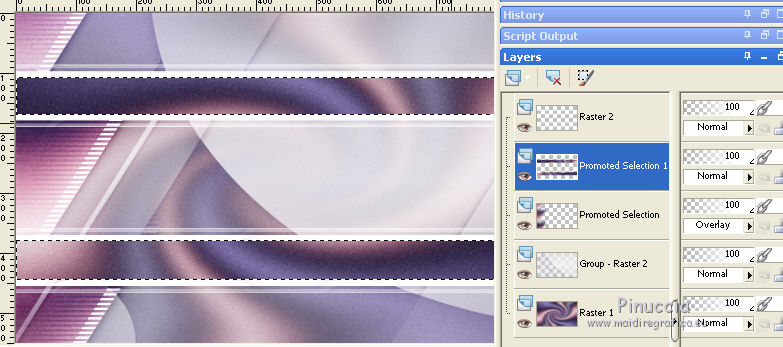
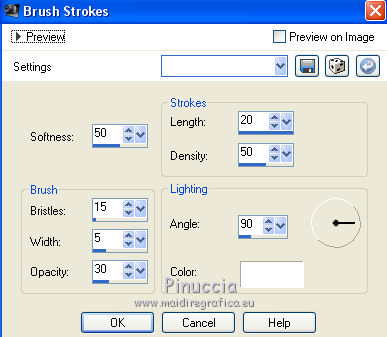
19. Effects>Art Media Effects>Brush Strokes.
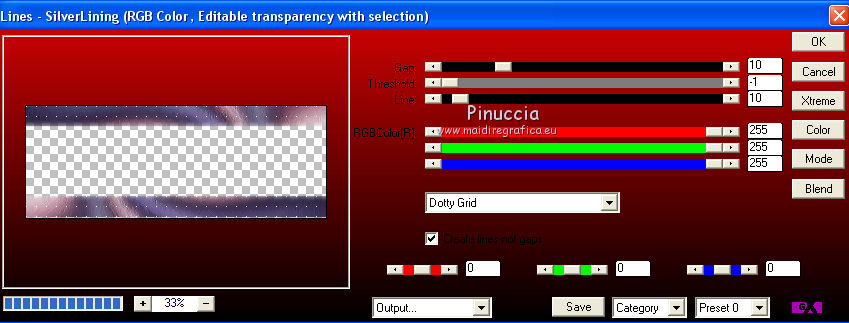
20. Effects>Plugins>AP 01 [Innovations] - Lines SilverLining.
Selections>Select None.
21. Activate your top layer, Raster 2.
Layer>Merge>Merge Down.
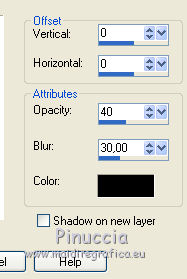
22. Effects>3D Effects>Drop Shadow, color black.
23. Open déco 2 and go to Edit>Copy.
Go back to your work and go to Edit>Paste as new layer.
K key to activate your Pick Tool 
and set Position X: 397,00 and Position Y: 197,00.

M key to deselect the Tool.
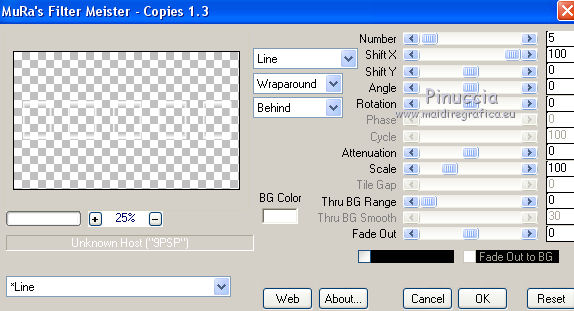
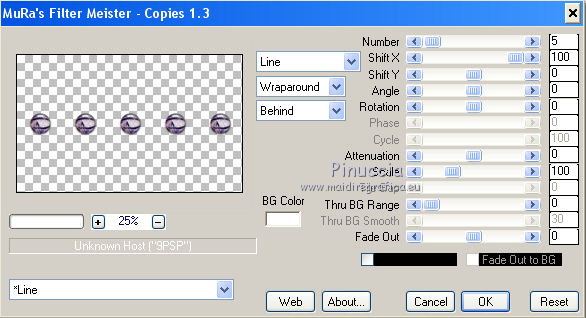
24. Effects>Plugins>Mura's Meister - Copies.
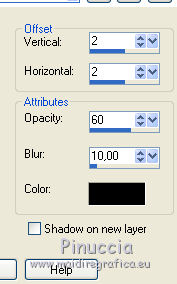
25. Effects>3D Effects>Drop Shadow, color black.
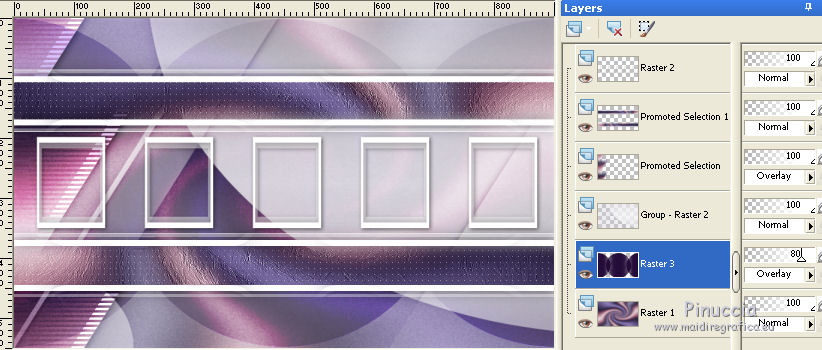
26. Open Rond M and go to Edit>Copy.
Go back to your work.
Activate the layer Raster 1 and go to Edit>Paste as new layer.
27. Effects>Image Effects>Seamless Tiling.

28. Change the Blend Mode of this layer to Soft Light and reduce the opacity to 80
29. Edit>Copy Special>Copy Merged.
Edit>Paste as new image and go on this image.
30. Effects>Geometric Effects>Circle.

31. Image>Resize, to 15%, resize all layers checked.
Edit>Copy.
Go back to your work.
Activate the top layer and go to Edit>Paste as new layer.
32. K key to activate your Pick Tool 
and set Position X: 415,00 and Position Y: 235,00.

M key to deselect the Tool.
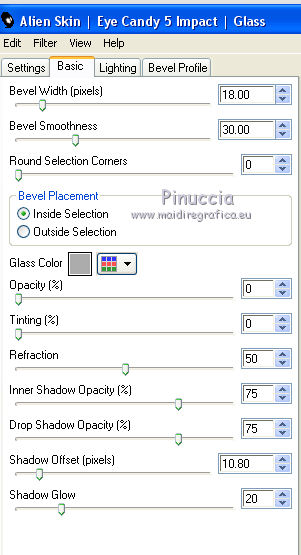
33. Effects>Plugins>Alien Skin Eye Candy 5 Impact - Glass.
34. Adjust>Brightness and Contrast>Brightness and Contrast (optional, according to your colors)
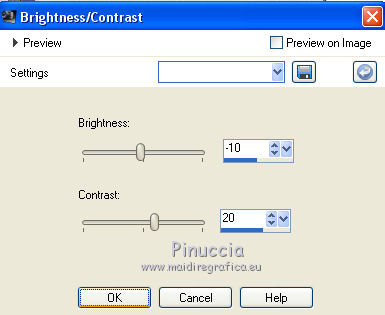
Adjust>Sharpness>Sharpen.
35. Effects>Plugins>Mura's Meister - Copies, same settings.
36. Open déco 3 and go to Edit>Copy.
Go back to your work and go to Edit>Paste as new layer.
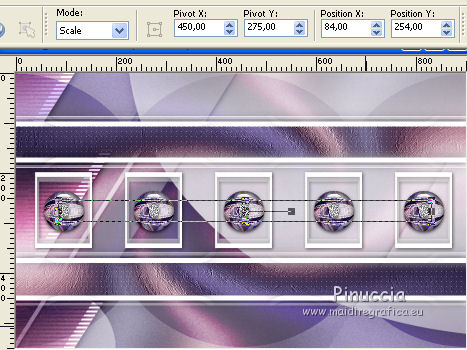
K key to activate your Pick Tool 
and set Position X: 84,00 and Position Y: 254,00.
M key to deselect the Tool.
37. Layers>Merge>Merge All.
38. Image>Add borders, 1 pixel, symmetric, color white.
Selections>Select All.
Image>Add borders, 20 pixels, symmetric, color #625582.
Selections>Invert.
39. Effects>Plugins>Filters Unlimited 2.0 - Paper Texture - Papier Kazy Jeans 2, same settings.
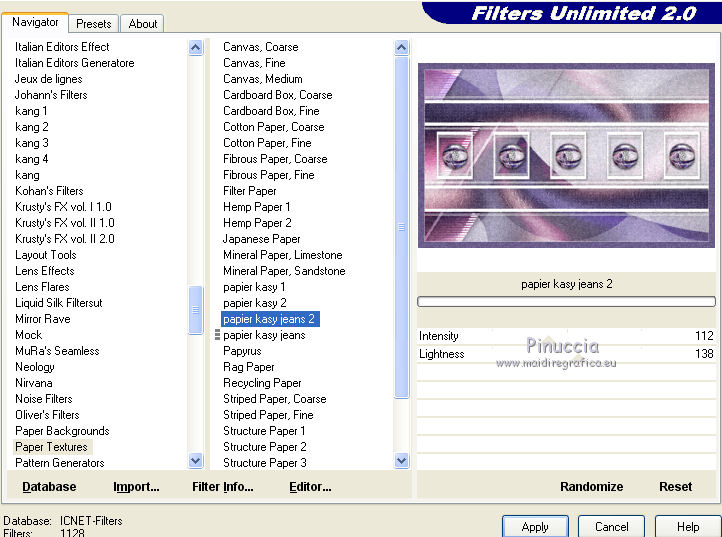
Effects>Edge Effects>Enhance.
40. Effects>3D Effects>Inner Bevel.
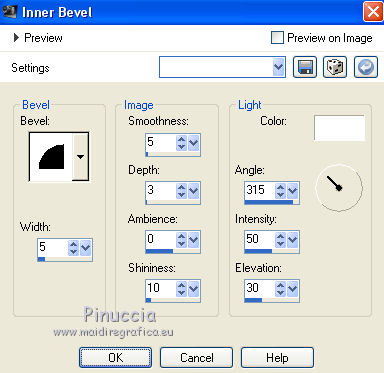
Selections>Select None.
41. Image>Add borders, 1 pixel, symmetric, color white.
Edit>Copy.
42. Open the frame "cadre", which is already selected.
Edit>Paste into Selection.
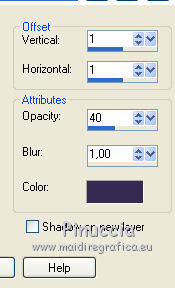
43. Effects>3D Effects>Drop Shadow, color #382b52.

Selections>Select None.
44. Open the text and go to Edit>Copy.
Go back to your work and go to Edit>Paste as new layer.
Is is at its place.
Change the Blend Mode of this layer to Overlay, opacity 100.
45. Effects>3D Effects>Drop Shadow, color black.
46. Open the woman tube and go to Edit>Copy.
Go back to your work and go to Edit>Paste as new layer.
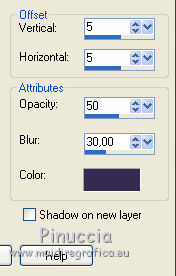
47. Effects>3D Effects>Drop Shadow, color black.
48. Image>Add borders, 1 pixel, symmetric, color #625582.
Image>Add borders, 2 pixels, symmetric, color white.
49. Sign your work on a new layer.
Add, if you want, the watermark's author; in this case don't forget the translator's watermark.
Layers>Merge>Merge All and save as jpg.
Versione con tube di Gabry
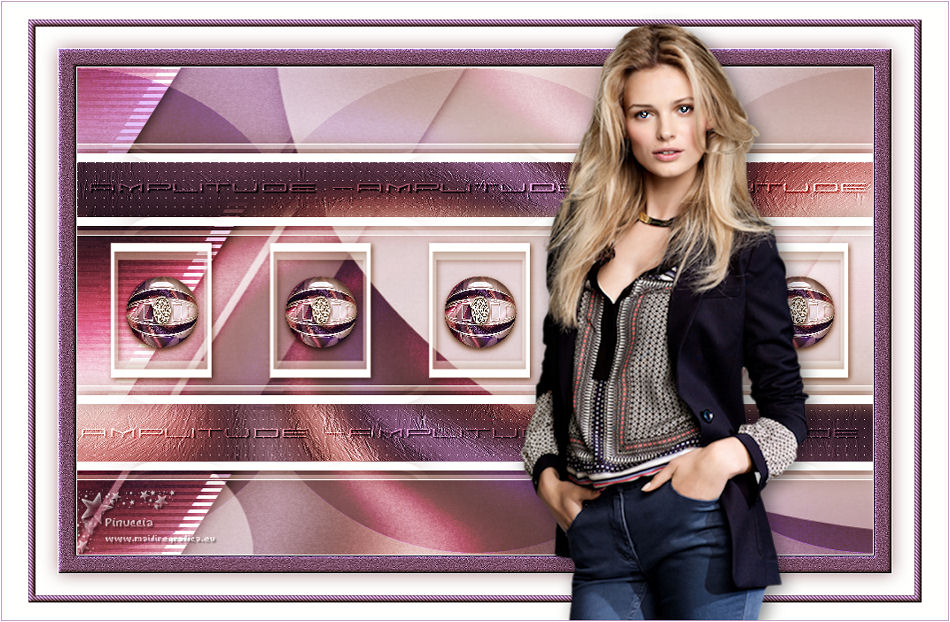

If you have problems or doubts, or you find a not worked link, or only for tell me that you enjoyed this tutorial, write to me.
31 March 2021
|

