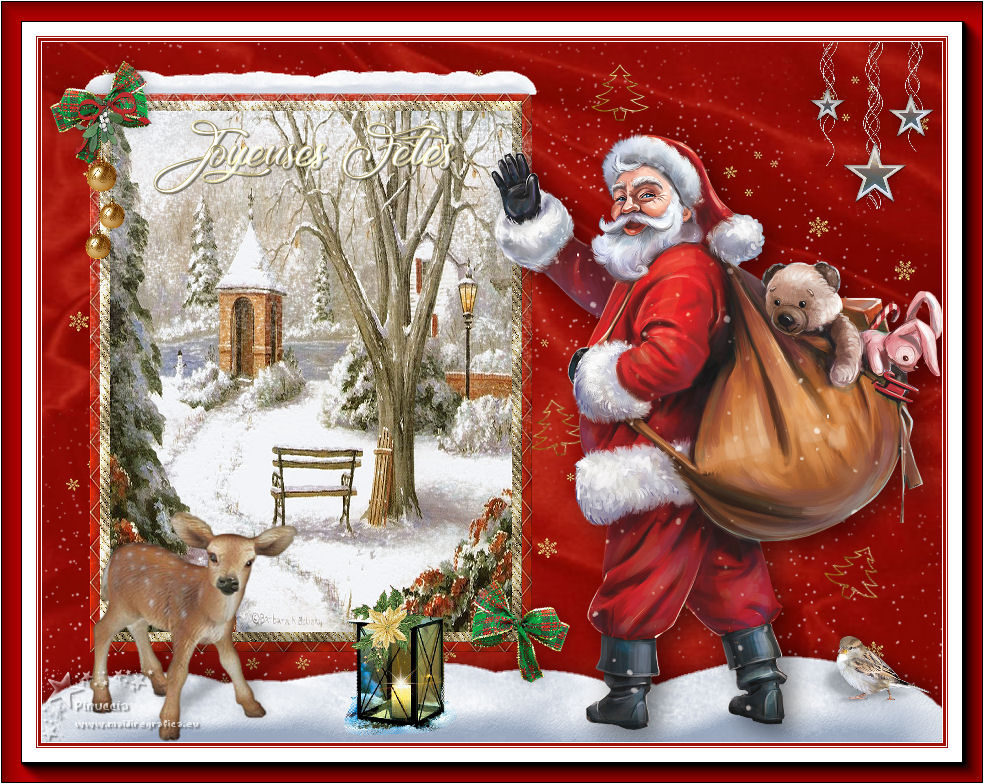
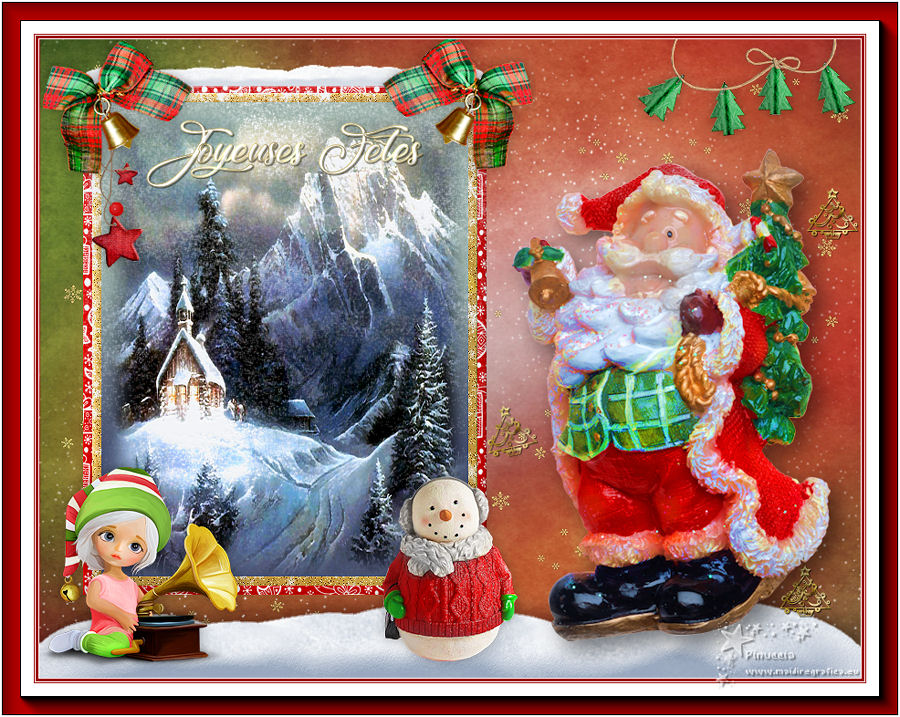
JOYEUSES FÊTES 2019
 english version
Thanks Carine for your invitation to translate

This tutorial was translated with PSPX and PSPX3, but it can also be made using other versions of PSP.
Since version PSP X4, Image>Mirror was replaced with Image>Flip Horizontal,
and Image>Flip with Image>Flip Vertical, there are some variables.
In versions X5 and X6, the functions have been improved by making available the Objects menu.
In the latest version X7 command Image>Mirror and Image>Flip returned, but with new differences.
See my schedule here
 italian translation here italian translation here
your versions here

Una pallina-souvenir per il vostro Albero di Natale
Une boule-souvenir pour votre Arbre de Noël
Material here
Thanks: for the tube Tatie and Tiram
(The links of the tubemakers here).
Plugins
consult, if necessary, my filter section here
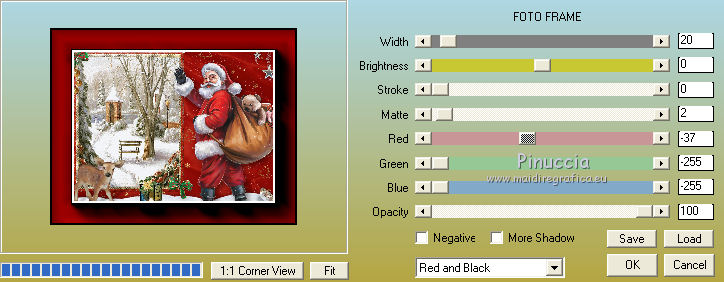
AAA Frames - Foto Frame here
Alien Skin Eye Candy 5 Nature - Snow Drift here

You can change Blend Modes according to your colors.
Open the font and minimize. You'll find it in the list of fonts available when you need it.
With the most recent o.s., this is no longer possible.
To use a font, you must copy it into the Fonts folder in Windows.
Copy the preset  in the folder of the plugins Alien Skin Eye Candy 5 Nature>Settings>Snow Drift. in the folder of the plugins Alien Skin Eye Candy 5 Nature>Settings>Snow Drift.
One or two clic on the file (it depends by your settings), automatically the preset will be copied in the right folder.
why one or two clic see here
Open the golden pattern in PSP and minimize it with the rest of the material.
Used colors (for the borders)
white #ffffff
red #9e0f09

1. Open a new transparent image 900 x 700 pixels.
2. Selections>Select All.
Open the image Fond P3 and go to Edit>Copy.
Go back to your work and go to Edit>Paste into Selection.
Selections>Select None.
3. Selection Tool 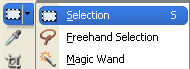
(no matter the type of selection, because with the custom selection your always get a rectangle)
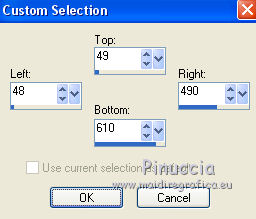
clic on the Custom Selection 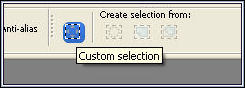
and set the following settings.
4. Layers>New Raster Layer, Raster 2.
Open the image Fond P1 and go to Edit>Copy.
Go back to your work and go to Edit>Paste into Selection.
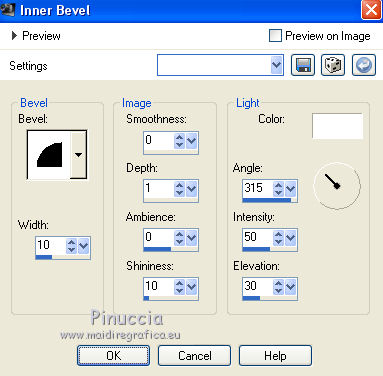
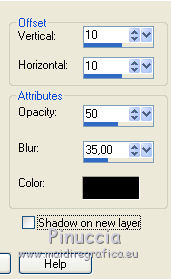
5. Effects>3D Effects>Inner Bevel.
6. Selections>Modify>Contract - 10 pixels.
Layers>New Raster Layer, Raster 3.
Open the image Noel Paper 9 and go to Edit>Copy.
Go back to your work and go to Edit>Paste into Selection.
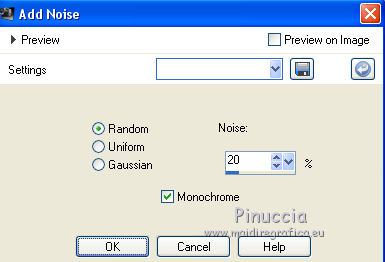
7. Adjust>Add/Remove Noise>Add Noise.
8. Effects>3D Effects>Inner Bevel, same settings.
9. Selections>Modify>Contract - 10 pixels.
Open the tube paysage hiver and go to Edit>Copy.
Go back to your work and go to Edit>Paste into Selection.
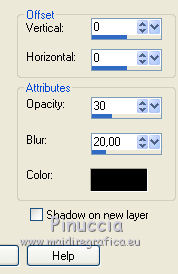
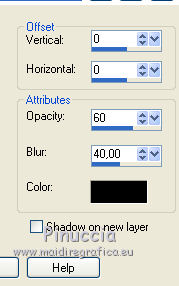
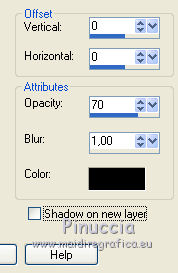
10. Effects>3D Effects>Drop Shadow, color black.
Selections>Select None.
11. Layers>Merge>Merge Down, Raster 2.
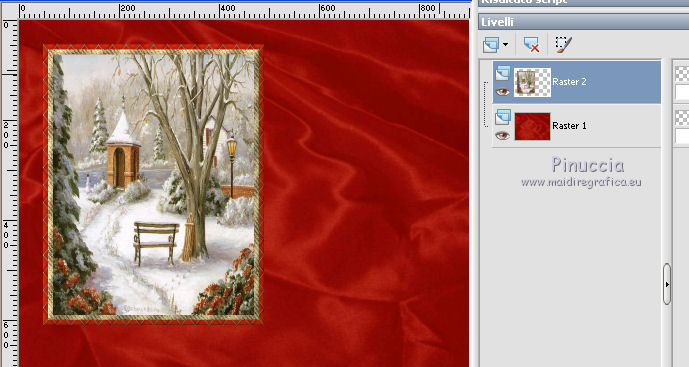
Stay on this layer.
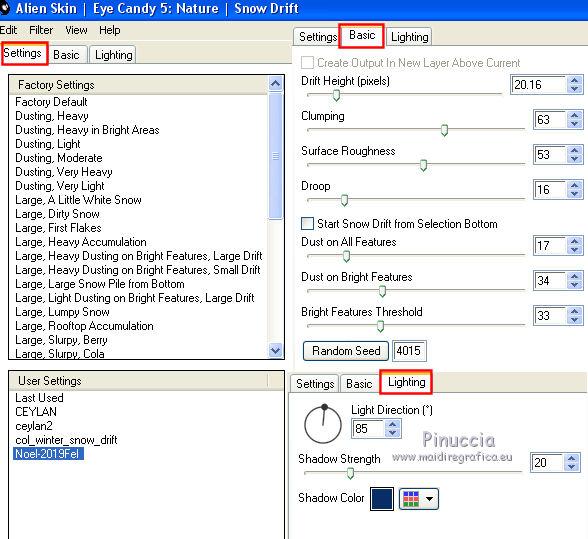
12. Effects>Plugins>Alien Skin Eye Candy 5 Nature
Select the preset Noel-2019Fel and ok.
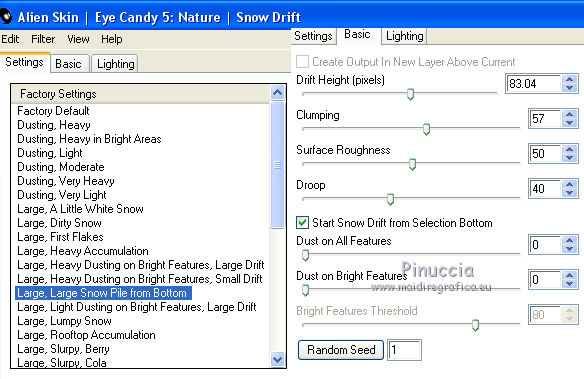
Here below the settings, in case of problems with the preset.
Adjust>Sharpness>Sharpen.
13. Activate the layer Raster 1.
Layers>New Raster Layer.
14. Effects>Plugins>Alien Skin Eye Candy 5 Nature - Snow Drift,
select the preset Large, Large Snow Pile from Bottom and ok.
15. Effects>3D Effects>Drop Shadow, color black.
16. Activate the top layer.
Open the tube of the ribbon noeudsnoeltiram10 and go to Edit>Copy.
Go back to your work and go to Edit>Paste as new layer.
Image>Resize, to 15%, resize all layers not checked.
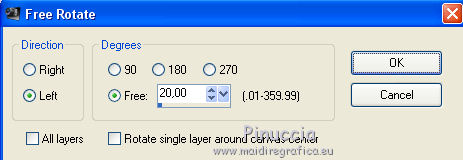
17. Image>Free Rotate - 20 degrees to left.
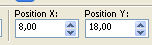
18. K key to activate your Pick Tool 
and set Position X: 8,00 and Position Y: 18,00.
Adjust>Sharpness>Sharpen.
19. Effects>3D Effects>Drop Shadow, color black.
20. Layers>Duplicate.
Image>Mirror.
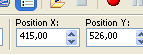
21. Pick Tool
and set Position X: 415,00 and Position Y: 526,00.
22. Open the tube boule noël and go to Edit>Copy.
Go back to your work and go to Edit>Paste as new layer.
Image>Resize, to 50%, resize all layers not checked.
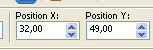
23. Pick Tool
and set Position X: 32,00 and Position Y: 49,00.
24. Effects>3D Effects>Drop Shadow, color black.
25. Activate the layer Raster 1.
Open the tube fond neige and go to Edit>Copy.
Go back to your work and go to Edit>Paste as new layer.
Don't move it.
26. Open the tube Déco Etoile and go to Edit>Copy.
Go back to your work and go to Edit>Paste as new layer.
Don't move it.
27. Activate the top layer.
28. Activate your Text Tool  , font Holiday Pi BT. , font Holiday Pi BT.
Adjust the size according to your lettre and your PSP version.
For me (PSPX and PSP12) 72 pixels.

29. Set your foreground color to Pattern.
Under the Open Images Category select the golden pattern Gold110,
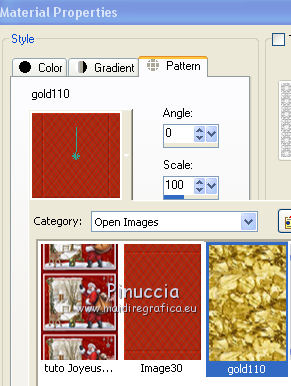
Close your background color.
30. Write the lettre i (or the letter you prefer).
Layers>Convert to raster layer.
31. Effects>3D Effects>Drop Shadow, color black.
32. Layers>Duplicate - 2 times
and place  the images at your choice, or see my example. the images at your choice, or see my example.
33. Open the tube by Tatie Père Noel and go to Edit>Copy.
Go back to your work and go to Edit>Paste as new layer.
Image>Mirror.
Image>Resize, to 65%, resize all layers not checked.
Move the tube to the right side, see my example.
34. Effects>3D Effects>Drop Shadow, color black.
35. Open the tube Accent Star White di @nn.
Copy the selected stars.
Go back to your work and go to Edit>Paste as new layer.
Image>Resize, to 35%, resize all layers not checked.
Move the tube at the upper right.
36. Effects>3D Effects>Drop Shadow, color black.
37. Open Elément Faon (23) and go to Edit>Copy.
Go back to your work and go to Edit>Paste as new layer.
Image>Resize, to 70%, resize all layers not checked.
Move the tube at the bottom left, see my example.
38. Open the tube Lampe Noel Gif and go to Edit>Copy.
Go back to your work and go to Edit>Paste as new layer.
Image>Resize, to 70%, resize all layers not checked.
Move the tube down, see my example.
39. Open the tube Oiseau and go to Edit>Copy.
Go back to your work and go to Edit>Paste as new layer.
Image>Resize, to 40%, resize all layers not checked.
Move the tube at the bottom right.
40. Effects>3D Effects>Drop Shadow, color black.
41. Open the text and go to Edit>Copy.
Go back to your work and go to Edit>Paste as new layer.
Move the text at the top, in the frame.
42. Image>Add borders, 1 pixel, symmetric, color white.
Image>Add borders, 3 pixels, symmetric, red background color.
Image>Add borders, 1 pixel, symmetric, color white.
Image>Add borders, 1 pixel, symmetric, red background color.
Image>Add borders, 35 pixels, symmetric, color white.
43. Effects>Plugins>AAA Frames - Foto Frame.
44. Image>Add borders, 1 pixel, symmetric, color white.
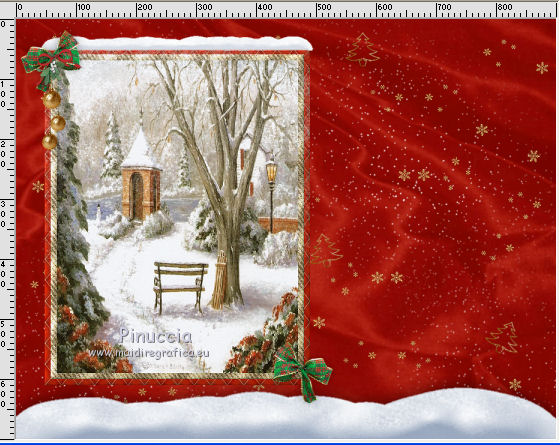
Sign your work.
Image>Resize, 900 pixels width, resize all layer checked.
Save as jpg.
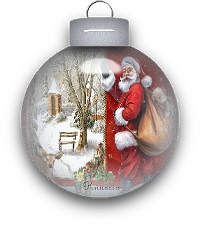
Version with tube by Sonia (the landscape) and elements scrap.

If you have problems or doubts, or you find a not worked link, or only for tell me that you enjoyed this tutorial, write to me.
2 December 2019
|