VENISE
 english version
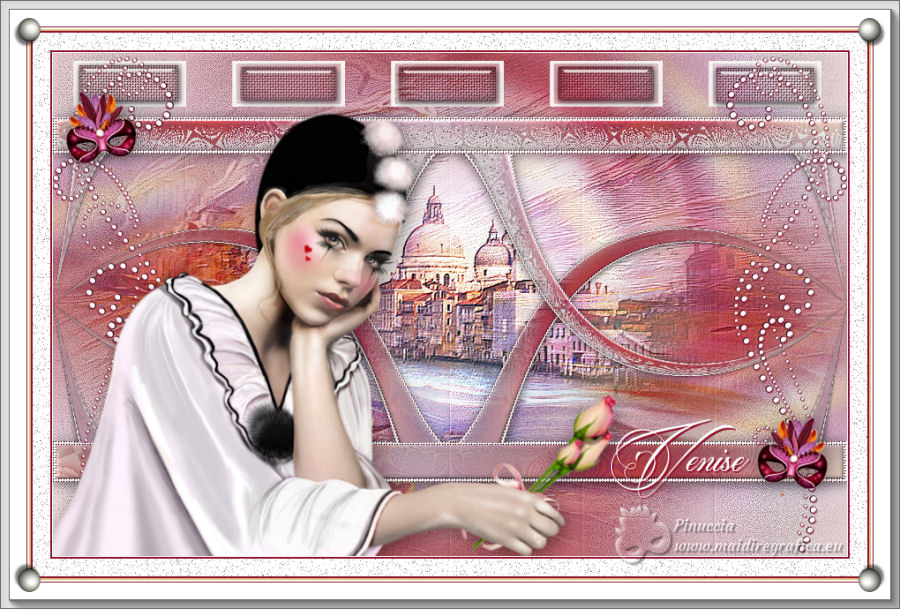
Thanks Carine for your invitation to translate

Clic and move the brush to follow the tutorial.

To print


|
This tutorial was translated with PSPX and PSPX3, but it can also be made using other versions of PSP.
Since version PSP X4, Image>Mirror was replaced with Image>Flip Horizontal,
and Image>Flip with Image>Flip Vertical, there are some variables.
In versions X5 and X6, the functions have been improved by making available the Objects menu.
In the latest version X7 command Image>Mirror and Image>Flip returned, but with new differences.
See my schedule here
 italian translation here italian translation here
Material here
Thanks for the tubes A PSP Devil, Nikita and Suizabella.
(The links of the tubemakers here).
Plugins
consult, if necessary, my filter section here
Krusty FX Vol.I - Transparency Blender qui
the effect in the material
&<Bkg Designer sf10III> - Radial Split06 (to import in Unlimited) qui
the effect in the material
Flaming Pear - Flexify 2 qui
AAA Frames - Foto Frame qui
Alien Skin Eye Candy 5 Impact - Glass qui
FM Tile Tools - Blend Emboss qui
Filters Unlimited 2.0 qui
Filters Krusty can be used alone or imported into Filters Unlimited.
(How do, you see here)
If a plugin supplied appears with this icon  it must necessarily be imported into Unlimited it must necessarily be imported into Unlimited

You can change Blend Modes according to your colors.
Copy the preset  in the folder of the plugin Alien Skin Eye Candy 5 Impact>Settings>Glass. in the folder of the plugin Alien Skin Eye Candy 5 Impact>Settings>Glass.
One or two clic on the file (it depends by your settings), automatically the preset will be copied in the right folder.
why one or two clic see here

Copy the gradient in the Gradients Folder.
Copy the selections in the Selections Folder.
1. Open a new transparent image 900 x 570 pixels.
Set your foreground color to Gradient, and select the gradient geisha 10, style Sunburst.
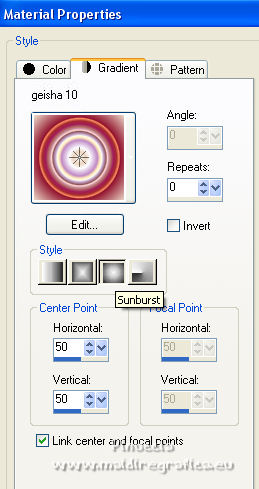
Flood Fill  the transparent image with your Gradient. the transparent image with your Gradient.
2. Effects>Image Effects>Seamless Tiling, default settings.

3. Adjust>Blur>Radial Blur.
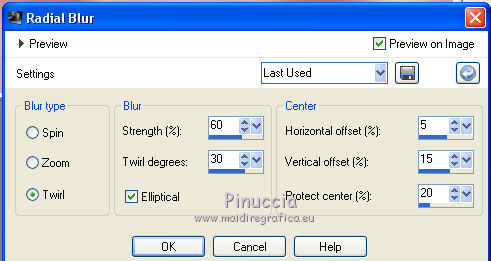
4. Layers>Duplicate.
Effects>Plugins>Filters Unlimited 2.0 - Krusty FX Vol.I1 - Transparency Blender
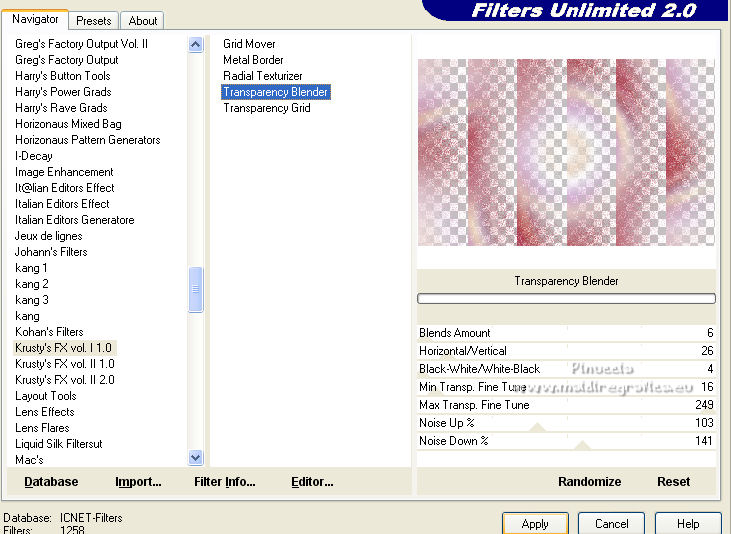
Adjust>Sharpness>Sharpen.
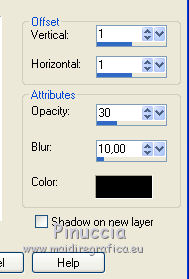
5. Effects>3D Effects>Drop Shadow, color black.
6. Layers>New Raster Layer, Raster 2.
Selections>Select All.
Open the tube SuizaBella_Ref_AG-001397 and go to Edit>Copy.
Go back to your work and go to Edit>Paste into Selection.
Selections>Select None.
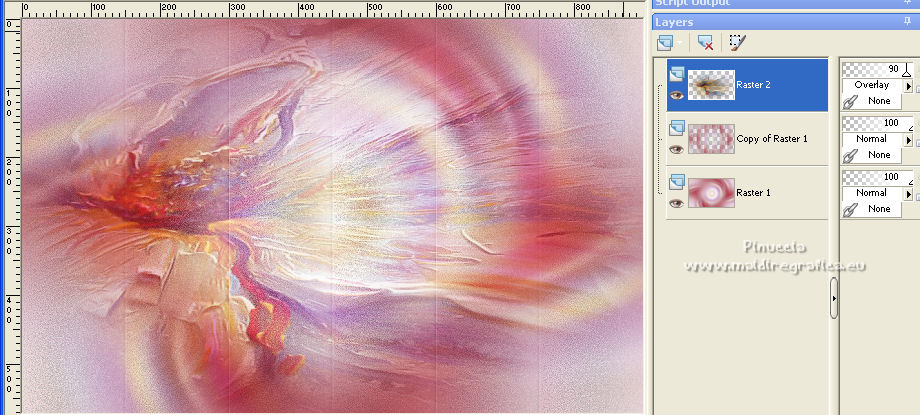
6. Change the Blend Mode of this layer to Overlay and reduce the opacity to 90%.
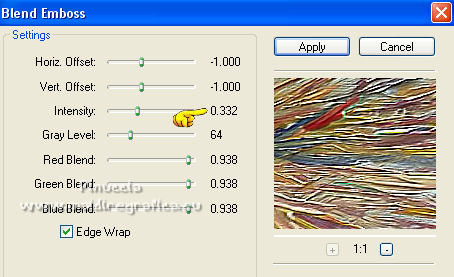
7. Effects>Plugins>FM Tile Tools - Blend Emboss.
8. Layers>Merge>Merge visible.
9. Layers>New Raster Layer.
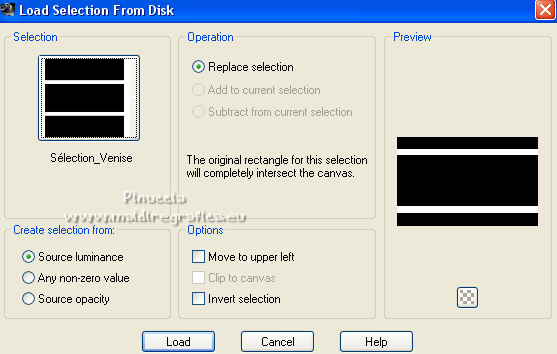
Selections>Load/Save Selection>Load Selection from Disk.
Look for and load the selection Sélection_venise.
10. Set your background color to white #ffffff.
Flood Fill  the selection with color white. the selection with color white.
11. Effects>Texture Effects>Weave
weave color #92142e - gap color: black.
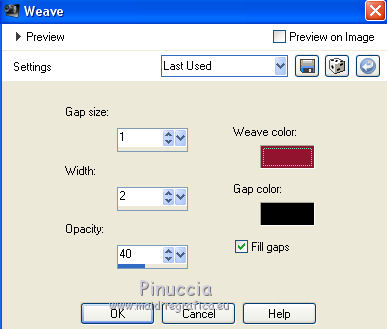
12. Selections>Modify>Contract - 4 pixels.
Flood Fill  the selection with your Gradient. the selection with your Gradient.
13. Adjust>Blur>Gaussian Blur - radius 20.

14. Effects>Plugins>Filters Unlimited 2.0 - &<Bkg Designer sf10III> - Radial Split 06.
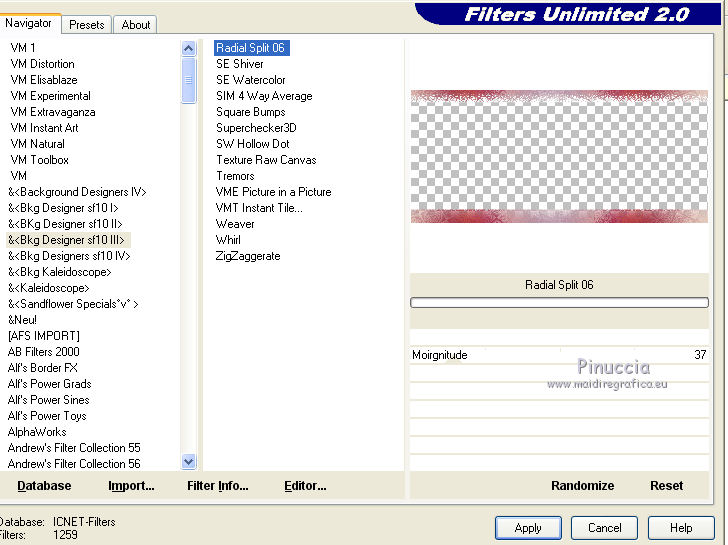
15. Effects>3D Effects>Inner Bevel.
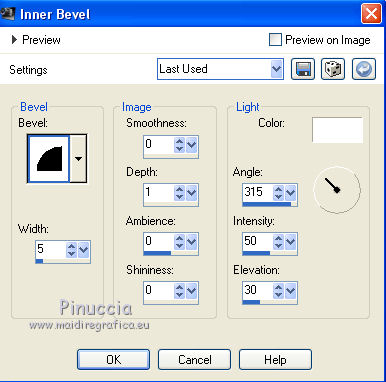
Selections>Select None.
16. Effects>3D Effects>Drop Shadow, color black.
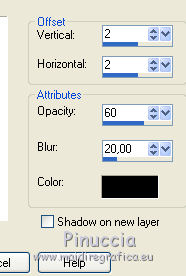
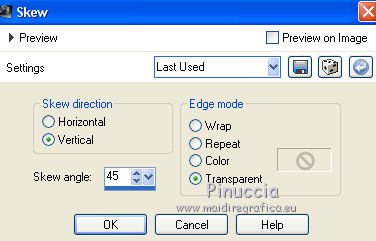
17. Layers>Duplicate.
Effects>Geometric Effects>Skew.
18. Layers>Duplicate.
Image>Mirror.
Layers>Merge>Merge Down.
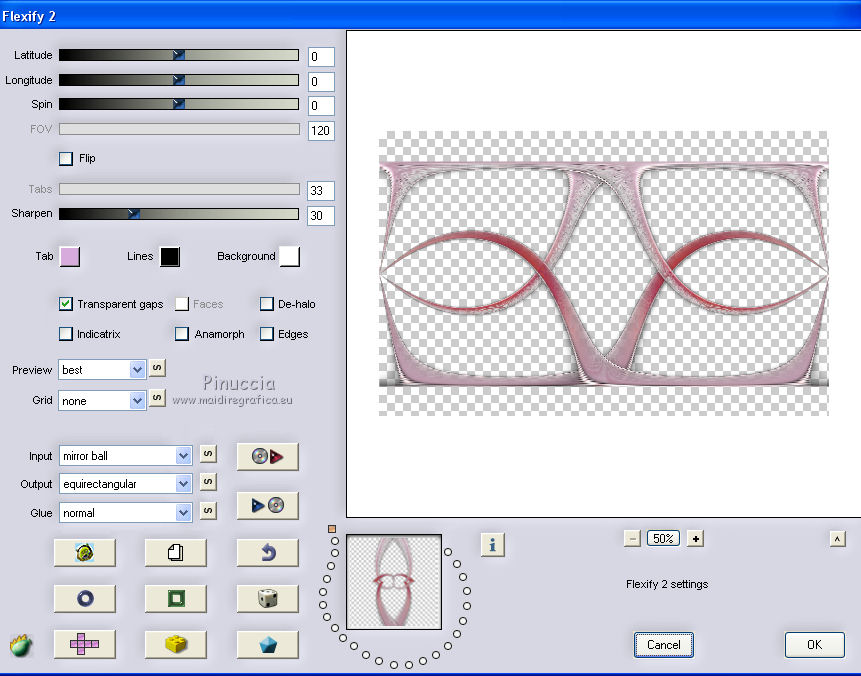
19. Effects>Plugins>Flaming pear - Flexify 2.
20. Selection Tool 
(no matter the type of selection, because with the custom selection your always get a rectangle)
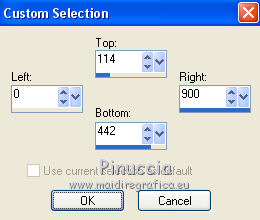
clic on the Custom Selection 
and set the following settings.
21. Selections>Invert.
Press CANC on the keyboard 
22. Again Selections>Invert.
Open the landscape tube by Nikita, erase the watermark, and go to Edit>Copy.
Go back to your work and go to Edit>Paste as new layer.
Don't move it.
23. Selections>Invert.
Press CANC on the keyboard.
Selections>Select None.
24. Layers>Arrange>Move Down.
Change the Blend Mode of this layer to Hard Light (or according to your landscape).
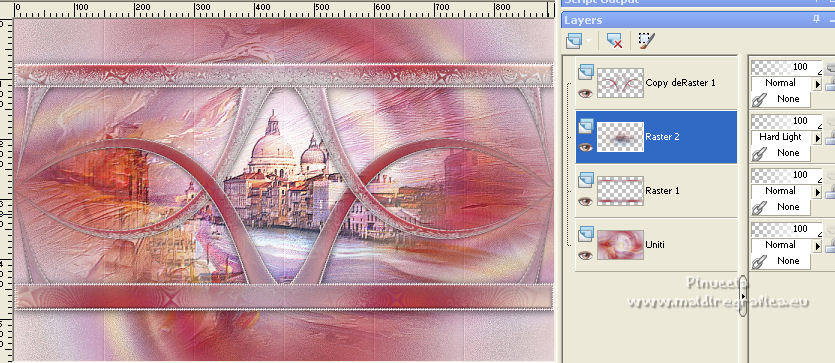
25. Effects>Plugins>FM Tiles Tools - Blend Emboss, same settings.

26. Open déco 1 and go to Edit>Copy.
Go back to your work and go to Edit>Paste as new layer.
26. K key to activate your Pick Tool 
and set Position X: 22,00 and Position Y: 8,00.

27. Activate the bottom layer, Merged.
Selections>Load/Save Selection>Load Selection from Disk.
Look for and load the selection Sélection_2.
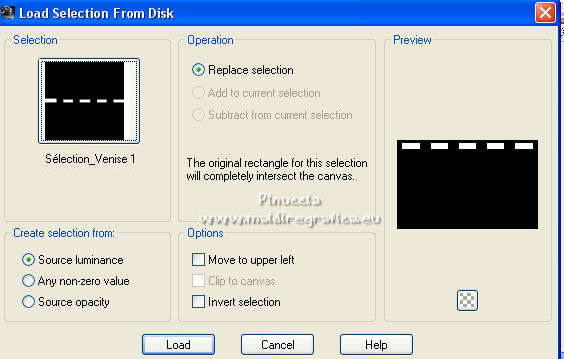
Selections>Promote Selection to layer.
Layers>Arrange>Bring to Top.
28. Effects>Texture Effects>Weave, same settings.

29. Effects>Plugins>Alien Skin Eye Candy 5 Impact - Glass.
Select the preset Venise and ok.
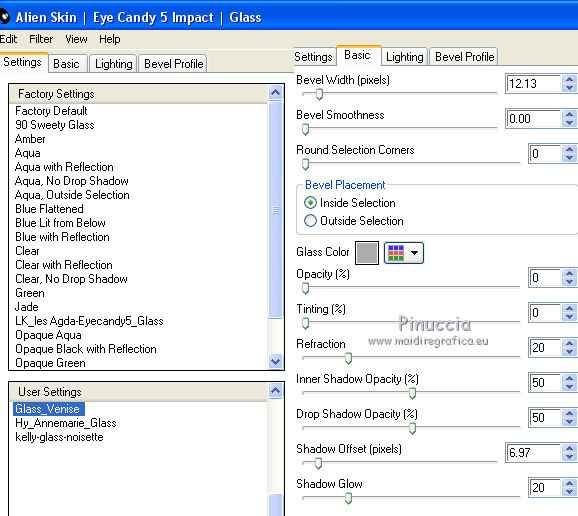
Selections>Select None.
30. Effects>3D Effects>Drop Shadow, color black.
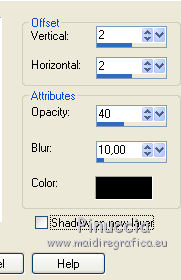
31. Open déco 2 and go to Edit>Copy.
Go back to your work and go to Edit>Paste as new layer.
Objects>Align>Right
or with your Pick Tool 
and set Position X: 763,00 (keep Position Y: 4,00).

32. Effects>3D Effects>Drop Shadow, color #92142e.
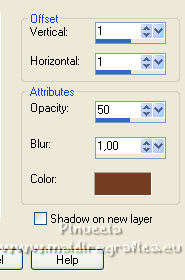
33. Layers>Duplicate.
Image>Mirror.
34. Open the tube Pierrot Crayonmaniac - tubed by A SP Devil and go to Edit>Copy.
Go back to your work and go to Edit>Paste as new layer.
Image>Resize, to 94%, resize all layers not checked.
Move  the tube to the left side. the tube to the left side.
35. Effects>3D Effects>Drop Shadow, color black.

36. Open the tube Masque and go to Edit>Copy.
Go back to your work and go to Edit>Paste as new layer.
37. Image>Free Rotate - 10 degrees to left.
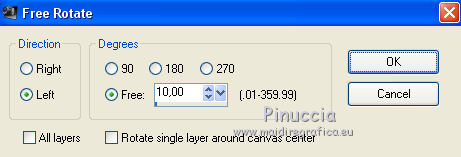
Adjust>Sharpness>Sharpen.
38. K key to activate your Pick Tool 
and set Position X: 13,00 and Position Y: 43,00.

39. Layers>Duplicate.
Image>Mirror.
Set Position X: 798,00 and Position Y: 412,00.

40. Layers>Merge>Merge Down.
41. Effects>3D Effects>Drop Shadow, color black.
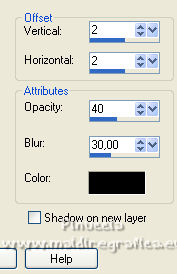
42. Layers>Merge>Merge visible.
(The Frame in the material is for those who want to skip the step with the borders:
copy/paste into selection your work.
Selections>Select None).
43. Borders
Set your foreground color to #92142e
and your background color to #ddc17f.
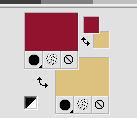
Image>Add borders, 1 pixel, symmetric, color white.
Image>Add borders, 2 pixels, symmetric, foreground color #92142e.
Image>Add borders, 20 pixels, symmetric, color white.
Image>Add borders, 2 pixels, symmetric, foreground color #92142e.
Image>Add borders, 2 pixels, symmetric, background color #ddc17f.
Image>Add borders, 2 pixels, symmetric, color white.
Image>Add borders, 1 pixel, symmetric, foreground color #92142e.
Image>Add borders, 30 pixels, symmetric, color white.
44. Activate your Magic Wand Tool 
and click in the 20 pixels border to select it.
Adjust>Add/Remove Noise>Add Noise.
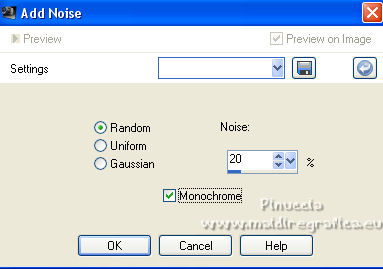
Selections>Select None.
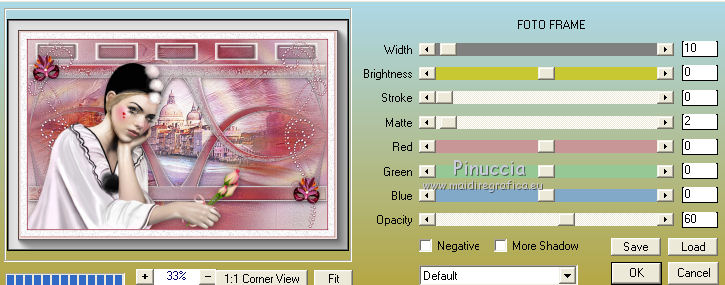
45. Effects>Plugins>AAA Frames - Foto Frame.
46. Open the text Venise and go to Edit>Copy.
Go back to your work and go to Edit>Paste as new layer.
Move  the tube at the bottom right. the tube at the bottom right.
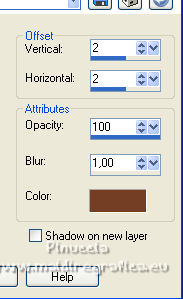
47. Effects>3D Effects>Drop Shadow, color #92142e
48. Open the corner - coin - and go to Edit>Copy.
Go back to your work and go to Edit>Paste as new layer.
Is is in its place.
49. Layers>Merge>Merge All.
50. Sign your work.
Image>Resize, 900 pixels width, resize all layers checked.
Save as jpg.
For the tube of this version thanks Luz Cristina; the misted is mine
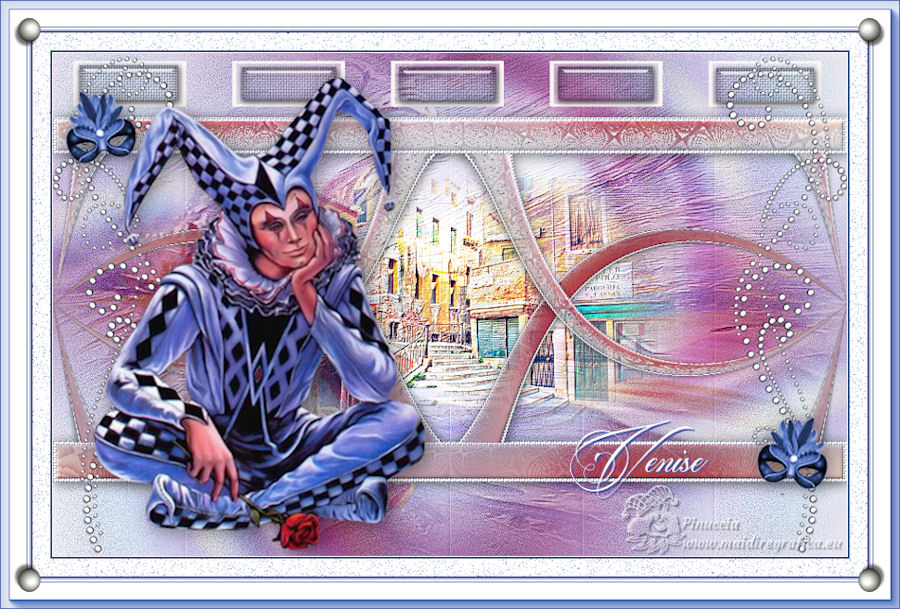

Your versions. Thanks
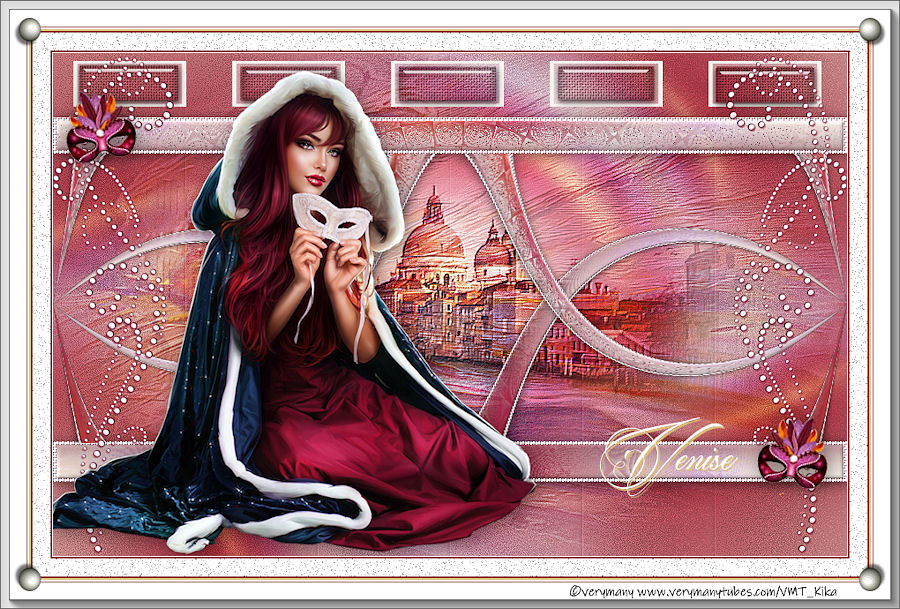
Kika
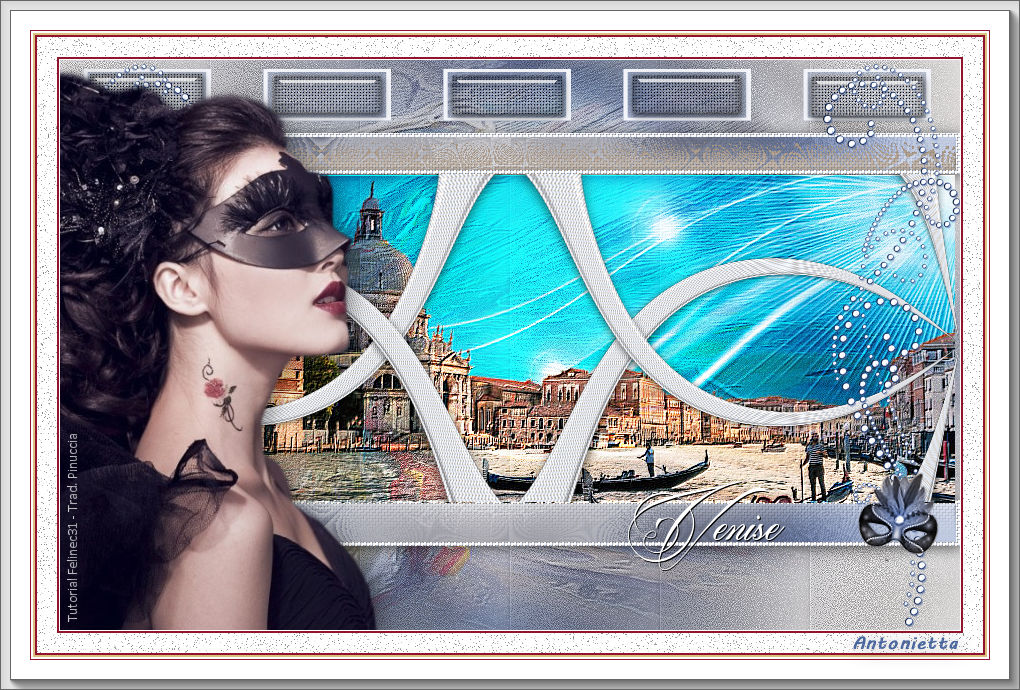
Antonietta
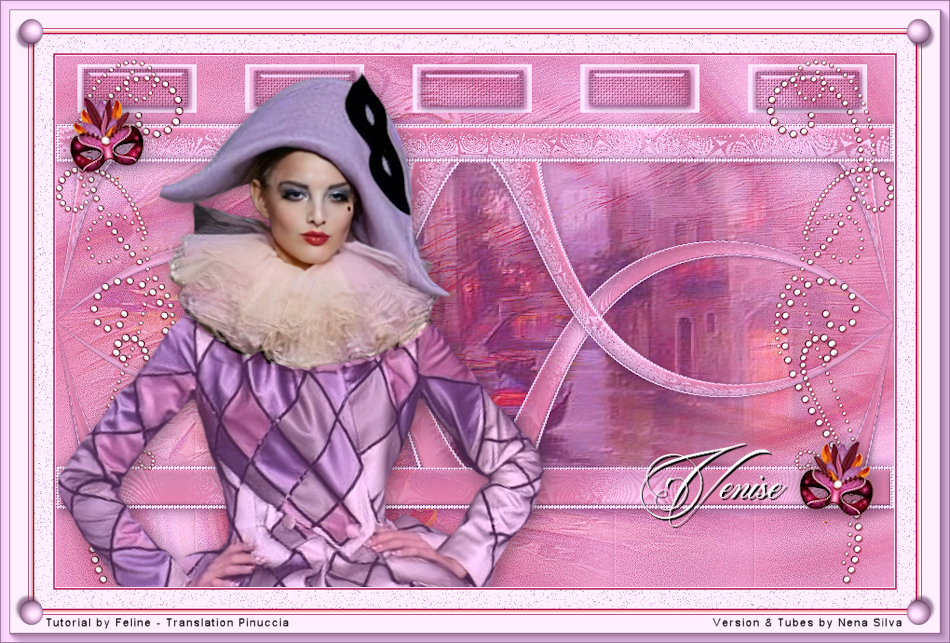
Nena Silva
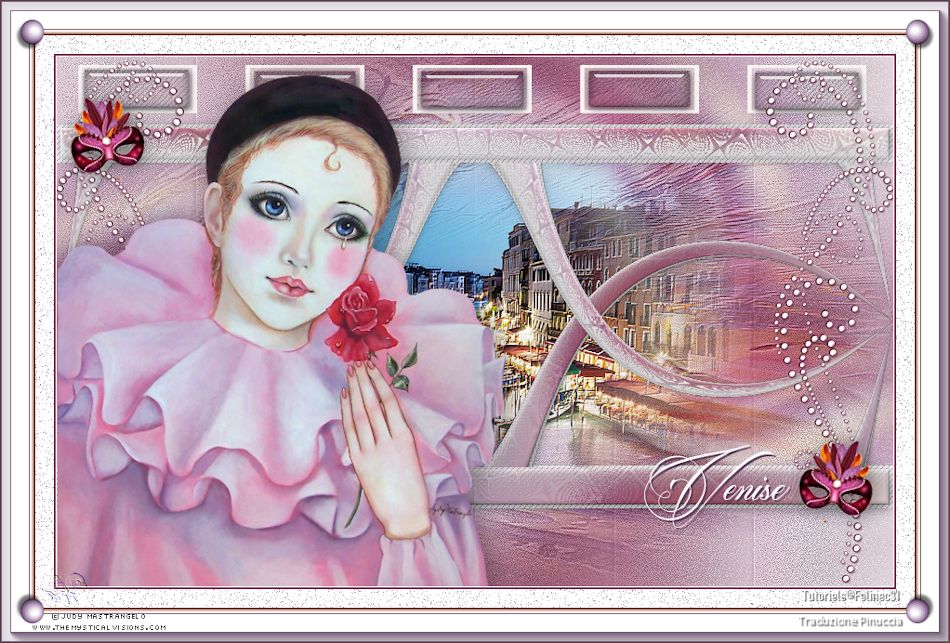
Pia

If you have problems or doubts, or you find a not worked link, or only for tell me that you enjoyed this tutorial, write to me.
10 March 2022

|

