XHIAN
 english version

Thanks Carine for your invitation to translate

Clic and move the brush to follow the tutorial.

To print


|
This tutorial was translated with PSPX and PSPX3, but it can also be made using other versions of PSP.
Since version PSP X4, Image>Mirror was replaced with Image>Flip Horizontal,
and Image>Flip with Image>Flip Vertical, there are some variables.
In versions X5 and X6, the functions have been improved by making available the Objects menu.
In the latest version X7 command Image>Mirror and Image>Flip returned, but with new differences.
See my schedule here
 italian translation here italian translation here
Material here
Thanks for the tubes Laurette and CibiBijoux and for the mask Narah.
(The links of the tubemakers here).
Plugins
consult, if necessary, my filter section here
Mehdi - Wavy Lab 1.1 here
Plugin Galaxy - Instant Mirror here
Flaming Pear - Flexify 2 here
AAA Frames - Foto Frame here
Alien Skin Eye Candy 5 Impact - Glass here
Graphics Plus - hereck Tile II here
Filters Unlimited 2.0 here
Filters Graphics Plus can be used alone or imported into Filters Unlimited.
(How do, you see here)
If a plugin supplied appears with this icon  it must necessarily be imported into Unlimited it must necessarily be imported into Unlimited

You can change Blend Modes according to your colors.

Open the mask in PSP and minimize it with the rest of the material.
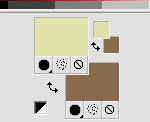
1. Set your foreground color to #e0e0aa,
and your background color to #866c6b.
1. Open a new transparent image 900 x 570 pixels.
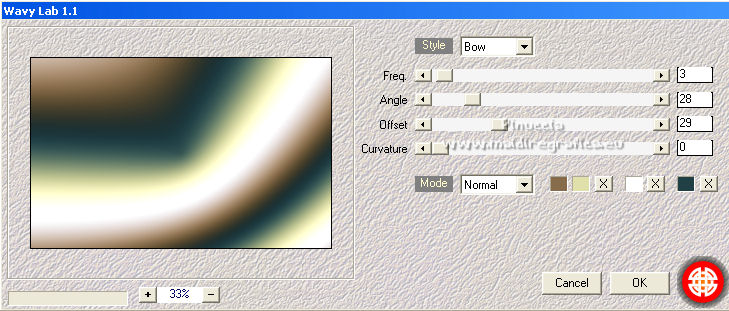
Effects>Plugins>Mehdi - Wavy Lab 1.1.
This filters creates gradients with the colors of your Materials palette.
The first is your background color, the second is your foreground color.
Change the last two colors created by the filtre:
the third color with color white #ffffff and the forth color with #214045.
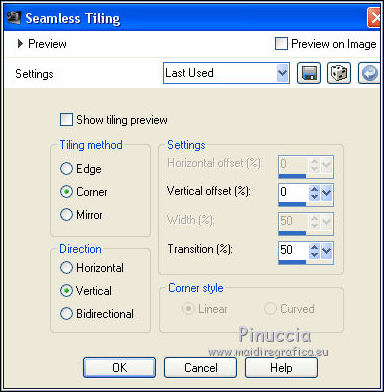
3. Effects>Image Effects>Seamless Tiling.
4. Layers>Duplicate.
Image>Mirror.
Reduce the opacity of this layer to 50%.
Layers>Merge>Merge Down.
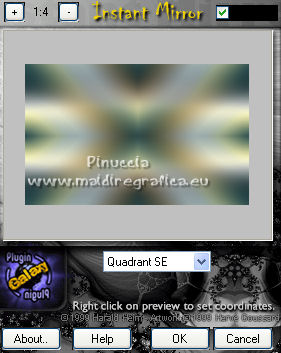
5. Effects>Plugins>Plugin Galaxy - Instant Mirror.
6. Layers>Duplicate.
Effects>Plugins>Flaming Pear - Flexify 2.
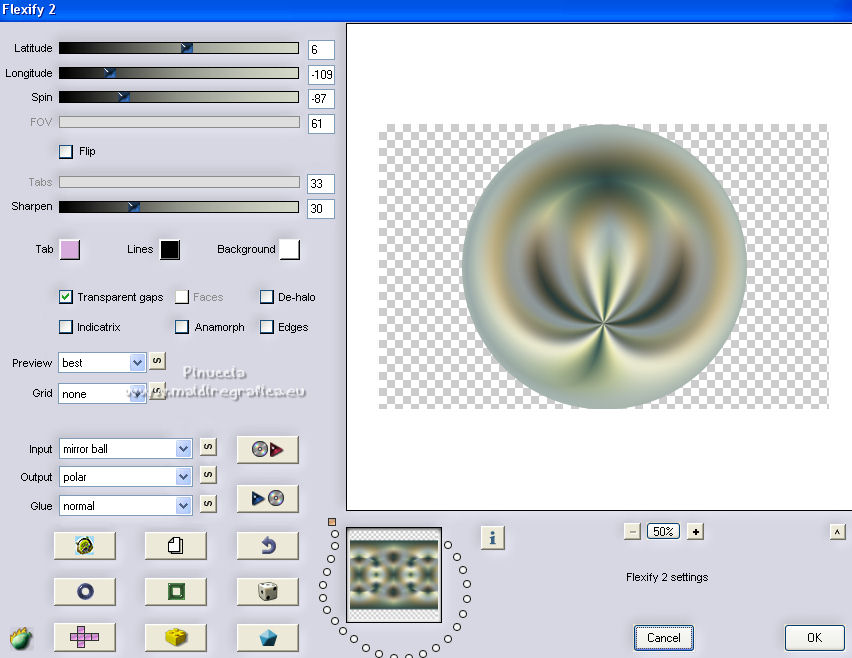
7. Effects>Distortion Effects>Polar Coordinates

8. Layers>Duplicate.
Image>Flip.
Layers>Merge>Merge Down.
9. Effects>Reflection Effects>Kaleidoscope.
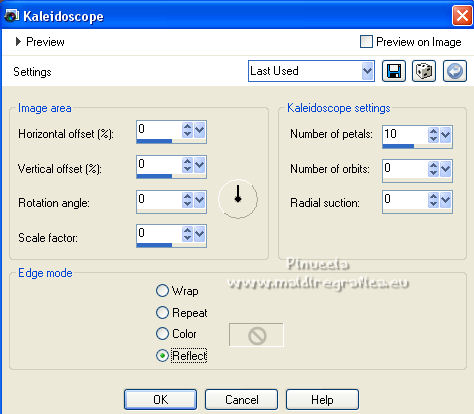
10. Effects>Image Effects>Seamless Tiling, default settings.

Change the Blend Mode of this layer to Soft Light.
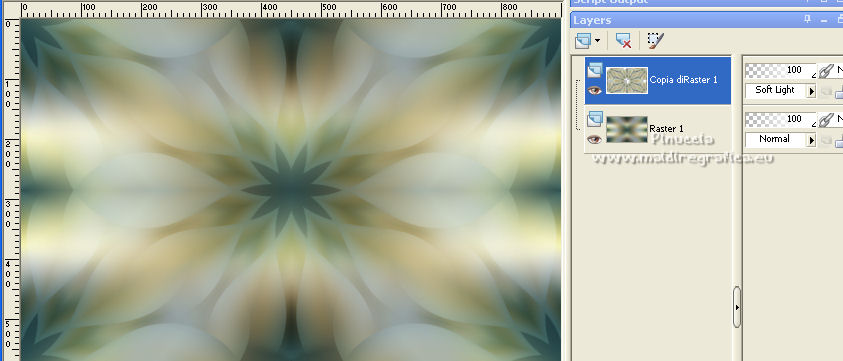
11. Layers>Merge>Merge All.
12. Effects>Plugins>AAA Frames - Foto Frame.
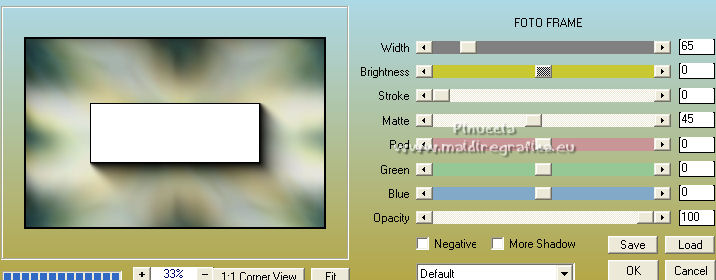
13. Selections>Select All.
Selections>Modify>Contract - 65 pixels.
Selections>Invert.
14. Adjust>Add/Remove Noise>Add Noise.

Selections>Select None.
15. Open the tube Déco 1 and go to Edit>Copy.
Go back to your work and go to Edit>Paste as new layer.
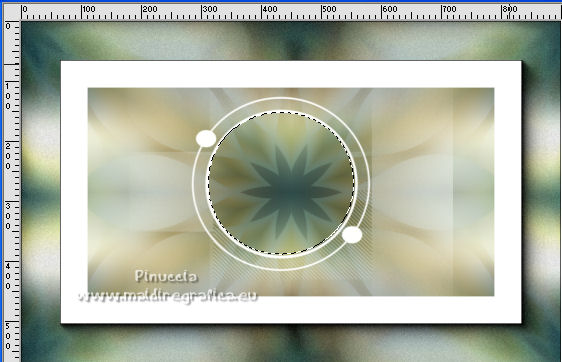
16. Activate your Magic Wand Tool 

and click in the circle to select it.
17. Open the landscape and go to Edit>Copy.
Go back to your work and go to Edit>Paste as new layer.
Image>Resize, to 65%, resize all layers not checked.
Place  correctly the tube. correctly the tube.
Selections>Invert.
Press CANC on the keyboard 
Again Selections Invert.
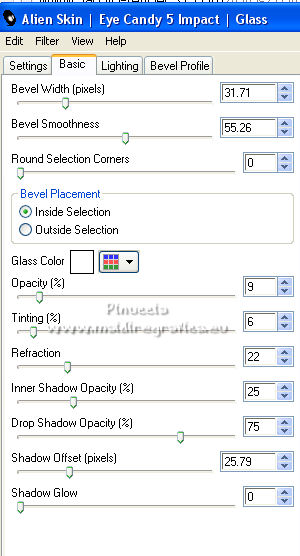
18. Effects>Plugins>Alien Skin Eye Candy 5 Impact - Glass.
Select the preset Clear with these settings.
Selections>Select None.
19. Layers>Arrange>Move Down.
Activate the top layer.
Layers>Merge>Merge Down.
20. Image>Resize, to 80%, resize all layers not checked.
K key to activate your Pick Tool 
and set Position X: 71,00 and Position Y: 134,00.

20. Layers>Duplicate.
Set Position X: 387,00 and keep Position Y: 134,00.

M key to deselect the tool.
21. Activate your bottom layer.
Layers>New Raster Layer.
Set your foreground color to white.
Flood Fill  the layer with color white. the layer with color white.
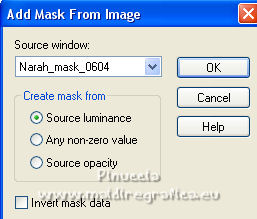
22. Layers>New Mask layer>From image
Open the menu under the source window and you'll see all the files open.
Select the mask Narah_mask_0604.
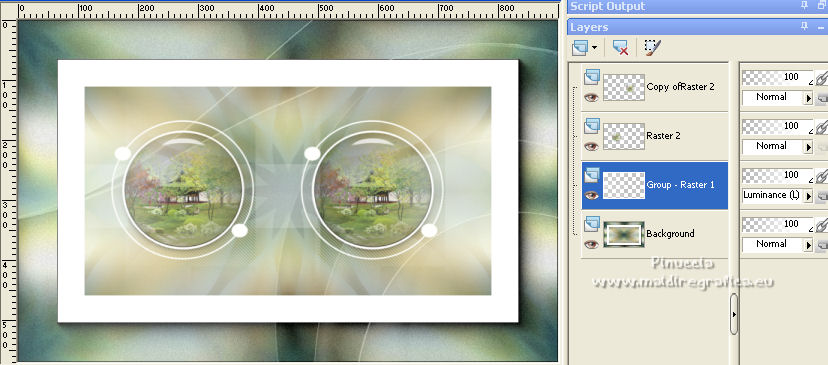
Layers>Merge>Merge Group.
Change the Blend Mode of this layer to Luminance (legacy).
23. Open the text and go to Edit>Copy.
Go back to your work and go to Edit>Paste as new layer.
K key to activate your Pick Tool 
and set Position X: 678,00 and Position Y: 120,00.

M key to deselect the tool.
24. Layers>Merge>Merge visible.
25. Selections>Select All.
Image>Add borders, symmetric not checked, color white.
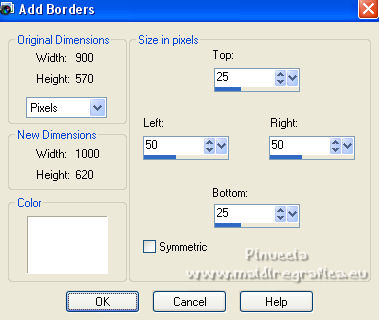
26. Effects>Image Effects>Seamless Tiling, default settings.

27. Selections>Invert.
Adjust>Blur>Gaussian Blur - radius 30.

28. Effects>Plugins>Graphics Plus - Quick Tile II.

Selections>Select None.
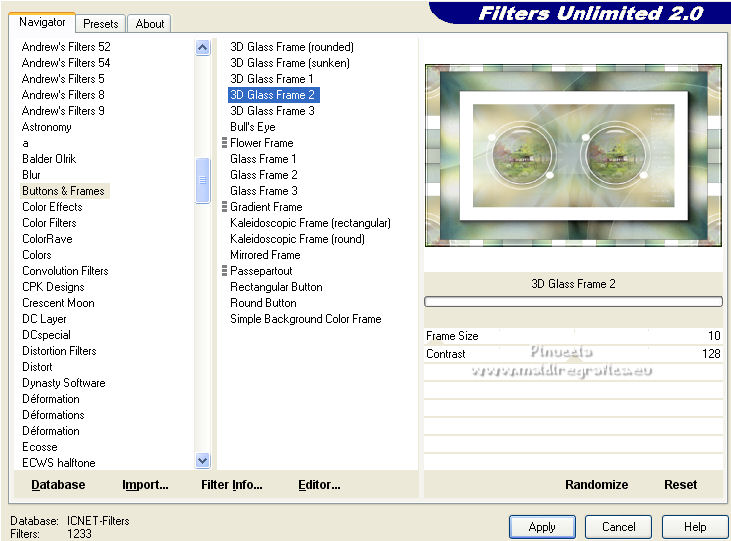
29. Effects>Plugins>Filters Unlimited 2.0 - Buttons &Frames - 3D Glass Frame 2.
30. Open the tube by Laurette, erase the watermark and go to Edit>Copy.
Go back to your work and go to Edit>Paste as new layer.
Image>Resize, to 75%, resize all layers not checked.
Place  correctly the tube. correctly the tube.
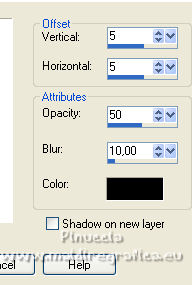
31. Effects>3D Effects>Drop Shadow, color black.

32. Open the flower tube "fleur", and go to Edit>Copy.
Go back to your work and go to Edit>Paste as new layer.
Image>Resize, to 45%, resize all layers not checked.
Move  the tube at the bottom right. the tube at the bottom right.
33. Effects>3D Effects>Drop Shadow, color black.
34. Open the tube Titre Xhian and go to Edit>Copy.
Go back to your work and go to Edit>Paste as new layer.
35. K key to activate your Pick Tool 
and set Position X: 664,00 and Position Y: 67,00.

36. Image>Add borders, 1 pixel, symmetric, color 214045.
37. Sign your work on a new layer.
Image>Resize, 900 pixels width, resize all layers checked.
Save as jpg.
For the tubes of this version thanks iPatries; the misted is mine
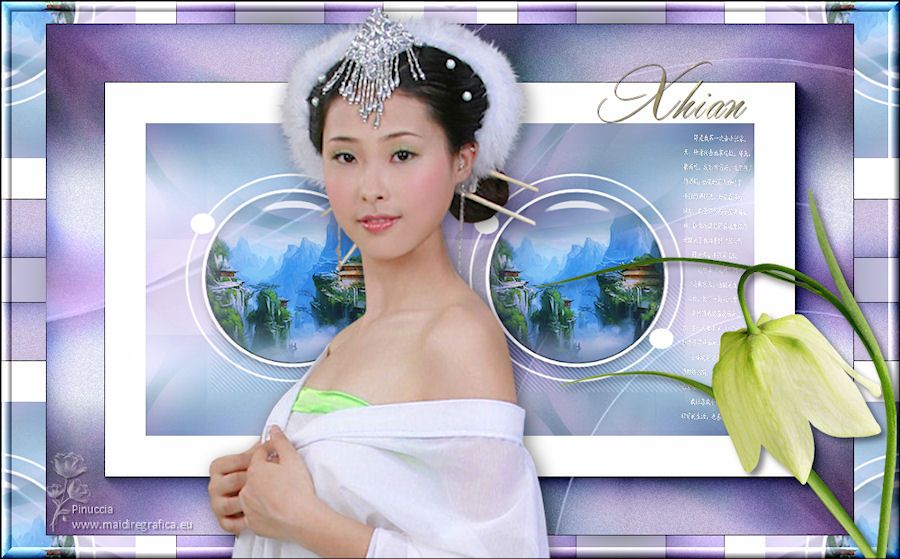

Your versions. Thanks

Mony
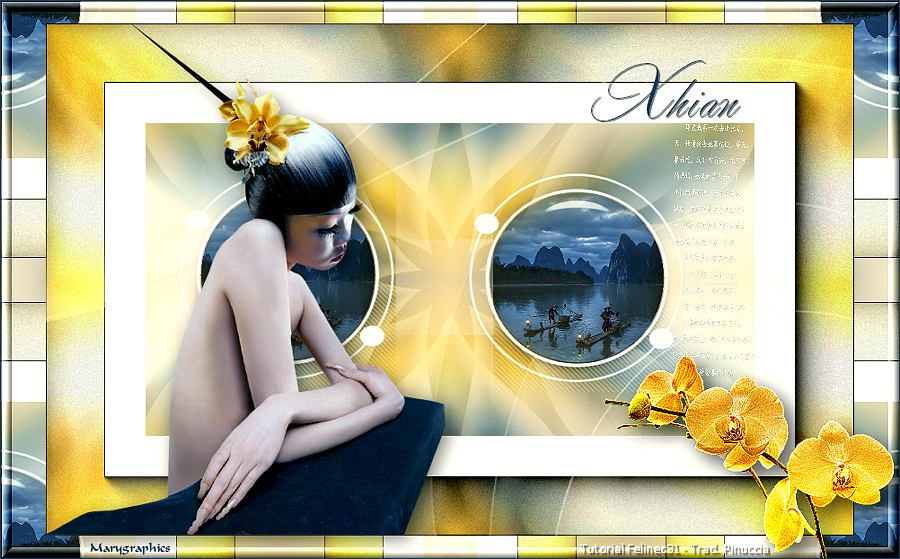
Marygraphics
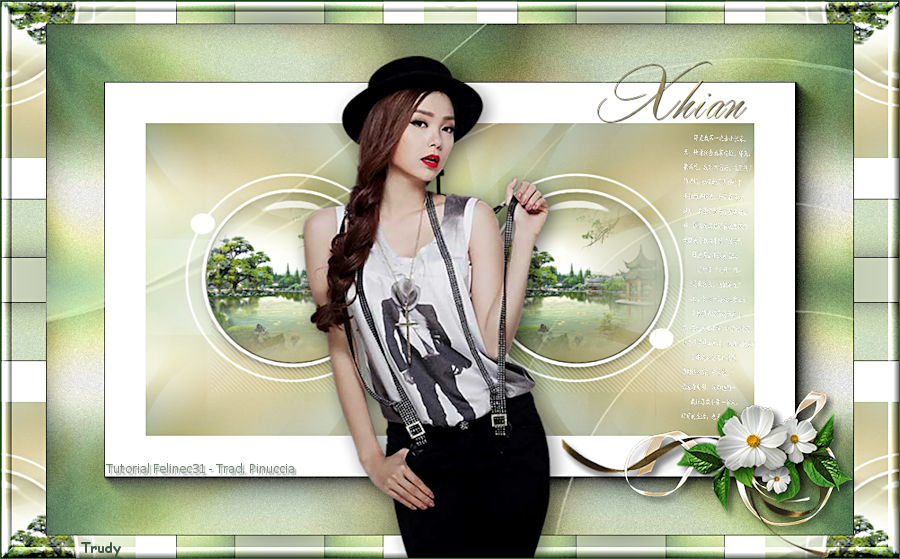
Trudy

If you have problems or doubts, or you find a not worked link, or only for tell me that you enjoyed this tutorial, write to me.
10 February 2022

|

