YOU DECORATE MY LIFE
 english version
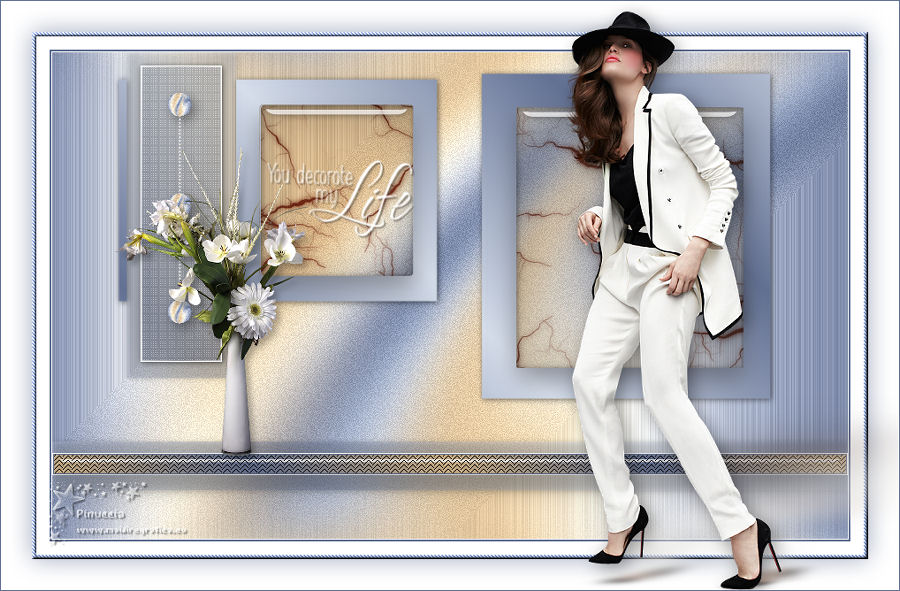
Thanks Carine for your invitation to translate

This tutorial was written with PSPX7 and translated with PSPX and PSPX3, but it can also be made using other versions of PSP.
Since version PSP X4, Image>Mirror was replaced with Image>Flip Horizontal,
and Image>Flip with Image>Flip Vertical, there are some variables.
In versions X5 and X6, the functions have been improved by making available the Objects menu.
In the latest version X7 command Image>Mirror and Image>Flip returned, but with new differences.
See my schedule here
italian translation here
Material here
Thanks: for the tubes Tocha et Linda and for the mask Franiemargot
(The links of the tubemakers here).
Plugins
consult, if necessary, my filter section here
Filters Unlimited 2.0 here
Alien Skin Eye Candy 5 Impact - Perspective Shadow here
Alien Skin Eye Candy 5 Texture - Marble here
Mehdi - Wavy Lab 1.1 here
AP Innovations - Lines SilverLining here
Penta.com - Jeans, Dot and cross here
Filters Penta.com can be used alone or imported into Filters Unlimited.
(How do, you see here)
If a plugin supplied appears with this icon  it must necessarily be imported into Unlimited it must necessarily be imported into Unlimited

You can change Blend Modes according to your colors.
In the newest versions of PSP, you don't find the foreground/background gradient (Corel_06_029).
You can use the gradients of the older versions.
The Gradient of CorelX here
Copy the presets  in the folders of the plugins Alien Skin Eye Candy 5. in the folders of the plugins Alien Skin Eye Candy 5.
One or two clic on the file (it depends by your settings), automatically the preset will be copied in the right folder.
why one or two clic see here
Open the masks in PSP and minimize it with the rest of the material.
Used colors

1. Set your foreground color to color 2 #dddb8e,
and your background color to color 1 #627093.
2. Open canal_Alpha_Decorate you my life.
Window>Duplicate, or shift+D on the keyboard, to make a copy.

Close the original.
The copy, which will be the basis of your work, is not empty,
but contains the selections saved on the alpha channel.
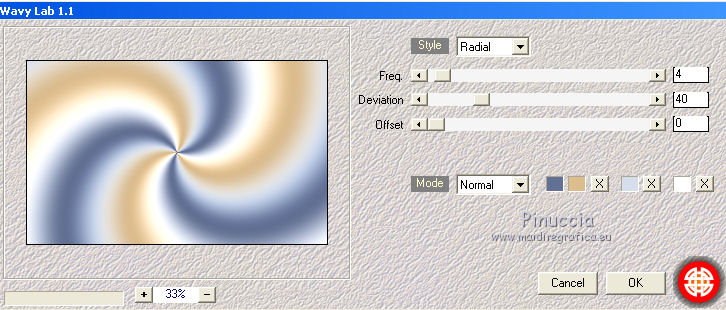
3. Effects>Plugins>Mehdi - Wavy Lab 1.1.
This filter creates gradients with the colors of your Materials palette:
the first is your background color, the second is your foreground color.
Change the last two colors created by the filter;
the first with color 3 #d6ddeb and the fourth with color white.
4. Adjust>Blur>Gaussian Blur, radius 30.

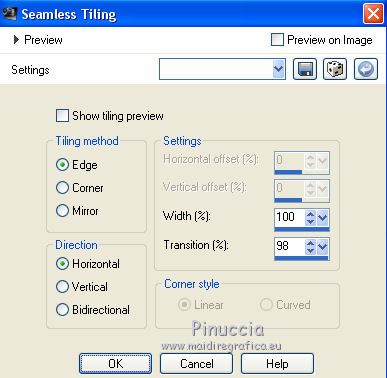
5. Effects>Image Effects>Seamless Tiling.
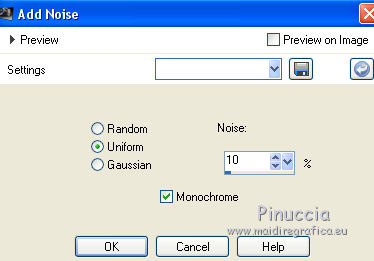
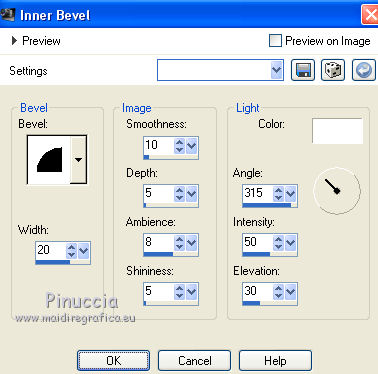
6. Adjust>Add/Remove Noise>Add Noise.
7. Set your foreground color to color 3 #d6deeb
and keep you background color to color 1 #627093.
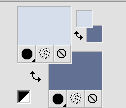
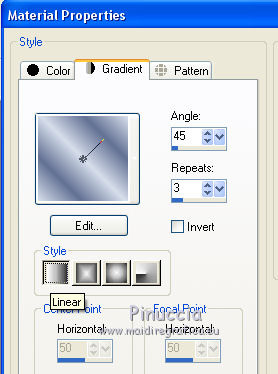
Set your foreground color to a Foreground/Background Gradient, style Linear.
8. Layers>New Raster Layer.
Flood Fill  the layer with your gradient. the layer with your gradient.
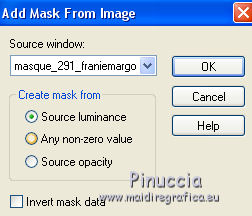
9. Layers>New Mask layer>From image
Open the menu under the source window and you'll see all the files open.
Select the mask masque 291_franiemargot
Layers>Merge>Merge Group.
10. Selections>Load/Save Selection>Load Selection from Alpha Channel.
The selection #1 is immediately available. You just have to click Load.
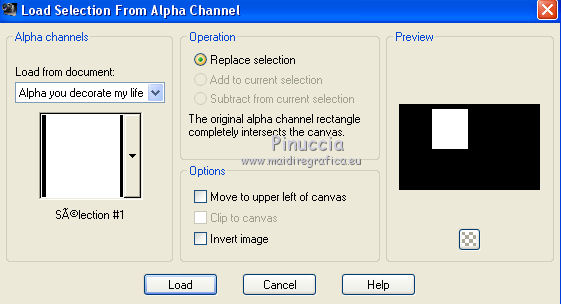
Selections>Modify>Contract - 30 pixels.
Press CANC on the keyboard 
Selections>Select None.
11. Activate the layer Raster 1.
Selections>Load/Save Save Selection>Load Selection from Alpha Channel.
Open the Selections menu and load sélection#2.
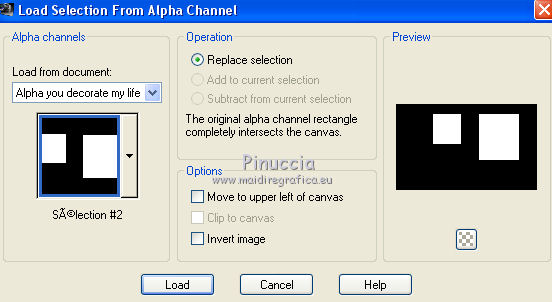
Selections>Promote Selection to Layer.
12. Effects>Plugins>Alien Skin Eye Candy 5 Texture - Marble.
Bedrock color #f8f1e7 - Vein Color #7d3421.
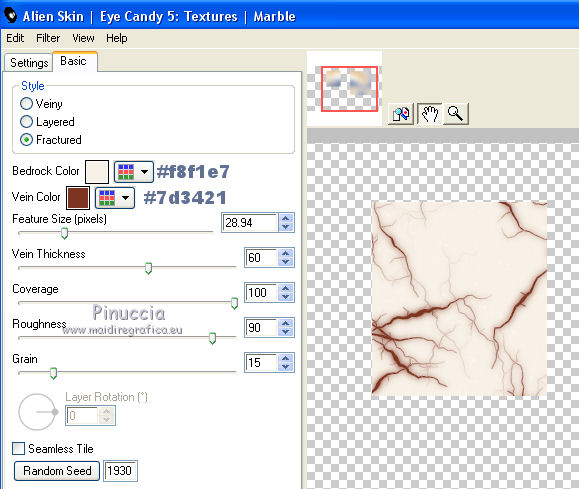
13. Change the Blend Mode of this layer to Multiply.
14. Keep selected and activate the top layer Gruppo Raster 2.
Effects>Plugins>Alien Skin Eye Candy 5 Impact - Glass
Select the preset Glass_fel1
(the preset installs itself with the name 2016-1noelglass).
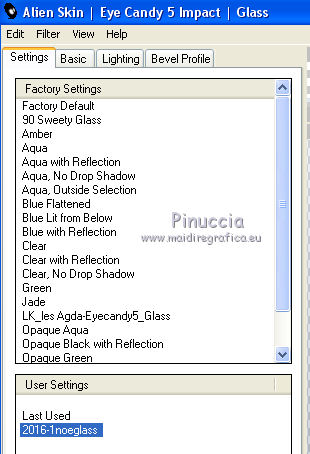
Here are the settings, in case of problems with the preset.
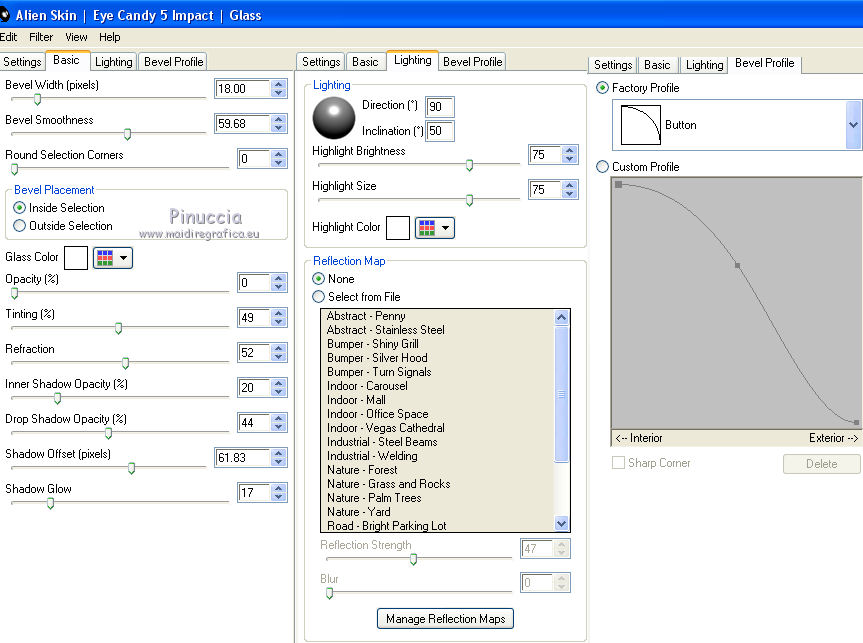
Selections>Select None.
15. Effects>3D Effects>Drop Shadow, color black.

16. Activate the layer Raster 1.
Effects>Geometric Effects>Skew.
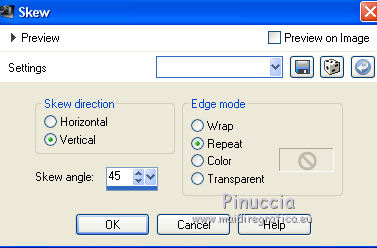
17. Adjust>Sharpness>Sharpen.
18. Effects>Image Effects>Seamless Tiling.
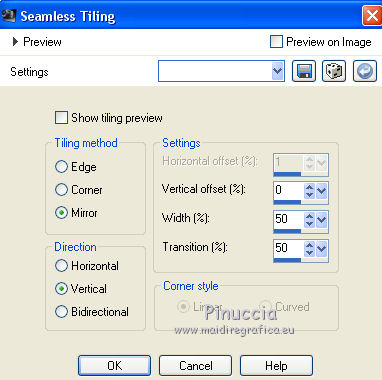
19. Activate the top layer.
Layers>New Raster Layer.
20. Selections>Load/Save Save Selection>Load Selection from Alpha Channel.
Open the Selections menu and load sélection#3.
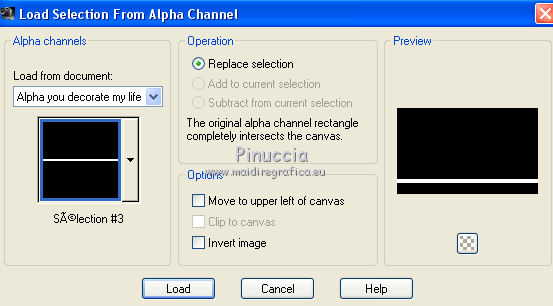
21. Set your foreground color to color white.
Flood Fill  the selection with color white. the selection with color white.
Selections>Modify>Contract - 1 pixels.
Flood Fill  with your background color (color 1). with your background color (color 1).
22. Set again your foreground color to initial color #ddbd8e (color 2)

and keep the gradient with the same settings.
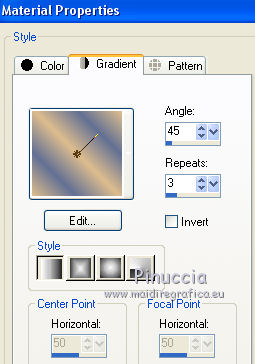
Flood Fill  the selection with the gradient. the selection with the gradient.
23. Effects>Plugins>Alien Skin Eye Candy 5 Impact - Glass - preset Glass_fel1.
24. Effects>Plugins>Ap 01 Innovations - Lines SilverLining.
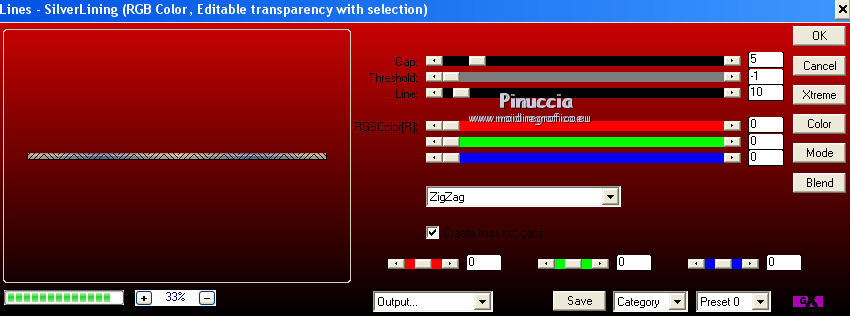
Selections>Select None.
25. Activate the layer below of the mask, Group Raster 2.
Selections>Load/Save Save Selection>Load Selection from Alpha Channel.
Open the Selections menu and load sélection#4.
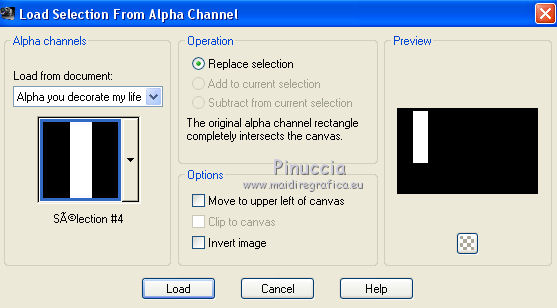
Selections>Promote Selection to Layer.
26. Effects>Plugins>Penta.com - Dot and Cross.
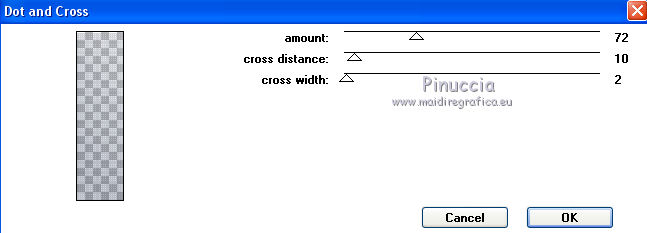
Adjust>Sharpness>Sharpen.
27. Effects>3D Effects>Drop Shadow, color black.

28. Selections>Modify>Select Selection Borders.
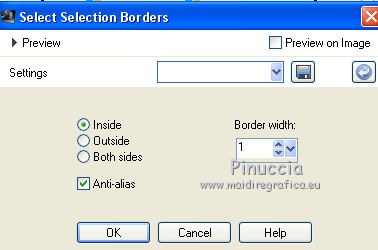
Set your foreground color to white #ffffff,
flood fill  the selection with color white. the selection with color white.
Selections>Select None.
29. Activate the bottom layer Raster 1.
Layers>Duplicate.
Effects>Geometric Effects>Circle.

30. Layers>Arrange>Bring to Top.
Image>Resize, 1 time to 10% and 1 time to 50%, resize all layers not checked.
31. Activate your Pick Tool 
and set Position X: 131,00 and Position Y: 46,00

32. Layers>Duplicate.
Set Position X: 131,00 and Position Y: 160,00.

33. Layers>Duplicate.
Set Position X: 131,00 and Position Y: 280,00.

34. Layers>Merge>Merge Down- 2 times.
35. Activate your Pen Tool 
Line style Dot
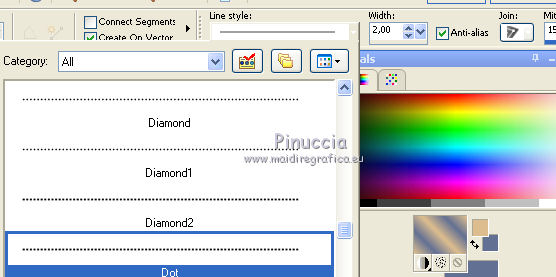
Draw a line from top to bottom as below
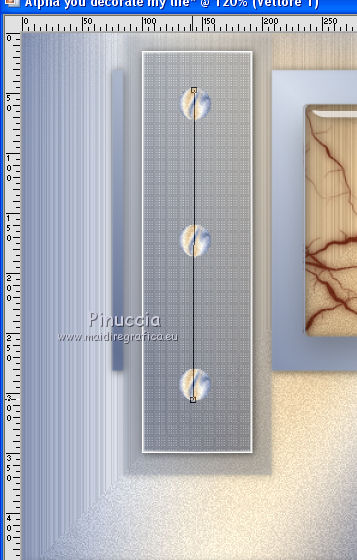
Layers>Convert to Raster Layer.
Layers>Arrange>Move down.
36. Activate the top layer.
Layers>Merge>Merge Down.
37. Effects>3D Effects>Drop Shadow, color black.
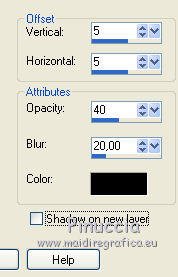
38. Open the brush You decorate my life.
File>Export>Custom Brush, give a name to the brush and ok.
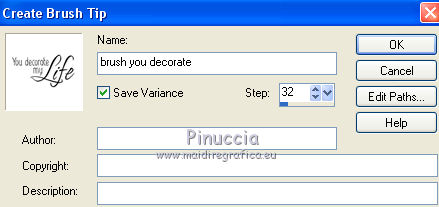
Activate your Brush Tool 
look for and select the brush you have just exported, size 190

39. Layers>New Raster Layer.
Apply the brush on the small square on the left, by clicking with the left mouse button,
to use the white foreground color.
40. Effects>3D Effects>Drop Shadow, color black.
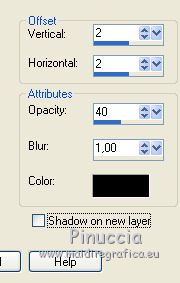
41. Open the vase tube by Linda and go to Edit>Copy.
Go back to your work and go to Edit>Paste as new layer.
Image>Resize, to 50%, resize all layers not checked.
42. Activate your Pick Tool 
and set Position X: 70,00 and Position Y: 106,00

43. Effects>3D Effects>Drop Shadow, color black.
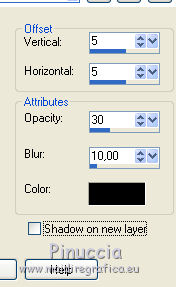
44. Image>Add borders, 1 pixel, symmetric, color white (color 4).
Image>Add borders, 2 pixels, symmetric, background color (color 1).
Image>Add borders, 15 pixels, symmetric, color white (color 4).
Image>Add borders, 5 pixels, symmetric, background color (color 1).
45. Select the last border with your Magic Wand Tool 
46. Effects>Plugins>Penta.com - Jeans, default settings.
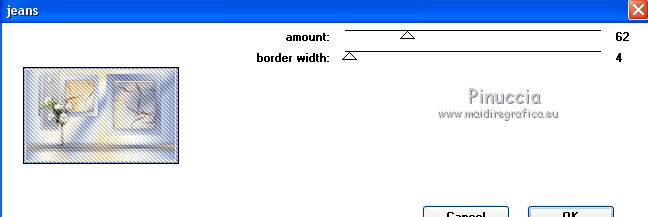
47. Effects>3D Effects>Inner Bevel.
48. Selections>Select All.
Image>Add borders, 35 pixels, symmetric, color white.
49. Effects>3D Effects>Drop Shadow, background color (color 1).
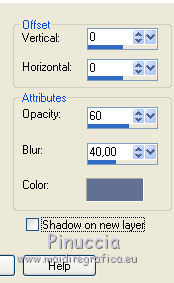
Selections>Select None.
50. Open the tube of the woman by Tocha and go to Edit>Copy.
Go back to your work and go to Edit>Paste as new layer.
Image>Resize, to 72%, resize all layers not checked.
Move  the tube to the right side. the tube to the right side.
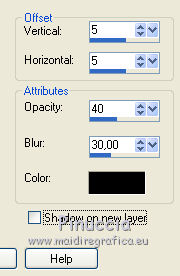
51. Effects>3D Effects>Drop Shadow, color black.
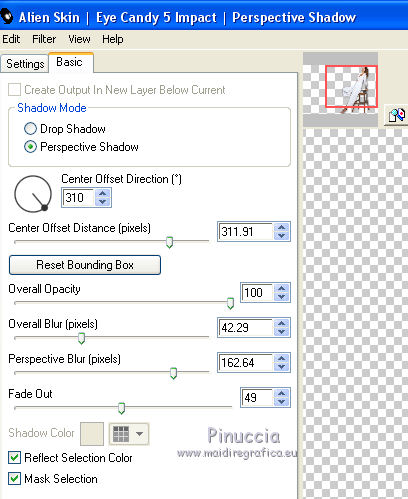
52. Effects>Plugins>Alien Skin Eye Candy 5 Impact - Perspective Shadow.
Select the preset Shadow_Feli and ok.
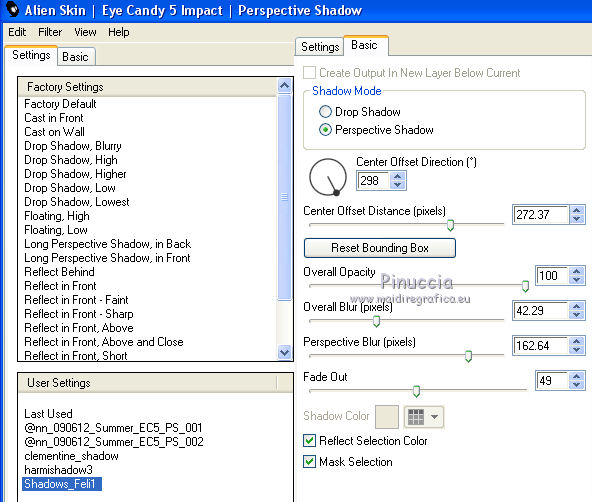
The settings change according to the position of the tube.
Here below, for example, are the settings obtained with the tube of the second versions
53. Image>Add borders, 1 pixel, symmetric, background color (color 1).
54. Sign your work.
Image>Resize, 900 pixels width, resize all layers checked.
Save as jpg.
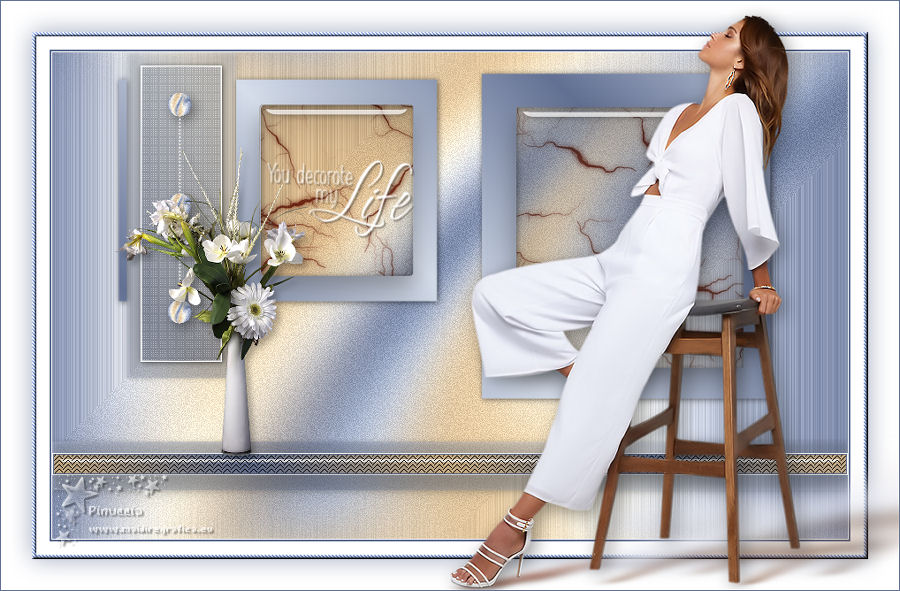
version with tube by Beatriz.

Your versions. Thanks
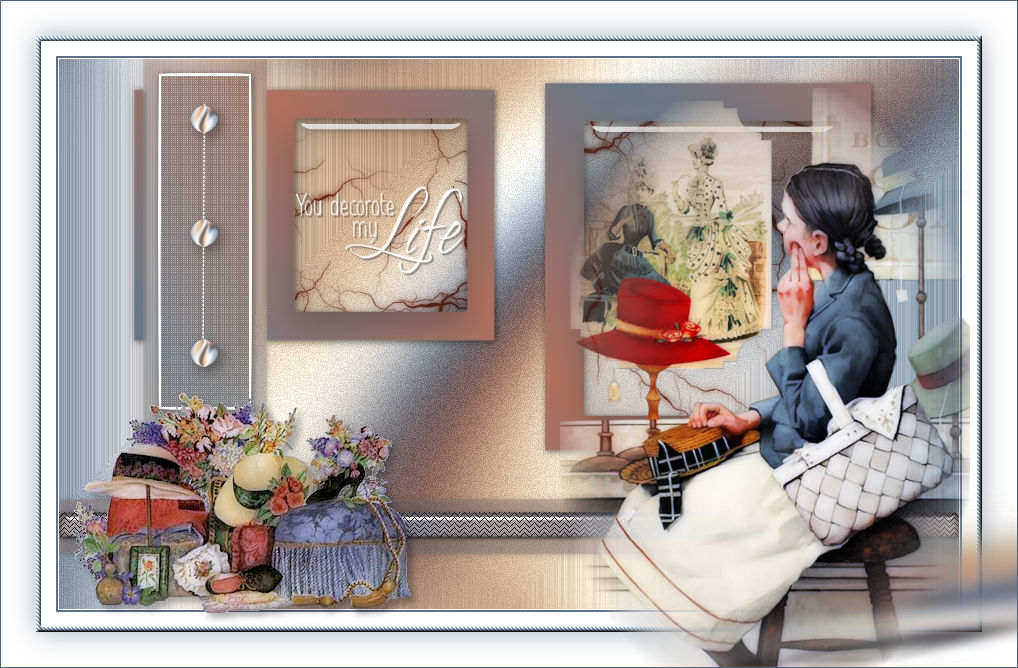
Olimpia
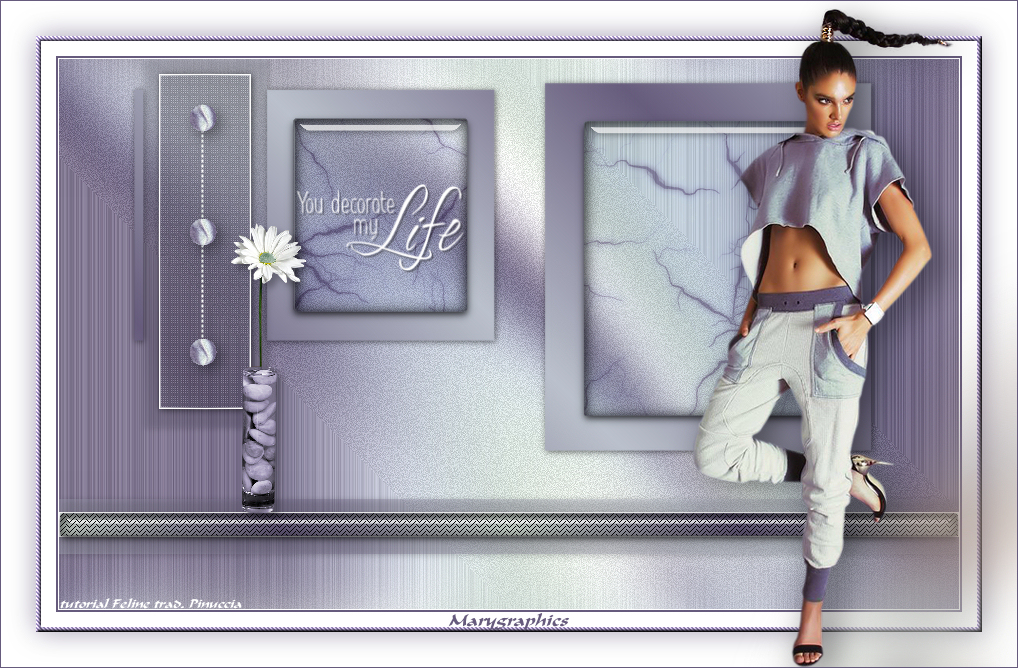
Marygraphics
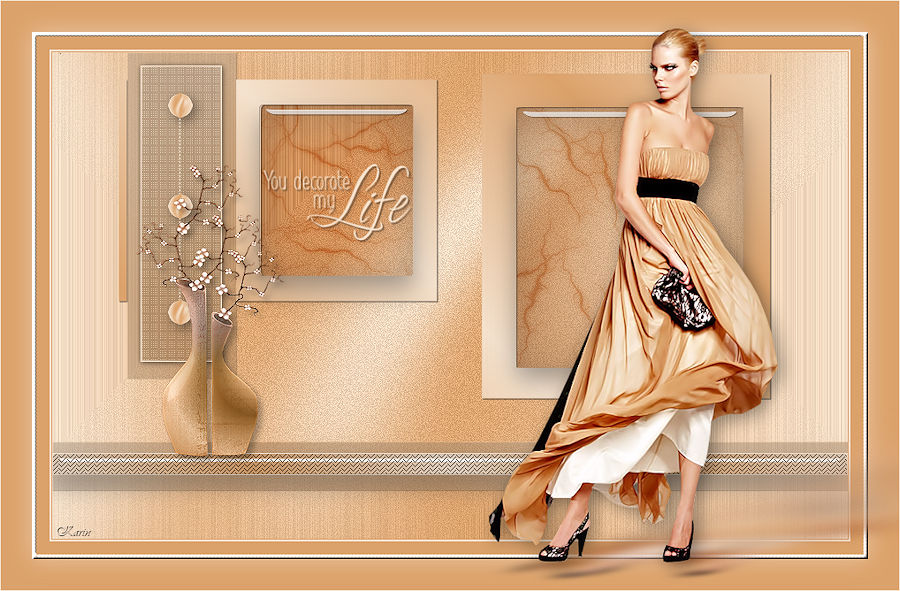
Karin
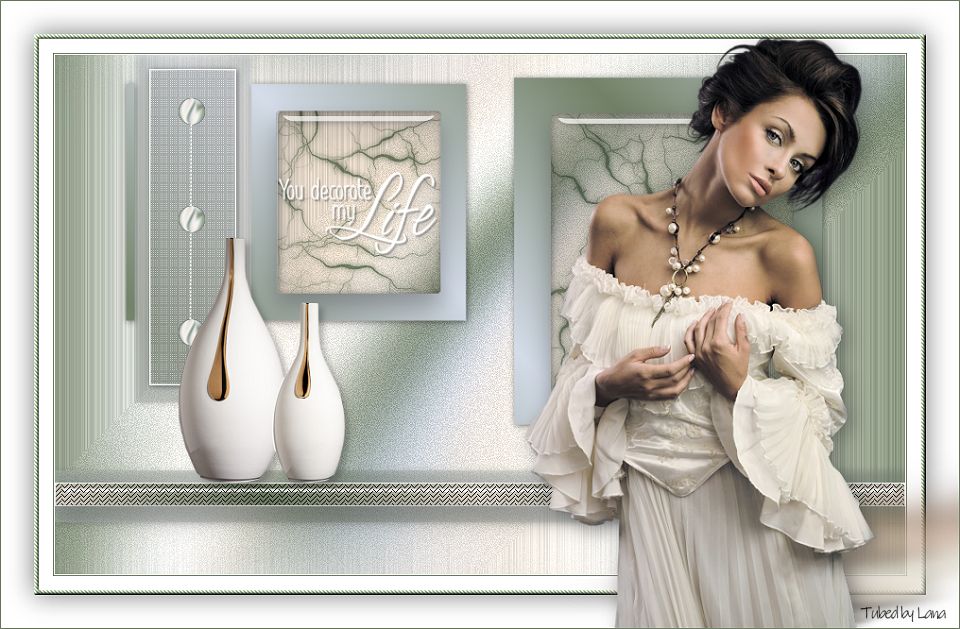
Lana
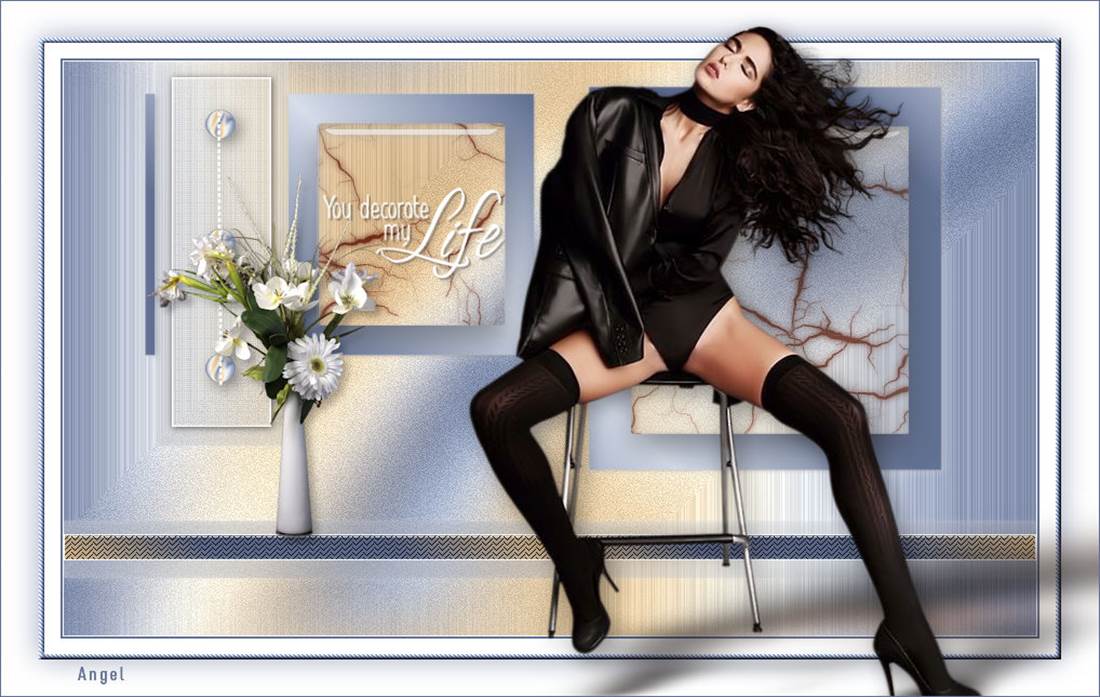
Angel
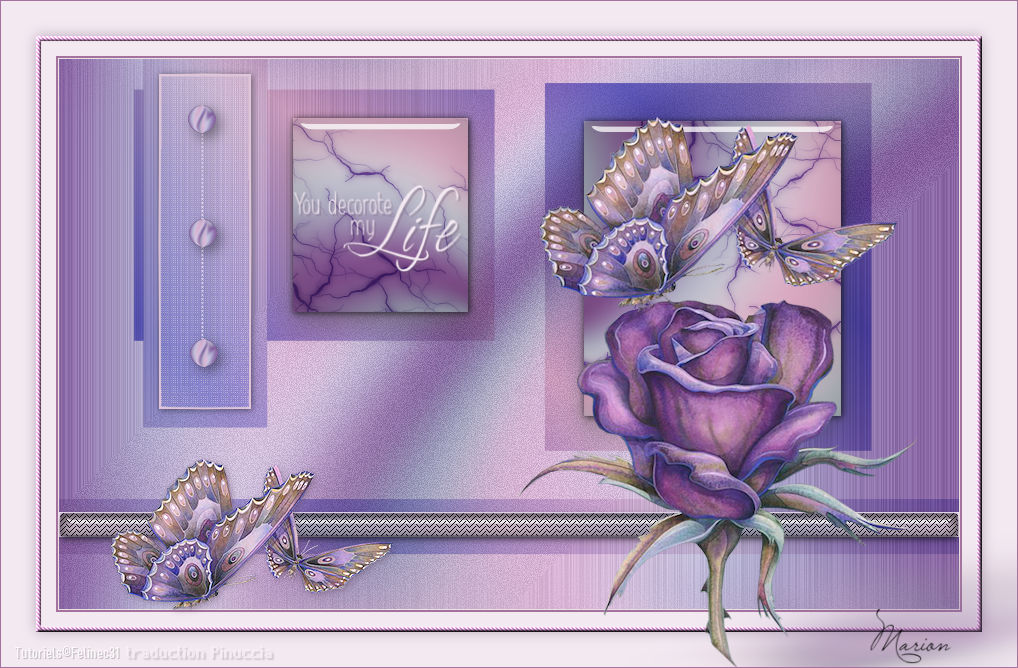
Marion

If you have problems or doubts, or you find a not worked link, or only for tell me that you enjoyed this tutorial, write to me.
13 June 2019
|

