IL FAUT CROIRE
 english version
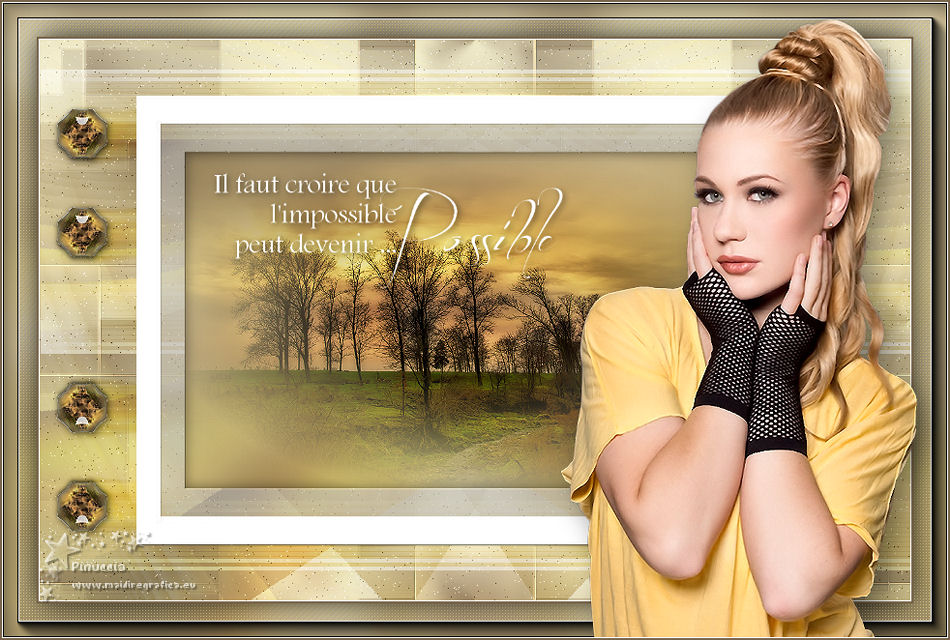
Thanks Carine for your invitation to translate

This tutorial was written with PSPX7 and translated with PSPX and PSPX3, but it can also be made using other versions of PSP.
Since version PSP X4, Image>Mirror was replaced with Image>Flip Horizontal,
and Image>Flip with Image>Flip Vertical, there are some variables.
In versions X5 and X6, the functions have been improved by making available the Objects menu.
In the latest version X7 command Image>Mirror and Image>Flip returned, but with new differences.
See my schedule here
italian translation here
your versions here
Material here
Thanks for the tubes Luna and Claudia Viza and for the a mask Ildiko.
(The links of the tubemakers here).
consult, if necessary, my filter section here
Filters Unlimited 2.0 here
Plugin AB07 - Bits Over The Place (ŕ importer dans Unlimited) - dans le zip
Alien Skin Eye Candy 5 Impact - Glass here
AAA Frames - Foto Frame here
Flaming Pear - Flexify here

You can change Blend Modes according to your colors.
Open the masks in PSP and minimize it with the rest of the material.
Colors
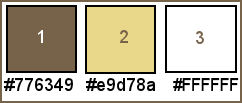
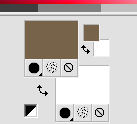
Set your foreground color to #776349,
and you background color to white #ffffff.
1. Open a new transparent image 900 x 580 pixels.
2. Selections>Select All.
Open the background image fond and go to Edit>Copy.
Go back to your work and go to Edit>Paste into Selection.
Selections>Select None.
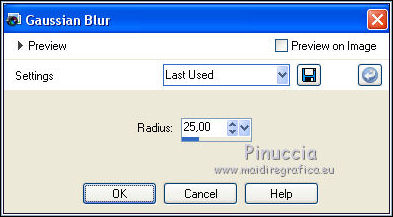
3. Adjust>Blur>Gaussian Blur, radius 25.
4. Effects>Plugins>Filters Unlimited 2.0 - Plugin AB 07 - Bits Over The Place, default settings.
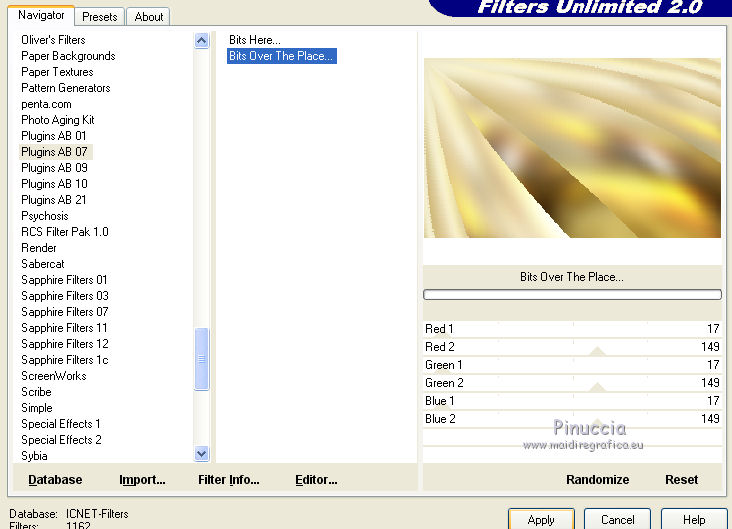
5. Layers>Duplicate.
Image>Mirror.
Image>Flip.
Reduce the opacity of this layer to 50%.
6. Layers>Merge>Merge down.
Layers>New Raster Layer.
Flood Fill  with your foreground color. with your foreground color.
7. Layers>New Mask layer>From image
Open the menu under the source window and you'll see all the files open.
Select the mask jouCAQ,.
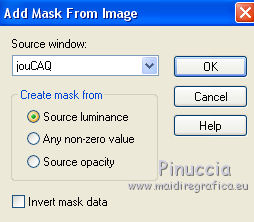
Layers>Merge>Merge Group.
8. Effects>Image Effects>Seamless Tiling, standard settings.

Effects>Edge Effects>Enhance.
9. Layers>Merge>Merge visible.
10. Layers>New Raster Layer.
Flood Fill  with color white. with color white.
11. Layers>New Mask layer>From image
Open the menu under the source window
and select the mask Ildiko Design Create.
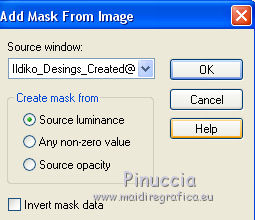
Layers>Merge>Merge Group.
12. Effetcts>3D Effects>Drop Shadow, color black.
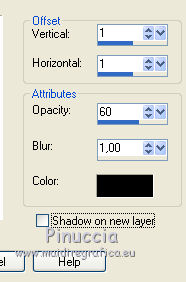
13. Activate your background layer, Merged.
Selection Tool 
(no matter the type of selection, because with the custom selection your always get a rectangle)
clic on the Custom Selection 
and set the following settings.
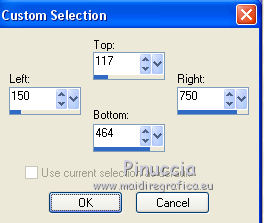
Selections>Promote Selection to layer.
14. Adjust>Blur>Gaussian Blur, same settings.

15. Activate the top layer.
Layers>Merge>Merge down.
Keep selected.
16. Open the landscape by Luna and go to Edit>Copy.
Go back to your work and go to Edit>Paste into Selection.
Adjust>Sharpness>Sharpen.
17. Layers>New Raster Layer.
Effects>3D Effects>Cutout
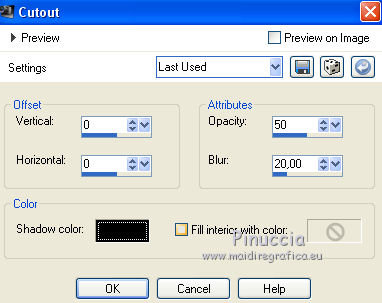
Selections>Select None.
18. Layers>Merge>Merge down (Promoted Selection)
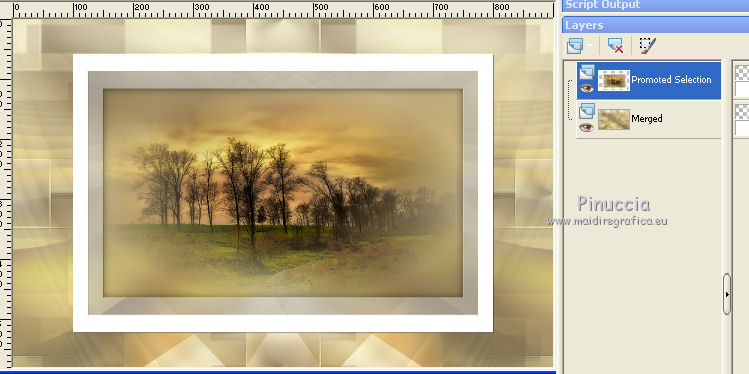
19. Layers>Duplicate.
Image>Resize, to 25%, resize all layer not checked.
20. Effects>Plugins>Flaming Pear - Flexify 2.
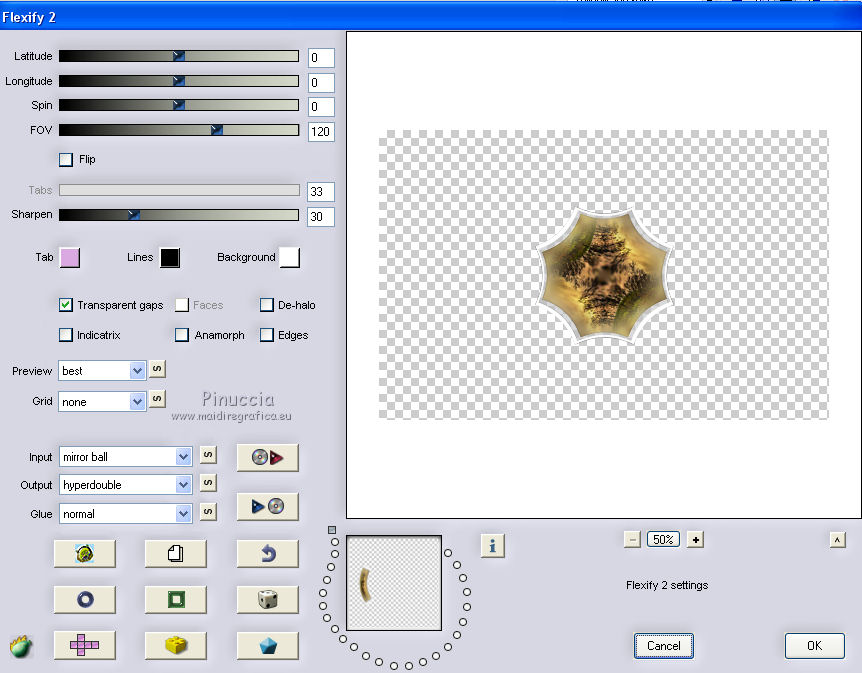
21. Image>Resize, to 20%, resize all layer not checked.
22. Effects>Plugins>Alien Skin Eye Candy 5 Impact - Glass.
Select the preset Clear with these settings.
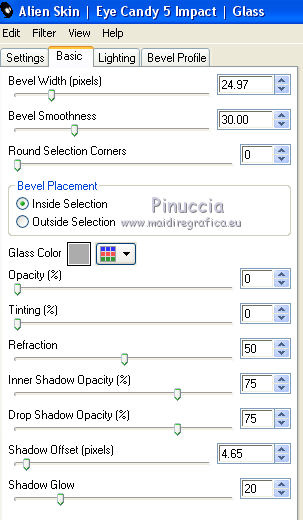
23. Activate your Pick Tool 
and set Position X.: 13,00 and Position Y: 68,00.
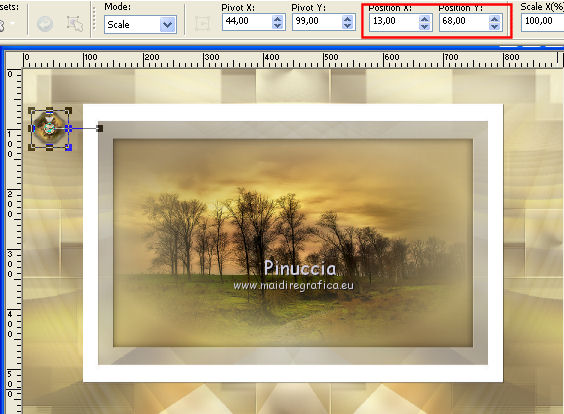
Adjust>Sharpness>Sharpen.
24. Layers>Duplicate.
and set Position Y: 170,00 (Position X remains unchanged)

Layers>Merge>Merge down.
25. Layers>Duplicate.
Image>Flip.
Layers>Merge>Merge down.
26. Effetcts>3D Effects>Drop Shadow, color black.
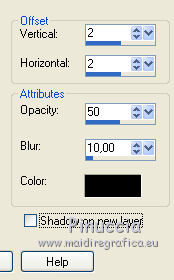
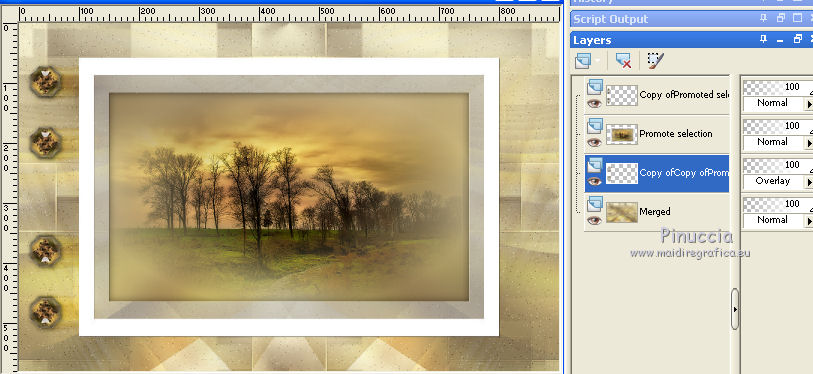
27. Layers>Duplicate.
Effects>Distortion Effects>Wind - from the left, intensity 100
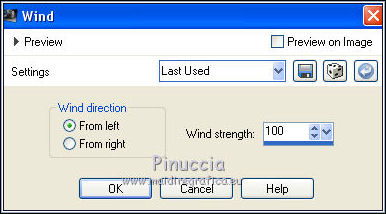
28. Change the Blend Mode of this layer to Overlay, opacity 100.
Layers>Arrange>Move Down - 2 times (under the frame's layer)
29. Activate the bottom layer (Merged)
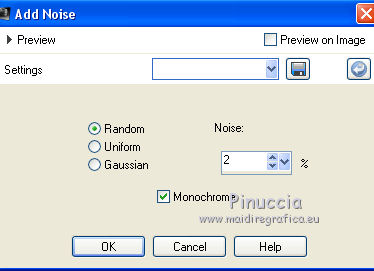
Adjust>Add/Remove Noise>Add Noise
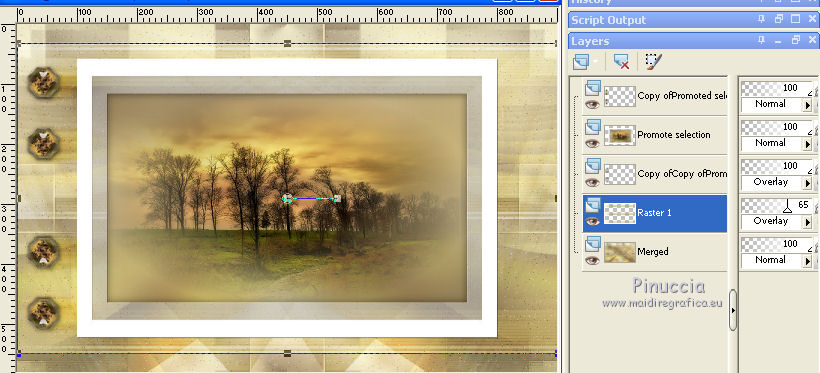
30. Open deco 1 and go to Edit>Copy.
Go back to your work and go to Edit>Paste as new layer.
Don't move it.
31. Change the Blend Mode of this layer to Overlay and reduce the opacity to 65%.
32. Image>Add borders, 1 pixel, symmetric, color white.
Image>Add borders, 2 pixels, symmetric, foreground color.
33. Edit>Copy.
34. Selections>Select All.
Image>Add borders, 35 pixels, symmetric, color white.
Selections>Invert.
35. Edit>Paste into Selection.
36. Adjust>Blur>Gaussian Blur, radius 20.

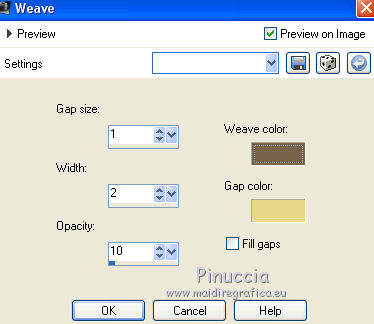
37. Effects>Texture Effects>Weave
weave color: foreground color,
gap color: color #e9d78a
38. Effects>Plugins>AAA Frames - Foto Frame.

39. Selections>Invert.
Effetcts>3D Effects>Drop Shadow, color black.
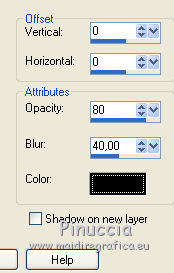
Selections>Select None.
40. Open the woman tube by Claudia Viza and go to Edit>Copy.
Go back to your work and go to Edit>Paste as new layer.
Image>Resize, to 72%, resize all layers not checked.
Move  the tube to the right side. the tube to the right side.
41. Effetcts>3D Effects>Drop Shadow, color black.
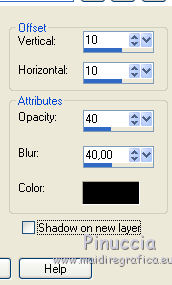
Adjust>Sharpness>Sharpen.
42. Open the tube texte and go to Edit>Copy.
Go back to your work and go to Edit>Paste as new layer.
Place  the text as in my example. the text as in my example.
43. Effetcts>3D Effects>Drop Shadow, color black.

in the material, you find my italian and english texts
44. Sign your work on a new layer.
45. Image>Add borders, 1 pixel, symmetric, color white.
Image>Add borders, 2 pixels, symmetric, foreground color.
46. Image>Resize, 950 pixels width, resize all layer checked.
Save as jpg.
The tubes of this version is by Wieskes and Sonia
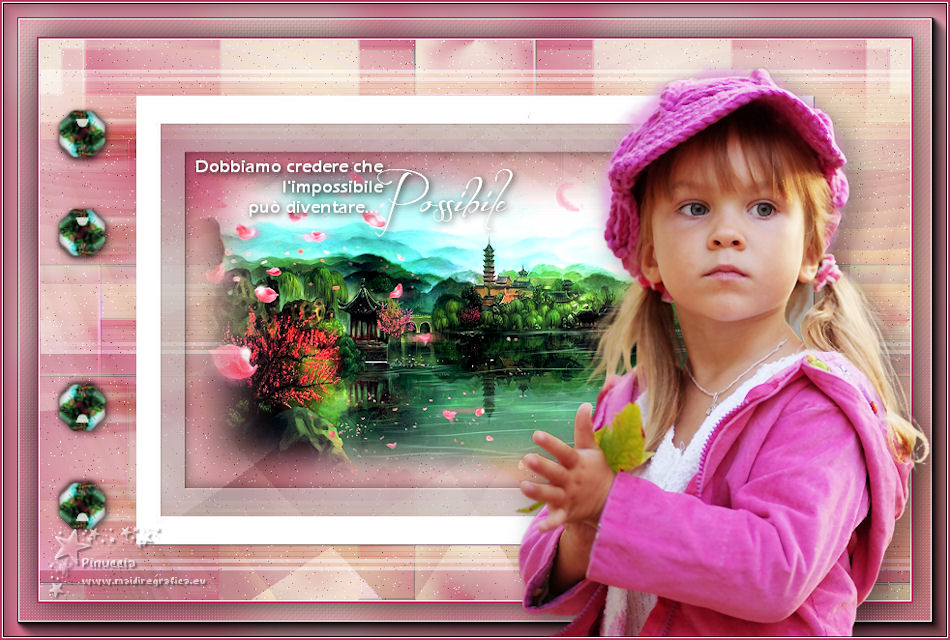

If you have problems or doubts, or you find a not worked link, or only for tell me that you enjoyed this tutorial, write to me.
2 Avril 2019
|

