|
JOYEUX NOËL 2017
 english version

Thanks Carine for your invitation to translate

This tutorial was written with CorelX17 and translated with CorelX17, but it can also be made using other versions of PSP.
Since version PSP X4, Image>Mirror was replaced with Image>Flip Horizontal,
and Image>Flip with Image>Flip Vertical, there are some variables.
In versions X5 and X6, the functions have been improved by making available the Objects menu.
In the latest version X7 command Image>Mirror and Image>Flip returned, but with new differences.
See my schedule here
italian translation here
your versions here
Material here
For the tube thanks Orev and Lori.
(The links of the tubemakers here).
Plugins:
consult, if necessary, my filter section here
Filters Unlimited 2.0 here
Simple - Diamonds here
Filters Simple can be used alone or imported into Filters Unlimited.
(How do, you see here)
If a plugin supplied appears with this icon  it must necessarily be imported into Unlimited it must necessarily be imported into Unlimited

You can change Blend Modes according to your colors.
Open the golden pattern in PSP and minimize it with the rest of the material.
1. Set your foreground color to the red color #9a0c0c.
Set your background color to Pattern and select the golden pattern Gold (15).
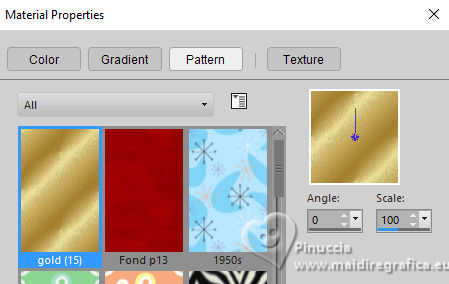
2. Open Alpha Joyeux Noel 2017.
Window>Duplicate or, on the keyboard, shift+D to make a copy.

Close the original.
The copy, that will be the basis of your work, is not empty,
but contains the selections saved to alpha channel.
3. Selections>Select All.
Open your background image fond P13 and go to Edit>Copy.
Edit>Copy.
Go back to your work and go to Edit>Paste into Selection.
Selections>Select None.
4. Selections>Load/Save Selection>Load Selection from Alpha Channel.
The selection sélection#1 is immediately available. You just have to click Load.
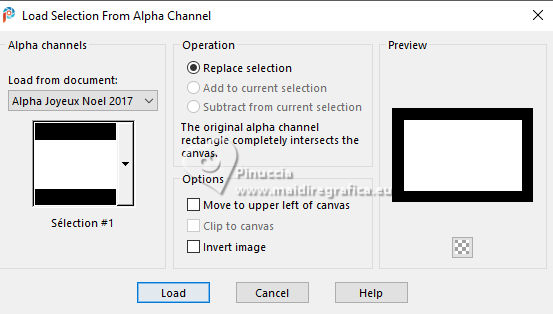
5. Layers>New Raster Layer.
Flood Fill  the selection with your golden pattern. the selection with your golden pattern.
6. Selections>Modify>Contract - 2 pixels.
Press CANC on the keyboard 
Selections>Select None.
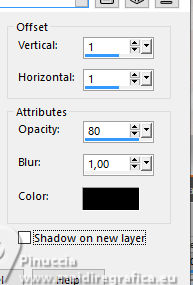
7. Effects>3D Effects>Drop Shadow, color black.
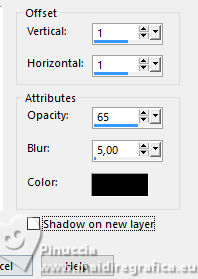
8. Effects>Plugins>Simple - Diamonds.
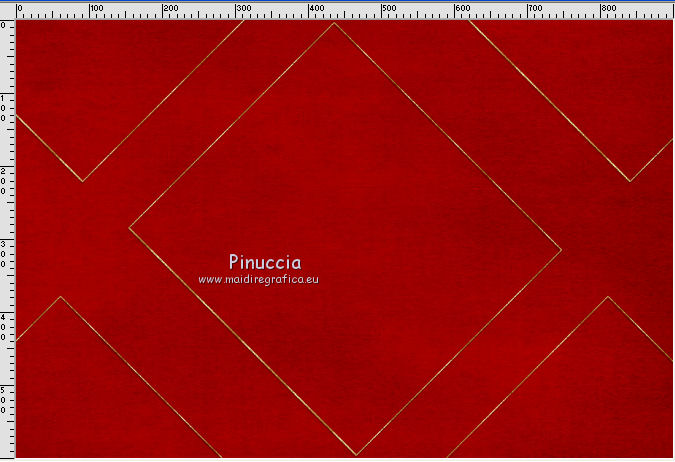
9. Activate the layer Raster 1.
Selections>Load/Save Selection>Load Selection from Alpha Channel.
Open the selections menu and load the selection Sélection#2.
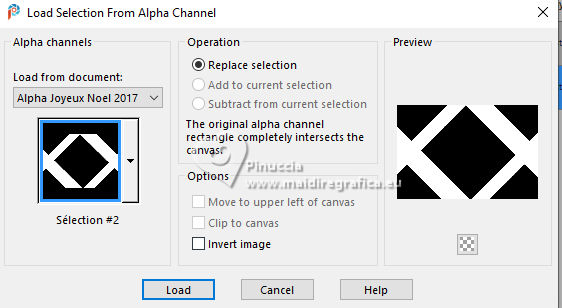
Selections>Promote Selection to Layer.
Flood Fill  the selection with your golden pattern. the selection with your golden pattern.
10. Change the Blend Mode of this layer to Dissolve and reduce the opacity to 5%.
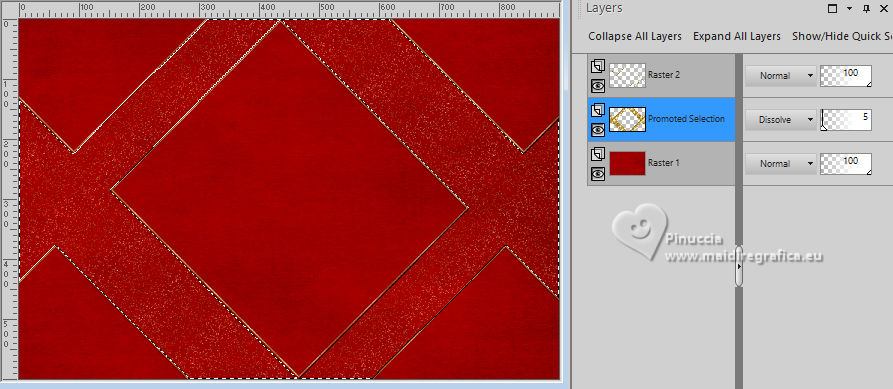
11. Adjust>Sharpness>Sharpen.
Selections>Select None.
12. Activate your top layer.
Layers>Merge>Merge Down.
The layer stay in Mode Dissolve and the opacity to 100.
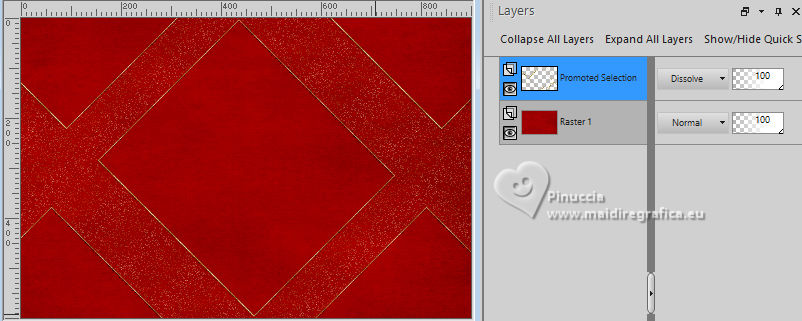
13. Open the tube Orevcrea_28.22.2010_Noel015, and go to Edit>Copy.
Go back to your work and go to Edit>Paste as new layer.
Don't move it. It is at its place.
(if you use another tube, place it to your liking).
14. Adjust>Sharpness>Sharpen More.
Layers>Arrange>Move Down.
15. Activate the layer raster 1.
Selections>Load/Save Selection>Load Selection from Alpha Channel.
Open the selections menu and load the selection Sélection #3.
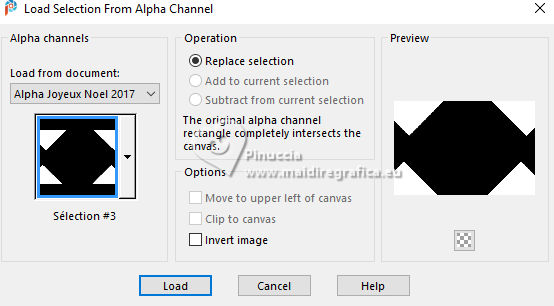
Selections>Promote Selection to Layer.
16. Effects>Plugins>Alien Skin Eye Candy 5 Impact - Brushed Metal
Select the preset Linear Red and ok.
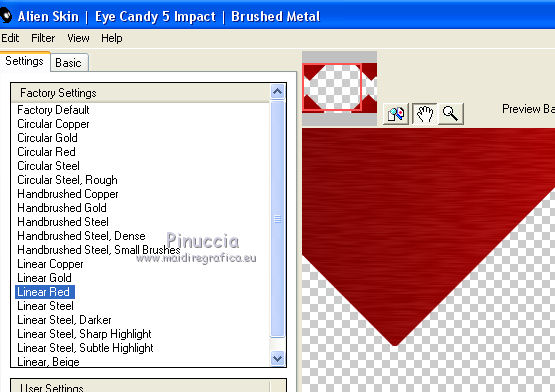
Effects>Edge Effects>Enhance.
17. Effects>Texture Effects>Mosaic Glass.
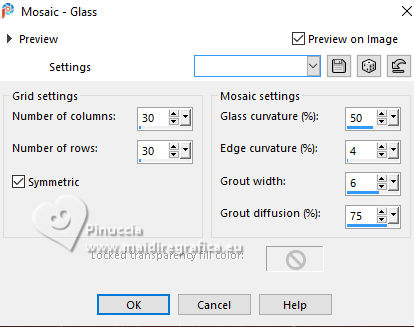
18. Layers>New Raster Layer - Raster 3.
Effects>3D Effects>Cutout.
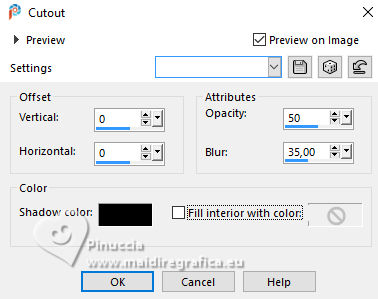
Selections>Select None.
19. You should have this
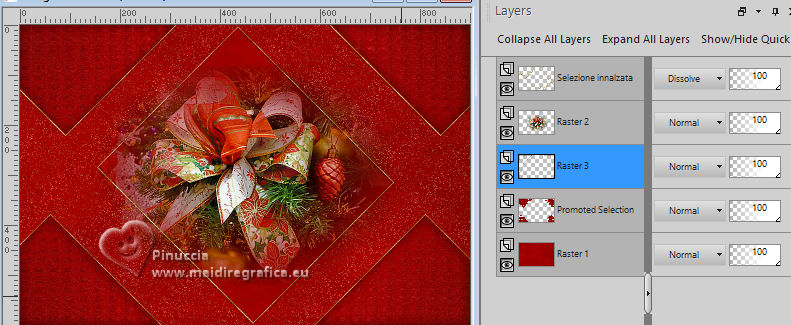
20. Layers>Merge>Merge visible.
21. Selections>Select All.
Image>Add borders, 3 pixels, symmetric, color white.
Selections>Invert.
Flood Fill  the selection with your golden pattern. the selection with your golden pattern.
22. Effects>3D Effects>Inner Bevel.
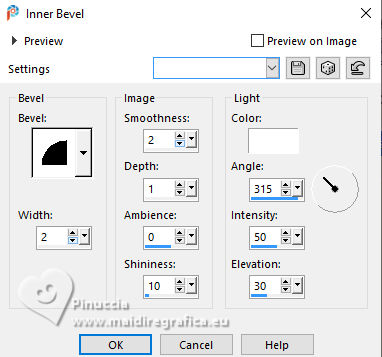
23. Image>Add borders, 55 pixels, symmetric, color white.
Selections>Select All.
Selections>Modify>Contract - 20 pixels.
24. Layers>New Raster Layer.
Flood Fill  with your red foreground color #9a0c0c. with your red foreground color #9a0c0c.
25. Selections>Modify>Contract - 15 pixels.
Press CANC on the keyboard.
Selections>Select None.
26. Activate your Magic Wand Tool 
and click in the red border to select it.
27. Layers>New Raster Layer.
Flood Fill  with your golden pattern. with your golden pattern.
28. Change the Blend Mode of this layer to Dissolve and reduce the opacity to 5%.
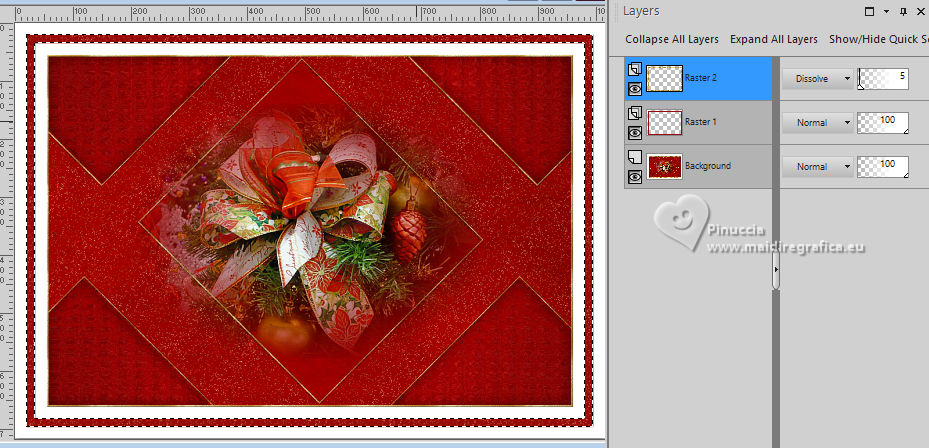
29. Layers>Merge>Merge Down.
30. Effects>3D Effects>Inner Bevel.
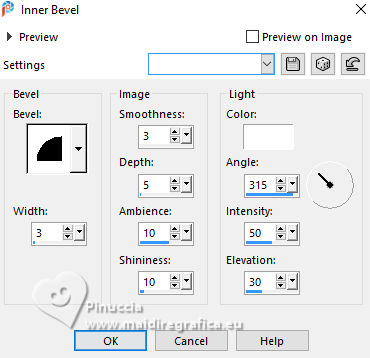
Selections>Select None.
31. Effects>3D Effects>Drop Shadow, color black.
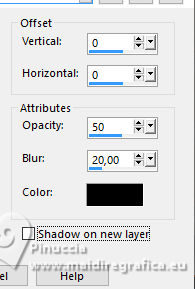
32. Open the tube cadre 1, and go to Edit>Copy.
Go back to your work and go to Edit>Paste as new layer.
****
Note: if you want to do a frame with your images,
go on with the next steps from 1 to 10; if not, go to the step 33.
1. Open the frame "cadre à travailler".
Activate your top layer.
Activate your Magic Wand Tool 
and clicin the frame to select it.
Selections>Modify>Expand - 3 pxiels.
2. Layers>New Raster Layer.
Open your image and go to Edit>Copy.
Go back to your work and go to Edit>Paste into Selection.
Selections>Select None.
3. Layers>Arrange>Move Down.
4. Layers>Merge>Merge visible.
5. Image>Resize, to 45%, resize all layers not checked.
Adjust>Sharpness>Sharpen.
6. Open coin Noel and go to Edit>Copy.
Go back to your work and go to Edit>Paste as new layer.
7. Image>Resize, to 35%, resize all layers not checked.
Place  the tube in the frame. the tube in the frame.
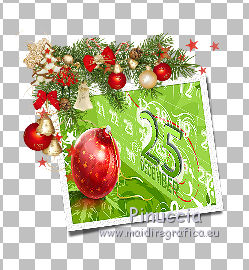
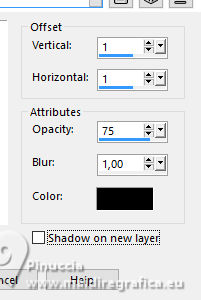
8. Effects>3D Effects>Drop Shadow, color black.
9. Layers>Merge>Merge Down.
10. Edit>Copy.
Go back to your work and go to Edit>Paste as new layer.
******
33. To place the frame:
K key on the keyboard to activate your Pick Tool 
Position X: 13,00 and Position Y: 24,00.
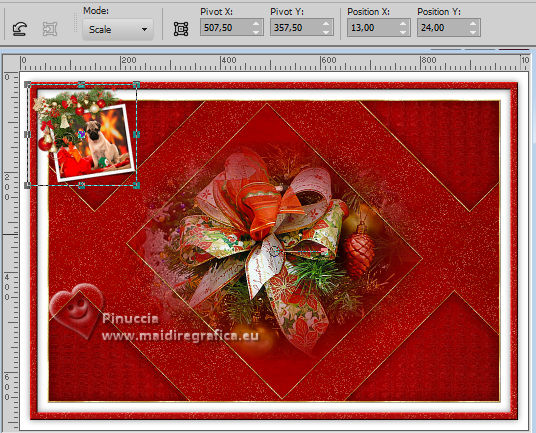
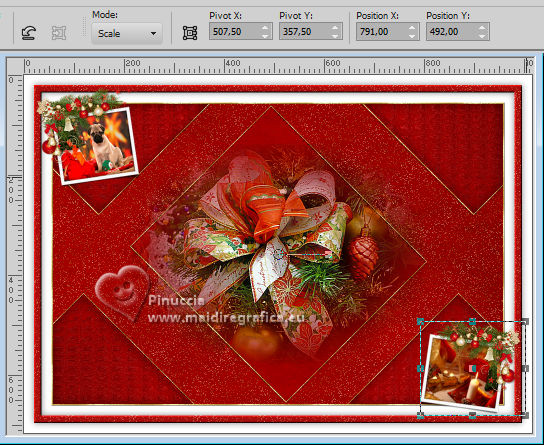
34. Open cadre 2 and go to Edit>Copy.
Go back to your work and go to Edit>Paste as new layer.
Pick Tool 
Position X: 791,00 - Position Y: 492,00.
35. Open the tube déco étoile and go to Edit>Copy.
Go back to your work and go to Edit>Paste as new layer.
Pick Tool 
Position X: 114,00 - Position Y: 145,00.
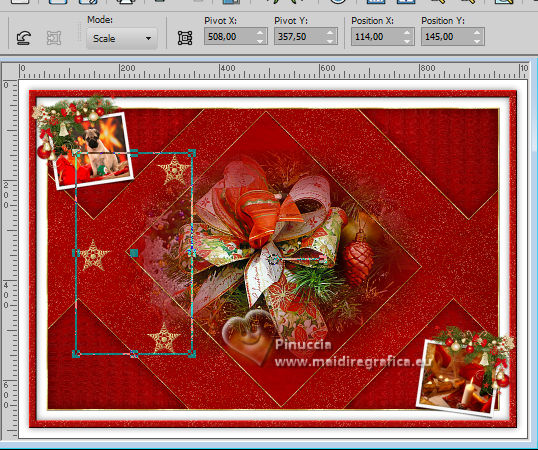
36. Effects>3D Effects>Drop Shadow, color black.
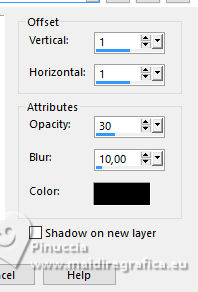
37. Layers>Duplicate.
Image>Mirror.
Layers>Merge>Merge Down.
Stay on this layer.
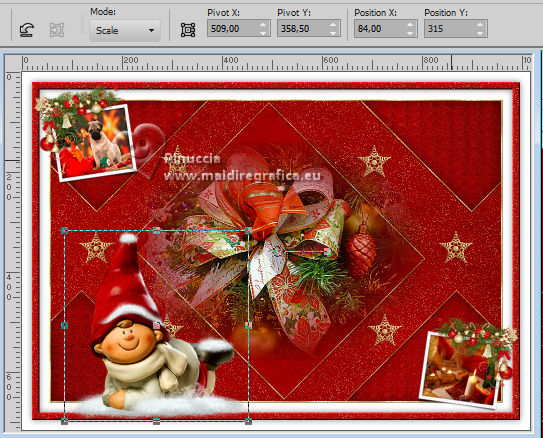
38. Open the tube Lori_25 and go to Edit>Copy.
Go back to your work and go to Edit>Paste as new layer.
Image>Resize, al 75%, resize all layers not checked.
39. Pick Tool 
Position X: 84,00 - Position Y: 315,00.
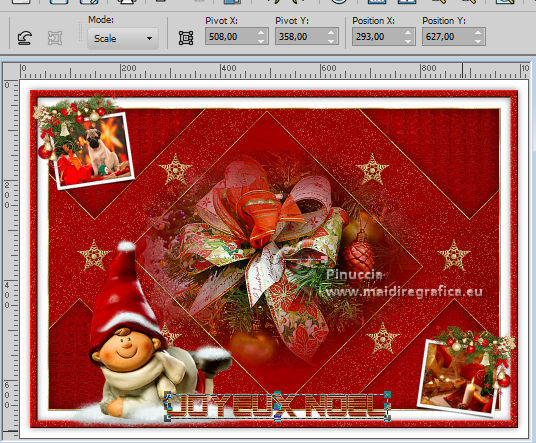
40. Open the text "texte" and go to Edit>Copy.
Go back to your work and go to Edit>Paste as new layer.
Pick Tool 
Position X: 293,00 - Position Y: 627,00.
41. Effects>3D Effects>Drop Shadow, color black.
42. Selections>Select All.
Image>Add borders, 1 pixel, symmetric, color white.
Selections>Invert.
Flood Fill  with your golden pattern. with your golden pattern.
43. Effects>3D Effects>Inner Bevel, same settings step 22.

Selections>Select None.
44. Sign your work.
45. Image>Resize, 900 pixels width, resize all layers checked.
46. Image>Add borders, 1 pixel, symmetric, color.
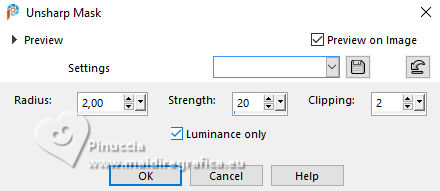
47. Adjust>Sharpness>Unsharp Mask.
For the tube of this version thanks Mentali


If you have problems or doubts, or you find a not worked link, or only for tell me that you enjoyed this tutorial, write to me.
20 November 2024
|
 english version

 english version
