|
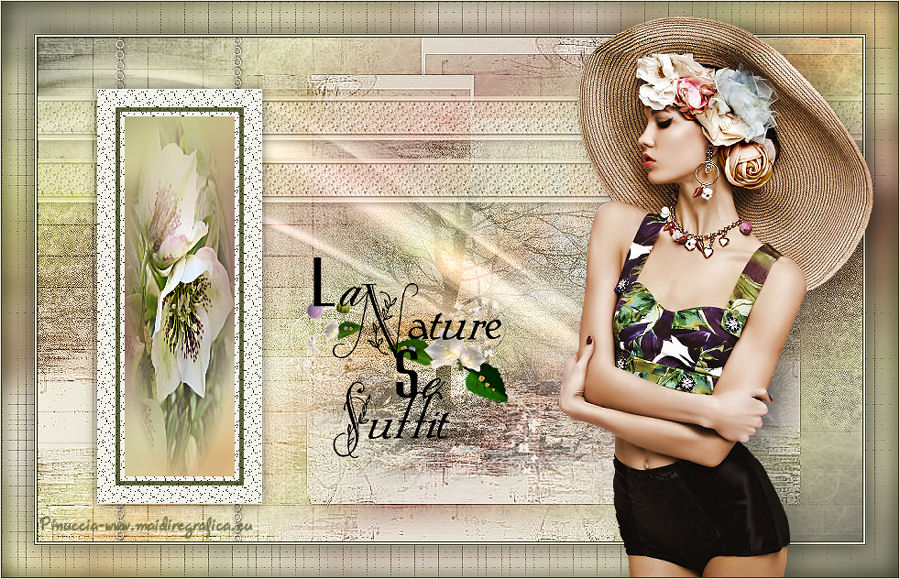
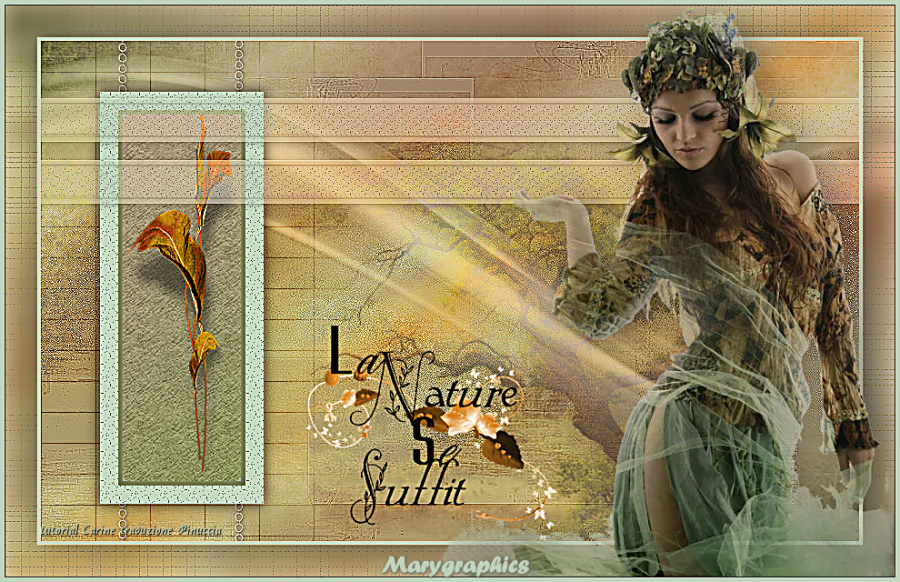
LA NATURE SE SUFFIT

Thanks Carine for your invitation to translate

This tutorial was written with CorelX17 and translated with CorelX17, but it can also be made using other versions of PSP.
Since version PSP X4, Image>Mirror was replaced with Image>Flip Horizontal,
and Image>Flip with Image>Flip Vertical, there are some variables.
In versions X5 and X6, the functions have been improved by making available the Objects menu.
In the latest version X7 command Image>Mirror and Image>Flip returned, but with new differences.
See my schedule here
italian translation here
Material qui
Thanks for the tubes: Tocha, Luz Cristina, Nikita and Jewel.
Plugins
consult, if necessary, my filter section here
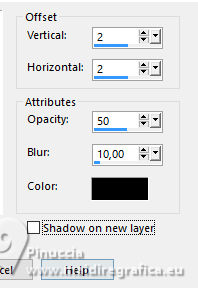
Alien Skin Eye Candy 5 Impact - Perspective Shadow here
Toadies - Ommadawn, What are you here
Filters unlimited 2.0 here
Filter Factory Gallery H - Reverb here
Cybia - Screenworks here
I filtri Factory Gallery, Toadies e Screenworks si possono usare da soli o importati in Filters Unlimited
(come fare vedi here)
Se un filtro fornito appare con questa icona  deve necessariamente essere importato in Filters Unlimited. deve necessariamente essere importato in Filters Unlimited.

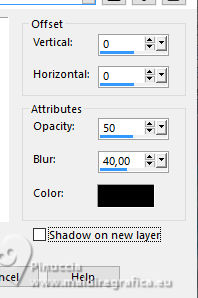
You can change Blend Modes according to your colors.
Copy the preset  in the folder of the plugin Alien Skin Eye Candy 5 Impact>Settings>Shadow. in the folder of the plugin Alien Skin Eye Candy 5 Impact>Settings>Shadow.
One or two clic on the file (it depends by your settings), automatically the preset will be copied in the right folder.
why one or two clic see here

Copy the Gradient in the Gradients Folder.
Open the masks in PSP and minimize them with the rest of the material.

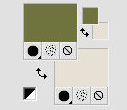
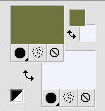
1. Set your foreground color with the color 1 #6f7440,
and your background color with the color 2 #e6e0d5.
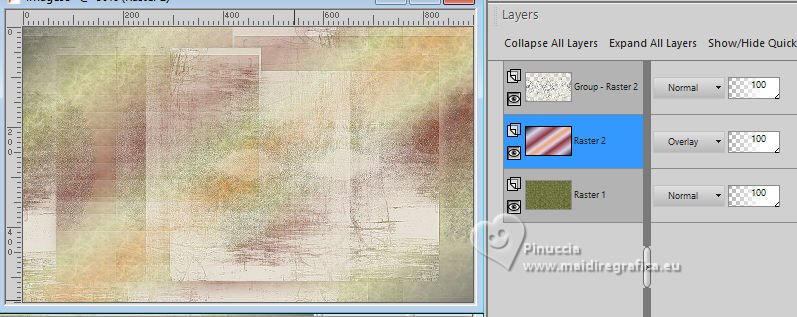
2. Open a new transparent image 900 x 550 pixels (Raster 1).
Flood Fill  the trasparent image with your foreground color #6f7440. the trasparent image with your foreground color #6f7440.
3. Effects>Plugins>Filters Unlimited 2.0 - Paper Texture - Fibrous paper Coarse.

4. Layers>New Raster Layer - Raster 2.
Flood Fill with your background color #e6e0d5.
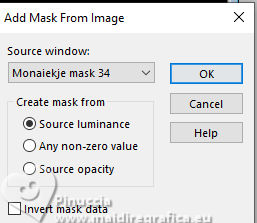
5. Layers>New Mask layer>From image
Open the menu under the source window and you'll see all the files open.
Select the mask Monaiekje mask 34.
Layers>Merge>Merge Group.
6. Effects>Edge Effects>Enhance.
7. Activate your background layer, Raster 1.
Layers>New Raster Layer - Raster 2.
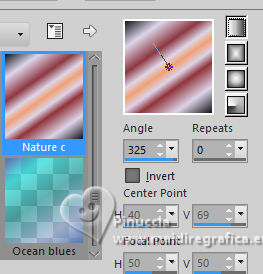
8. Set your foreground color to Gradient and select the gradient Nature C, style Linear.
9. Flood Fill the layer with your Gradient.
Change the Blend Mode of this layer to Overlay.
10. Activate your top layer.
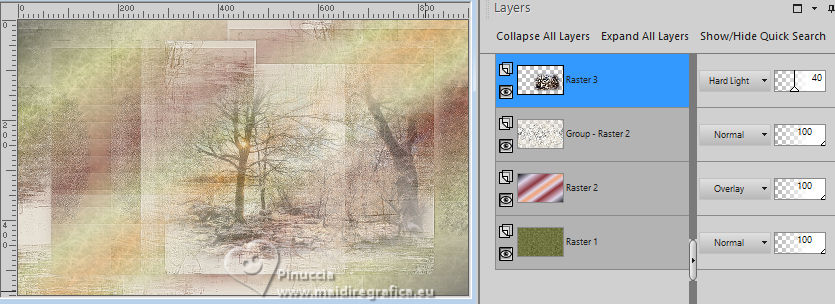
Open the landscape tube by Luz Cristina and go to Edit>Copy.
Go back to your work and go to Edit>Paste as new layer.
11. To place the tube:
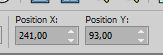
K key to activate your Pick Tool 
Position X: 241,00 - Position Y: 93,00.
12. Change the Blend Mode of this layer to Hard Light and reduce the opacity to 40%.
13. Layers>Merge>Merge visible.
14. Adjust>Brightness and Contrast>Brightness and Contrast
(optional, according to your colors).

15. Selection Tool 
(no matter the type of selection, because with the custom selection your always get a rectangle)
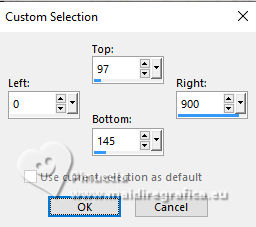
clic on the Custom Selection 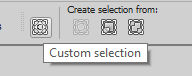
and set the following settings.
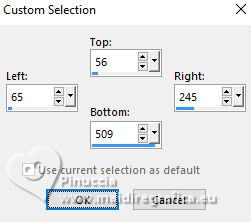
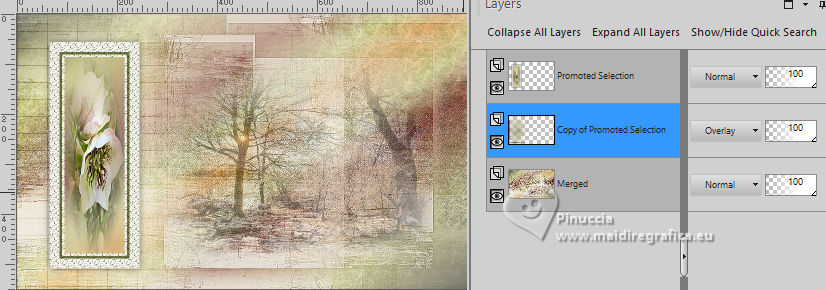
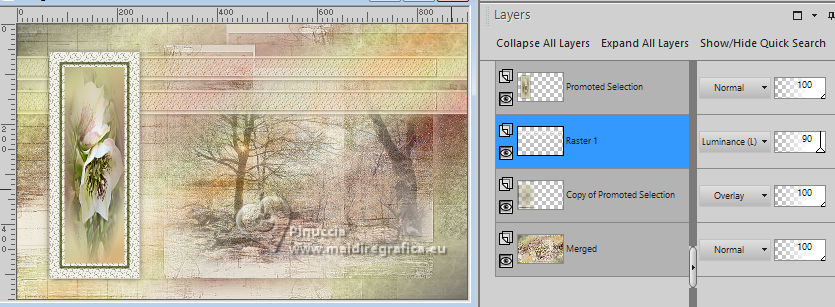
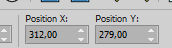
Selections>Promote Selection to Layer.
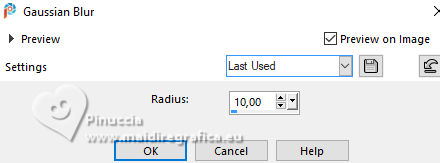
16. Adjust>Blur>Gaussian Blur - radius 10.
17. Set again your foreground color to the color 1 #6f7440,
and change your background color with the color 3 #f1f1e7.
Flood Fill with the color 3 #f1f1e7.
18. Selections>Modify>Contract - 20 pixels.
Flood Fill with the color 1 #6f7440.
19. Selections>Modify>Contract - 5 pixels.
Flood Fill with the color 3 #f1f1e7.
20. Selections>Modify>Contract - 5 pixels.
Press CANC on the keyboard 
21. Selections>Invert.
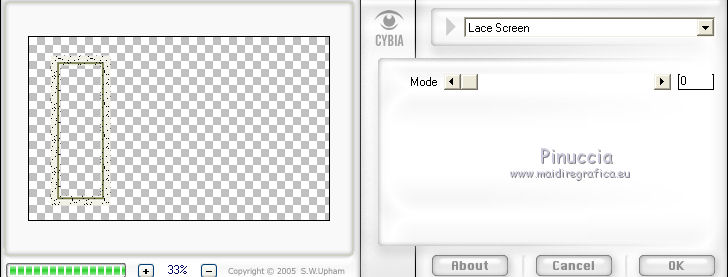
Effects>Plugins>Cybia - Screenworks - Lace screen, default settings.
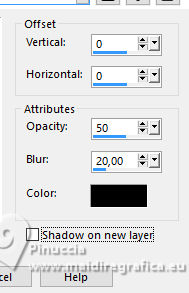
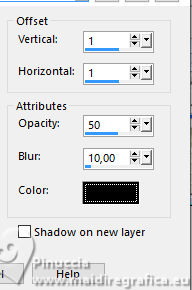
22. Effects>3D Effects>Drop Shadow, color black.
23. Again Selections>Invert.
Open the flowers tube by Nikita and go to Edit>Copy.
Go back to your work and go to Edit>Paste into Selection.
Adjust>Sharpness>Sharpen More.
Selections>Select None.
24. Layers>Merge>Merge Down.
25. Effects>3D Effects>Drop Shadow, same settings.
26. Layers>Duplicate.
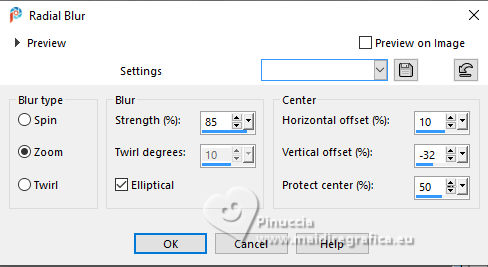
27. Adjust>Blur>Radial Blur.
Layers>Arrange>Move Down.
28. Effects>Plugins>Toadies - Ommadawn.

29. Change the Blend Mode of this layer to Overlay.
30. Layers>New Raster Layer - raster 1.
Custom Selection
31. Set again your background color with the color 2 #e6e0d5.
Flood Fill the selection with the color 2 #e6e0d5.
32. Selections>Modify>Contract - 5 pixels.
Flood Fill with your foreground color (color 1) #6f7440.
33. Selections>Modify>Contract - 2 pixels.
Flood Fill with your background color (color 2) #e6e0d5.
34. Effects>Plugins>Cybia - Screenworks, Lace Screen.
Selections>Select None.
35. Effects>3D Effects>Drop Shadow, color black.
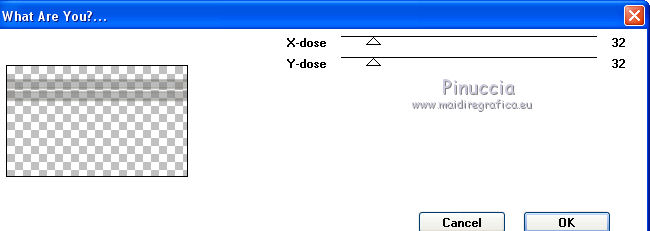
36. Effects>Plugins>Toadies - What are you
(don't use it in Unlimited, because you'll get a different result)
37. Layers>Duplicate.
Layers>Merge>Merge Down.
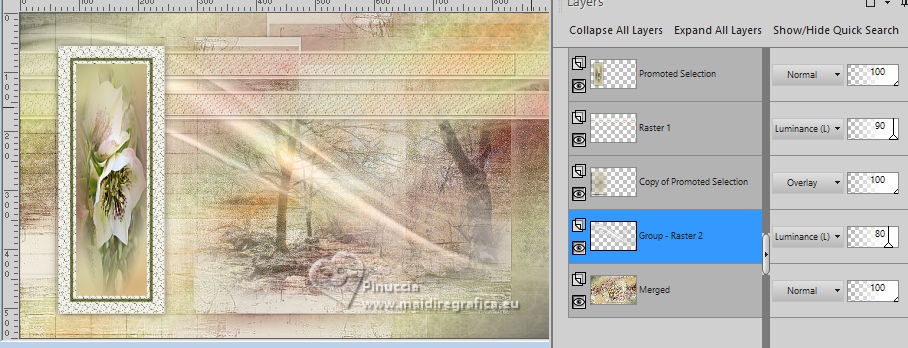
38. Change the Blend Mode of this layer to Luminance (legacy) and reduce the opacity to 90%.
39. Effects>User Defined Filter - preset Emboss 3,
or Adjust>Sharpness>Sharpen, according to your colors.
40. Activate your background layer (Merged).
41. Layers>New Raster Layer.
Set your foreground color to white #ffffff,
Flood Fill the layer with the color white.
42. Layers>New Mask layer>From image
Open the menu under the source window
and select the mask Narah_mask_Abstract86.
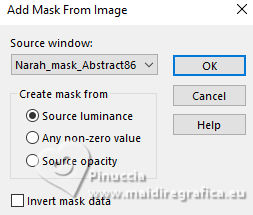
Layers>Merge>Merge Group.
43. Effects>3D Effects>Drop Shadow, color black.
44. Change the Blend Mode of this layer to Luminance (Legacy) and reduce the opacity to 80%.
45. Image>Mirror>Mirror Horizontal (Image>Mirror).
Image>Mirror>Mirror Vertical (Image>Flip).
46. Open the tube Deco chaine, and go to Edit>Copy.
Go back to your work and go to Edit>Paste as new layer.
Move this layer under the frame's layer.
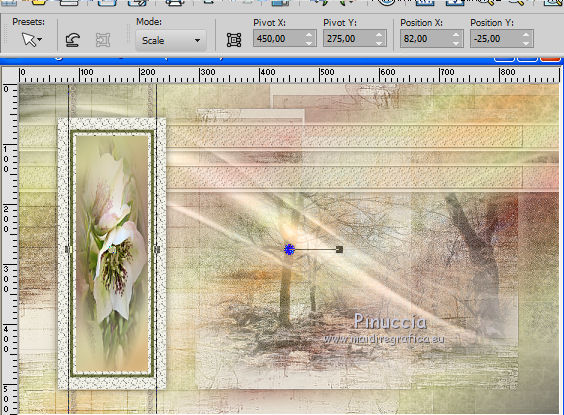
47. K key to activate your Pick Tool
umenti/deformazione2.jpg">
Position X: 82,00 - Position Y: -25,00.
48. Image>Add borders, 1 pixel, symmetric, color 4 #3d4121.
49. Edit>Copy.
50. Image>Add borders, 2 pixels, symmetric, color 2 #e6e0d5.
Image>Add borders, 1 pixel, symmetric, color 4 #3d4121.
51. Selections>Select All.
Image>Add borders 35 pixels, symmetric, color white.
52. Selections>Invert.
Edit>Paste into Selection.
53. Adjust>Blur>Gaussian Blur - radius 10.
54. Selections>Promote Selection to Layer.
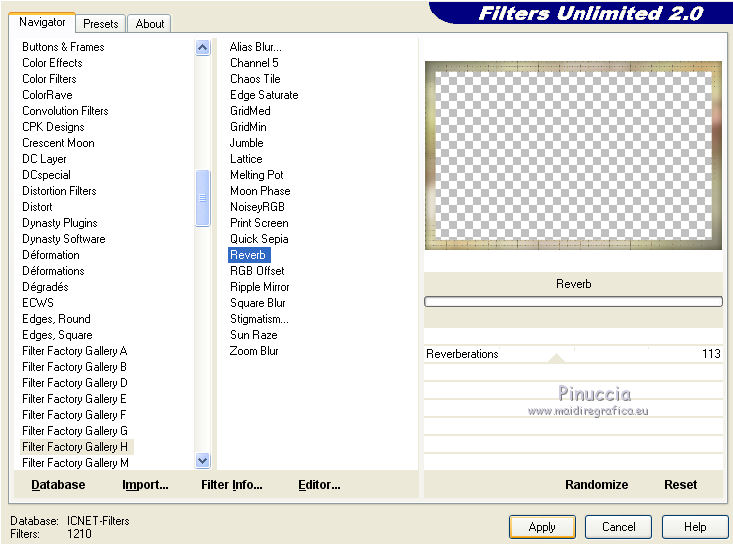
55. Effects>Plugins>Filters unlimited 2.0 - Filters Factory Gallery H - Reverb, default settings.
Adjust>Sharpness>Sharpen.
56. Selections>Invert.
Effects>3D Effects>Drop Shadow, color black.
Selections>Select None.
57. Layers>Merge>Merge visible.
58. Open the wordart by Jewel and go to Edit>Copy.
Go back to your work and go to Edit>Paste as new layer.
Image>Resize, to 70%, resize all layers not checked.
59. K key to activate your Pick Tool
Position X: 312,00 - Position Y: 279,00.
60. Open the woman's tube by Tocha and go to Edit>Copy.
Go back to your work and go to Edit>Paste as new layer.
Image>Mirror>Mirror Horizontal (Image>Mirror).
Image>Resize, to 68%, resize all layers not checked.
Move  the tube to the right. the tube to the right.
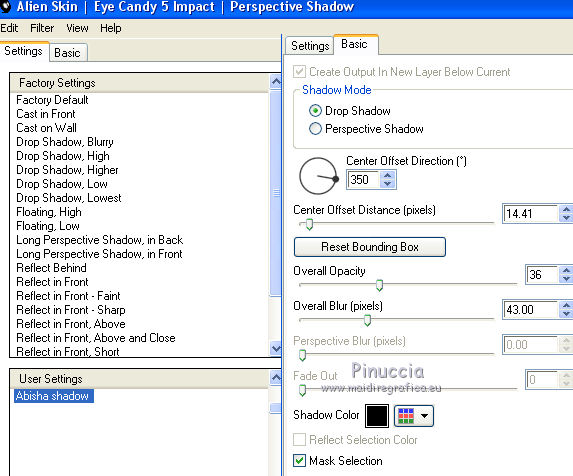
61. Effects>Plugins>Alien Skin Eye Candy 5 Impact - Perspective Shadow.
Select the preset Abisha shadow
62. Image>Add borders, 1 pixel, symmetric, color 4 #3d4121.
Image>Add borders, 1 pixel, symmetric, color 2 #e6e0d5.
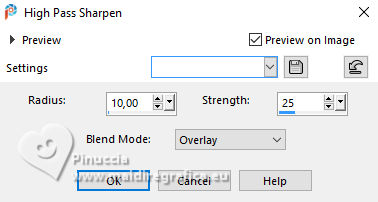
63. Adjust>Sharpness>High Pass Sharpen.
64. Sign your work.
Image>Resize, to 900 pixels width, resize all layers checked.
Save as jpg.
Your versions. Thanks

Olimpia
Maria L
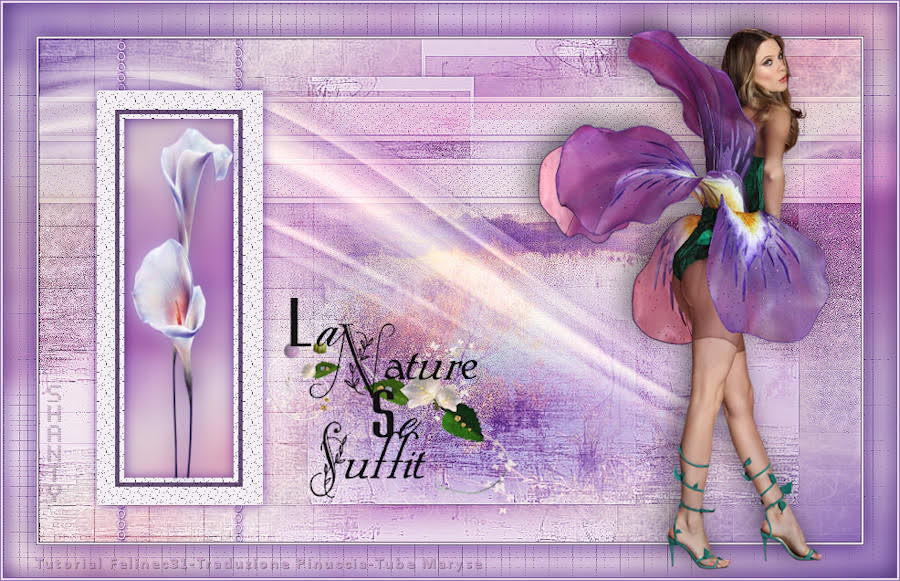
Shanty
If you have problems or doubts, or you find a not worked link,
or only for tell me that you enjoyed this tutorial, write to me.
30 Dicembre 2024
|