|
ANDREAS

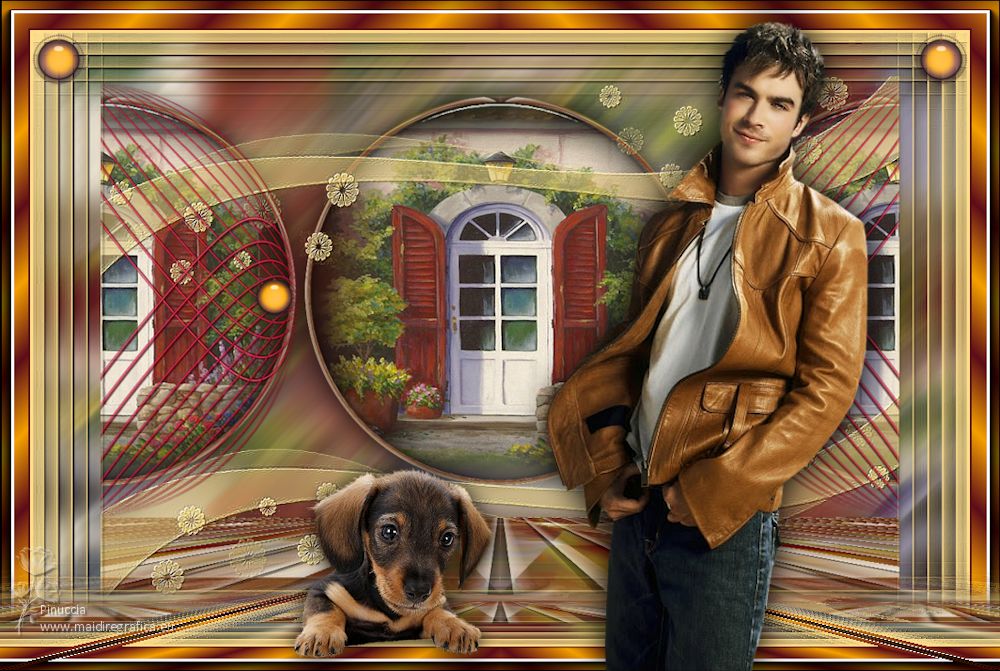
Thanks Inge-lore for your invitation to translate your tutorials.

This tutorial was translated with PSPX2 and PSPX7, but it can also be made using other versions of PSP.
Since version PSP X4, Image>Mirror was replaced with Image>Flip Horizontal,
and Image>Flip with Image>Flip Vertical, there are some variables.
In versions X5 and X6, the functions have been improved by making available the Objects menu.
In the latest version X7 command Image>Mirror and Image>Flip returned, but with new differences.
See my schedule here
 Italian translation qui Italian translation qui
 French translation here French translation here
 Your versions ici Your versions ici
Material:
Tubes of yours (the tubes used by Inge-Lore are under licence)
The rest of the material here
Thanks for the tubes of my version Mina and Anna.br
(you find here the links to the material authors' sites)

consult, if necessary, my filter section here
Filters Unlimited 2.0 here
Mehdi - Sorting Tiles here
Simple - Blintz, Top Left Mirror here
Mura's Seamless - Emboss at Alpha here
Mura's Meister - Perspective Tiling here
FM Tile Tools Saturation Emboss here
Graphics Plus - Panel Stripes here
Flaming Pear - Flexixy 2 here
Alien Skin Eye Candy 5 Impact - Glass here
AAA Frames - Foto Frame here
Filters VM Extravaganza can be used alone or imported into Filters Unlimited.
(How do, you see here)
If a plugin supplied appears with this icon  it must necessarily be imported into Unlimited it must necessarily be imported into Unlimited

You can change Blend Modes according to your colors.
In the newest versions of PSP, you don't find the foreground/background gradient (Corel_06_029).
You can use the gradients of the older versions.
The Gradient of CorelX here

Copy the Selection in the Selection Folder.
Open the mask in PSP and minimize it with the rest of the material.
1. Choose 3 colors from your tubes.

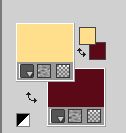
Set your foreground color to color 3 #ffdf8c,
and your background color to color 2 #5c0c19
Open a new transparent image 1000 x 650 pixels.
Flood Fill  the transparent image with your background color #5c0c19 (color 2). the transparent image with your background color #5c0c19 (color 2).
Selections>Select All.
Open your background tube Mina@4222.Mist paesaggio.09.16 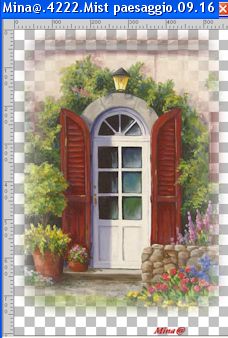
Erase the watermark and go to Edit>Copy.
Go back to your work and go to Edit>Paste into Selection.
Selections>Select None.
Effects>Image Effects>Seamless Tiling, default settings.

Adjust>Blur>Motion Blur.
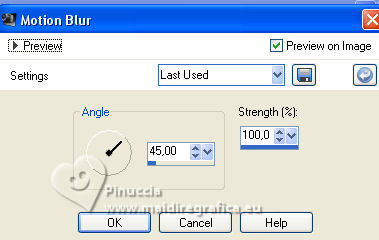
Edit>Repeat Motion Blur.
Layers>Duplicate.
2. Effects>Plugins>Mehdi - Sorting Tiles.
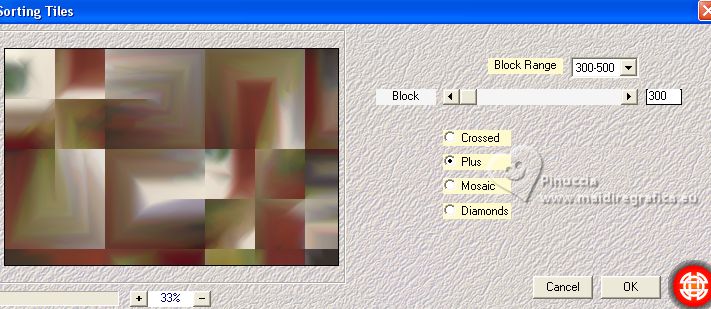
Effects>Plugins>Simple – Blintz
Edit>Repeat Blintz.
Effects>Plugins>Simple - Top Left Mirror
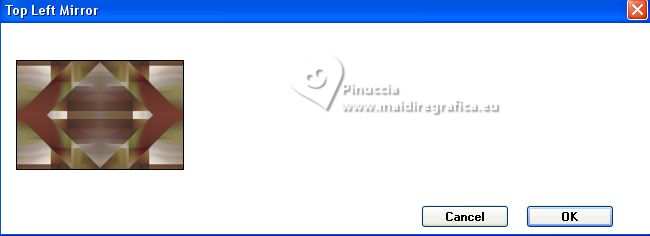
Effects>Image Effects>Seamless Tiling, Side by side.

Effects>Plugins>FM Tile Tools - Saturation Emboss, default settings.

3. Effects>Plugins>Graphics Plus - Panel Stripes, default settings.
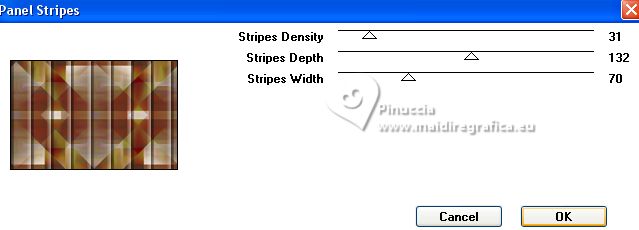
Effects>Plugins>Mura's Meister - Perspective Tiling.
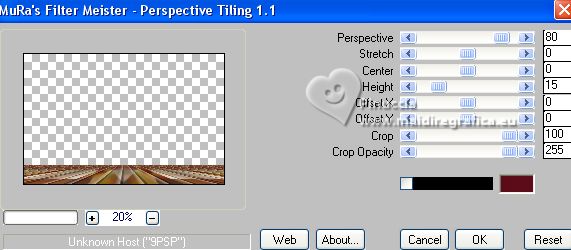
Effects>Reflection Effects>Rotating Mirror.

Layers>Duplicate.
Effects>Plugins>Flaming Pear – Flexify 2
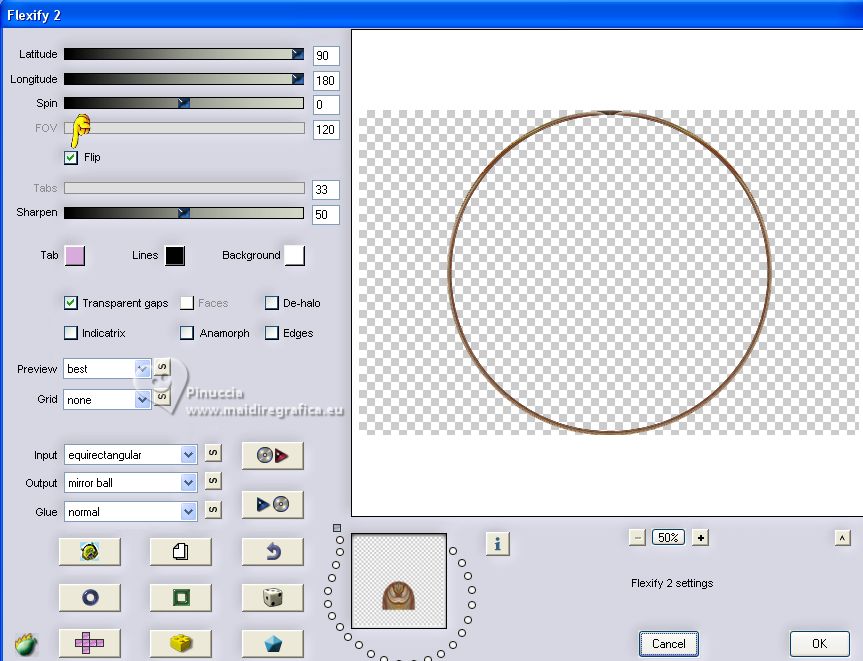
Image>Resize, al 75%, resize all layers not checked.
4. Effects>Plugins>Mura's Meister - Copies.
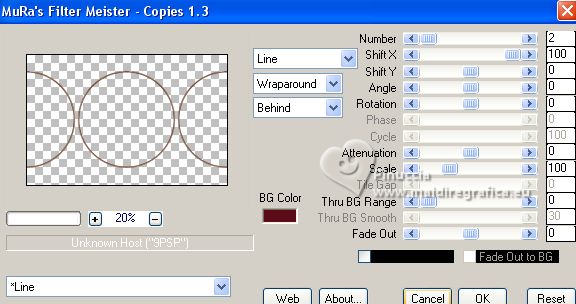
K key to activate your Pick Tool 
keep Position X: 0,00 and set Position Y: 25,00.

Activate your Magic Wand Tool 
and click in the central circle to select it.
Layers>New Raster Layer.
Layers>Arrange>Move Down.
Edit>Paste into Selection (the landscape tube is still in memory).
Adjust>Sharpness>Sharpen.
Layers>New Raster Layer.
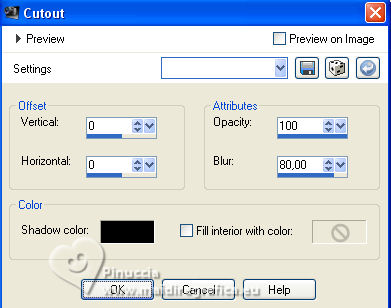
5. Effects>3D Effects>Cutout.
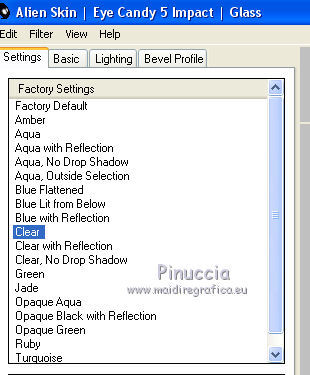
Effects>Plugins>Alien Skin Eye Candy 5 Impact - Glass.
Select the preset Clear and ok.
Selections>Select None.
Layers>Merge>Merge Down.
Effects>Plugins>Mura's Meister - Copies, same settings.
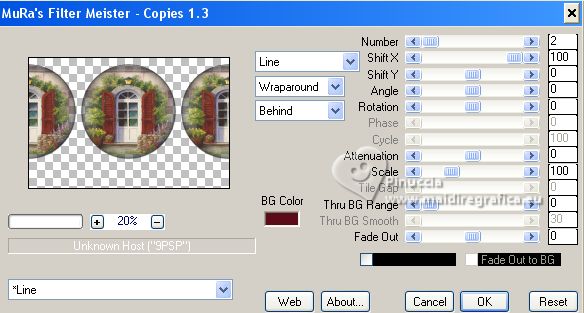
Activate your top layer.
Layers>Merge>Merge Down.
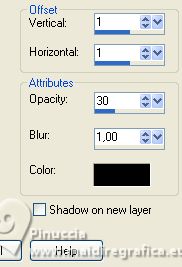
Effects>3D Effects>Drop Shadow.
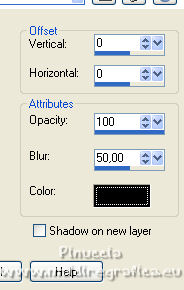
6. Layers>New Raster Layer.
Flood Fill  the layer with your foreground color #ffdf8c (color 3). the layer with your foreground color #ffdf8c (color 3).
Layers>New Mask layer>From image
Open the menu under the source window and you'll see all the files open.
Select the mask NarahsMasks_1632
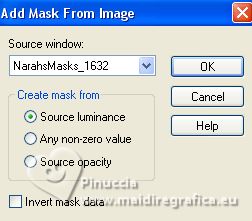
Effects>Edge Effects>Enhance More.
Layers>Merge>Merge group.
K key to activate your Pick Tool 
keep Position X: 0,00 and set Position Y: 310,00.

Layers>Duplicate.
Image>Mirror.
Image>Flip.
Layers>Merge>Merge Down.
7. Effects>Plugins>Mura's Seamless - Emboss at Alpha, default settings.
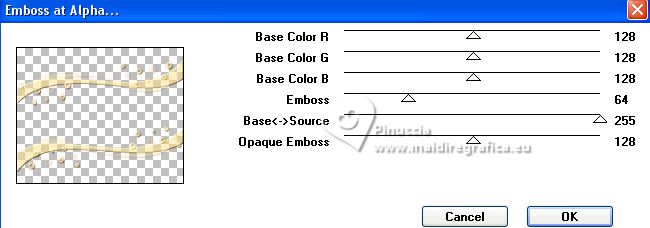
Effects>3D Effects>Drop Shadow.
Open Deco-1 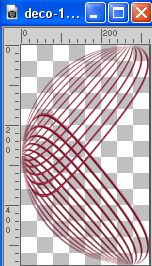
Edit>Copy.
Go back to your work and go to Edit>Paste as new layer.
K key to activate your Pick Tool 
set Position X: 750,00 and Position Y: 5,00.

If necessary, colorize with your Change to target  , ,
Layers>Duplicate.
Image>Mirror.
Layers>Merge>Merge Down.
Reduce the opacity of this layer to 70%.
8. Open deco_1_mj 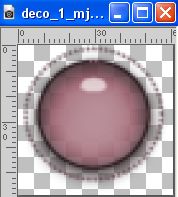
Edit>Copy.
Go back to your work and go to Edit>Paste as new layer.
K key to activate your Pick Tool 
set Position X: 188,00 and Position Y: 249,00.

If necessary, colorize with your Change to target  , ,
Layers>Duplicate.
Image>Mirror.
Layers>Merge>Merge Down.
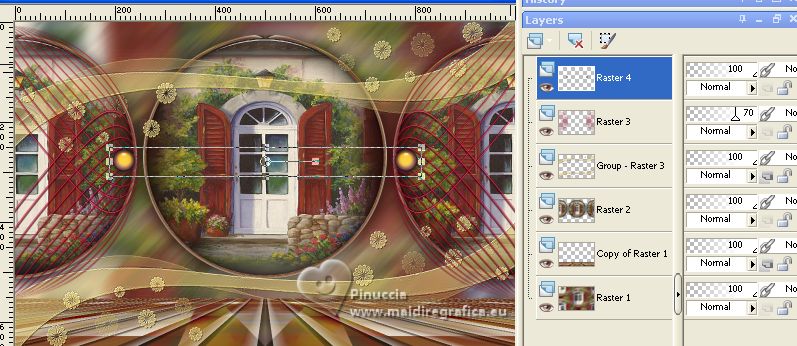
Close the layer Raster 1.
Layers>Merge>Merge visible.
Image>Resize, to 85%, resize all layers not checked.
Open the layer Raster 1 and stay on the top layer.
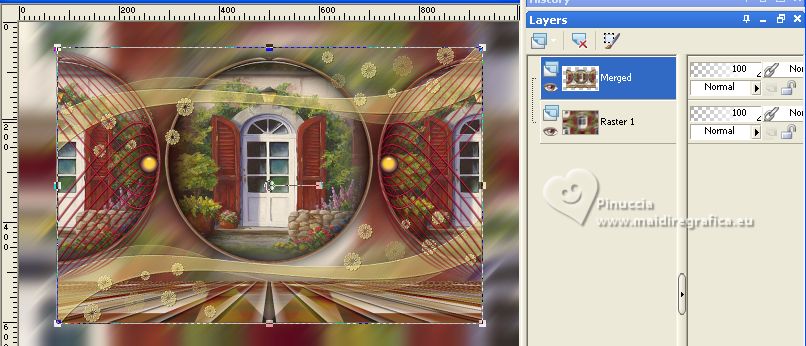
9. Layers>New Raster Layer.
Flood Fill  the layer with your foreground color #ffdf8c (color 3). the layer with your foreground color #ffdf8c (color 3).
Layers>New Mask layer>From image
Open the menu under the source window
and select the mask sc-edge101
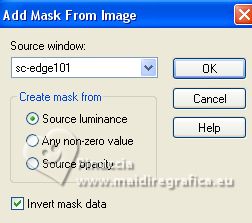
Effects>Edge Effects>Enhance More.
Layers>Merge>Merge Group.
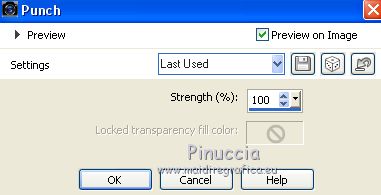
Effects>Distortion Effects>Punch.
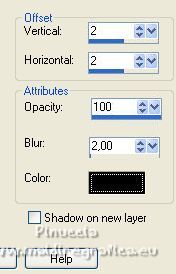
Effects>3D Effects>Drop Shadow.
10. Set your foreground color to color 1 #f4a000
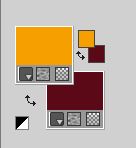
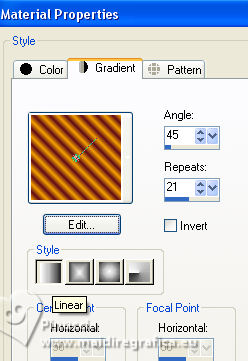
Set your foreground color to a Foreground/Background Gradient, style Linear.
Image>Add borders, 2 pixels, symmetric, background color (color 2 #5c0c19).
Selections>Select All.
Image>Add borders, 30 pixels, symmetric, foreground color (color 1 #f4a000).
Selections>Invert.
Flood Fill  the selection with your Gradient. the selection with your Gradient.
Effects>Plugins>AAA Frames - Foto Frame.
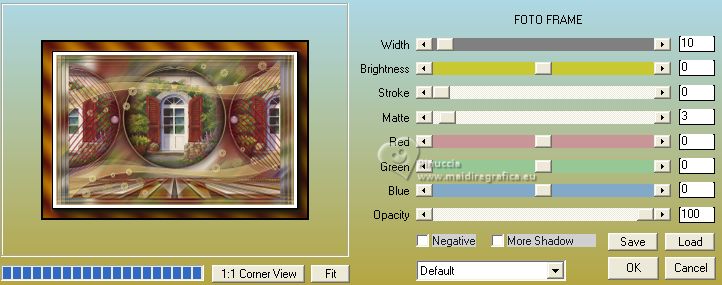
Effects>Reflection Effects>Rotating Mirror, default settings.

Selections>Select None.
11. Layers>Duplicate.
Effects>Plugins>Mura's Meister - Perspective Tiling, same settings.
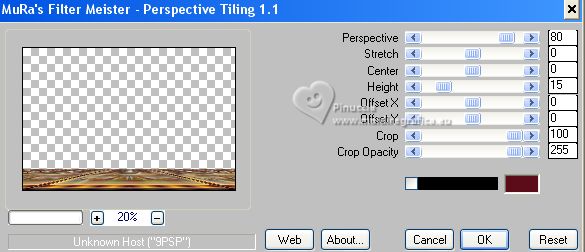
Activate your Magic Wand Tool  , feather 50, , feather 50,
and click in the transparent part to select it.
Press 5 times CANC on the keyboard 
Selections>Select None.
don't forget to set again the feather of your Magic Wand Tool to 0
Open your person tube, for me a tube by Mina 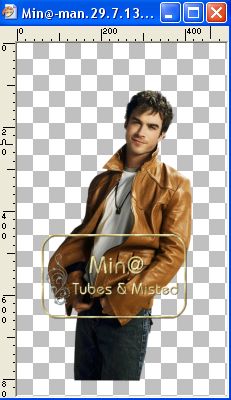 . .
Edit>Copy.
Go back to your work and go to Edit>Paste as new layer.
Image>Resize, if necessary, resize all layers not checked.
Adjust>Sharpness>Sharpen.
Effects>3D Effects>Drop Shadow.

12. Activate again the tube deco_1_mj 
Edit>Copy.
Go back to your work and go to Edit>Paste as new layer.
K key to activate your Pick Tool 
set Position X: 33,00 and Position Y: 36,00.

If necessary, colorize with your Change to Target Tool  , ,
Layers>Duplicate.
Image>Mirror.
Activate your deco tube, for me a tube by Anna.br 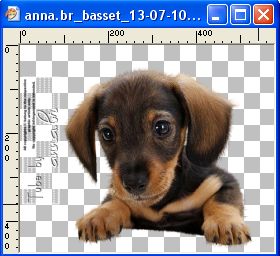
Edit>Copy.
Go back to your work and go to Edit>Paste as new layer.
Image>Resize, if necessary, resize all layers not checked.
Adjust>Sharpness>Sharpen.
Effects>3D Effects>Drop Shadow.
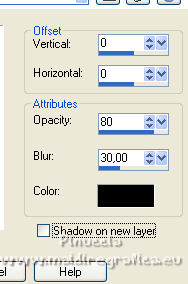
Sign your work on a new layer.
Layers>Merge>Merge All and save as jpg.

If you have problems or doubts, or you find a not worked link, or only for tell me that you enjoyed this tutorial, write to me.
6 September 2023

|


