|
KATIA
 ENGLISH VERSION ENGLISH VERSION
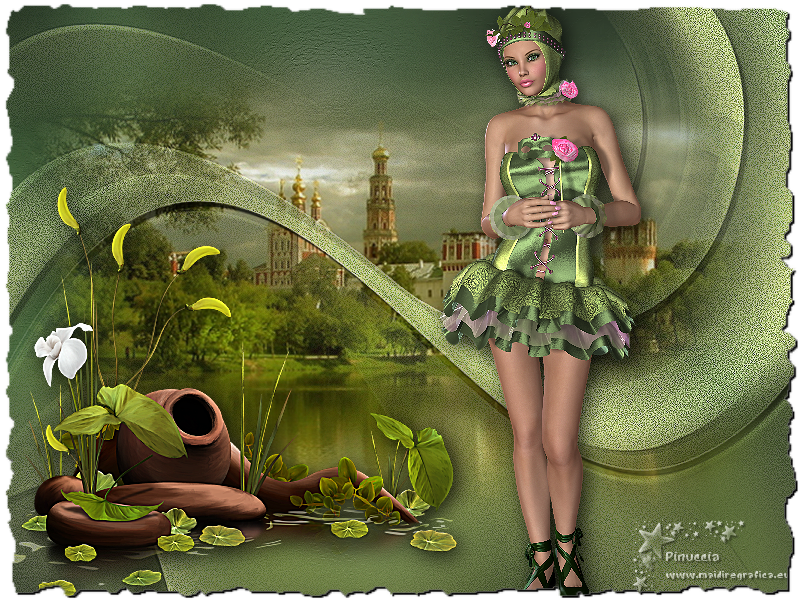
Thanks Joanne for the invitation to translate your tutorials:

This tutorial was translated with PSPX3 but it can also be made using other versions of PSP.
Since version PSP X4, Image>Mirror was replaced with Image>Flip Horizontal,
and Image>Flip with Image>Flip Vertical, there are some variables.
In versions X5 and X6, the functions have been improved by making available the Objects menu.
In the latest version X7 command Image>Mirror and Image>Flip returned, but with new differences.
See my schedule here
 Italian translation here Italian translation here
 Your versions Your versions
For this tutorial, you will need:
Material here
Thanks Monro for the woman tube.
The rest of the material is not signed.
(The links of the tubemakers sites here).
Plugins
consult, if necessary, my filter section here
Filters Unlimited 2.0 here
Graphics Plus - Cross Shadow here
Filters Graphics Plus can be used alone or imported into Filters Unlimited.
(How do, you see here)
If a plugin supplied appears with this icon  it must necessarily be imported into Unlimited it must necessarily be imported into Unlimited

You can change Blend Modes according to your colors.
In the newest versions of PSP, you don't find the foreground/background gradient (Corel_06_029).
You can use the gradients of the older versions.
The Gradient of CorelX here
Open the masks in PSP and minimize them with the rest of the material.
1. Open a new transparent image 800 x 600 pixel.
2. Selections>Select All.
Open the image of the daisies and go to Edit>Copy.
Go back to your work and go to Edit>Paste into Selection.
Selections>Select None.
3. Adjust>Blur>Gaussian Blur - radius 30.

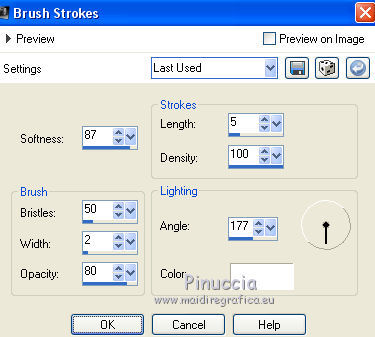
4. Effects>Art Media Effects>Brush Strokes.
5. Adjust>Sharpness>Sharpen More.
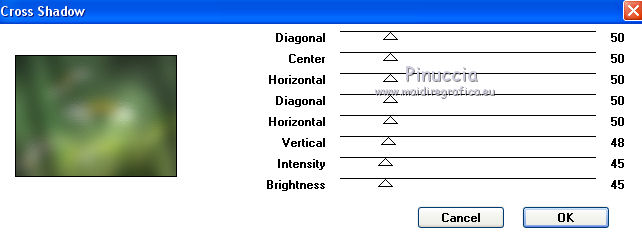
6. Effects>Plugins>Graphics Plus - Cross Shadow.
7. Open the tube of the landscape and go to Edit>Copy.
Go back to your work and go to Edit>Paste as new layer.
Image>Resize, to 120%, resize all layers not checked.
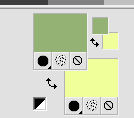
8. Set your foreground color to #94b274,
and your background color to #f1ff9b.
9. Set your foreground color to a Foreground/Background Gradient, style Linear.
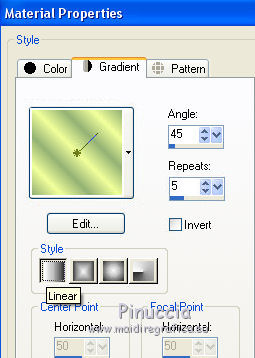
10. Layers>New Raster Layer.
Flood Fill  the layer with your gradient. the layer with your gradient.
11. Layers>New Mask layer>From image
Open the menu under the source window and you'll see all the files open.
Select the mask MASK-MD-110
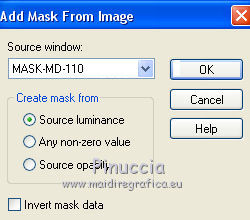
Layers>Merge>Merge Group.
12. Adjust>Add/Remove Noise>Add Noise.
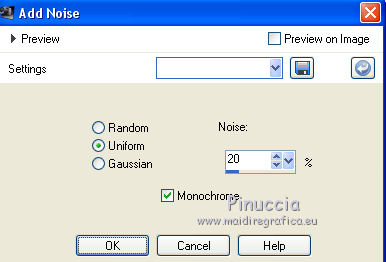
13. Effects>Edge Effects>Enhance.
14. Effects>3D Effects>Drop Shadow.
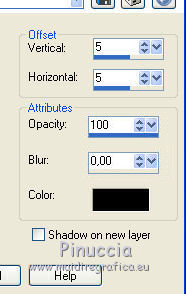
15. Open the tube of the flowers and go to Edit>Copy.
Go back to your work and go to Edit>Paste as new layer.
Image>Mirror.
Image>Resize, to 60%, resize all layers not checked.
Move  the tube at the bottom left, see my example. the tube at the bottom left, see my example.
16. Effects>3D Effects>Drop Shadow.
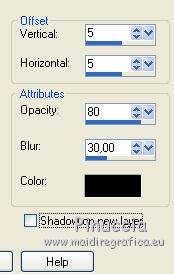
Adjust>Sharpness>Sharpen More.
17. Open the tube of the woman and go to Edit>Copy.
Go back to your work and go to Edit>Paste as new layer.
Image>Resize, to 25%, resize all layers not checked.
Move  the tube to the right side, see my example. the tube to the right side, see my example.
Adjust>Sharpness>Sharpen.
Effects>3D Effects>Drop Shadow, same settings.
18. Sign your work on a new layer.
little note about the watermark:
I never ask to put watermark on the versions made by my translations.
But if you decide to use the watermark supplied by the author (to change in Soft Light),
I would appreciate that my work as translator was respected too.
For that, I added my watermark to the material (a layer for every language that I translate).
19. Layers>Merge>Merge visible.
20. Layers>New Mask layer>From image
Open the menu under the source window
and select the mask coref8bn
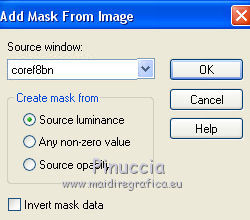
Layers>Merge>Merge Group.
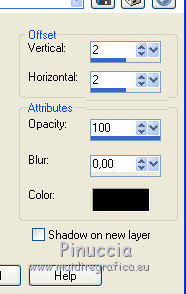
21. Effects>3D Effects>Drop Shadow.
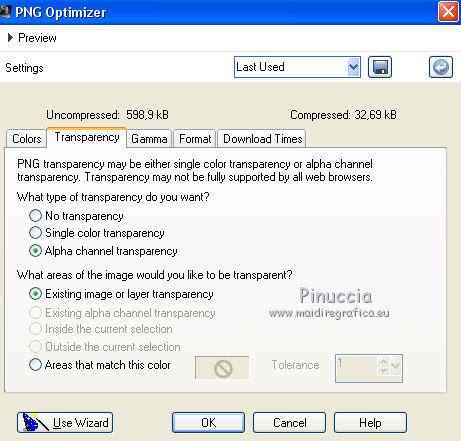
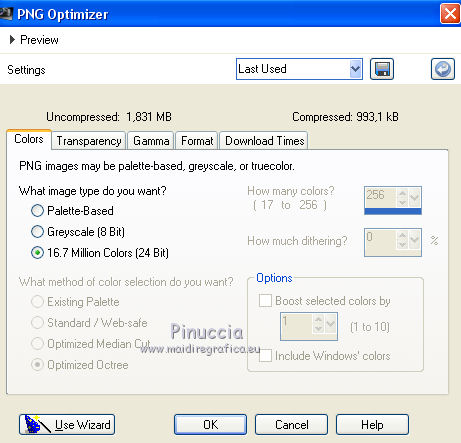
22. Save as png to keep the transparence of your background:
File>Export>Ottimizzazione PNG.
Version with tubes by Lady Valella and Thafs
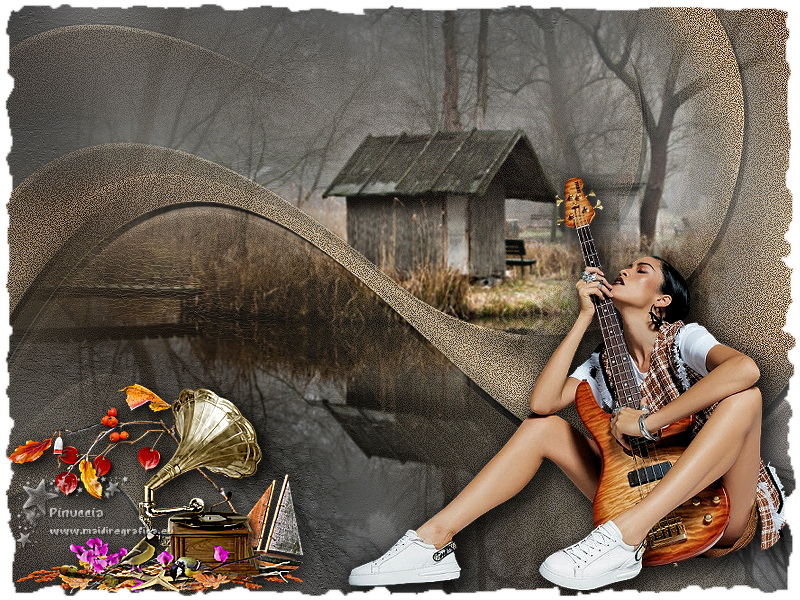

Your versions Thanks
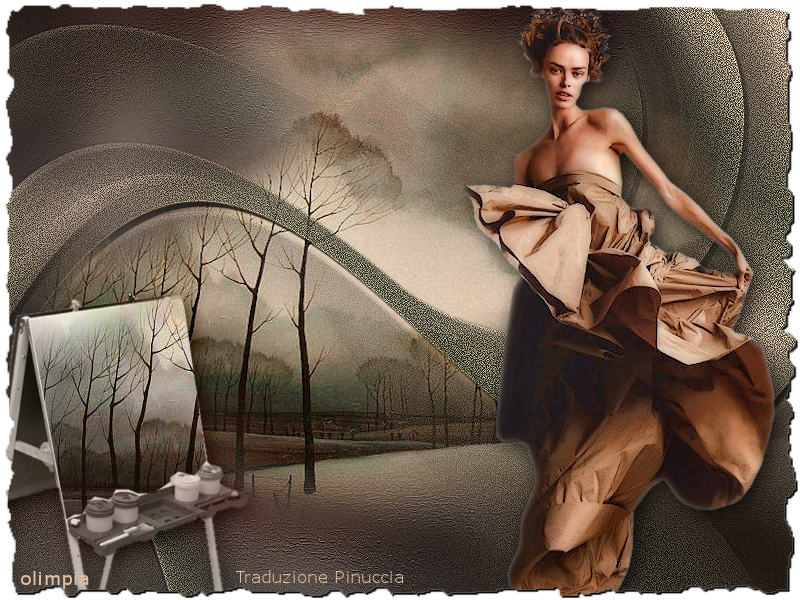
Olimpia
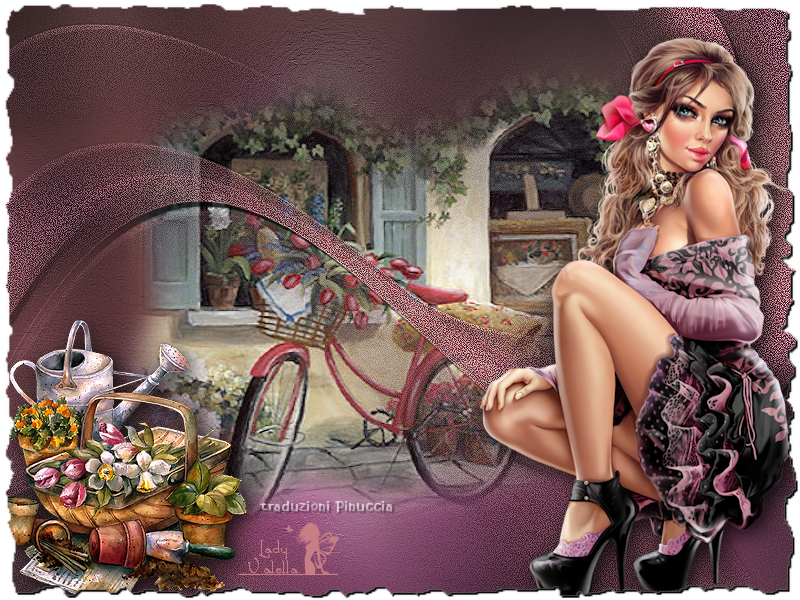
LadyValella

If you have problems or doubts, or you find a not worked link, or only for tell me that you enjoyed this tutorial, write to me.
9 June 2020
|
 ENGLISH VERSION

 ENGLISH VERSION
