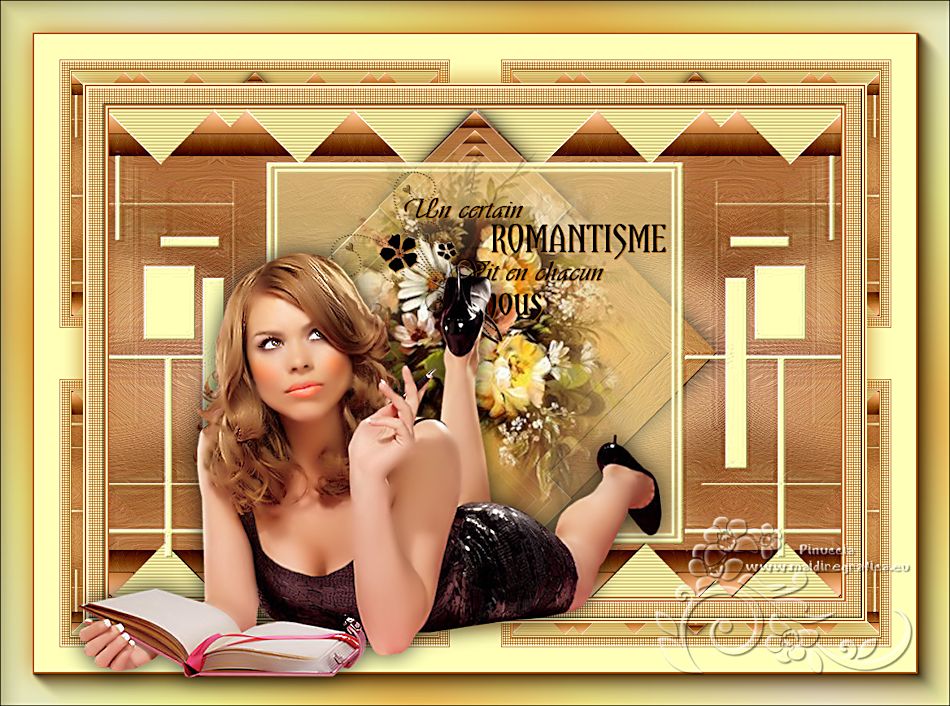
|
DAPHNÉE

english version

Here you find the original of this tutorial:

This tutorial was written with CorelX8 and translated with Corel X7 and CorelX3, but it can also be made using other versions of PSP.
Since version PSP X4, Image>Mirror was replaced with Image>Flip Horizontal,
and Image>Flip with Image>Flip Vertical, there are some variables.
In versions X5 and X6, the functions have been improved by making available the Objects menu.
In the latest version X7 command Image>Mirror and Image>Flip returned, but with new differences.
See my schedule here
italian translation here
your versions here
A woman tube of yours.
The rest of the material here
For my tube thanks Tocha.
The flowers from the net.
The mask is by CGmask.
The rest of the material is by Laurette.
(The links of the tubemakers here).
Plugins
consult, if necessary, my filter section here
Filters Unlimited 2.0 here
Mura's Seamless - Emboss at Alpha here
Mura's Meister - Copies here
Graphics Plus - hereck Tile I here
Simple - Blintz, Top Left Mirror here
AAA Frames - Foto Frame here
Filters Mura's Seamless, Graphics Plus and Simple can be used alone or imported into Filters Unlimited.
(How do, you see here)
If a plugin supplied appears with this icon  it must necessarily be imported into Unlimited it must necessarily be imported into Unlimited

You can change Blend Modes according to your colors.
In the newest versions of PSP, you don't find the foreground/background gradient (Corel_06_029).
You can use the gradients of the older versions.
The Gradient of CorelX here
Copy the selections in the Selections Folder.
Open the mask in PSP and minimize it with the rest of the material.
Colors

1. Choose two colors from your tube.
For the example:
Set your foreground color to #b96804,
and your background color to #fefeb9.
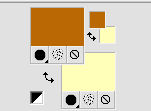
Open a new transparent image 900 x 600 pixels.
Flood Fill  the transparent image with you foreground color #b96804. the transparent image with you foreground color #b96804.
2. Layers>New Raster Layer, Raster 2.
Selection>Select All.
Open your woman tube and go to Edit>Copy.
Go back to your work and go to Edit>Paste into Selection.
Selection>Select None.
3. Effects>Image Effects>Seamless Tiling, default settings.

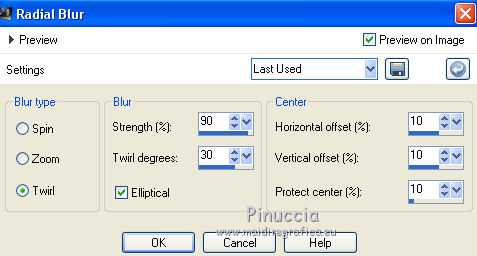
Adjust>Blur>Radial Blur.
Effects>Artistic Effect>Enamel.
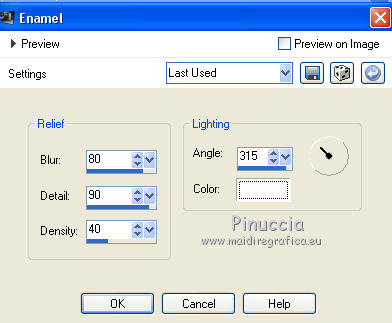
Layers>Merge>Merge Down.
4. Effects>Plugins>AAA Frames - Foto Frame.
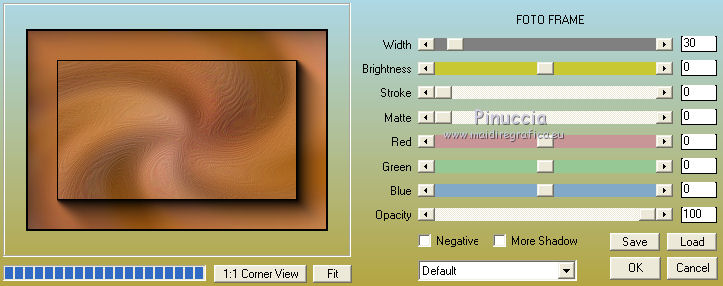
Effects>Plugins>Filters Unlimited 2.0 - Buttons &Frames - 3D Glass Frame 2
default settings.
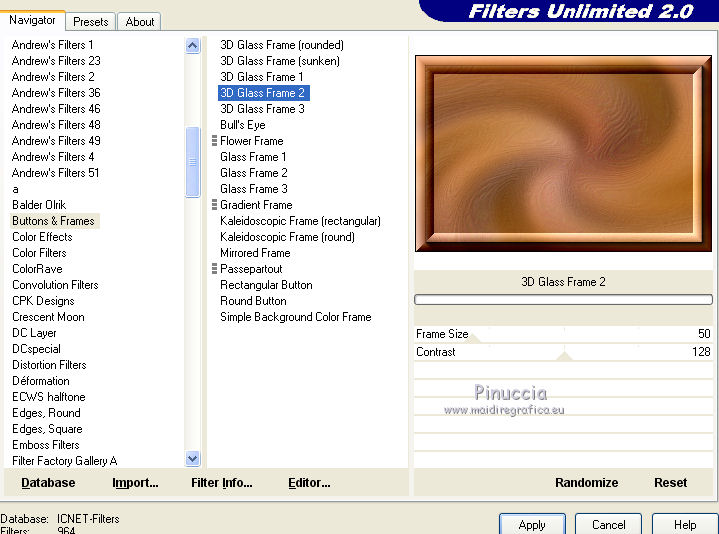
Effects>Plugins>Simple - Blintz
Effects>Plugins>Simple - Top Left Mirror.
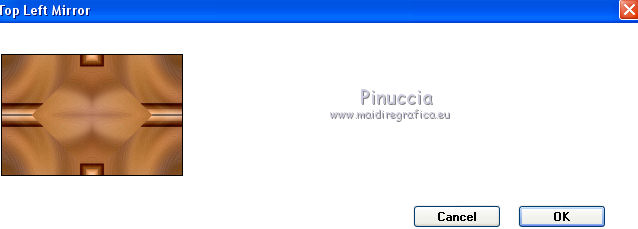
Effects>Image Effects>Seamless Tiling, default settings.
5. Selections>Load/Save Selection>Load selection from Disk.
Look for and load the selection New Daphnée1.
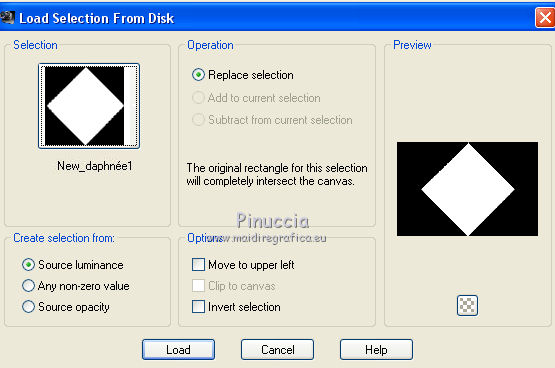
Selections>Promote Selection to Layer.
Selection>Select None.
Layers>Duplicate.
Close the top layer and activate the central layer, Promoted selection.
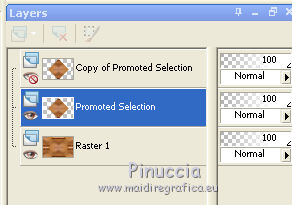
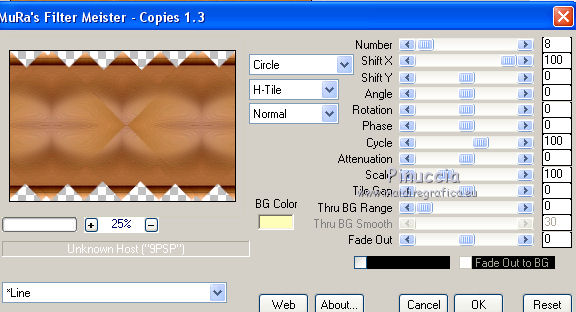
Effects>Plugins>Mura's Meister - Copies.
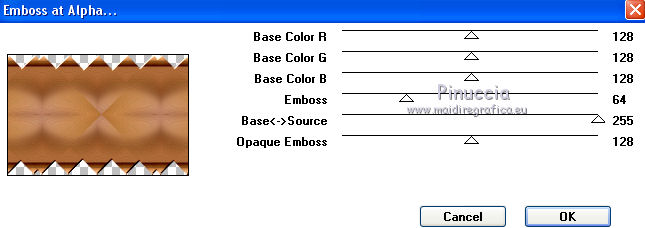
Effects>Plugins>Mura's Seamless - Emboss at Alpha, default settings.
Effects>Reflection Effects>Rotating Mirror, default settings.

6. Activate the bottom layer, Raster 1.
Press CANC on the keyboard 
Flood Fill  the layer with your light background color. the layer with your light background color.
Effects>Texture Effects>Blinds, color #a47e2e.
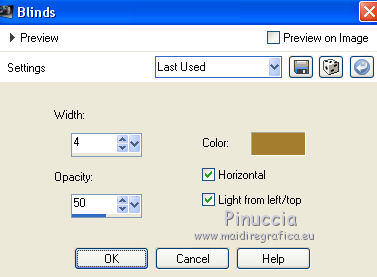
You should have this

7. Re-open and activate the top layer.
Effects>Plugins>Mura's Seamless - Emboss at Alpha, default settings.
Layers>Duplicate.
Image>Resize, to 80%, resize all layers not checked.
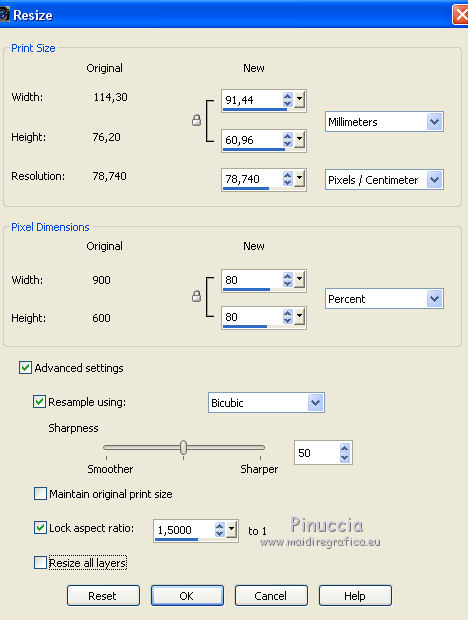
Again Layers>Duplicate.
Image>Resize, to 80%, resize all layers not checked.
One more time Layers>Duplicate.
Image>Resize, 80%, resize all layers not checked.
Result
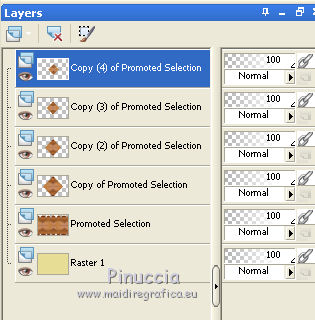
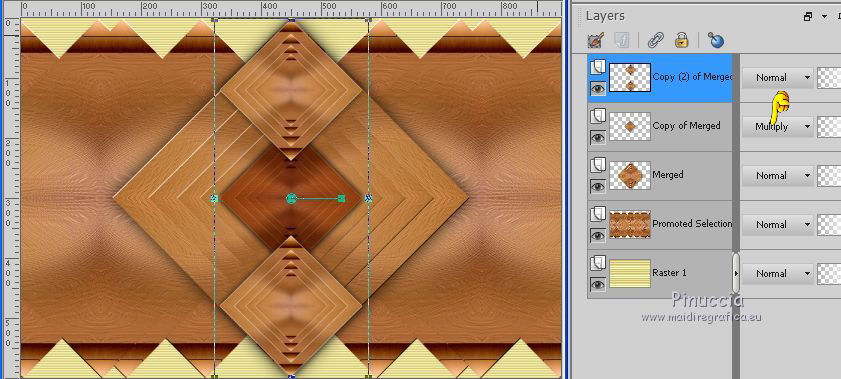
Close the two bottom layers.
Layers>Merge>Merge visible.
Effects>3D Effects>Drop Shadow, color black.
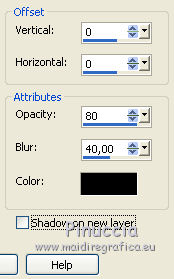
Re-open the two bottom layer and keep the top layer selected.
Layers>Duplicate.
Image>Resize, to 40%, resize all layers not checked.
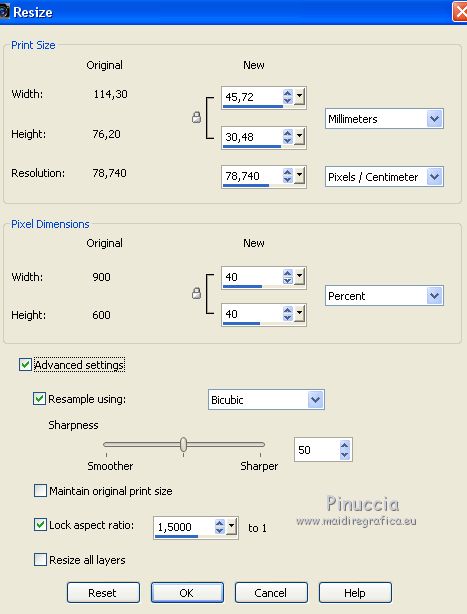
Effects>Plugins>Simple - Top Left Mirror.
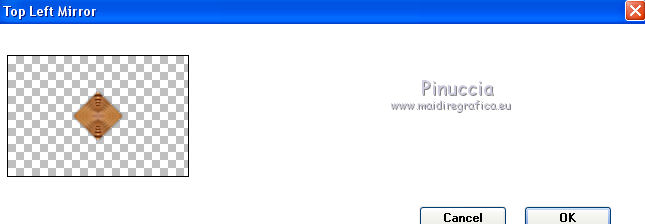
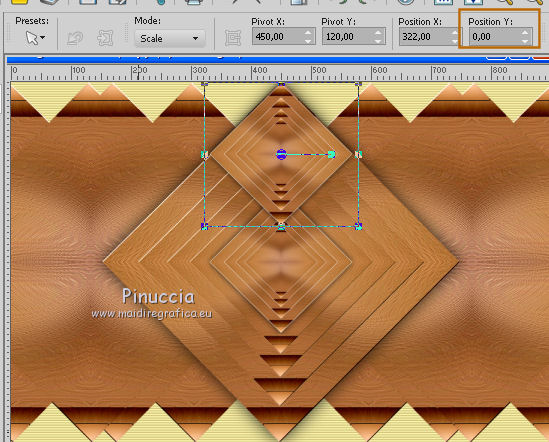
Layers>Duplicate.
Objects>Align>Top
or, first of all if you are working with a previous version that has not available the menu Objects,
press K key on the keyboard to activate the Pick Tool 
and set Position Y to 0,00
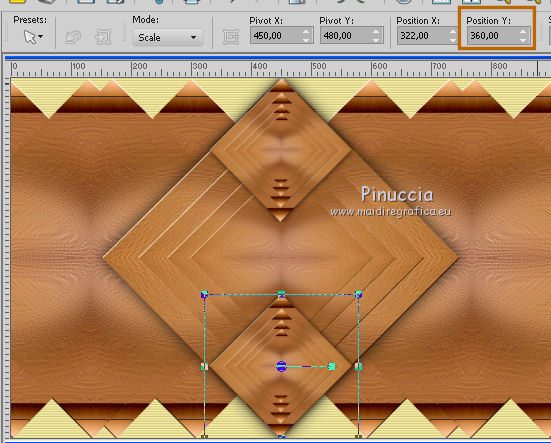
Layers>Duplicate.
Objects>Align>Bottom
or Pick Tool 
and set Position Y to 360,00
Layers>Merge>Merge Down.
Change the Blend Mode of the layer below, Copy of Merged to Multiply
and keep the top layer selected
9. Layers>New Raster Layer.
Flood Fill  with your background color. with your background color.
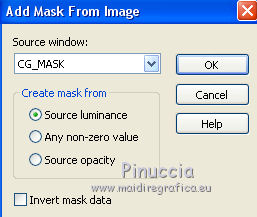
Layers>New Mask layer>From image
Open the menu under the source window and you'll see all the files open.
Select the maskCGmask
Layers>Duplicate
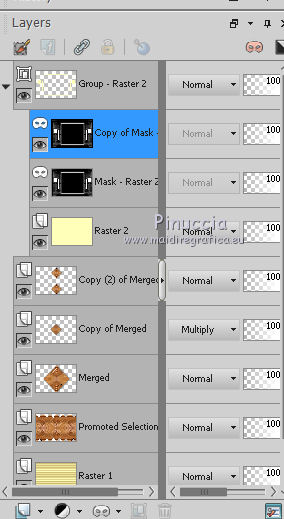
Adjust>Sharpness>Sharpen.
Effects>Edge Effects>Enhance.
Layers>Merge>Merge group.
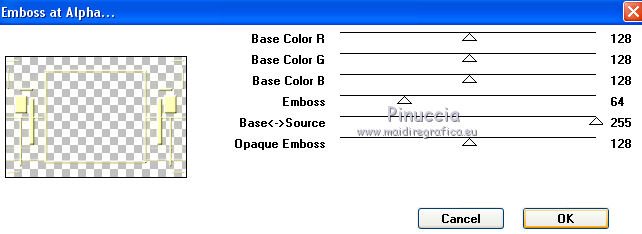
Effects>Plugins>Mura's Seamless - Emboss at Alpha, default settings
10. Selections>Load/Save Selection>Load selection from Disk.
Look for and load the selection New Daphnée2.
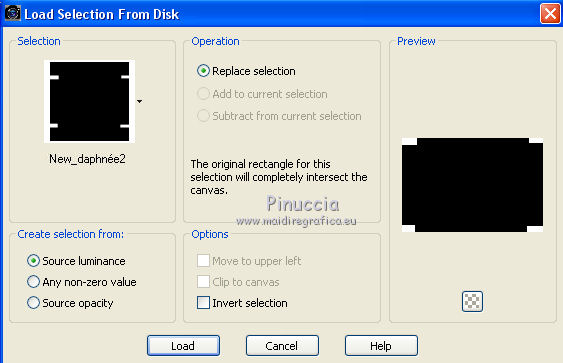
Press CANC on the keyboard 
Selection>Select None.
11. Layers>New Raster Layer.
Selection Tool 
(no matter the type of selection, because with the custom selection your always get a rectangle)
clic on the Custom Selection 
and set the following settings.
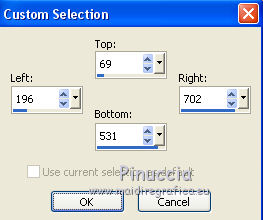
Reduce the Opacity of Flood Fill Tool to 45
Flood Fill  the selection with your light background color. the selection with your light background color.
Set again the opacity to 100.
12. Open the tube - flowers or landscape, as you like better, and go to Edit>Copy.
Go back to your work and go to Edit>Paste as new layer.
Selections>Invert.
Press CANC on the keyboard.
Selection>Select None.
13. Open the wordart C.Laurette e vai a Modifica>Copia.
Torna al tuo lavoro e vai a Modifica>Incolla come nuovo livello.
Pic Tool 
and set Position X: 272,00 and Position Y: 75,00

Effects>3D Effects>Drop Shadow, foreground color.
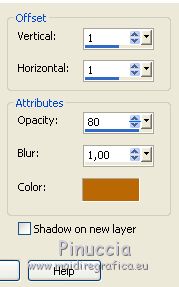
14. Image>Add borders, 2 pixels, symmetric, foreground color.
Image>Add borders, 2 pixels, symmetric, background color.
Image>Add borders, 2 pixels, symmetric, foreground color.
Selection>Select All.
Image>Add borders, 20 pixels, symmetric, foreground color.
Selections>Invert.
Effects>Texture Effects>Weave
weave color: foreground color
gap color: background color
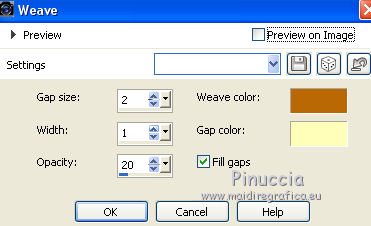
Effects>3D Effects>Inner Bevel.
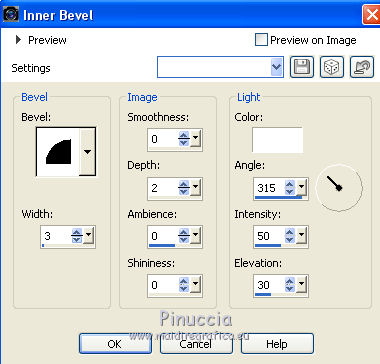
Selection>Select None.
15. Image>Add borders, 2 pixels, symmetric, background color.
Image>Add borders, 2 pixels, symmetric, foreground color.
Image>Add borders, 2 pixels, symmetric, background color.
Selection>Select All.
Image>Add borders, 60 pixels, symmetric, background color.
Selections>Invert.
Effects>Plugins>Graphics Plus - Quick Tile I, default settings.
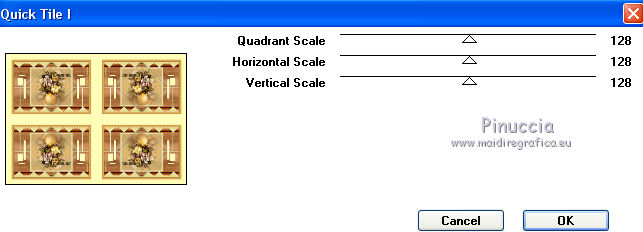
Selections>Invert.
Effects>3D Effects>Drop Shadow, foreground color.
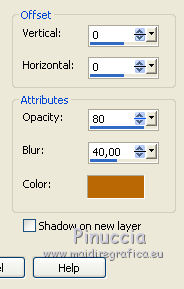
Selection>Select None.
16. Image>Add borders, 2 pixels, symmetric, foreground color.
Selection>Select All.
Image>Add borders, 40 pixels, symmetric, color white.
Selections>Invert.
Set your foreground color to a Foreground/Background Gradient, style Linear.
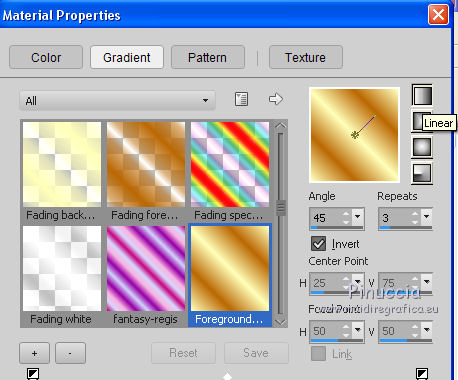
Flood Fill  the selection with your Gradient. the selection with your Gradient.
Effects>Texture Effects>Weave, same settings.
Effects>Plugins>AAA Frames - Foto Frame.

Selections>Invert.
Effects>3D Effects>Drop Shadow, same settings.
Selection>Select None.
17. Open your woman tube and go to Edit>Copy.
Go back to your work and go to Edit>Paste as new layer.
Place  the tube where you like better. the tube where you like better.
Effects>3D Effects>Drop Shadow, at your choice.
18. Sign your work on a new layer.
Layers>Merge>Merge All.
Image>Resize, 950 pixels width, resize all layers checked.
Adjust>Sharpness>Unsharp mask.
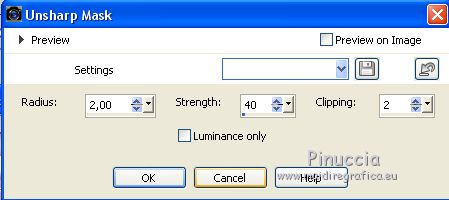
Save as jpg.
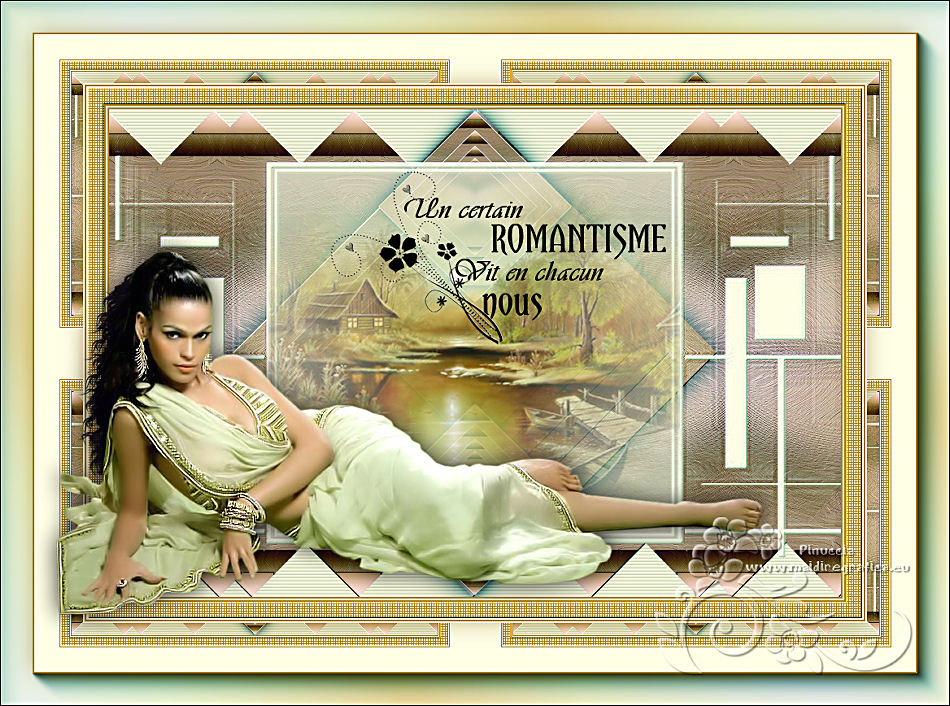
The tube of this version is by Tocha

If you have problems or doubts, or you find a not worked link,
or only for tell me that you enjoyed this tutorial, write to me.
2 August 2018
|

