|
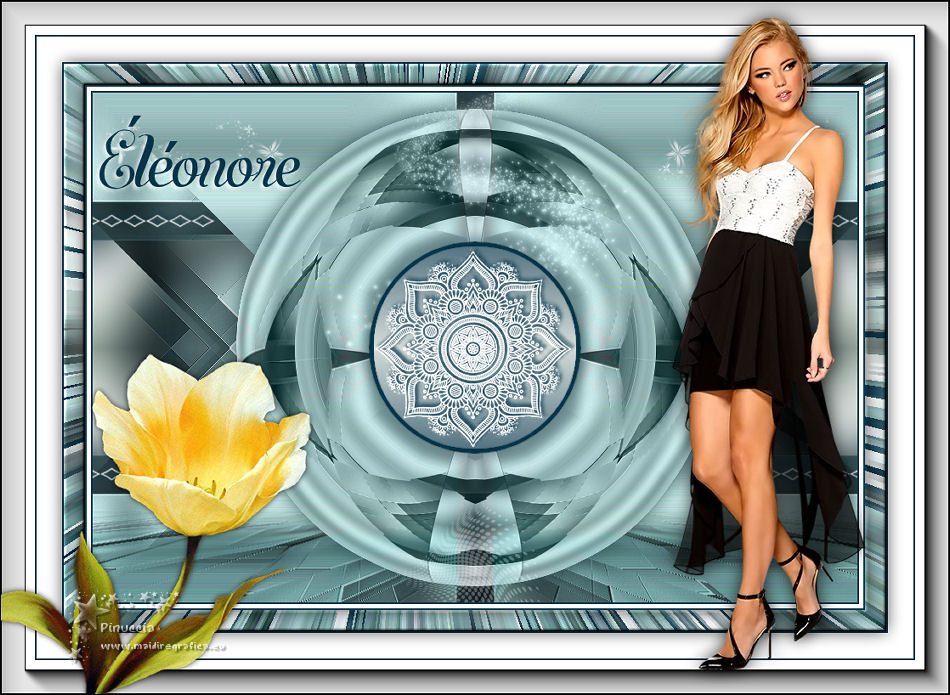
ÉLÉONORE

english version

Here you find the original of this tutorial:

This tutorial was written with CorelX9 and translated with Corel X7 and CorelX3, but it can also be made using other versions of PSP.
Since version PSP X4, Image>Mirror was replaced with Image>Flip Horizontal,
and Image>Flip with Image>Flip Vertical, there are some variables.
In versions X5 and X6, the functions have been improved by making available the Objects menu.
In the latest version X7 command Image>Mirror and Image>Flip returned, but with new differences.
See my schedule here
italian translation here
Tube of yours
The rest of the material here
For the tubes thanks Valyscappassion and Silvie.
(The links of the tubemakers here).
Plugins
consult, if necessary, my filter section here
Filters Unlimited 2.0 here
Mehdi - Wavy Lab 1.1 here
Toadies - What are you here
VanDerLee - Unplugged-X here
Simple - Pizza Slice Mirror here
Flaming Pear - Flexify 2 here
Mura's Meister - Perspective Tiling here
VM Natural - Splash here
AAA Frames - Foto Frame here
Filters Mura's Seamless and Simple can be used alone or imported into Filters Unlimited.
(How do, you see here)
If a plugin supplied appears with this icon  it must necessarily be imported into Unlimited it must necessarily be imported into Unlimited

You can change Blend Modes according to your colors.
In the newest versions of PSP, you don't find the foreground/background gradient (Corel_06_029).
You can use the gradients of the older versions.
The Gradient of CorelX here
Open the font and minimize. You'll find it in the list of fonts available when you need it.
With the most recent o.s., this is no longer possible.
To use a font, you must copy it into the Fonts folder in Windows.
Copy the brushes in Brush folder. Attention, please, every brush is composed by two files, you must place both the files in the folder.
See my notes about Brushes here
Copy the preset Emboss 3 in the Presets Folder.
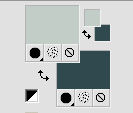
Set your foreground color to color #c2cdc8,
and your background color to color #30494f.
1. Open a new transparent image 900 x 600 pixels.
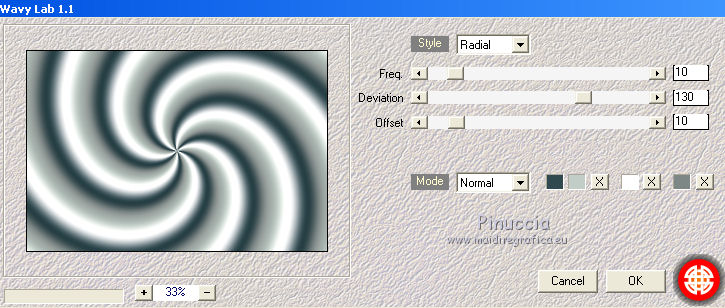
Effects>Plugins>Mehdi - Wavy Lab 1.1.
This filter creates gradients with the colors of your Materials palette:
the first is your background color, the second is your foreground color.
Change the last two colors created by the filter:
the third to white #ffffff and the fourth with #7d8786.
Adjust>Blur>Gaussian Blur - radius 30.

2. Layers>Duplicate.
Effets>Geometric Effects>Skew.
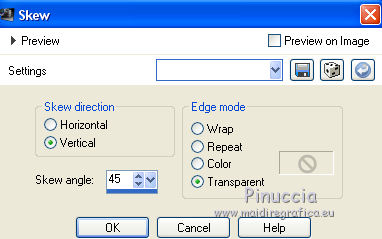
Layers>Duplicate.
Image>Mirror.
Reduce the opacity of this layer to 50%.
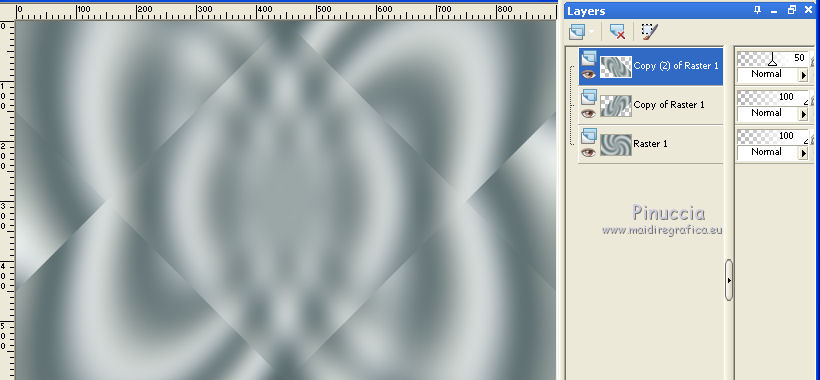
Layers>Merge>Merge Down.
Effects>Edge Effects>Enhance.
3. Selection Tool 
(no matter the type of selection, because with the custom selection your always get a rectangle)
clic on the Custom Selection 
and set the following settings.
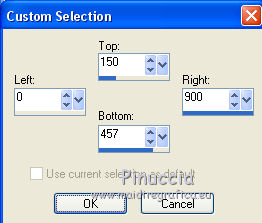
Selections>Promote Selection to Layer.
Selections>Select None.
Effects>Plugins>Toadies - What are you.
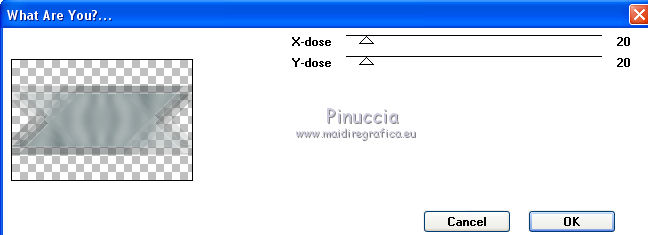
Adjust>Sharpness>Sharpen.
4. Effects>Image Effects>Seamless Tiling, defaults settings.

Effects>Plugins>VanDerLee - Unplugged-X - Split Contrast
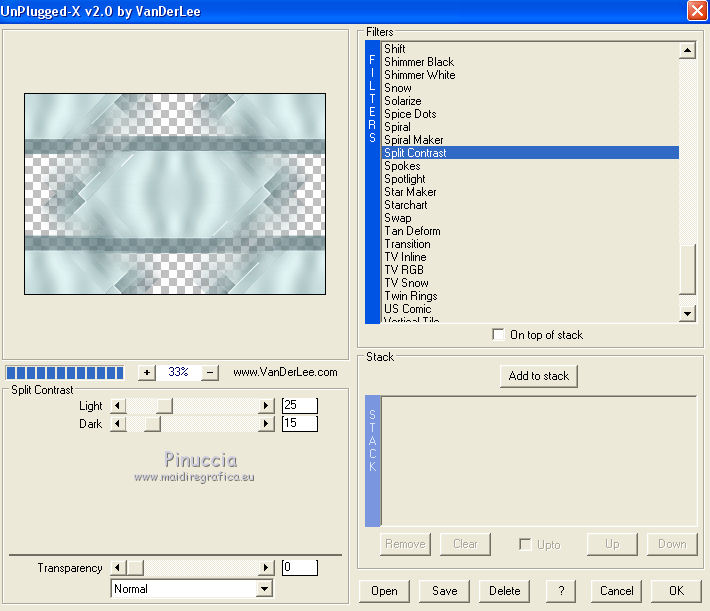
Change the Blend Mode of the layer below to Multiply.
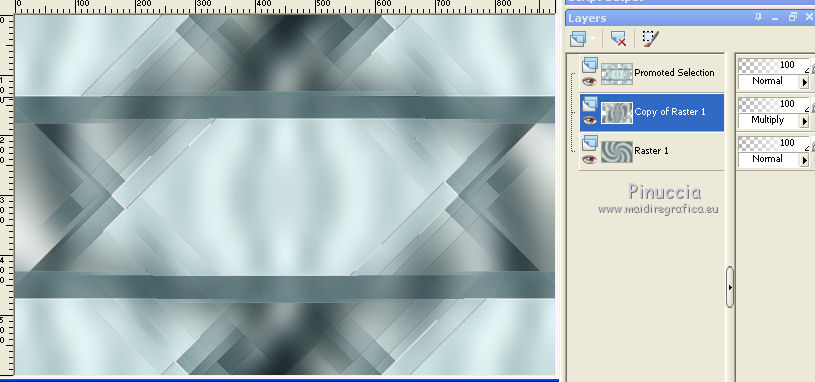
Layers>Merge>Merge visible.
5. Layers>Duplicate.
Effects>Plugins>Simple - Pizza Slice Mirror.
This plugins works without window; result
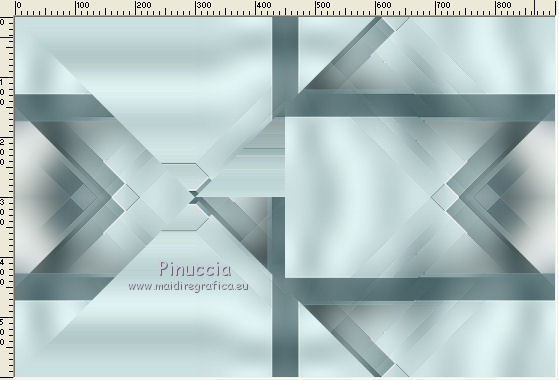
6. Effects>Reflections Effects>Rotating Mirror.

Layers>Duplicate.
Change the Blend Mode of this layer to Multiply, ou other.
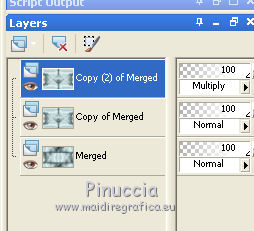
7. Layers>Duplicate.
Change the Blend Mode of this layer to Soft Light, ou other.
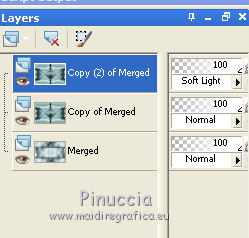
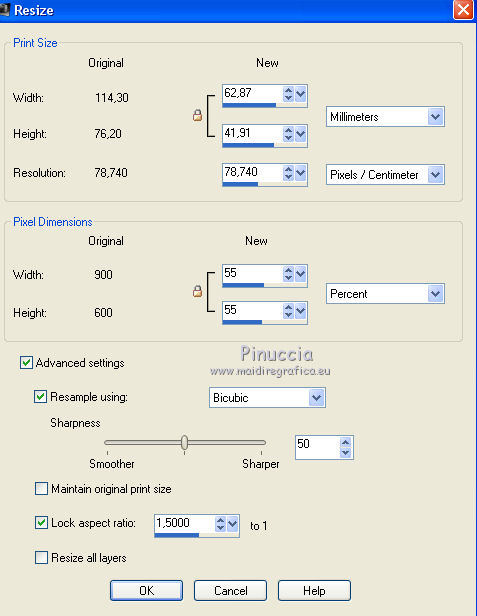
Image>Resize, to 55%, resize all layers not checked.
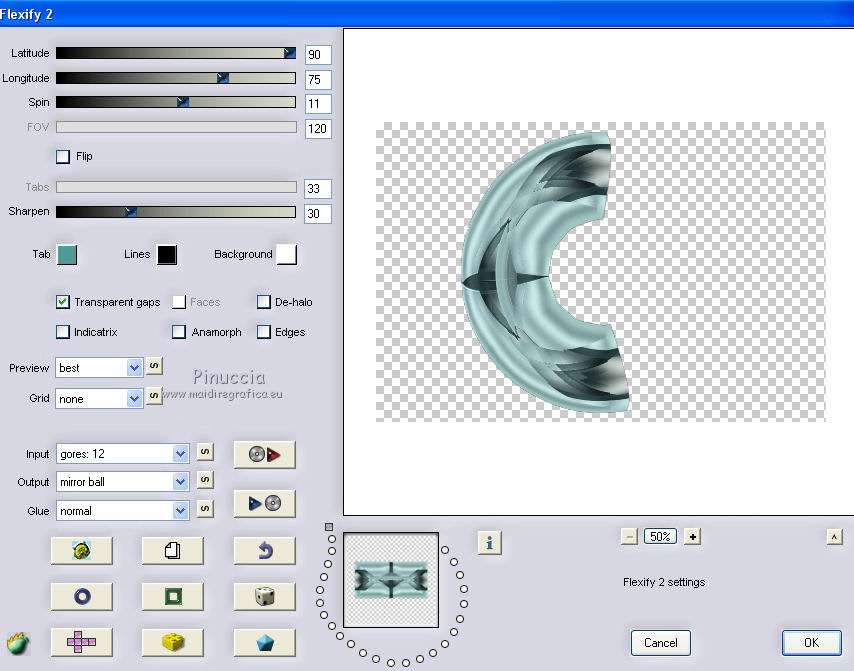
Effects>Plugins>Flaming Pear - Flexify 2.
Tab color #4d9c99
Change the Blend Mode of this layer to Luminance (Legacy), ou other.
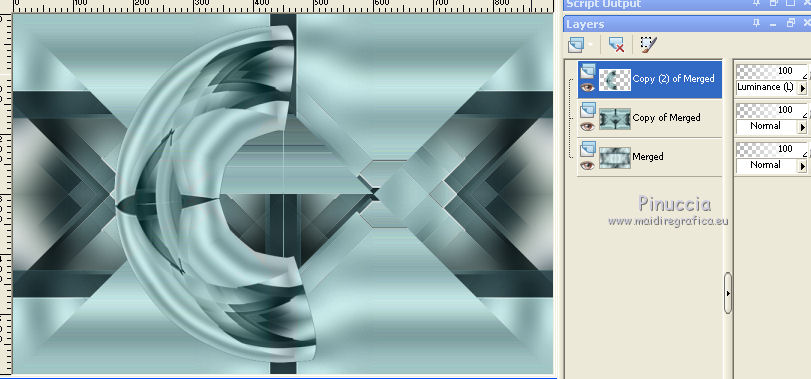
Layers>Duplicate.
Image>Mirror.
Layers>Merge>Merge Down.
Effects>3D Effects>Drop Shadow, dark color or black.
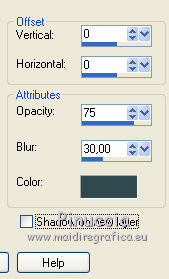
Effects>Reflection Effects>Rotating Mirror, same settings.

Close this layer and activate the layer below.
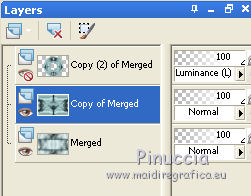
Layers>Merge>Merge visible.
Re-open and activate the top layer.
Open the tube déco 1 CLaurette and go to Edit>Copy.
Go back to your work and go to Edit>Paste as new layer.
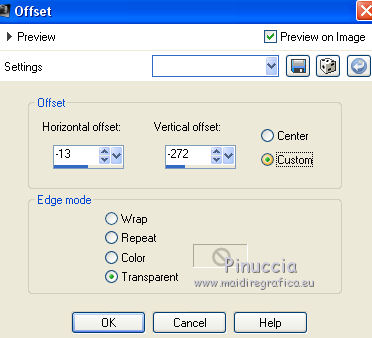
Effects>Image Effects>Offset.
9. Reduce the opacity of this layer to 30%.
Layers>Merge>Merge Down.
10. Open the tube déco frame CLaurette and go to Edit>Copy.
Go back to your work and go to Edit>Paste as new layer.
Don't move it: it is at its place.
Selections>Select All.
Selections>Float.
Selections>Defloat.
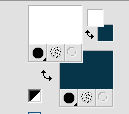
11. Keep your foreground color to light color #c2cdc8
and set your background color to dark color #073449.
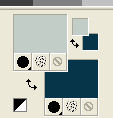
Set your Foreground Color to a Foreground/Background Gradient, style Linear.
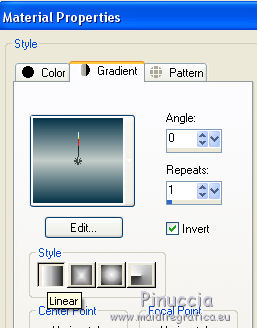
Reduce the opacity of your Flood Fill Tool to 70.
Flood Fill  the selection with your gradient. the selection with your gradient.
Don't forget to set again the opacity to 100.
12. Selections>Modify>Select Selection Borders.
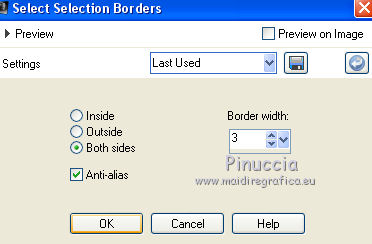
Keep always selected.
13. Layers>New Raster Layer.
Flood Fill  with your dark color #073449. with your dark color #073449.
Selections>Select None.
Layers>Merge>Merge Down.
Effects>3D Effects>Drop Shadow, dark color, still in memory.

14. Layers>New Raster Layer.
Set your foreground color to white.
Activate your Brush Tool 
look for and select the brush pinceau _Rosace _CLaurette

Click in the middle of the circle 5 times to get a nice rosette, by clicking with the left mouse button,
to use your white foreground color.
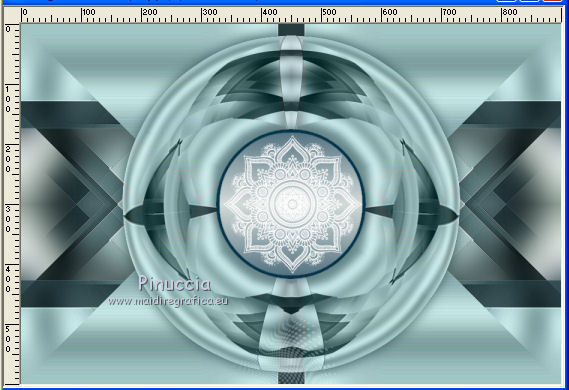
Effects>3D Effects>Drop Shadow, dark color.
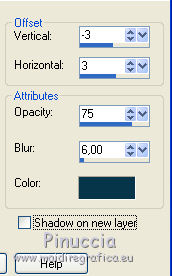
Layers>Duplicate.
Layers>Merge>Merge Down.
15. Layers>New Raster Layer.
Look for and select the brush pinceau _Losanges _CLaurette

Apply the brush in the upper left, as below, always with your white foreground color.
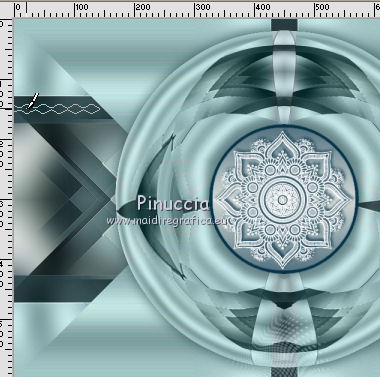
Layers>Duplicate.
Image>Mirror.
Layers>Merge>Merge Down.
Effects>3D Effects>Drop Shadow, same settings.
Again Layers>Duplicate.
Image>Flip.
Layers>Merge>Merge Down.
16. Layers>New Raster Layer.
Look for and select the brush pinceau _fleur _CLaurette

Apply the brush in the upper left corner, always with color white.
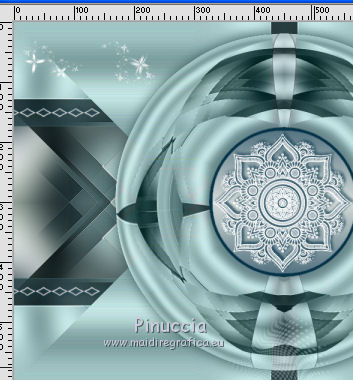
Layers>Duplicate.
Image>Mirror.
Layers>Merge>Merge Down.
Reduce the opacity of this layer to 75%.
17. Activate the bottom layer.
Layers>Duplicate.
Effects>Image Effects>Seamless Tiling, default settings.

You shoud have this
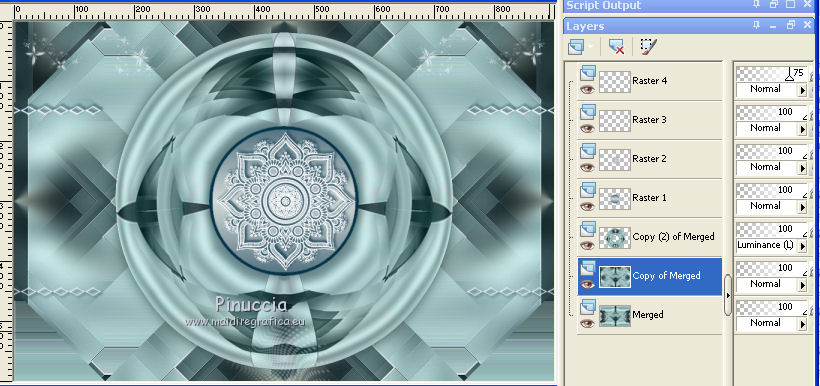
Stay on this layer.
Effects>Plugins>Mura's Meister - Perspective Tiling.
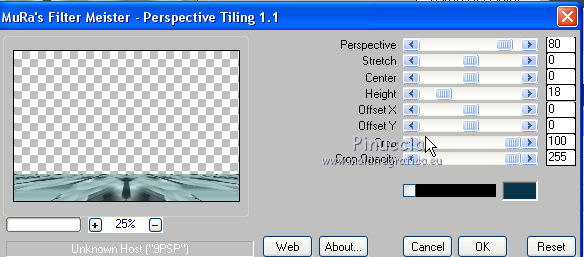
Effects>User Defined Filter, select the preset Emboss 3 and ok.

18. Close the layer above (Copy (2) of Merged) and stay on the layer Copy of Merged.
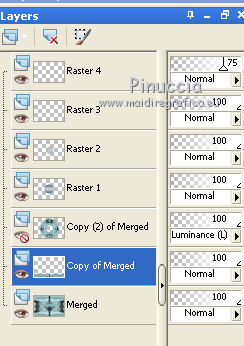
Activate your Selection Tool  , feather 30 , feather 30

and draw a little selection, as below.
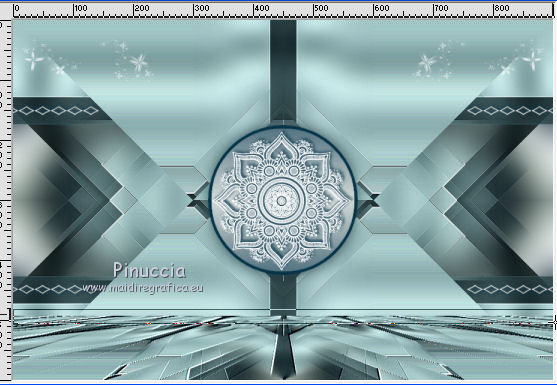
When you release the mouse button, the selection will widen due to the feather.
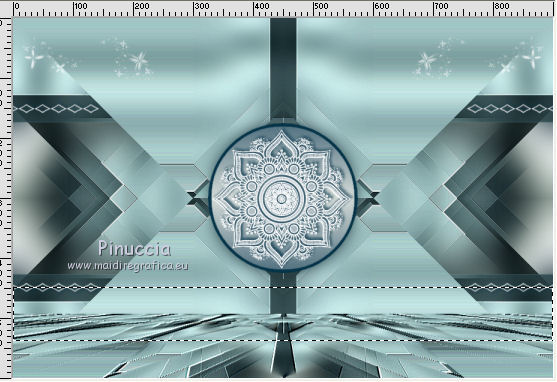
Press on the keyboard 2-3 times CANC 
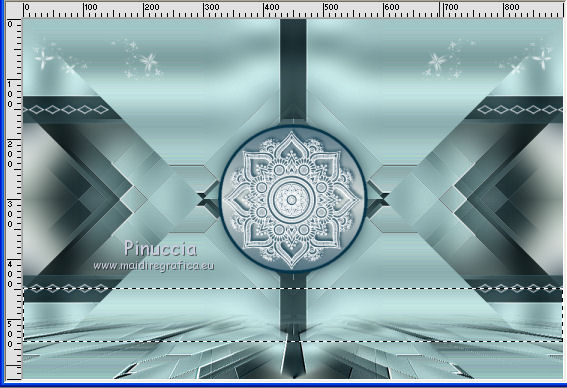
Selections>Select None.
Change the Blend Mode of this layer to Multiply, ou other,
and reduce the opacity to 80%.
Don't forger to set again the Feather to 0.
19. Re-open and activate the closed layer (the third layers from the bottom).
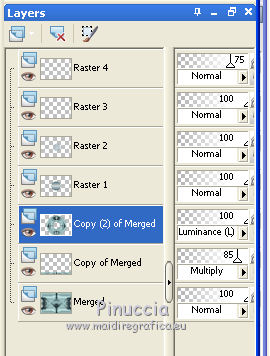
Open the tube Déco...Ciel _étoilé_CLaurette and go to Edit>Copy.
Go back to your work and go to Edit>Paste as new layer.
Move  the tube upwards. the tube upwards.
Change the Blend Mode of this layer to Luminance (Legacy).
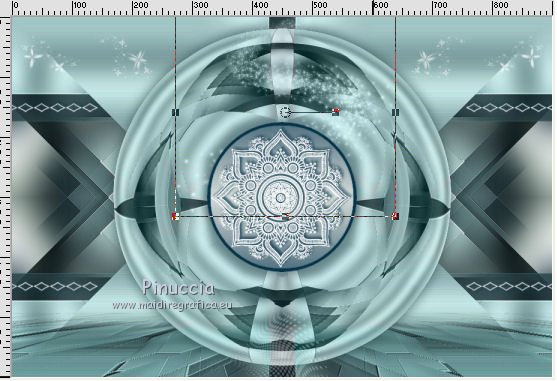
20. Image>Add borders, 2 pixels, symmetric, dark color.
Modifica>Copia.
Image>Add borders, 5 pixels, symmetric, color white.
Image>Add borders, 2 pixels, symmetric, dark color.
Selections>Select All.
Image>Add borders, 25 pixels, symmetric, color white.
Selections>Invert.
Edit>Paste into Selection.
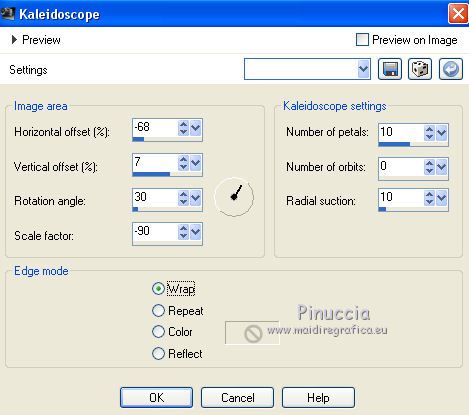
21. Effects>Reflection Effects>Kaleidoscope.
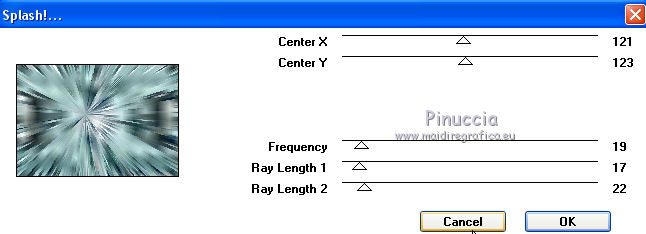
22. Effects>Plugins>VM Natural - Splash
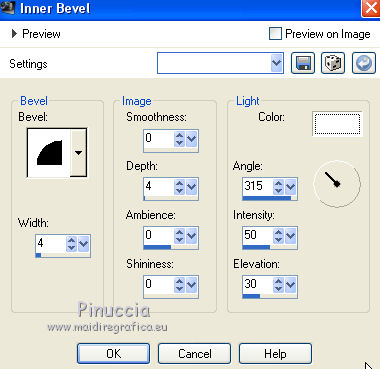
23. Effects>3D Effects>Inner Bevel.
Selections>Invert.
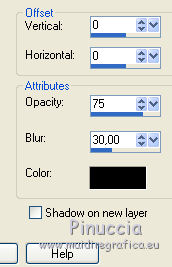
Effects>3D Effects>Drop Shadow, color black.
24. Selections>Select All.
Image>Add borders, 2 pixels, symmetric, dark color.
Image>Add borders, 30 pixels, symmetric, color white.
Effects>3D Effects>Drop Shadow, color black.

Selections>Select None.
25. Image>Add borders, 2 pixels, symmetric, dark color.
Image>Add borders, 40 pixels, symmetric, color white.
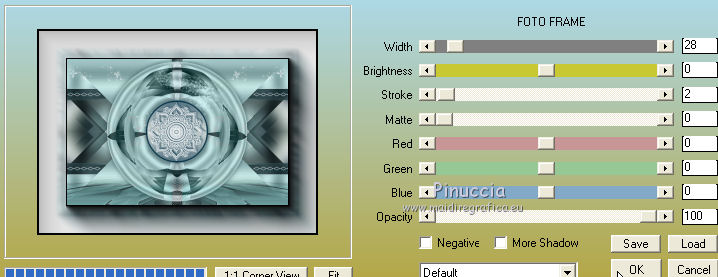
Effects>Plugins>AAA Frames - Foto Frame.
26. Open your woman tube and go to Edit>Copy.
Go back to your work and go to Edit>Paste as new layer.
Move  the tube to the right side. the tube to the right side.
Effects>3D Effects>Drop Shadow, color black.

27. Open the flower tube (or other) and go to Edit>Copy.
Go back to your work and go to Edit>Paste as new layer.
Move  the tube at the bottom left. the tube at the bottom left.
Effects>3D Effects>Drop Shadow, color black.
28. Activate your Text Tool 
choose a font or use the one supplied (or copy/paste as new layer the text you find in the material)

Write Eleonore
Layers>Convert in Raster Layer.
Move  the texte at the upper left. the texte at the upper left.
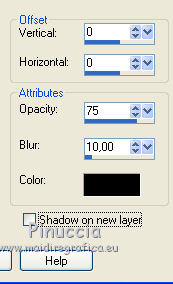
Effects>3D Effects>Drop Shadow, color white, shadow on new layer checked.
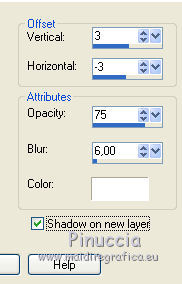
Don't forget to deselect Shadow on a new layer.
29. Sign your work on new layer.
Image>Add borders, 1 pixel, symmetric, color black.
Image>Resize, 950 pixels width, resize all layers checked.
Save as jpg.

If you have problems or doubts, or you find a not worked link, or only for tell me that you enjoyed this tutorial, write to me.
31 March 2019
|

