|
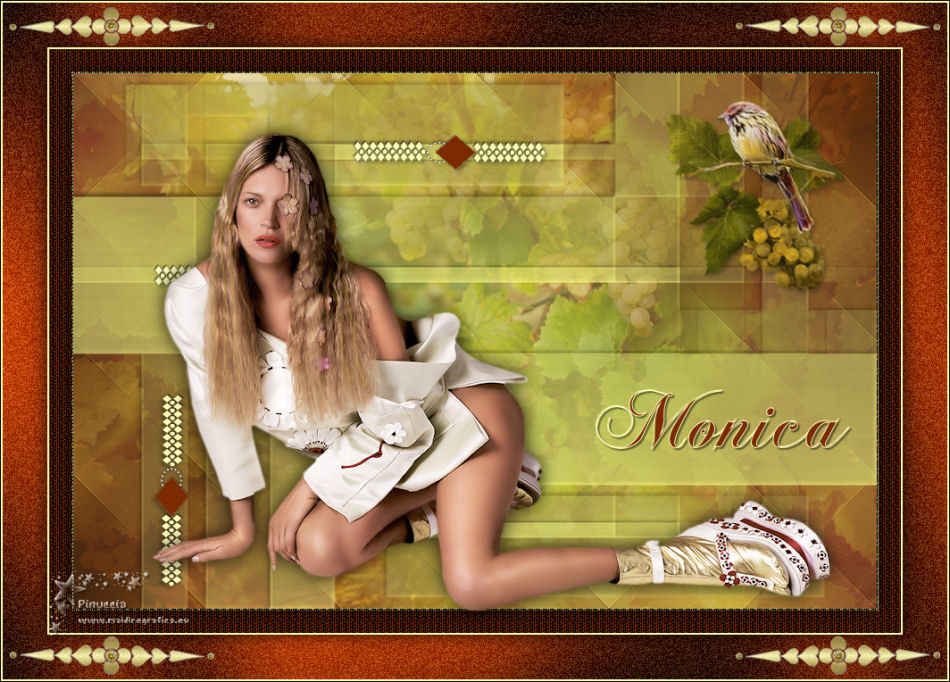
MONICA

english version

Here you find the original of this tutorial:

This tutorial was written with CorelX8 and translated with Corel X7 and CorelX3, but it can also be made using other versions of PSP.
Since version PSP X4, Image>Mirror was replaced with Image>Flip Horizontal,
and Image>Flip with Image>Flip Vertical, there are some variables.
In versions X5 and X6, the functions have been improved by making available the Objects menu.
In the latest version X7 command Image>Mirror and Image>Flip returned, but with new differences.
See my schedule here
italian translation here
your versions here
A woman tube of yours.
The rest of the material here
For my tube thanks Mina.
The mask from the net (unknown author)
The rest of the material is by Laurette.
(The links of the tubemakers here).
Plugins
consult, if necessary, my filter section here
Filters Unlimited 2.0 here
Mehdi - Sorting Tiles here
Cybia - Screenworks here
Graphics Plus - Cross Shadow here
Simple here
Filters Graphics Plus and Simple can be used alone or imported into Filters Unlimited.
(How do, you see here)
If a plugin supplied appears with this icon  it must necessarily be imported into Unlimited it must necessarily be imported into Unlimited

You can change Blend Modes according to your colors.
In the newest versions of PSP, you don't find the foreground/background gradient (Corel_06_029).
You can use the gradients of the older versions.
The Gradient of CorelX here
Open the mask in PSP and minimize it with the rest of the material.
1. Set your foreground color to #fefeb9,
and your background color to #7c2a00.
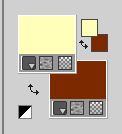
Set your foreground color to a Foreground/Background Gradient, style Linear.
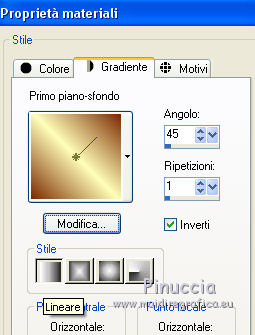
Open a new transparent image 900 x 600 pixels.
Flood Fill  the transparent image with your Gradient. the transparent image with your Gradient.
Adjust>Blur>Gaussian Blur - radius 30.

Effects>Plugins>Mehdi - Sorting Tiles
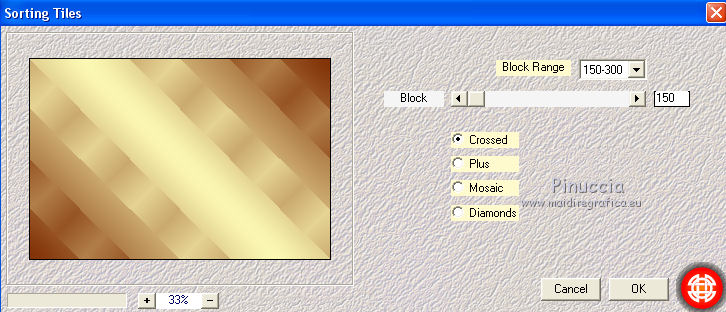
Effects>Edge Effects>Enhance.
Layers>Duplicate.
Image>Mirror.
Change the Blend Mode of this layer to Multiply and reduce the opacity to 50%.
Layers>Merge>Merge Down.
2. Layers>New Raster Layer.
Selections>Select All.
Open the image "Vendange-camusat" and go to Edit>Copy.
Go back to your work and go to Edit>Paste into Selection.
Selections>Select None.
Change the Blend Mode of this layer to Overlay and reduce the opacity to 50%.
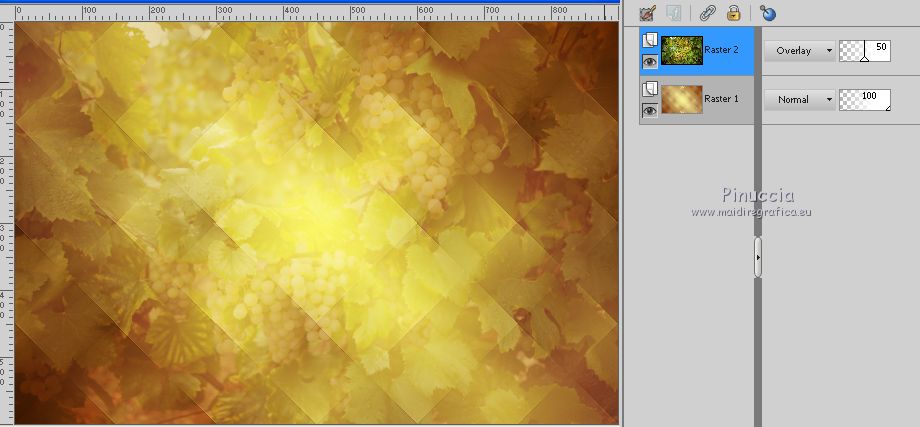
Layers>Merge>Merge Down.
Open "tube paysage vignes" and go to Edit>Copy.
Go back to your work and go to Edit>Paste as new layer.
Don't move it.
Reduce the opacity of this layer to 70%.
Layers>Merge>Merge Down.
Layers>New Raster Layer.
Set your foreground color to Color.
Flood Fill  the layer with your foreground color (or white, if you prefer). the layer with your foreground color (or white, if you prefer).
Layers>New Mask layer>From image
Open the menu under the source window and you'll see all the files open.
Select the mask "mask du net"
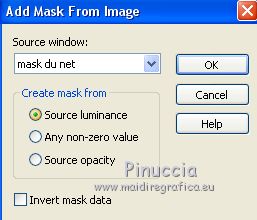
Layers>Merge>Merge group.
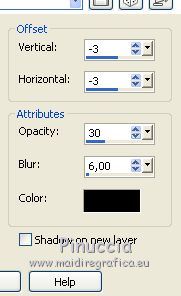
Effects>3D Effects>Drop Shadow, color black.
Layers>Duplicate.
Change the Blend Mode of this layer to Multiply.
Open the tube déco 1 and go to Edit>Copy.
Go back to your work and go to Edit>Paste as new layer.
Move  the tube at the upper right. the tube at the upper right.
Layers>Arrange>Move down.
Effects>3D Effects>Drop Shadow, color black.
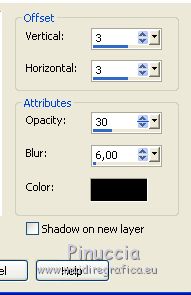
Reduce the opacity of this layer to 60%.
Layers>Merge>Merge visible.
3. Edit>Paste as new layer (the tube déco 1 is still in memory).
Move  the tube at the upper right. the tube at the upper right.
Reuce the opacity of this layer to 50%.
Effects>3D Effects>Drop Shadow, same settings.
Open the tube déco 2 and go to Edit>Copy.
Go back to your work and go to Edit>Paste as new layer.
Activate the Magic Wand Tool  , tolérance et feather 0, , tolérance et feather 0,
and click in the middle of the tube to select it.
Flood Fill  with your background color. with your background color.
Selections>Select None.
K key on the keyboard to activate the Pick Tool 
and set Position X: 312,00 and Position Y: 68,00
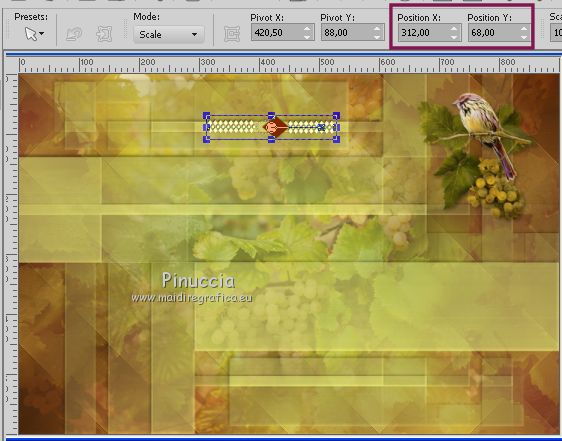
M key to deselect the tool.
Effects>3D Effects>Drop Shadow, same settings.
Layers>Duplicate.
K key to activate the Pick Tool 
and set Position X: 89,00 and Position Y: 207,00.
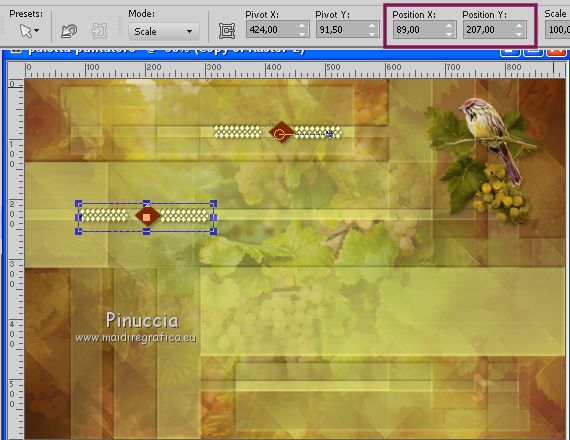
M key to deselect the tool.
Layers>Duplicate.
Image>Free Rotate - 90 degrees to right.
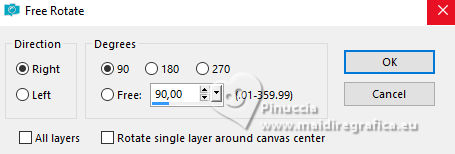
K key to activate the Pick Tool 
and set Position X: 84,00 and Position Y: 358,00.
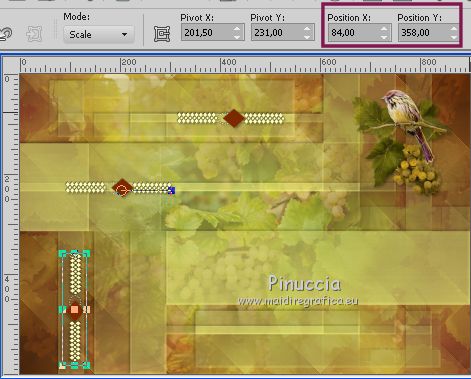
M key to deselect the tool.
Layers>Merge>Merge All.
4. Image>Add borders, 2 pixels, symmetric, foreground color.
Image>Add borders, 25 pixels, symmetric, background color.
Selections>Invert.
Effects>Plugins>Cybia - Screenworks - Mezzo Grain
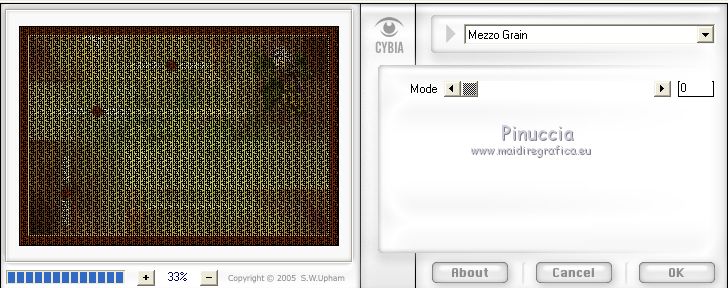
Selections>Invert.
Effects>3D Effects>Drop Shadow, color black.
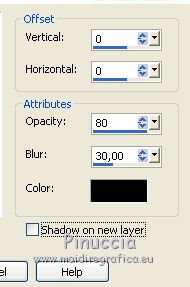
Selections>Select Nones.
Image>Add borders, 2 pixels, symmetric, foreground color.
Selections>Select All.
Image>Add borders, 50 pixels, symmetric, background color.
Selections>Inver.
Effects>Plugins>Graphics Plus - Cross Shadow, default settings.
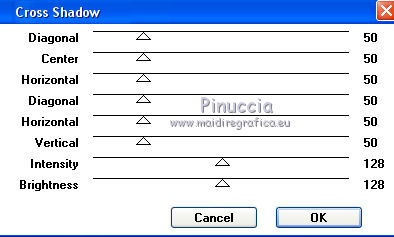
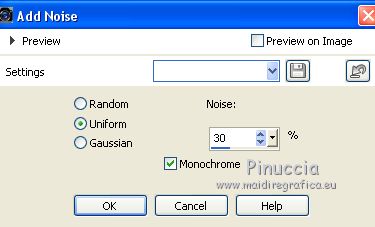
Adjust>Add/Remove Noise>Add Noise.
Selections>Invert.
Effects>3D Effects>Drop Shadow, same settings.
Selections>Select None.
Image>Add borders, 2 pixels, symmetric, foreground color.
5. Open your woman tube and go to Edit>Copy.
Go back to your work and go to Edit>Paste as new layer.
Image>Resize, if necessary, resize all layers not checked.
Place  rightly the tube. rightly the tube.
Effects>3D Effects>Drop Shadow, same settings.
Activate the Text Tool  , font ChopinScript, larghezza pennellata 1 , font ChopinScript, larghezza pennellata 1

Write Monica.
Layers>Convert to raster layer.
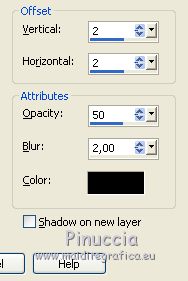
Effects>3D Effects>Drop Shadow, color black.
Open "tube coin" and go to Edit>Copy.
Go back to your work and go to Edit>Paste as new layer.
K key to activate the Pick Tool 
and set Position X: 10,00 and Position Y: 7,00.

M key to deselect the tool.
Effects>Plugins>Simple - Top Left Mirror.
Effects>3D Effects>Drop Shadow, same settings.
Sign your work on a new layer.
Image>Add borders, 1 pixel, symmetric, color black.
Image>Resize, 950 pixels width, resize all layers checked.
Save as jpg.

If you have problems or doubts, or you find a not worked link,
or only for tell me that you enjoyed this tutorial, write to me.
27 August 2018
|

