|
ROSALECTA

english version

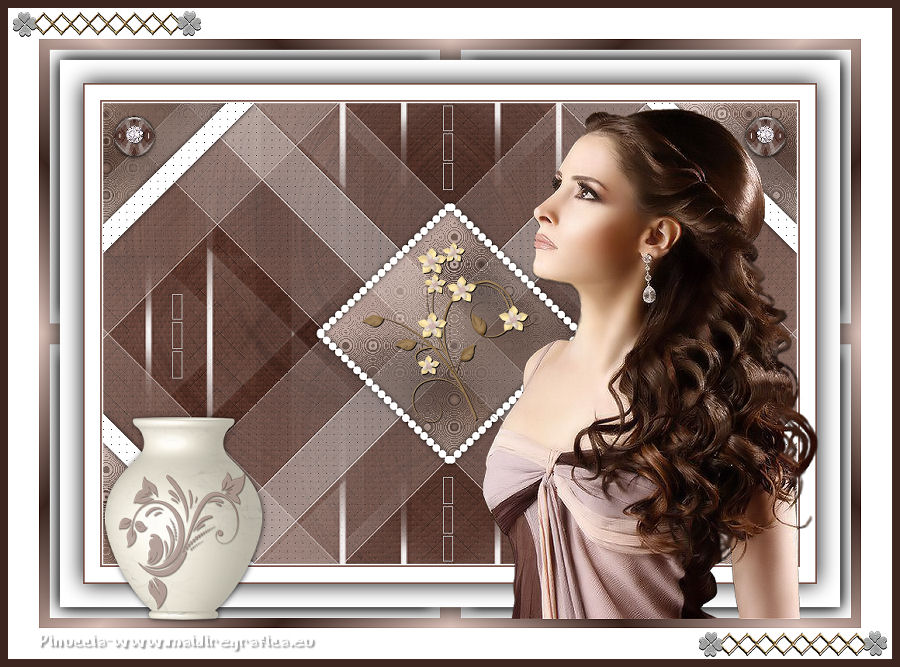
Here you find the original of this tutorial:

This tutorial was written with CorelX8 and translated with CorelX3, but it can also be made using other versions of PSP.
Since version PSP X4, Image>Mirror was replaced with Image>Flip Horizontal,
and Image>Flip with Image>Flip Vertical, there are some variables.
In versions X5 and X6, the functions have been improved by making available the Objects menu.
In the latest version X7 command Image>Mirror and Image>Flip returned, but with new differences.
See my schedule here
italian translation here
your versions here
Material here
For the woman tube thanks Babette.
(The links of the tubemakers here).
Plugins
consult, if necessary, my filter section here
Filter Factory Gallery J - Twister here
&<Bkg Designer sf10III> - Road Kill (da importare in Unlimited) here
Mehdi - Sorting Tile here
Toadies - What are you here
AP Lines - Lines SilverLining here
Funhouse - Cirquelate here
Alien Skin Eye Candy 5 Impact - Glass here
Simple - Top Left Mirror here
VM Toolbox - Instant Tile here
Filters Unlimited 2.0 here
Filters Factory Gallery, Toadies, Funhouse, Simple and VM Toolbox can be used alone or imported into Filters Unlimited.
(How do, you see here)
If a plugin supplied appears with this icon  it must necessarily be imported into Unlimited it must necessarily be imported into Unlimited

In the newest versions of PSP, you don't find the foreground/background gradient (Corel_06_029).
You can use the gradients of the older versions.
The Gradient of CorelX here
Copy the Preset Emboss 3 in the Presets Folder.
Copy the texture in the Textures Folder.
Copy the selections in the Selections Folder.
Open the masks in PSP and minimize them with the rest of the material.
Used colors

1. Open a new transparent image 900 x 600 pixels.
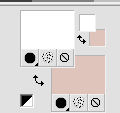
Set your foreground color to #754d42,
and your background color to #dec4bb.
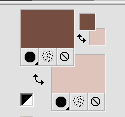
Flood Fill  the transparent image with your foreground color #754d42. the transparent image with your foreground color #754d42.
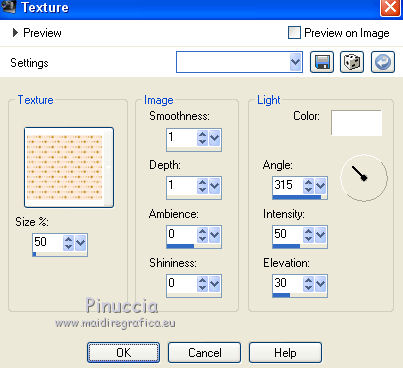
Effects>Texture Effects>Texture - select the texture Texture Rosalecta
2. Layers>New Raster Layer.
Selections>Select All.
Open the tube by Babette, erase the watermark, and go to Edit>Copy.
Minimize the tube.
Go back to your work and go to Edit>Paste as new layer.
Selections>Select None.
Effects>Image Effects>Seamless Tiling.

Adjust>Softness>Soft Focus, default settings.
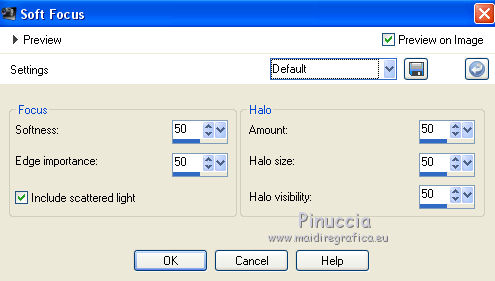
Adjust>Blur>Radial Blur.
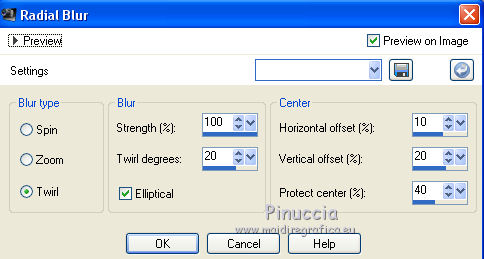
Effects>Edge Effects>Enhance More.
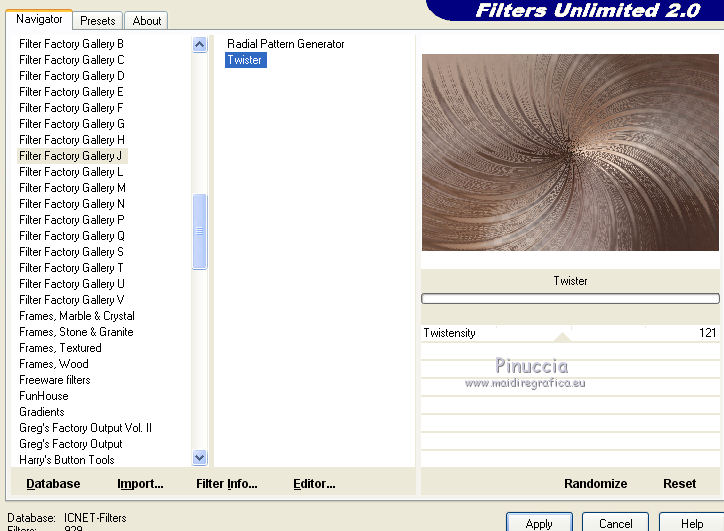
3. Effects>Plugins>Filters Unlimited 2.0 - Filter Factory Gallery J - Twister, default settings.
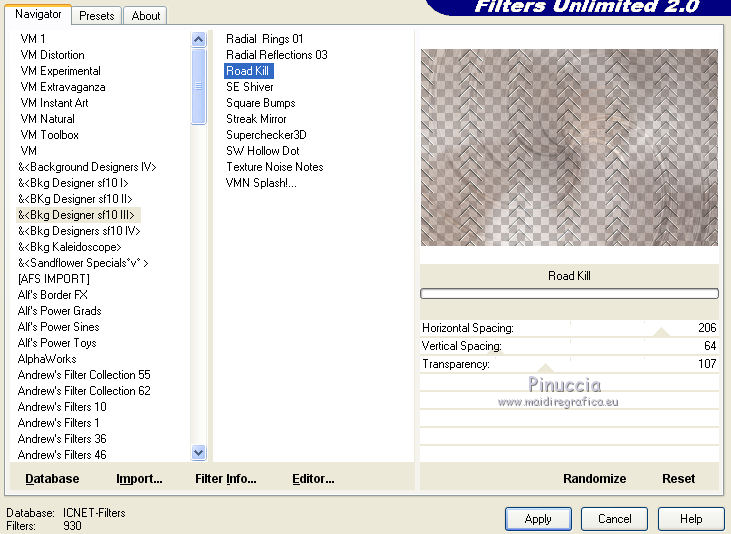
Effects>Plugins>Filters Unlimited 2.0 - &< Bkg Designers sf10II> - Road Kill, default settings.
4. Effects>Reflection Effects>Rotating Mirror.

Layers>Duplicate.
Image>Flip.
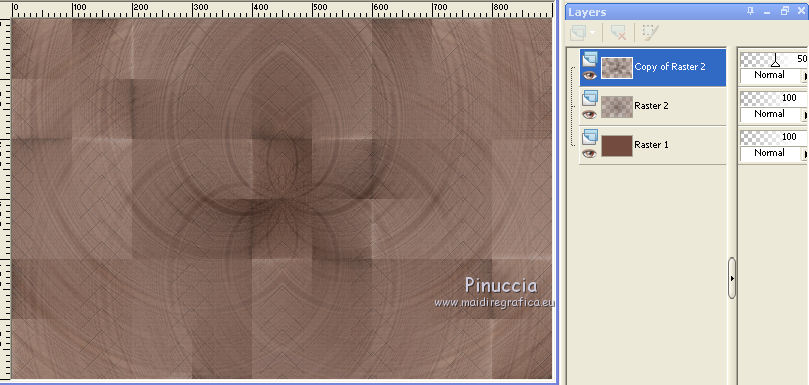
Reduce the opacity of this layer to 50%.
Layers>Merge>Merge Down.
5. Layers>Duplicate.
Effects>Plugins>Mehdi - Sorting Tiles.
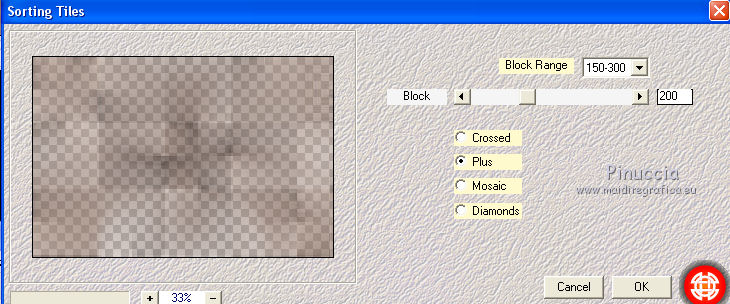
Reduce the opacity of this layer to 50%.
6. Set your foreground color to white.
Layers>New Raster Layer.
Flood Fill  the layer with white. the layer with white.
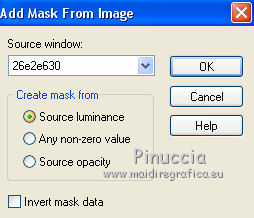
Layers>New Mask layer>From image
Open the menu under the source window and you'll see all the files open.
Select the mask 26e2e630.
Layers>Duplicate.
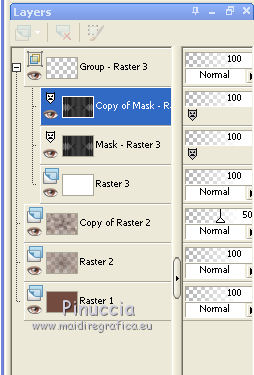
Adjust>Sharpness>Sharpen.
Layers>Merge>Merge Group.
Effects>Image Effects>Seamless Tiling, default settings.

7. Layers>New Raster Layer.
Selection Tool 
(no matter the type of selection, because with the custom selection your always get a rectangle)
clic on the Custom Selection 
and set the following settings.
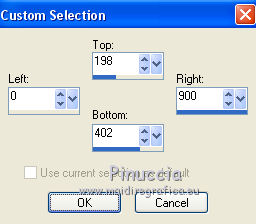
Flood Fill  the layer with white. the layer with white.
Selections>Modify>Contract - 2 pixels.
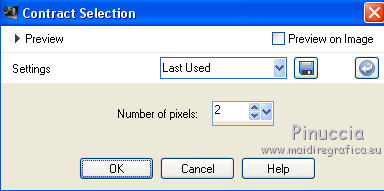
Press CANC on the keyboard 
Reduce the opacity of Flood Fill Tool to 50

Flood Fill  the layer with color white. the layer with color white.
Selections>Select None.
Don't forget to set again the Flood Fill Tool opacity to 100.

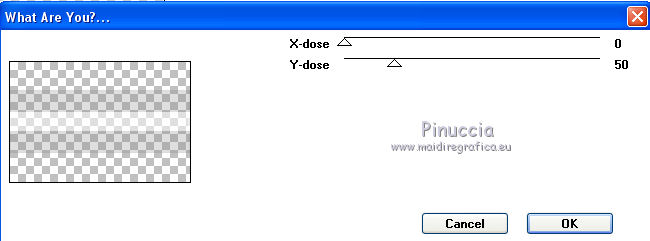
8. Effects>Plugins>Toadies - What are you.
Effects>User Defined Filter - select the preset Emboss 3 and ok.

Effects>Geometric Effects>Skew.
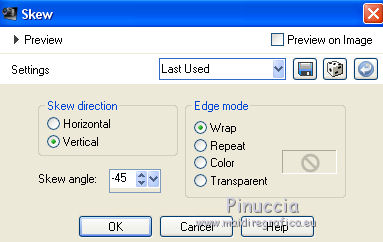
9. Layers>Duplicate.
Image>Mirror.
Layers>Merge>Merge Down.
Reduce the opacity of this layer to 85%.
Effects>Plugins>AP Lines - Lines SilverLining
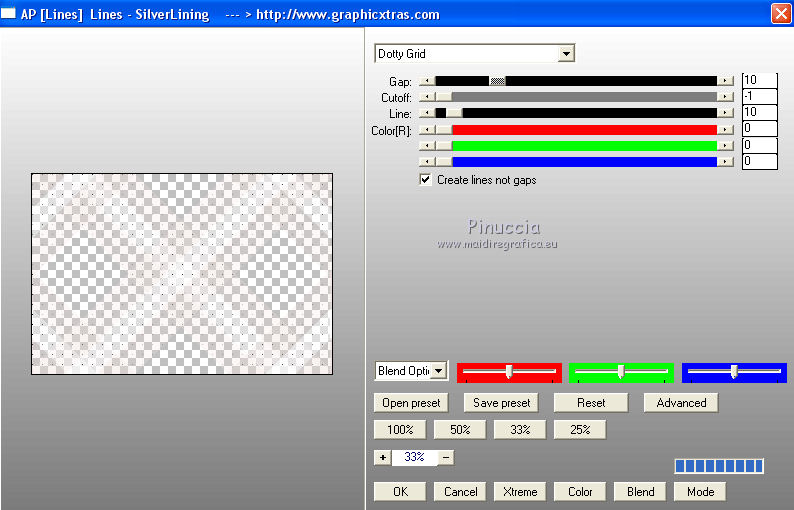
Change the Blend Mode of the layer Raster 2 to Multiply.
Change the Blend Mode of the layer Copy of Raster 2 to Soft Light.
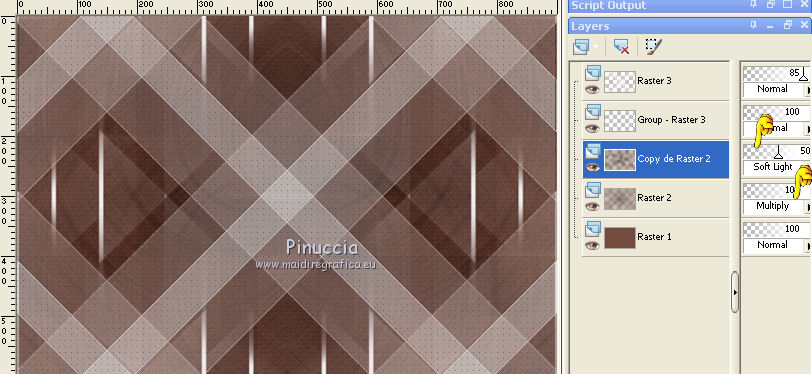
Keep the layer Copy of Raster 2 selected.
Selections>Load/Save Selection>Load Selection from Disk.
Look for and load the selection ©Rosalecta
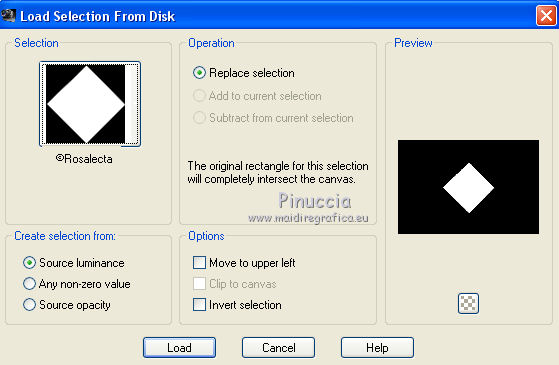
Selections>Promote Selection to Layer.
Selections>Select None.
10. Layers>Arrange>Bring to Top.
Effects>Plugins>Funhouse - Cirquelate, default settings.
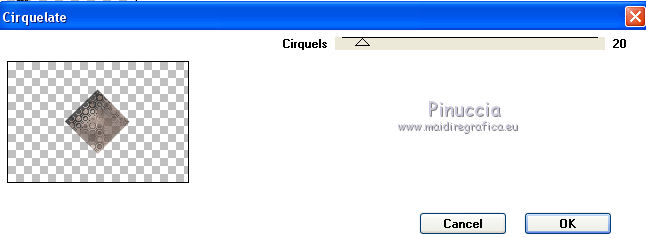
Effects>Image Effects>Seamless Tiling.

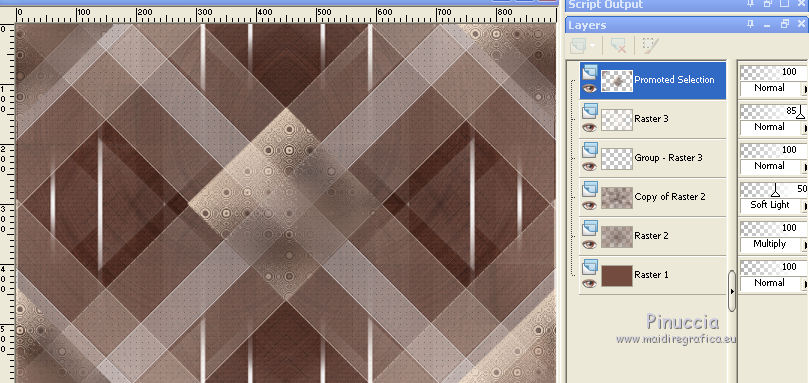
Layers>Merge>Merge All.
Selections>Select All.
Selections>Modify>Contract - 3 pixels.
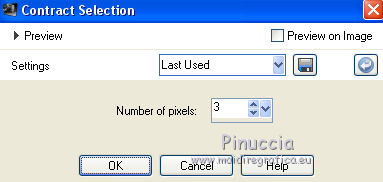
Image>Crop to selection.
11. Layers>New Raster Layer.
Selections>Load/Save Selection>Load Selection from Disk.
Look for and load the selection ©Rosalecta2
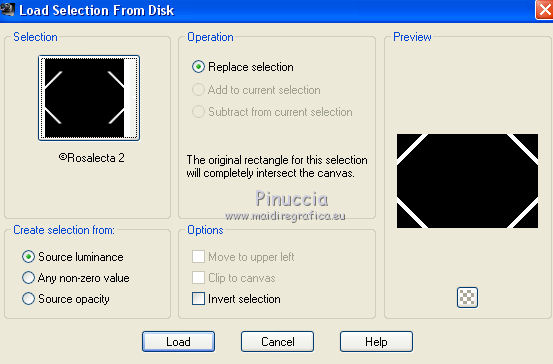
Flood Fill  the selection with color white. the selection with color white.
Effects>Plugins>AP Lines - Lines SilverLining, same settings.
Selections>Select None.
Effects>3D Effects>Drop Shadow, color black.
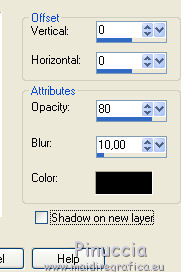
Layers>Merge>Merge Down.
12. Layers>Duplicate.
Effects>Geometric Effects>Circle.

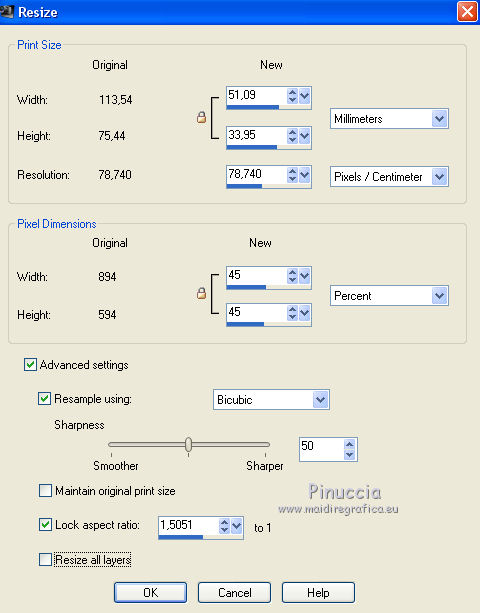
Image>Resize, 3 times to 45%, resize all layers not checked.
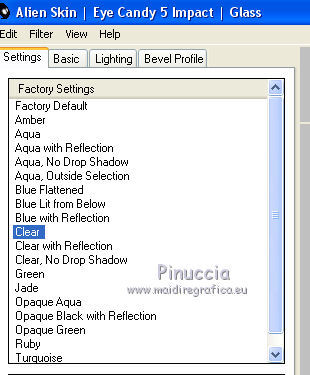
Effects>Plugins>Alien Skin Eye Candy 5 Impact - Glass.
Seleziona il preset Clear et ok.
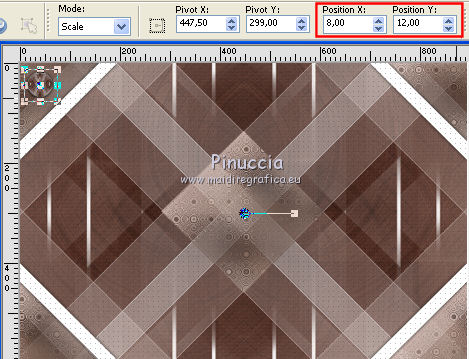
On the keyboard K key to activate the Pick Tool 
and set Position X: 8,00 and Position Y: 12,00.
M key to deselect the Tool.
Open the tube Perle and go to Edit>Copy.
Go back to your work and go to Edit>Paste as new layer.
K key to activate the Pick Tool 
and set Position X: 28,00 and Position Y: 28,00

M key to deselect the Tool.
Layers>Merge>Merge Down.
Effects>Plugins>Simple - Top Left Mirror
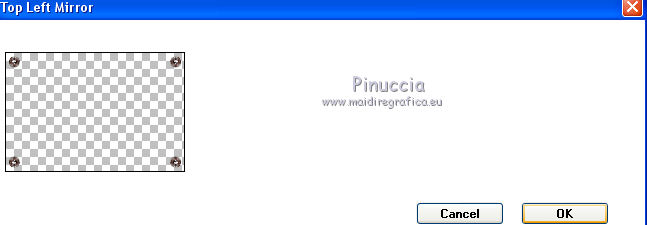
Effects>3D Effects>Drop Shadow, same settings.

13. Open the tube déco 1 and go to Edit>Copy.
Go back to your work and go to Edit>Paste as new layer.
Don't move it.
Colorize according to your colors or keep it so, at your choice.
14. Open the tube déco 2 and go to Edit>Copy.
Go back to your work and go to Edit>Paste as new layer.
Don't move it.
Effects>3D Effects>Drop Shadow, same settings.

15. Open the tube fleur du net, and go to Edit>Copy.
Go back to your work and go to Edit>Paste as new layer.
Don't move it.
Effects>3D Effects>Drop Shadow, color black.
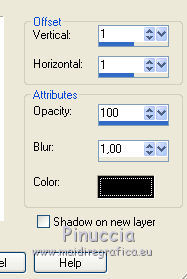
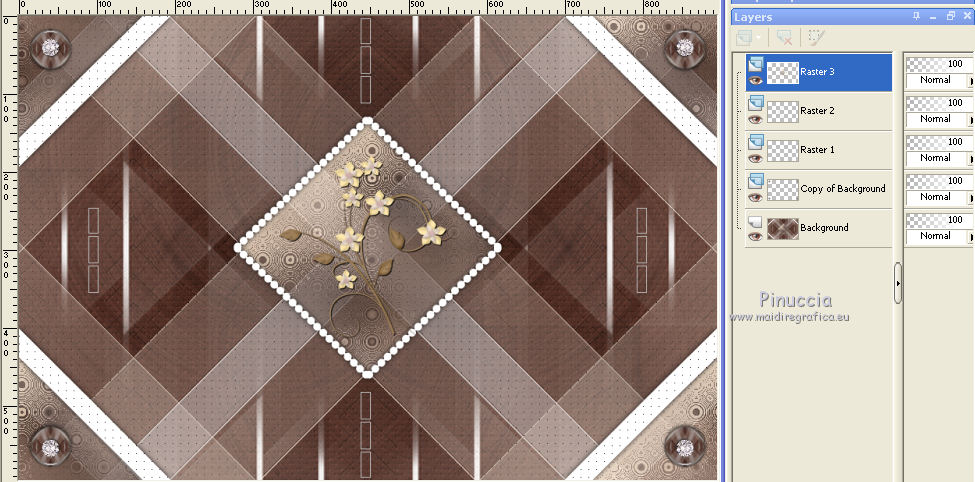
Layers>Merge>Merge All.
16. Set your first foreground color #754d42.

Image>Add borders, 2 pixels, symmetric, color white.
Image>Add borders, 2 pixels, symmetric, foreground color.
Image>Add borders, 20 pixels, symmetric, color white.
Image>Add borders, 2 pixels, symmetric, foreground color.
Selections>Select All.
Image>Add borders, 30 pixels, symmetric, color white.
Effects>3D Effects>Drop Shadow, color black.

17. Selections>Select All.
Image>Add borders, 2 pixels, symmetric, foreground color.
Image>Add borders, 25 pixels, symmetric, background color.
Selections>Invert.
Set your foreground color to #3c251e.
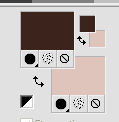
Set your foreground color to a Foreground/Background Gradient, style Linear.
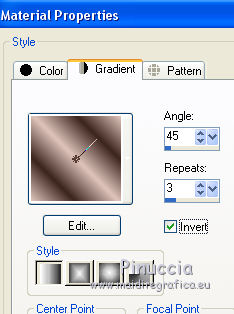
Flood Fill  the selection with your Gradient. the selection with your Gradient.
Effects>Plugins>VM Toolbox - Instant Tile, default settings.
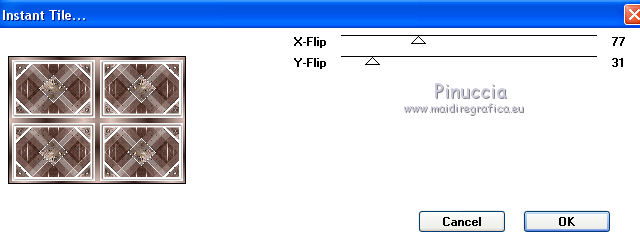
Selections>Invert.
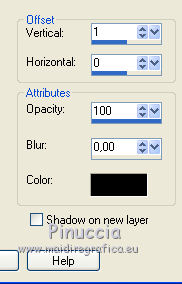
Effects>3D Effects>Drop Shadow, same settings.
Selections>Select None.
Activate again the tube by Babette and go to Edit>Copy.
Go back to your work and go to Edit>Paste as new layer.
Image>Resize, to 105%, resize all layers not checked.
Image>Mirror.
Adjust>Sharpness>Sharpen.
K key to activate the Pick Tool 
and set Position X: 572,00 and Position Y: 86,00

Effects>3D Effects>Drop Shadow, color black.
Image>Add borders, 50 pixels, symmetric, color white.
18. Passa il colore di primo piano a Colore.
Selections>Select All.
Selections>Modify>Contract - 10 pixels.
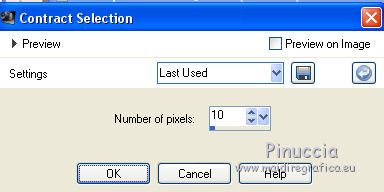
Selections>Invert.
Press CANC on the keyboard.
Riempi  la selezione con il colore di primo piano #3c251e. la selezione con il colore di primo piano #3c251e.
Selections>Select None.
19. Apri il tube Vase and go to Edit>Copy.
Go back to your work and go to Edit>Paste as new layer.
K key to activate the Pick Tool 
and set Position X: 127,00 and Position Y: 530,00

Layers>Merge>Merge Down.
20. Apri il tube Coin and go to Edit>Copy.
Go back to your work and go to Edit>Paste as new layer.
Don't move it.
Effects>3D Effects>Drop Shadow, same settings.
21. Image>Resize, 900 pixels width, resize all layers checked.
Sign your work on a new layer.
Layers>Merge>Merge All and save as jpg.
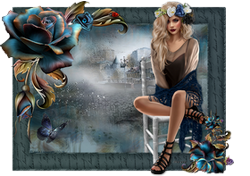
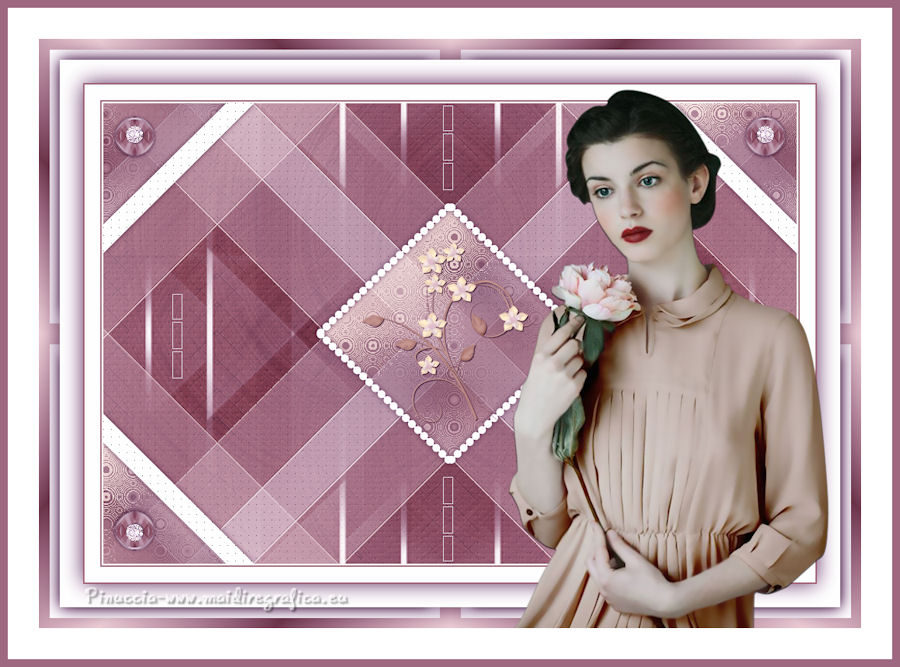
The tube of this version is by Criss

If you have problems or doubts, or you find a not worked link,
or only for tell me that you enjoyed this tutorial, write to me.
15 June 2018
|

