|
TAG LOVE IN MY HEART
 ENGLISH VERSION ENGLISH VERSION
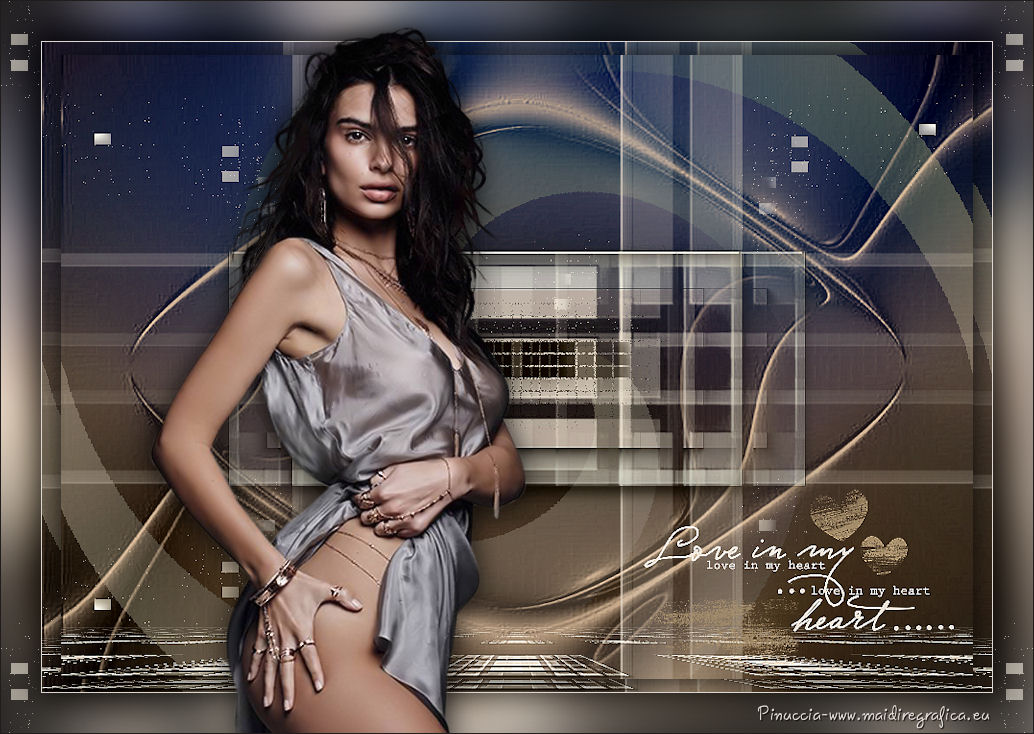
Here you find the original of this tutorial:

This tutorial was created with PSPX8 and translated with PSPX3, but it can also be made using other versions of PSP.
Since version PSP X4, Image>Mirror was replaced with Image>Flip Horizontal,
and Image>Flip with Image>Flip Vertical, there are some variables.
In versions X5 and X6, the functions have been improved by making available the Objects menu.
In the latest version X7 command Image>Mirror and Image>Flip returned, but with new differences.
See my schedule here
French translation here
Your versions ici
For this tutorial, you will need:
Material here
Masks: @Ildiko_Mask_free_036 and Narah_mask_Abstract137.
Tube: 2560-Emily-Ratajkowski-LB TUBES.
Décos: deco1lc, deco2lc et deco3lc
Text: LoveInMyHeart
(you find here the links to the material authors' sites)
Plugins
consult, if necessary, my filter section here
Filters Unlimited 2.0 here
AAA Filters - Custom/AAA Frames - Foto Frame here
Graphics Plus - Cross Shadow here
Alien Skin Eye Candy 5 Impact - Glass here
Mura's Meister - Perspective Tiling here
Alf's Power Sines here
Nik Software - Color Efex Pro here
Filters Graphics Plus et Alf's Power Sines can be used alone or imported into Filters Unlimited.
(How do, you see here)
If a plugin supplied appears with this icon  it must necessarily be imported into Unlimited it must necessarily be imported into Unlimited

You can change Blend Modes according to your colors.
Copy the preset Emboss 3 in the Presets Folder.
Open the masks in PSP and minimize them with the rest of the material.
1. Set your foreground color to #211d1d,
Set your background color to #dfd7d1.

Open a new transparent image 950 x 650 pixels.
Flood Fill  the transparent image with your foreground color. the transparent image with your foreground color.
2. Layers>New Raster Layer.
Flood Fill  the layer with your background color. the layer with your background color.
Layers>New Mask layer>From image
Open the menu under the source window and you'll see all the files open.
Select the mask @Ildiko_Mask_free_036.
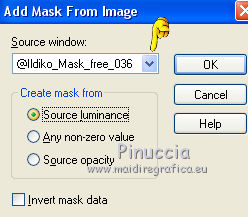
Effects>User Defined Filter - select the preset Emboss 3 and ok.

Layers>Merge>Merge Group.
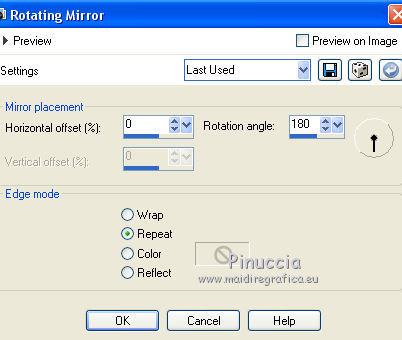
Effects>Reflection Effects>Rotating Mirror.
3. Selection Tool 
(no matter the type of selection, because with the custom selection your always get a rectangle)
clic on the Custom Selection 
and set the following settings.
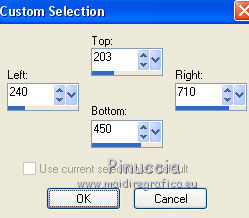
Selections>Promote Selection to Layer.
Effects>Plugins>AAA Frames - Foto Frame.
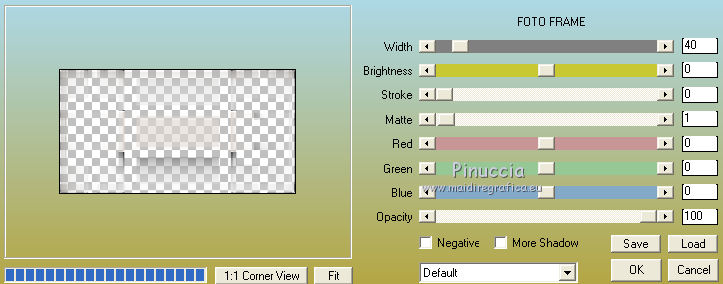
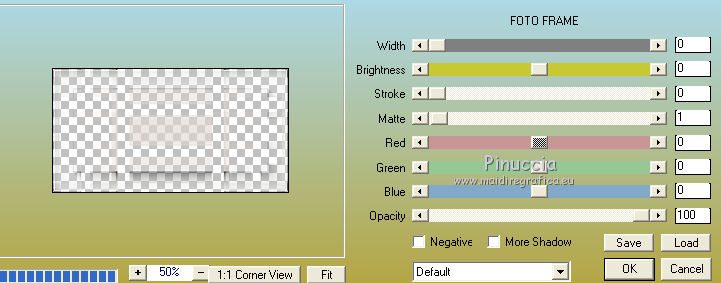
Repeat Effects>Plugins>AAA Frames - Foto Frame width to 0.
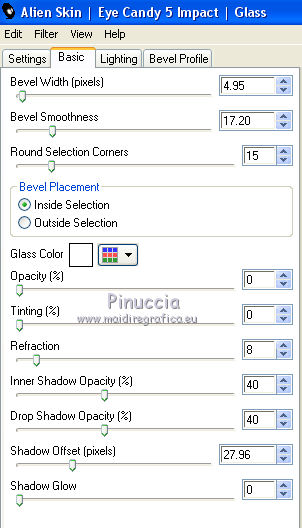
Effects>Plugins>Alien Skin Eye Candy 5 Impact - Glass.
Selections>Select None.
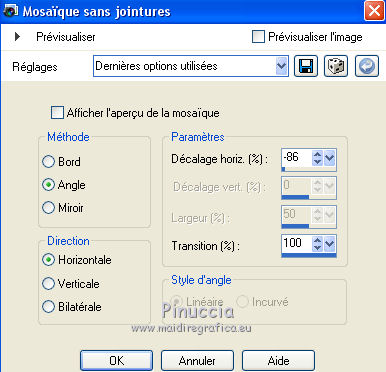
Effects>Image Effects>Seamless Tiling.
Layers>Duplicate.
Image>Mirror.
Layers>Merge>Merge Down.
4. Layers>Duplicate.
Effects>Plugins>Mura's Meister - Perspective Tiling.
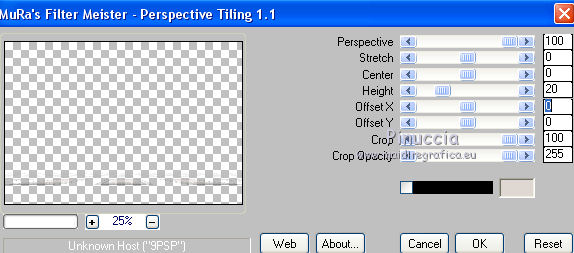
Objects>Align>Bottom
If you are working with a previous version that has not available the menu Objects,
use the Move Tool  to move the image down. to move the image down.
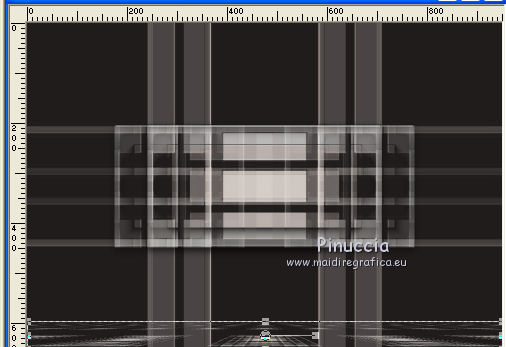
Adjust>Sharpness>Sharpen More.
Change the Blend Mode of this layer to Hard Light.
5. Activate the layer Raster 1.
Layers>Duplicate.
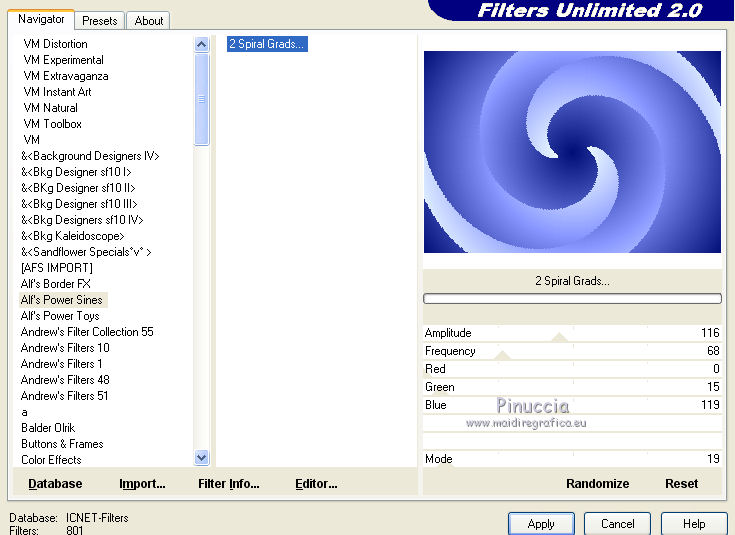
Effects>Plugins>Filters Unlimited 2.0 - Alf's Power Sines - 2 Spiral Grads.
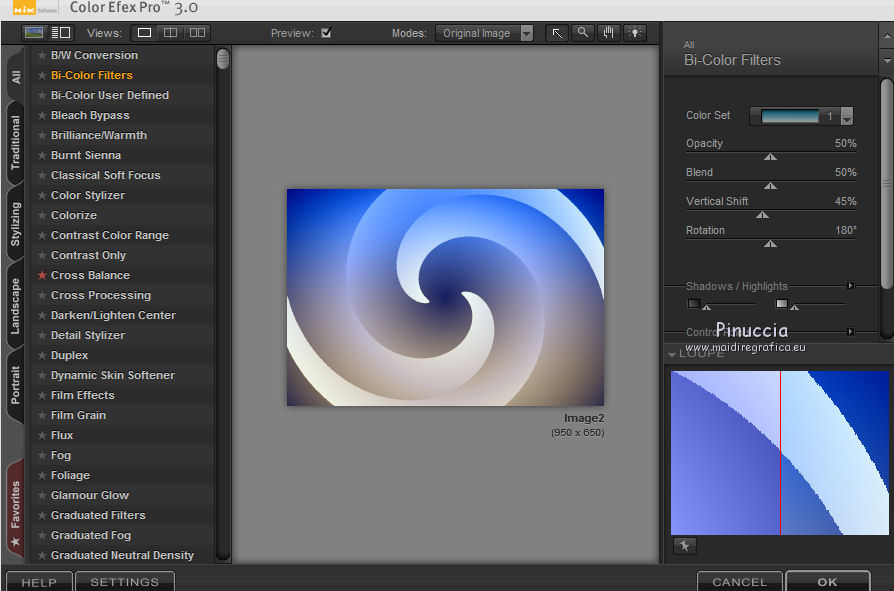
Effects>Plugins>Nik Software - Color Efex Pro
Bi-Color Filters - Color Set Cool/Warm 1.
Change the Blend Mode of this layer to Soft Light.

6. Layers>Duplicate.
Keep the Blend Mode to Soft Light and reduce the opacity to 46%.
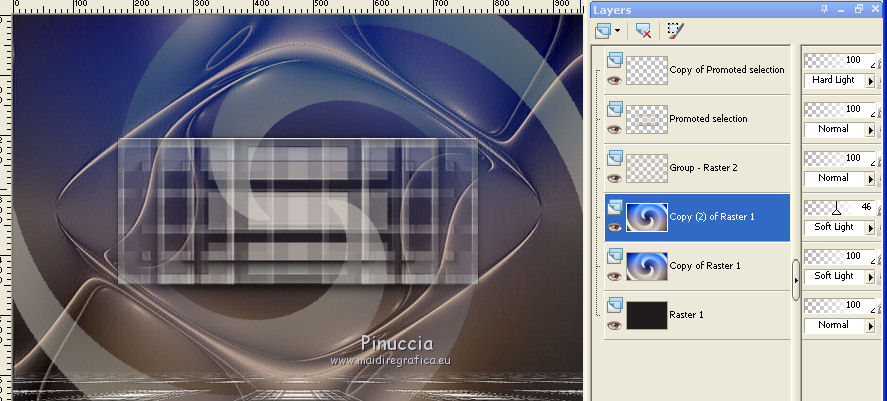
Layers>Merge>Merge Down.
7. Layers>New Raster Layer.
Reduce the opacity of the Flood Fill Tool to 80%.
Flood Fill  the layer with your background color. the layer with your background color.
(don't forget to set again the opacity to 100).
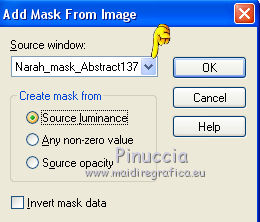
Layers>New Mask layer>From image
Open the menu under the source window and select the mask Narah_Mask_Abstract137.
Effetcs>User Defined Filter - Emboss 3.
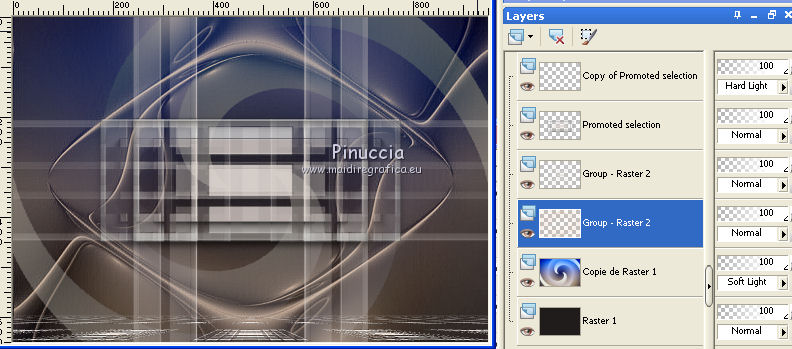
Layers>Merge>Merge Group.
Adjust>One Step Foto Fix.
You should have this
8. Activate the top layer.
Open the tube deco1lc (the blend mode of this layer is Screen) - Edit>Copy.
Go back to your work and go to Edit>Paste as new layer.
Move  the tube up to the left. the tube up to the left.
Layers>Duplicate.
Image>Flip.
Activate the layer below of the original.
Layers>Duplicate.
Image>Mirror.
9. Activate the top layer.
Open the tube deco2lc (the Blend mode is Luminance legacy) - Edit>Copy.
Go back to your work and go to Edit>Paste as new layer.
10. Open the text LoveInMyHeart and copy the layer Raster 2.
Go back to your work and go to Edit>Paste as new layer.
Move  the tube down to the right. the tube down to the right.

Layers>Merge>Merge visible.
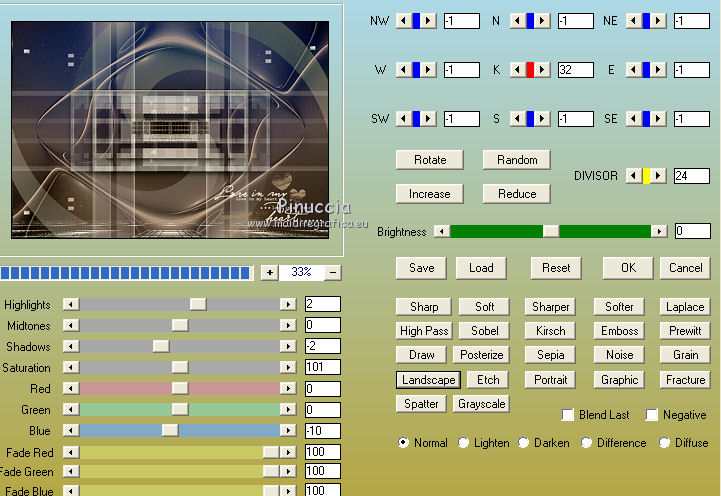
Effects>Plugins>AAA Filters - Custom - click on Landscape and ok.
11. Layers>Duplicate.
Image>Resize, to 96%, resize all layers not checked.
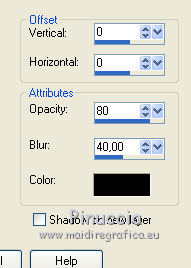
Effects>3D Effects>Drop Shadow, color black #000000.
12. Image>Add borders, 1 pixel, symmetric, background color.
Edit>Copy.
13. Image>Add borders, 40 pixels, symmetric, foreground color.
Activate the Magic Wand Tool 
and click on the bord to select it.
Edit>Paste into Selection.
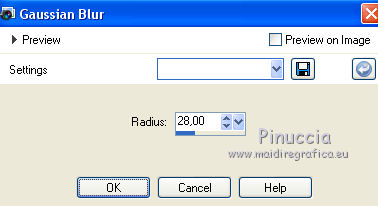
Adjust>Blur>Gaussian Blur - radius 28.
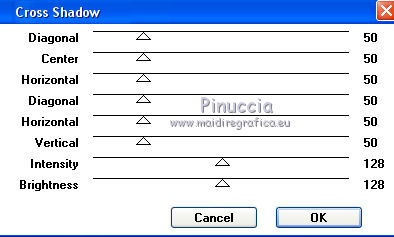
Effects>Plugins>Graphics Plus - Cross Shadow, default settings.
Selections>Invert.
Effects>3D Effects>Drop Shadow, color black #000000.

Selections>Select None.
14. Open the tube deco3lc - Edit>Copy.
Go back to your work and go to Edit>Paste as new layer.
15. Open the tube 2560-Emily-Ratajkowski-LB TUBES - Edit>Copy.
Go back to your work and go to Edit>Paste as new layer.
Image>Mirror.
Move  the tube to the left side. the tube to the left side.
Effects>3D Effects>Drop Shadow, at your choice.
16. Image>Add borders, 1 pixel, symmetric, foreground color.
Sign your work and save as jpg.
little note about the watermark:
I don't ask to put watermark on the versions made by my translations.
But if you decide to use the watermark, I would appreciate that my work as translator was also respected.
For that, I added a new watermark to the material.

The tube of this layer is by Azyzam
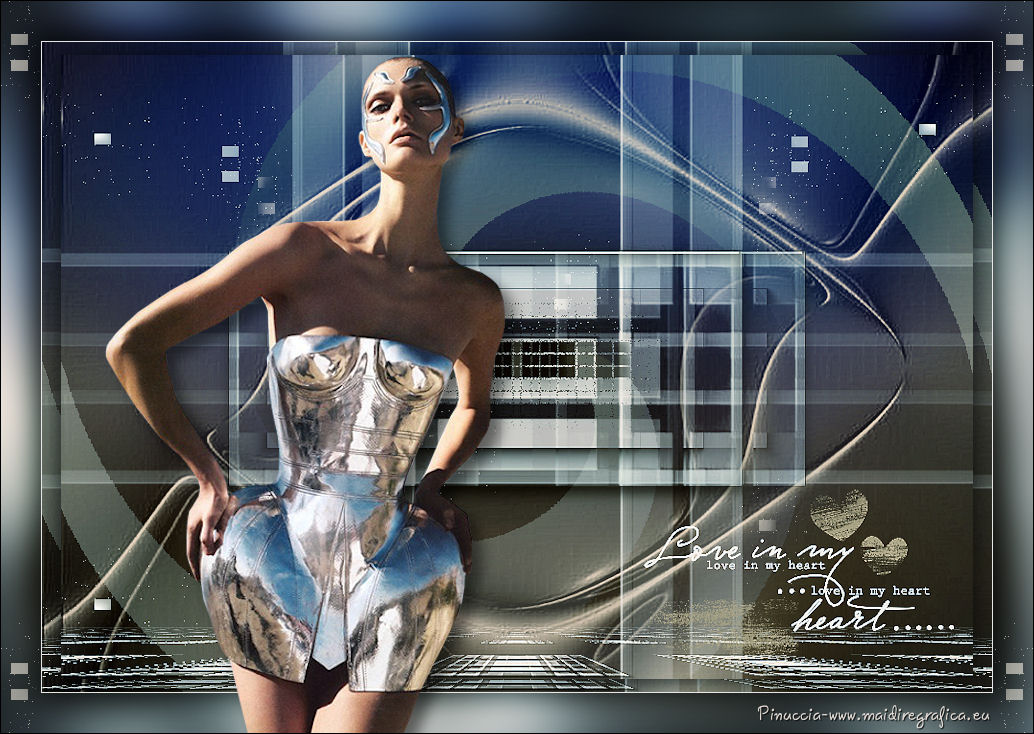
your versions here

If you have problems or doubts, or you find a not worked link, or only for tell me that you enjoyed this tutorial, write to me.
My mail is in the menu on the top of the page.
17 January 2018
|
 ENGLISH VERSION

 ENGLISH VERSION
