|
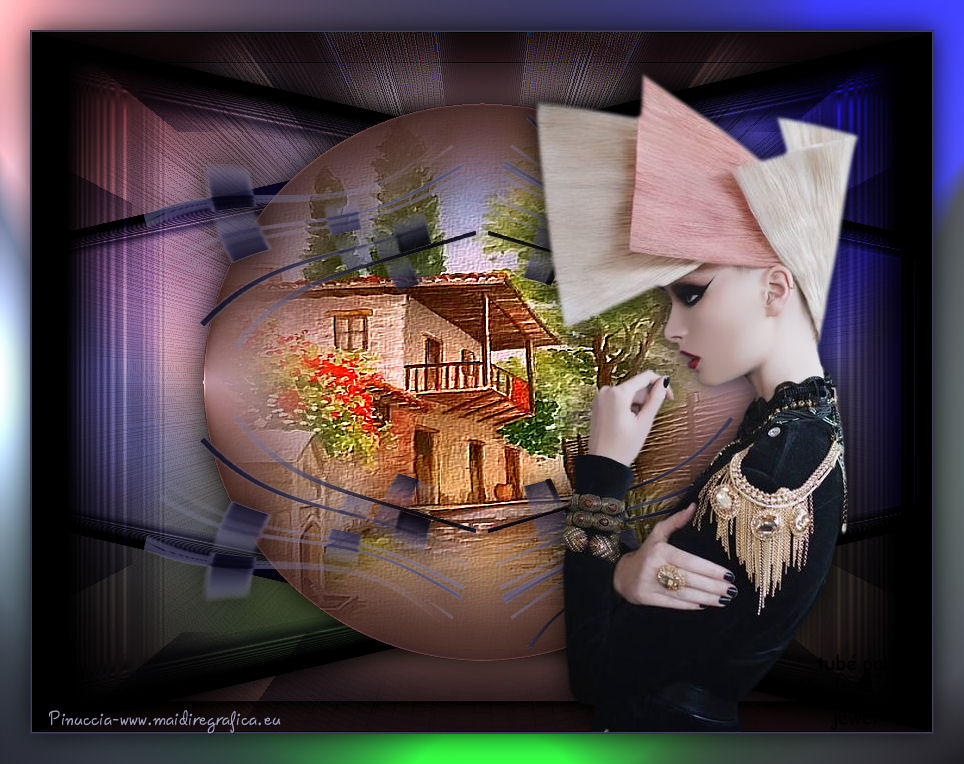
TAG STRANGE HAIR
 ENGLISH VERSION ENGLISH VERSION
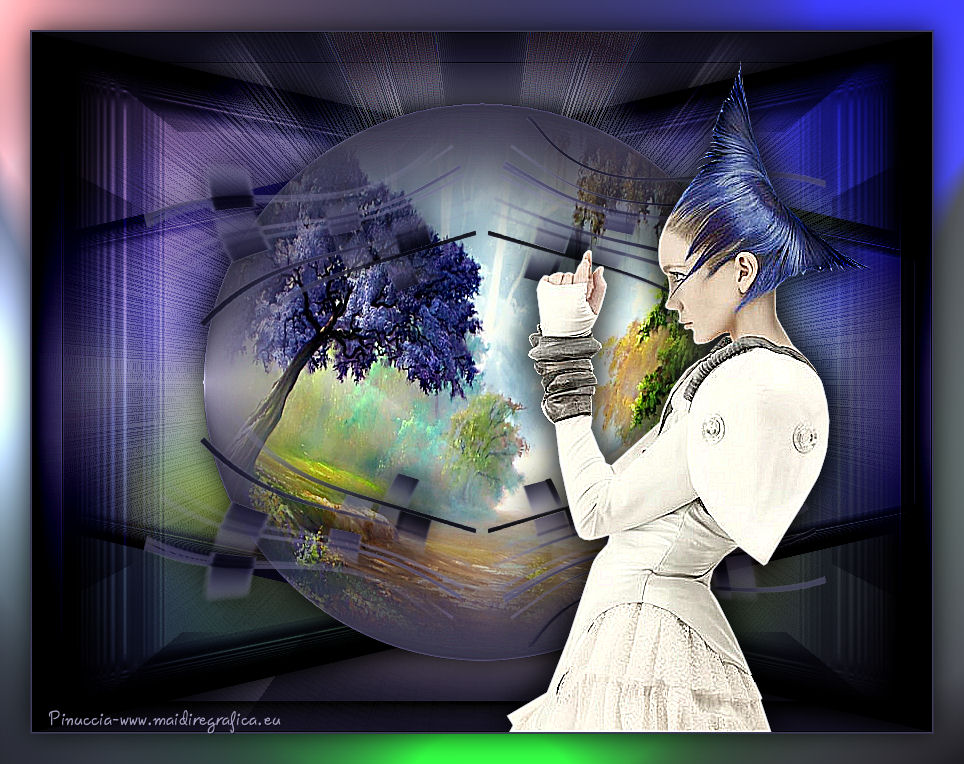
Here you find the original of this tutorial:

This tutorial was created with PSPX8 and translated with PSPX3, but it can also be made using other versions of PSP.
Since version PSP X4, Image>Mirror was replaced with Image>Flip Horizontal,
and Image>Flip with Image>Flip Vertical, there are some variables.
In versions X5 and X6, the functions have been improved by making available the Objects menu.
In the latest version X7 command Image>Mirror and Image>Flip returned, but with new differences.
See my schedule here
French translation here
your versions ici
For this tutorial, you will need:
Material here
For the tubes thanks:
background Riet_342_161117mail_back1,
woman: Yoka-StrangeHair-6418
deco: CAL-2649-041018
sélection: Aliciar sel3952_aliciar.PspSelection.
(you find here the links to the material authors' sites)
Plugins
consult, if necessary, my filter section here
Toadies - Weaver here
Filters Unlimited 2.0 here
Mura's Meister- Pole Transform here
Flaming Pear - Flexify 2 here
Flaming Pear - Silver here
VM Toolbox - Zoom Blur here
AAA Frames - Foto Frame/AAA Filters - Custom here
Filters Toadies and VM Toolbox can be used alone or imported into Filters Unlimited.
(How do, you see here)
If a plugin supplied appears with this icon  it must necessarily be imported into Unlimited it must necessarily be imported into Unlimited

You can change Blend Modes according to your colors.
In the newest versions of PSP, you don't find the foreground/background gradient (Corel_06_029).
You can use the gradients of the older versions.
The Gradient of CorelX here
Copy the preset Preset_Lights_monique in the Presets Folder.
Copy the selection in the Selections Folder.
1. Open a new transparent image 900 x 700 pixels.
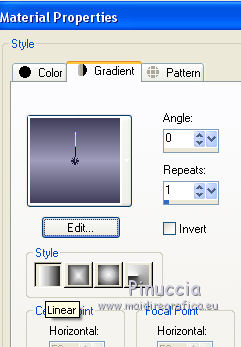
Set your foreground color to #403e5a.
and your background color to #a09dbc.

Set your foreground color to a Foreground/Background Gradient, style Linear.
3. Selections>Select All.
Open Riet_342_161117mail_back1 - Edit>Copy.
Go back to your work and go to Edit>Paste into Selection.
Selections>Select None.
4. Selections>Load/Save Selection>Load Selection from Disk.
Look for and load the selection sel3952_aliciar.PspSelection.
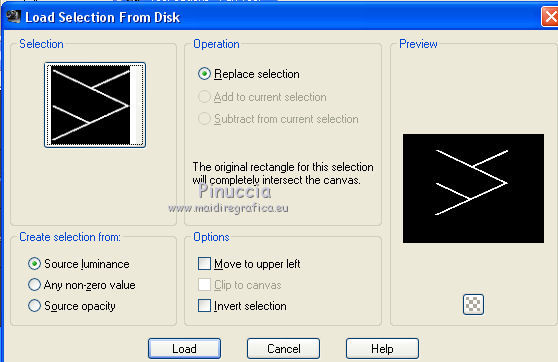
Layers>New Raster Layer.
Flood Fill  the selection with your Gradient. the selection with your Gradient.
Selections>Select None.
Objects>Align>Left
if you are working with a previous version that has not available the menu Objects,
use the Move Tool 
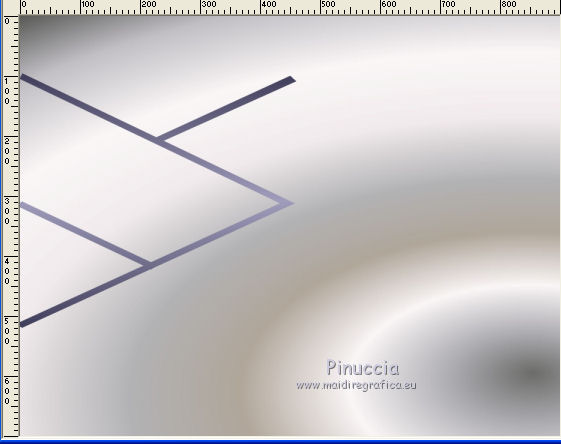
Layers>Duplicate.
Image>Mirror.
Layers>Merge>Merge Down.
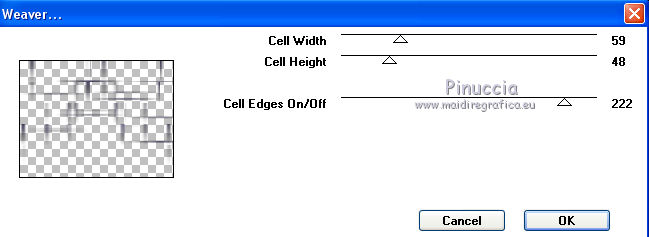
5. Effects>Plugins>Toadies - Weaver, default settings.
Layers>Duplicate.
Change the Blend Mode of this layer to Multiply.
Layers>Merge>Merge Down.
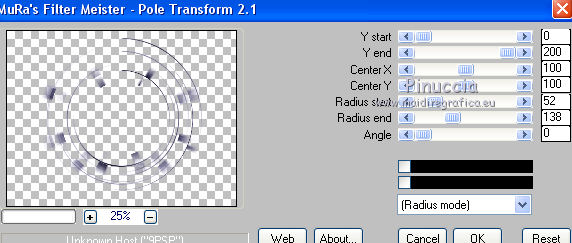
6. Effects>Plugins>Mura's Meister - Pole Transform.
Layers>Duplicate.
Image>Flip.
Change the Blend Mode of this layer to Multiply.
Layers>Merge>Merge Down.
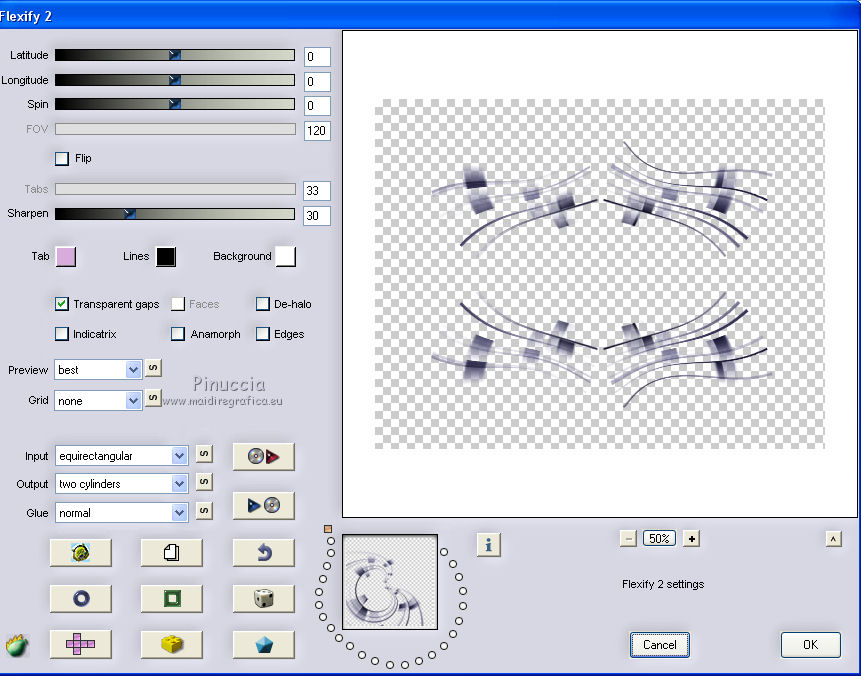
7. Effects>Plugins>Flaming Pear - Flexify 2.
Layers>Duplicate.
Change the Blend Mode of this layer to Multiply.
Layers>Merge>Merge Down.
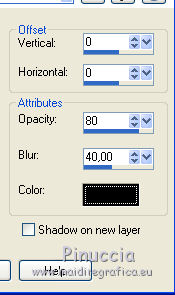
Effects>3D Effects>Drop Shadow, color #000000.
8. Layers>New Raster Layer.
Layers>Arrange>Send to Bottom.
Flood Fill  the layer with your Gradient. the layer with your Gradient.
Change the Blend Mode of Raster 1 to Overlay.
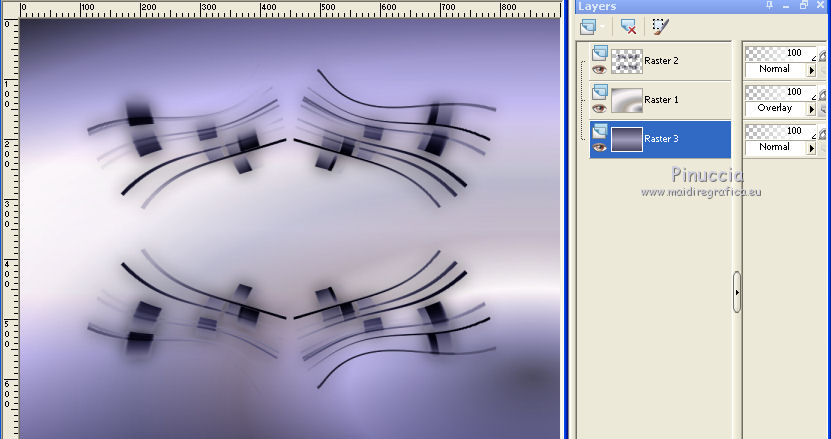
Keep Raster 3 selected
Selections>Select All.
Selections>Modify>Contract - 100 pixels.
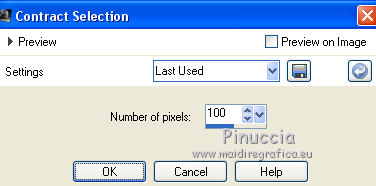
Selections>Invert.
Selections>Promote Selection to Layer.
9. Keep selected.
Effects>Plugins>VM Toolbox - Zoom Blur
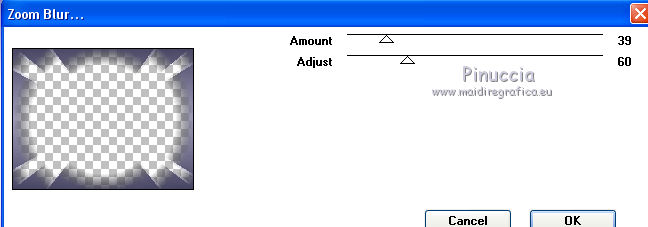
if your import the effect in Unlimited, it places itself as VM Stylize
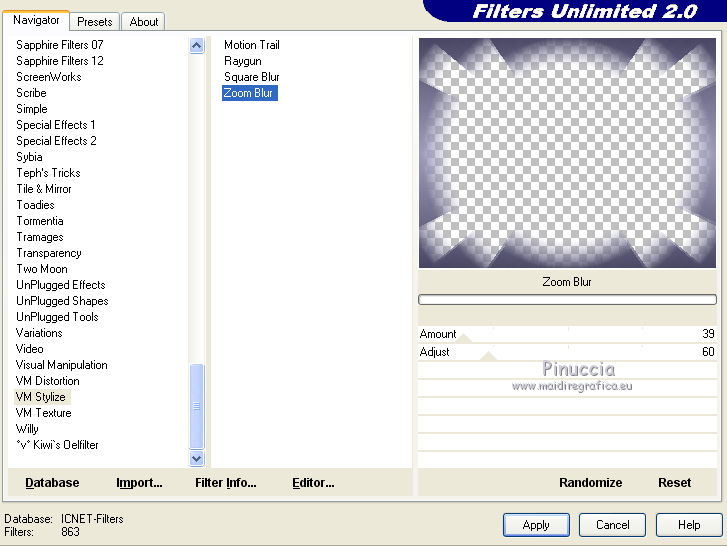
Change the Blend Mode of this layer to Multiply.
Selections>Select None.
Layers>Arrange>Move up.
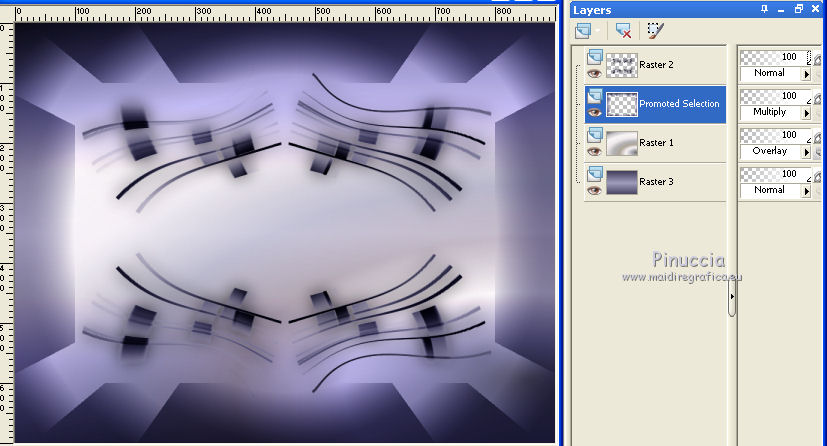
10. Activate the layer Raster 1.
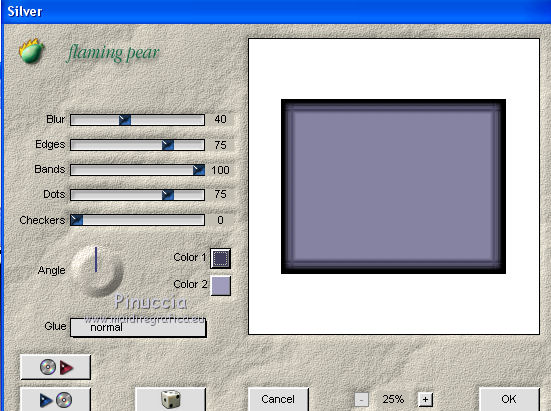
Effects>Plugins>Flaming Pear - Silver
color 1: foreground color #403e5a
color 2: background color #a09dbc
11. Effects>Geometric Effects>Perspective Horizontal

Adjust>Sharpness>Sharpen More.
Layers>Duplicate.
Image>Mirror.
Layers>Merge>Merge Down.
Effects>3D Effects>Drop Shadow, comme précédemment.

12. Activate the layer Raster 3.
Selections>Select All.
Open the tube CAL-2649-041018 - Edit>Copy.
Go back to your work and go to Edit>Paste into Selection.
Selections>Select None.
Adjust>Sharpness>Sharpen More
13. Adjust>Blur>Gaussian Blur - radius 24.
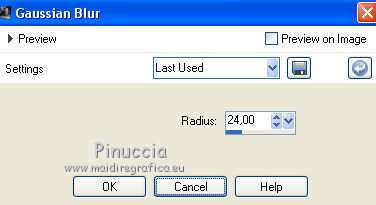
Layers>Duplicate.
14. Effects>Geometric Effects>Circle.

Layers>Arrange>Move Up.
Image>Resize, to 80%, resize all layers not checked.
Activate the Magic Wand Tool 
click outside of the circle to select it.
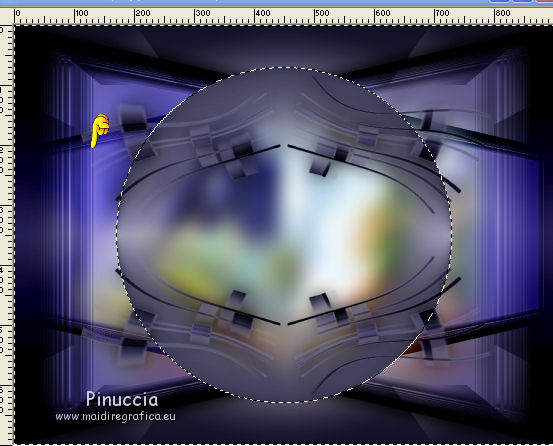
Selections>Invert.
Edit>Paste into Selection (the misted CAL-2649-041018 is still in memory).
Selections>Select None.
Adjust>Sharpness>Sharpen More.
Effects>3D Effects>Drop Shadow, same settings.

15. Activate the layer Raster 3.
Effects>Plugins>AAA Frames - Foto Frame.
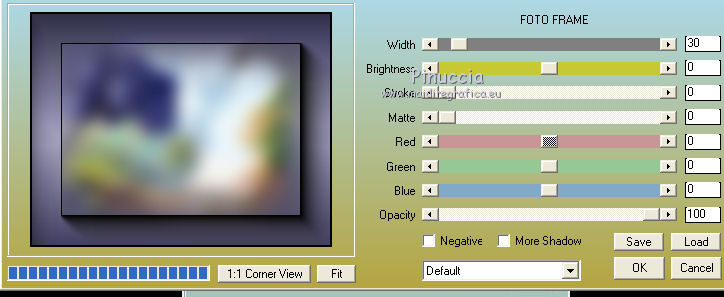
Effects>Plugins>AAA Filtres - Custom, click on Landscape and ok.
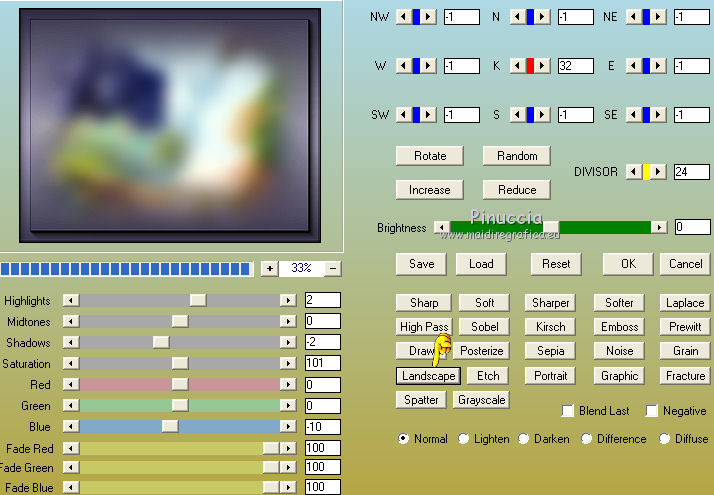
Apply the plugin also on the layer Copy of Raster 3.
16. Activate the layer Raster 1.
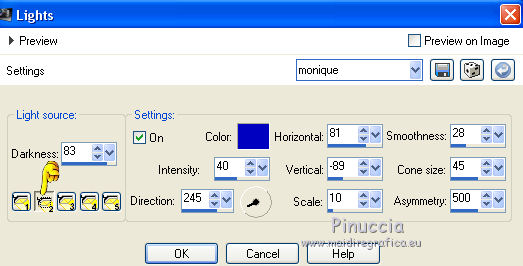
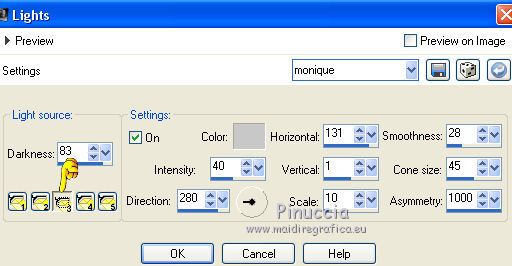
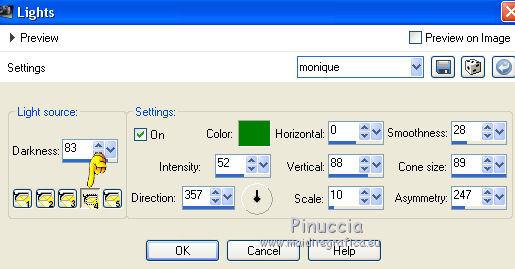
Effects>Illumination Effects>Lights
select the preset monique and ok.
The first light is the number 5 - color #c8c8c8
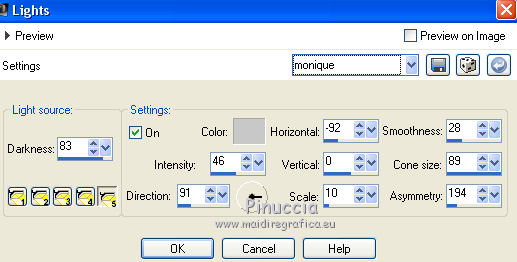
Here below the other lights, in case of problem with the preset
light 1 - color #7c4734
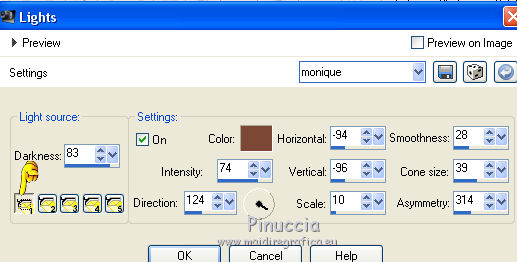
light 2 - color #0000c0
light 3 - color #c8c8c8
light 4 - color #008000.
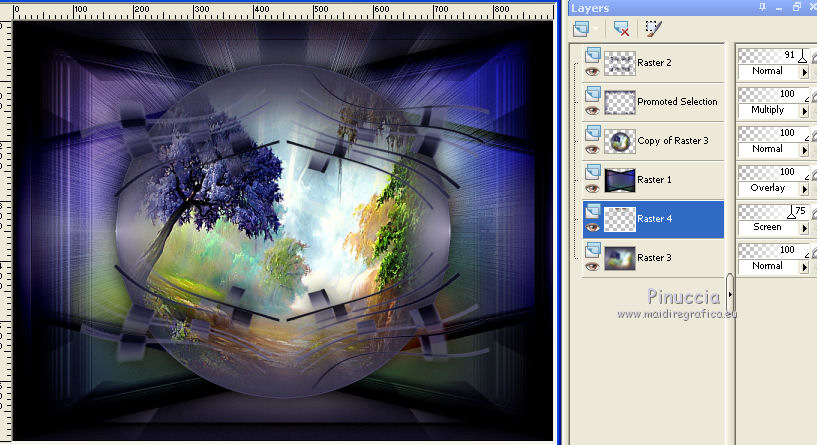
17. Open decodesafiolc - Edit>Copy.
Go back to your work and go to Edit>Paste as new layer.
Layers>Arrange>Move down.
You should have this
18. Activate the top layer, Raster 2.
Open the tube Yoka-StrangeHair-6418 - Edit>Copy.
Go back to your work and go to Edit>Paste as new layer.
Adjust>Sharpness>Sharpen More
Move  the tube to the right side. the tube to the right side.
Effects>3D Effects>Drop Shadow, same settings.

19. Image>Add borders, 2 pixels, symmetric, foreground color.
Image>Add borders, 30 pixels, symmetric, background color.
Activate the Magic Wand Tool 
click on the 30 pixels border to select it.
Effects>>Illumination Effects>Lights, same settings.
Selections>Invert.
Effects>3D Effects>Drop Shadow, same settings.

Selections>Select None.
20. Sign your work.
little note about the watermark:
I don't ask to put watermark on the versions made by my translations.
But if you decide to use the watermark supplied by the author, I would appreciate that my work as translator was also respected.
For that, I added my watermark to the material (in english and in french).

21. Save as jpg.
The tubes of this version are by Luz Cristina and Jewel
Your versions here

If you have problems or doubts, or you find a not worked link, or only for tell me that you enjoyed this tutorial, write to me.
My mail is in the menu on the top of the page.
3 May 2018
|
 ENGLISH VERSION

 ENGLISH VERSION
