|
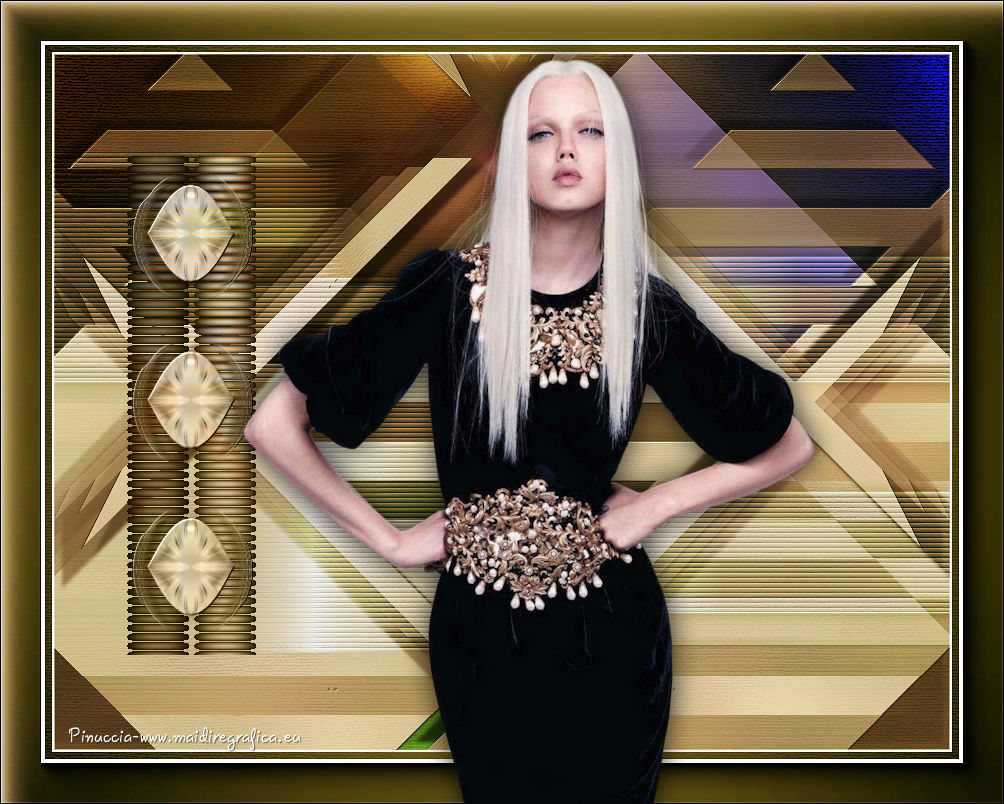
TAG VICTORIA
 ENGLISH VERSION ENGLISH VERSION
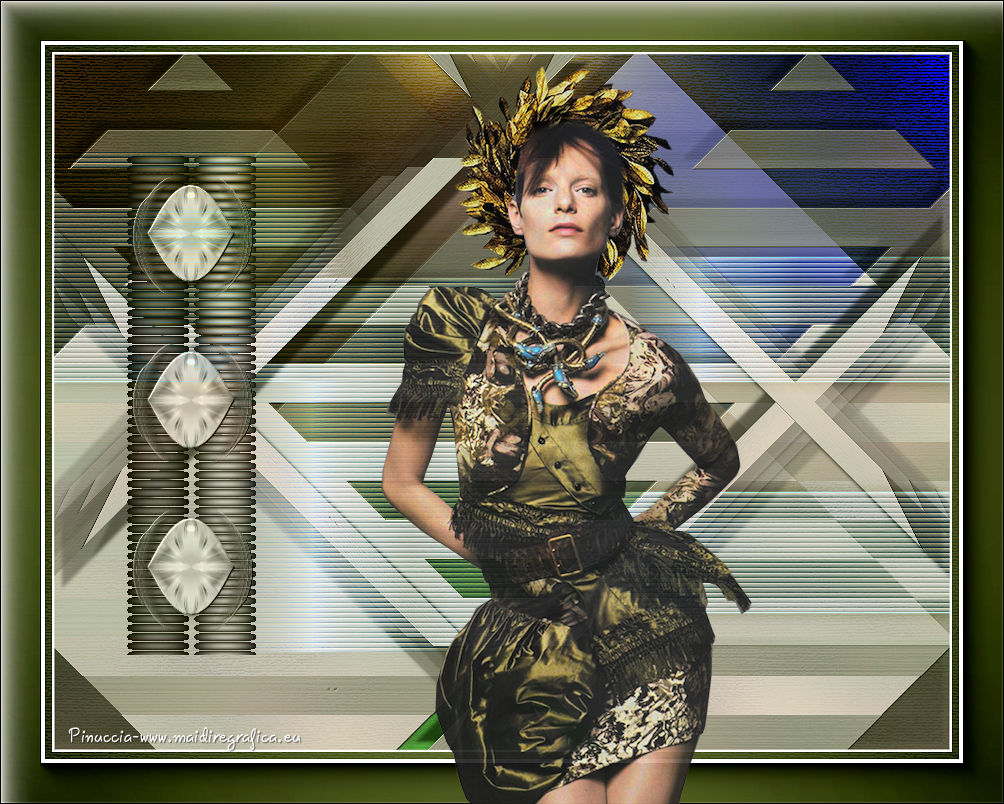
Thanks Lica Cida for your invitation to translate

This tutorial was created with PSPX8 and translated with PSPX3, but it can also be made using other versions of PSP.
Since version PSP X4, Image>Mirror was replaced with Image>Flip Horizontal,
and Image>Flip with Image>Flip Vertical, there are some variables.
In versions X5 and X6, the functions have been improved by making available the Objects menu.
In the latest version X7 command Image>Mirror and Image>Flip returned, but with new differences.
See my schedule here
French translation here
Your versions ici
For this tutorial, you will need:
Material here
Tube: 4721-luzcristina.
Decos: ildiko_deco_2016_18, Ildiko_create_deco (126) and ildiko_deco_2016_16.
(you find here the links to the material authors' sites)
Plugins
consult, if necessary, my filter section here
Filters Unlimited 2.0 here
Artistics - Rough Pastels here
AAA Frames - Foto Frame/AAA Filters - Custom here
Mura's Seamless - Emboss at Alpha here
DSB Flux - Linear Transmission here
Unplugged Shapes - 45 Degree Rectangle here
Toadies - Motion Trail here
Filters Mura's Seamless, Unplugged Shapes and Toadies can be used alone or imported into Filters Unlimited.
(How do, you see here)
If a plugin supplied appears with this icon  it must necessarily be imported into Unlimited it must necessarily be imported into Unlimited

You can change Blend Modes according to your colors.
In the newest versions of PSP, you don't find the foreground/background gradient (Corel_06_029).
You can use the gradients of the older versions.
The Gradient of CorelX here
Copy the preset Lights_palco (marapontes) in the Presets Folder.
1. Set your foreground color to #292d19,
set your background color to #b1bb83.

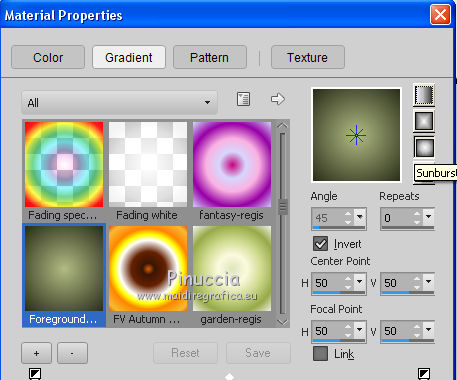
Set your foreground color to a Foreground/Background Gradient, style Sunburst.
2. Open a new transparent image 900 x 700 pixels.
Flood Fill  the transparent image with your gradient. the transparent image with your gradient.
3. Selections>Select All.
Open the tube 4721-luzcristina - Edit>Copy.
Minimize the tube.
Go back to your work and go to Edit>Paste into Selection.
Selections>Select None.
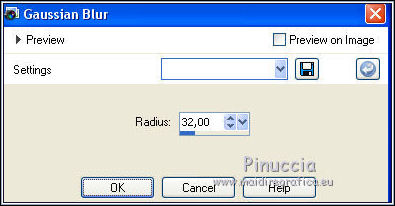
4. Adjust>Blur>Gaussian Blur - radius 32.
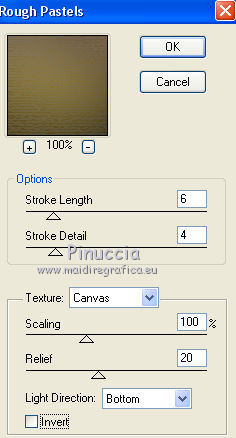
5. Effects>Plugins>Artistics - Rough Pastels
6. Effects>Plugins>Unplugged Shapes - 45 Degree Rectangle.
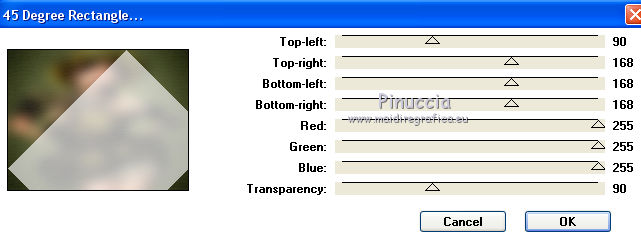
7. Activate the Magic Wand Tool 
and click on the effect to select it.
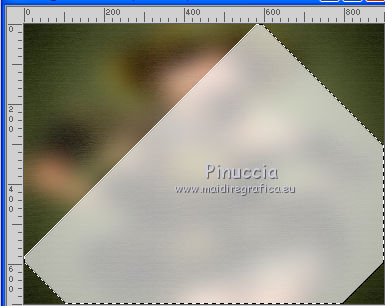
Selections>Promote Selection to Layer.
Selections>Select None.
8. Effects>Plugins>DSB Flux - Linear Transmission
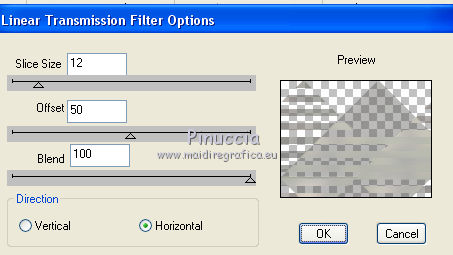
9. Layers>Duplicate.
Image>Mirror.
Layers>Merge>Merge Down.
10. Effects>3D Effects>Drop Shadow, color black #000000.
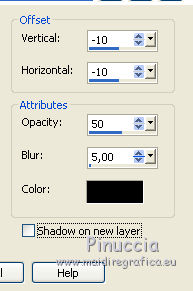
11. Effects>Plugins>Mura's Seamless - Emboss at Alpha, default settings.
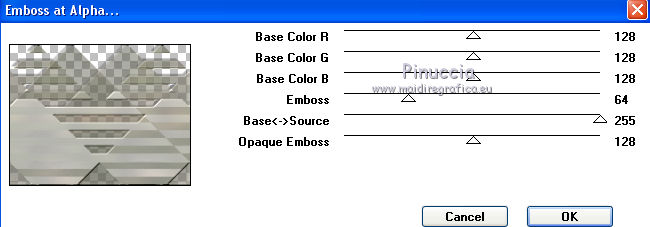
12. Activate the Selection Tool  , rectangle , rectangle
and select the bottom second line.
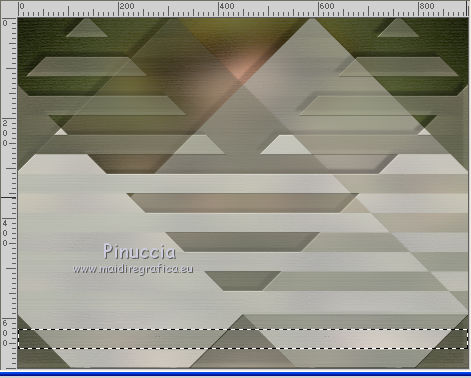
Selections>Promote Selection to Layer.
Selections>Select None.
13. Effects>Plugins>Toadies - Motion Trail, default settings.
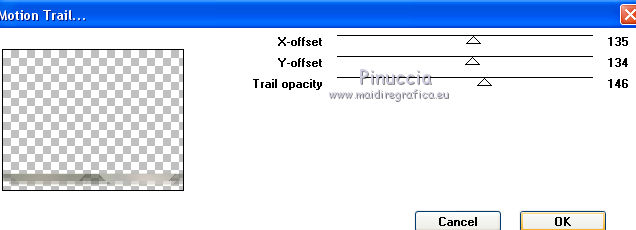
Repeat this Effect another time.
14. Effects>Geometric Effects>Skew.
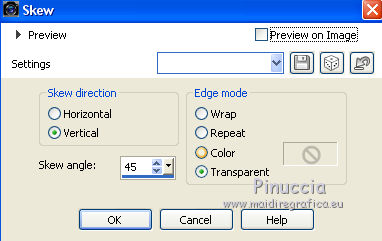
15. Layers>Duplicate.
Image>Mirror.
Layers>Merge>Merge Down.
Layers>Duplicate.
Image>Flip.
Layers>Merge>Merge Down.
16. Effects>3D Effects>Drop Shadow, color #000000.

Repeat Drop Shadow in positive.
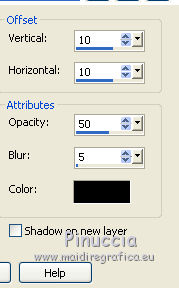
17. Activate the layer Raster 1.
Effects>Illuminations Effects>Lights
select the preset palco and ok
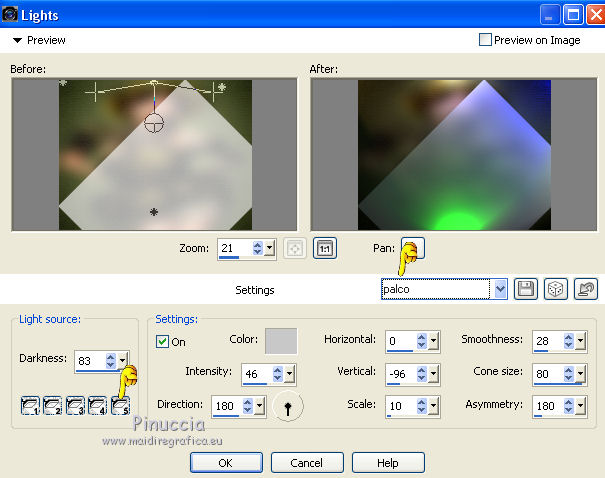
Here above the settings of light "5".
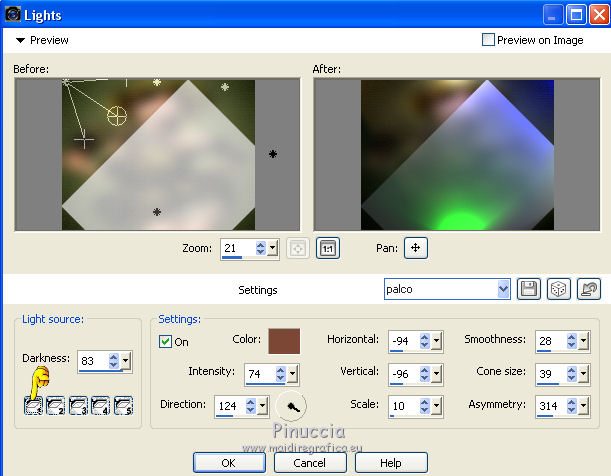
If you have problems with the preset, here below the settings of the other lights:
Light 4
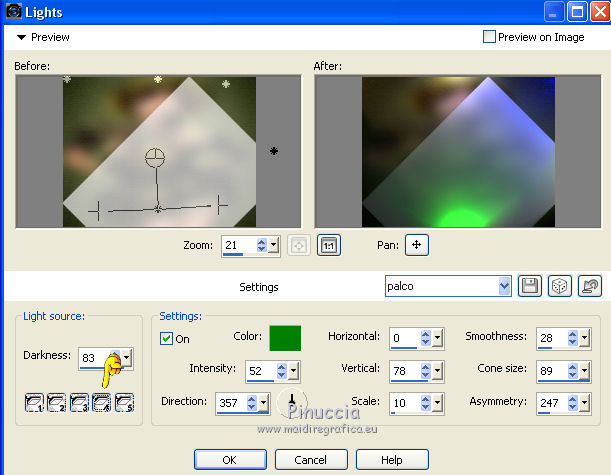
Light 3
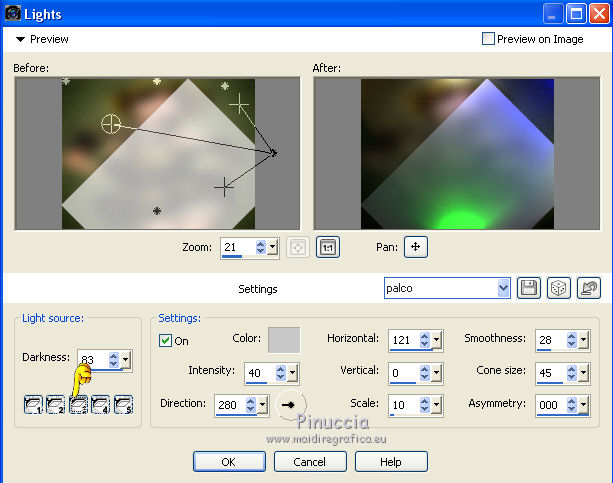
Light 2
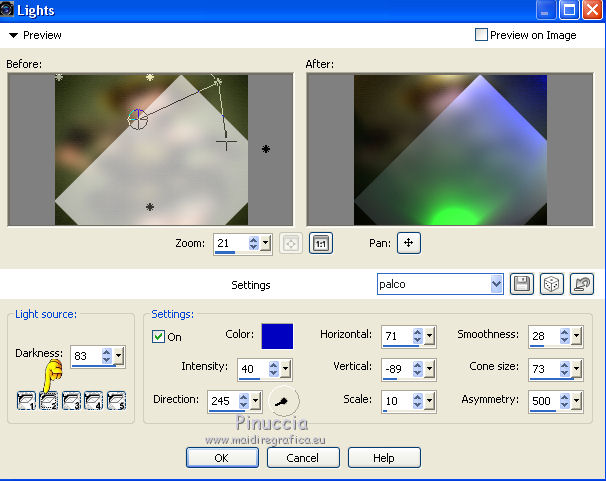
Light 1
You should have this.
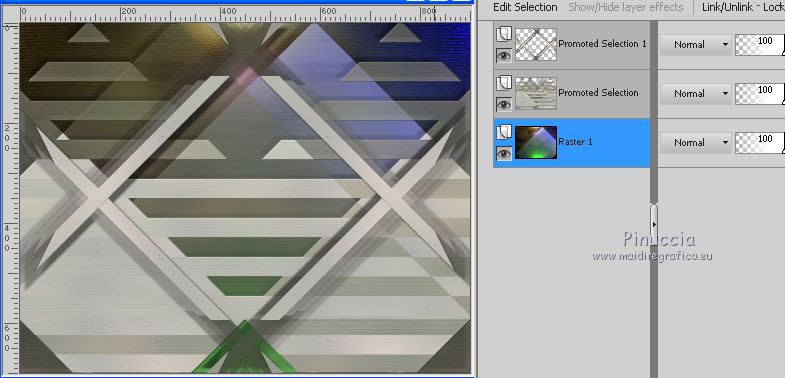
18. Layers>Merge>Merge visible.
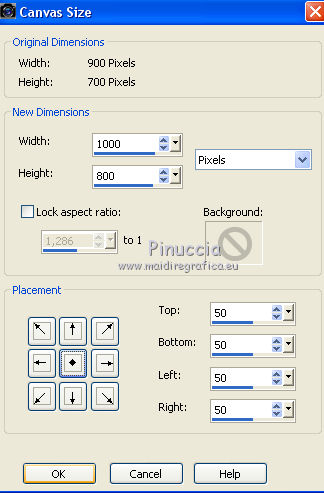
19. Image>Canvas Size - 1000 x 800 pixels.
20. Layers>New Raster Layer.
Flood Fill  the layer with your Gradient. the layer with your Gradient.
21. Effects>Plugins>Artistics - Rough Pastels, same settings.
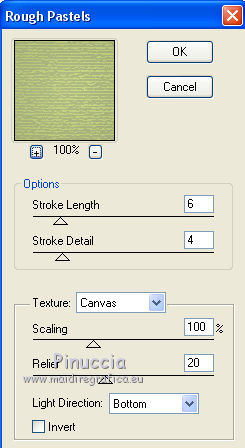
Layers>Arrange>Send to Bottom.
22. Activate the top layer, Merged.
Activate the Magic Wand Tool 
and click on the transparent space to select it.
Selections>Invert.
Selections>Modify>Select Selection Borders.
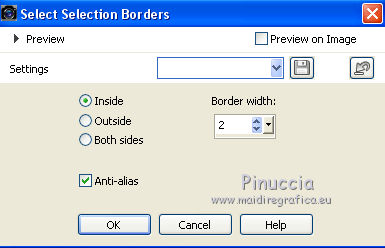
23. Layers>New Raster Layer.
Set your foreground color to white #ffffff.
Flood Fill  the selection with color white #ffffff. the selection with color white #ffffff.
Selections>Select None.
24. Image>Add borders, 2 pixels, symmetric, color #ffffff.
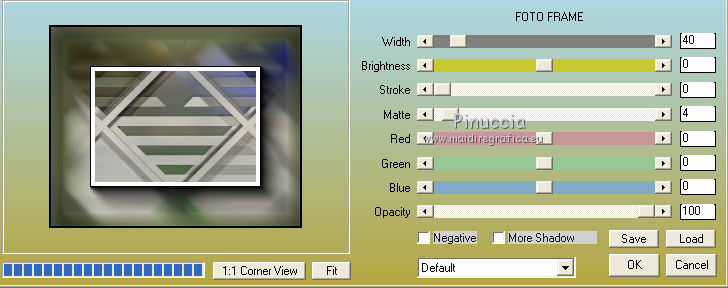
25. Effects>Plugins>AAA Frames - Foto Frame.
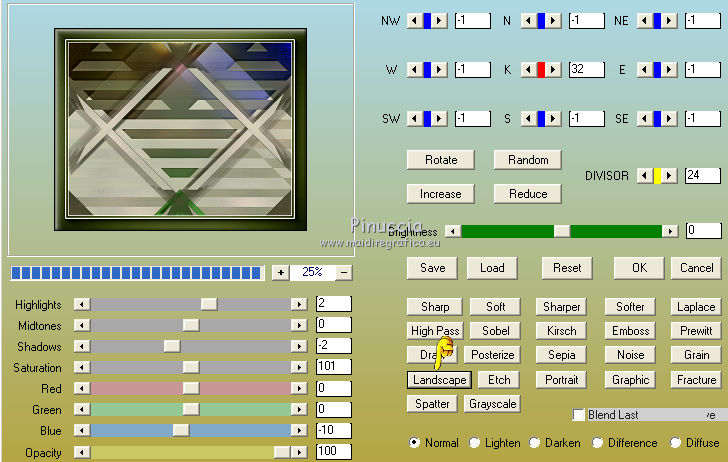
**Optional: Effects>Plugins>AAA Filters - Custom - click on Landscape and ok
25. Open ildiko_deco_2016_18 - Edit>Copy.
Go back to your work and go to Edit>Paste as new layer.
Change the Blend Mode of this layer to Overlay.
Adjust>One Step Photo Fix.
26. Open Ildiko_create_deco (126) - Edit>Copy.
Go back to your work and go to Edit>Paste as new layer.
Change the Blend Mode of this layer to Luminance (Legacy).
Move  the tube to the left side (see my example). the tube to the left side (see my example).
27. Open ildiko_deco_2016_16 - Edit>Copy.
Go back to your work and go to Edit>Paste as new layer.
Change the Blend Mode of this layer to Luminance (Legacy).
Place  the tube over the previous element. the tube over the previous element.
Effects>Plugins>Mura's Seamless - Emboss at Alpha, default settings.
28. Activate again the tube 4721-luzcristina - Edit>Copy.
Go back to your work and go to Edit>Paste as new layer.
Image>Resize, to 90%, resize all layers not checked.
Move  the tube a little further to the right. the tube a little further to the right.
29. Sign your work on a new layer.
Layers>Merge>Merge All and save as jpg.
little note about the watermark:
I don't ask to put watermark on the versions made by my translations.
But if you decide to use the watermark, I would appreciate that my work as translator was also respected.
For that, I added a new watermark to the material.

The tube of this version is by Yoka
Your versions here

If you have problems or doubts, or you find a not worked link, or only for tell me that you enjoyed this tutorial, write to me.
My mail is in the menu on the top of the page.
19 January 2018
|
 ENGLISH VERSION

 ENGLISH VERSION
