|
TOP ALIVE
 ENGLISH VERSION ENGLISH VERSION
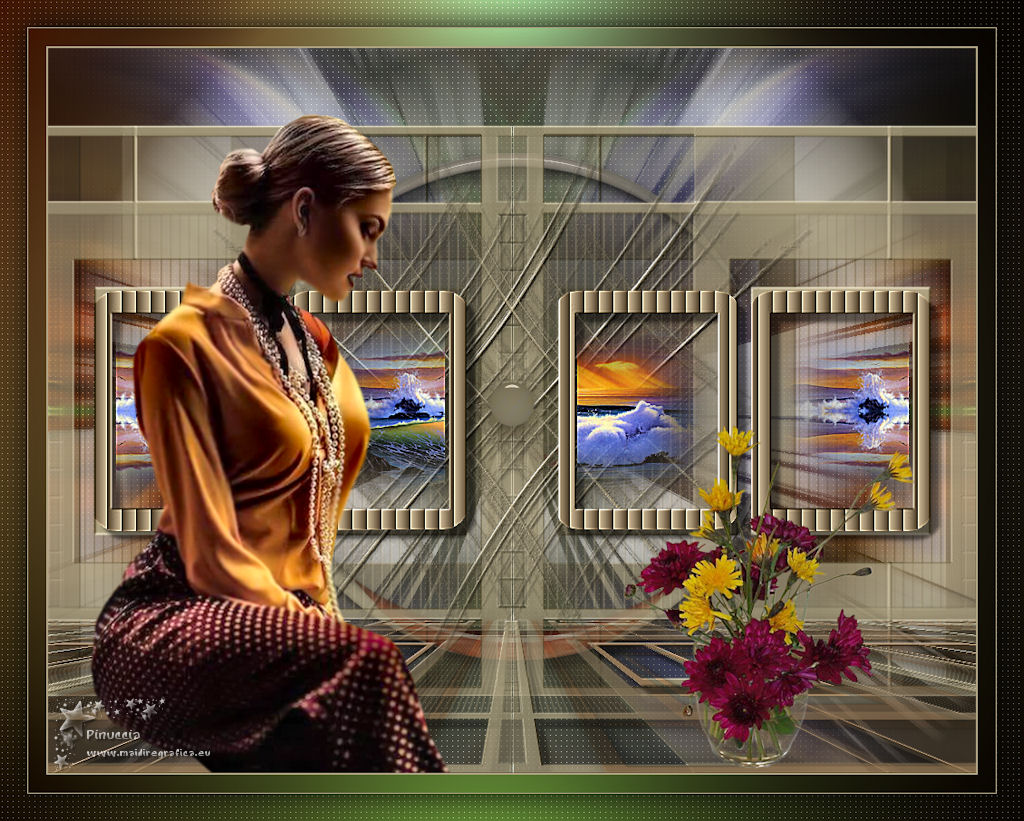
Here you find the original of this tutorial:

This tutorial was created with PSPX8 and translated with PSPX3, but it can also be made using other versions of PSP.
Since version PSP X4, Image>Mirror was replaced with Image>Flip Horizontal,
and Image>Flip with Image>Flip Vertical, there are some variables.
In versions X5 and X6, the functions have been improved by making available the Objects menu.
In the latest version X7 command Image>Mirror and Image>Flip returned, but with new differences.
See my schedule here
French translation here
your versions ici
For this tutorial, you will need:
Material here
Thanks:
for the tubes: for the tubes: Luz Cristina (5008-luzcristina), Thafs (bouquet_de_fleurs_tubed_by_thafs) et Cal (CAL-2917-080218)
for the masks Ildiko (Ildiko_mask_1_031) et Narah (Narah_Mask_1287)
The rest of the materiel is by Lica Cida
(you find here the links to the material authors' sites)
Plugins
consult, if necessary, my filter section here
Filters Unlimited 2.0 here
Plugin Galaxy here
Carolaine and Sensibility - CS-LDots here
Mura's Meister - Prespective Tiling here
Mura's Seamless - Emboss at Alpha here
Filters Mura's Seamless can be used alone or imported into Filters Unlimited.
(How do, you see here)
If a plugin supplied appears with this icon  it must necessarily be imported into Unlimited it must necessarily be imported into Unlimited

You can change Blend Modes according to your colors.
In the newest versions of PSP, you don't find the foreground/background gradient (Corel_06_029).
You can use the gradients of the older versions.
The Gradient of CorelX here
Copy the preset Preset_Light alive in the Presets Folder.
Open the masks in PSP and minimized them with the rest of the material.
1. Open a new transparent image 1024 x 800 pixels.
Selections>Select All.
Open the tube CAL-2917-080218 misted.
Activate the layer Raster 1.
Erase the watermark and go to Edit>Copy.
Go back to your work and go to Edit>Paste into selection.
Selections>Select None.
2. Effects>Image Effects>Seamless Tiling, default settings.

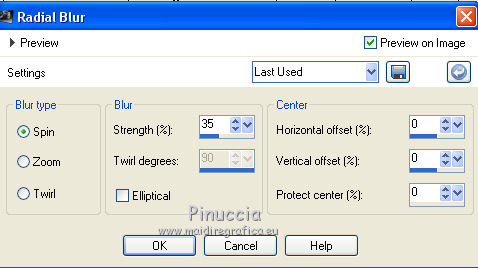
3. Adjust>Blur>Radial Blur.
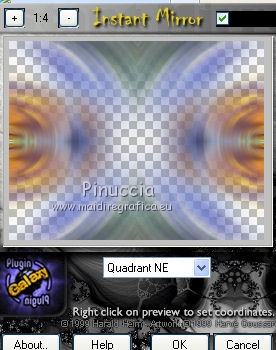
4. Effects>Plugins>Plugin Galaxy - Instant Mirror
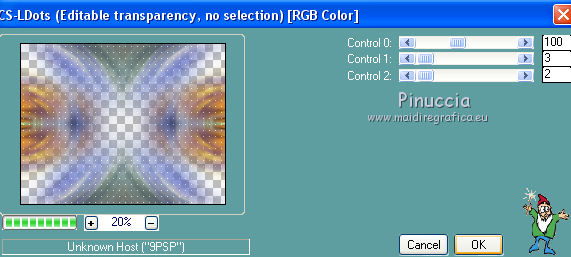
5. Effects>Plugins>Carolaine and Sensibility - CS-LDots
6. Choose two colors according to your main tube.
For me:
Foreground color #1f0e00,
background color #b1a585.
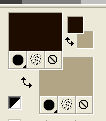
Layers>New Raster Layer.
Flood Fill  with your foreground color #1f0e00. with your foreground color #1f0e00.
Layers>New Raster Layer.
Flood Fill  with your background color #b1a585. with your background color #b1a585.
7. Layers>New Mask layer>From image
Open the menu under the source window and you'll see all the files open.
Select the mask Mask_Ildiko_mask_1_031.
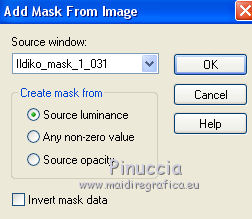
Layers>Merge>Merge Group.
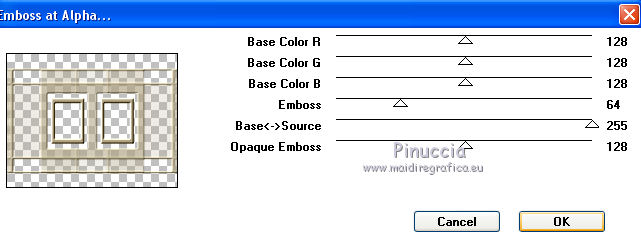
Effects>Plugins>Mura's Seamless - Emboss at Alpha, default settings
8. Activate the Magic Wand Tool 
and click on the rectangles to select them
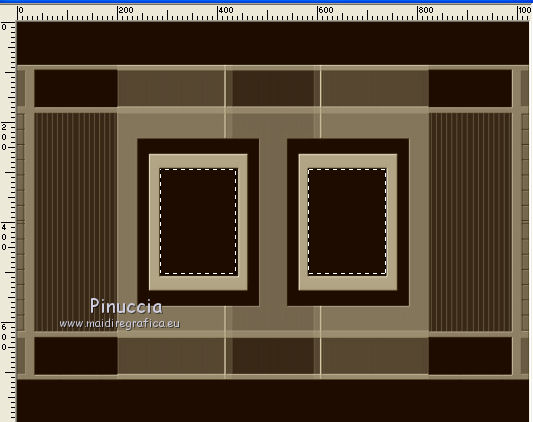
9. Selections>Modify>Select Selection Borders.

Selections>Promote Selection to Layer.
10. Effects>Texture Effects>Blinds.
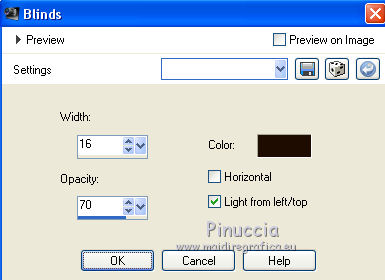
Selections>Select None.
11. Activate again the Magic Wand Tool 
and click on the rectangles to select them
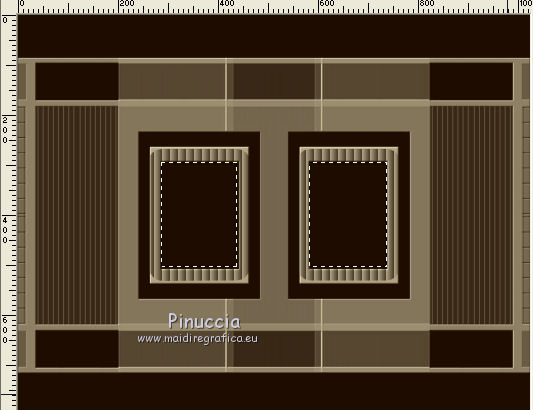
Activate again the tube CAL-2917-080218 misted.
Activate the layer Raster 2.
Erase the watermark and go to Edit>Copy.
Go back to your work and go to Edit>Paste into selection.
Selections>Select None.
12. Activate the layer below Groupe-Raster 3.
Layers>Duplicate.
Effects>Plugins>Plugin Galaxy - Instant Mirror, same settings
Layers>Duplicate.
13. Effects>Plugins>Mura's Meister - Perspective Tiling.
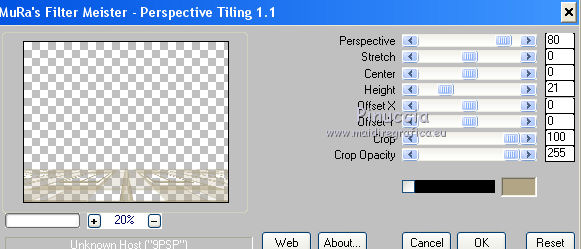
Effects>Plugins>Mura's Seamless - Emboss at Alpha, default settings
Effects>3D Effects>Drop Shadow, default settings
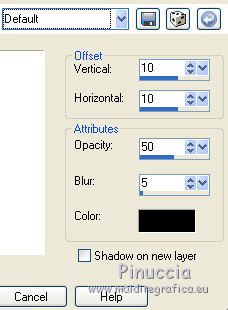
14. Activate the top layer (Promoted Selection).
Layers>Duplicate.
Effects>Plugins>Plugin Galaxy - Instant Mirror, same settings
Layers>Merge>Merge Down.
Adjust>One Step Photo Fix (optional, according to your misted).
Adjust>Sharpness>Sharpen More.
Effects>3D Effects>Drop Shadow, default settings
15. Layers>New Raster Layer.
Layers>Arrange>Send to Bottom.
Set your foreground color to a Foreground/Background Gradient, style Surburst
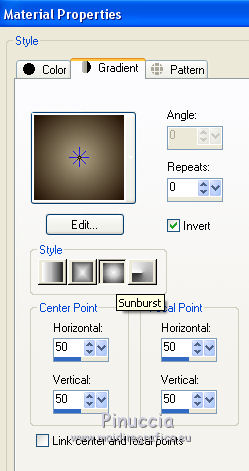
Flood Fill  the layer with your gradient. the layer with your gradient.
16. Effects>Illuminations Effects>Lights
select the preset alive and ok.

Your layers and blend modes (adapt to your colors)
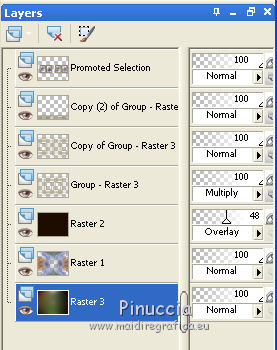
17. Activate the layer Raster 2.
Open the tube deco1lc - Edit>copy.
Go back to your work and go to Edit>Paste as new layer, Raster 4.
18. Open the tube decor_nmcriacoes_86 - Edit>copy.
Go back to your work and go to Edit>Paste as new layer, Raster 5.
Effects>3D Effects>Drop Shadow, default settings
19. Activate the layer Copy (2) of Group-Raster 3 (l'effect Perspective Tiling)
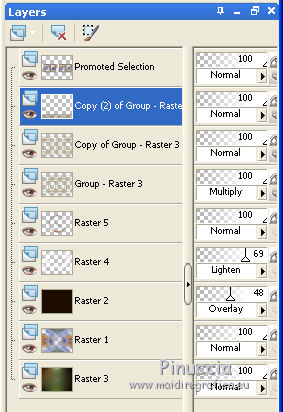
Open the tube deco2lc-chão - Edit>copy.
Go back to your work and go to Edit>Paste as new layer, Raster 6.
Objects>Align>Bottom
if you are working with a previous version that has not available the menu Objects,
use the Pick Tool 
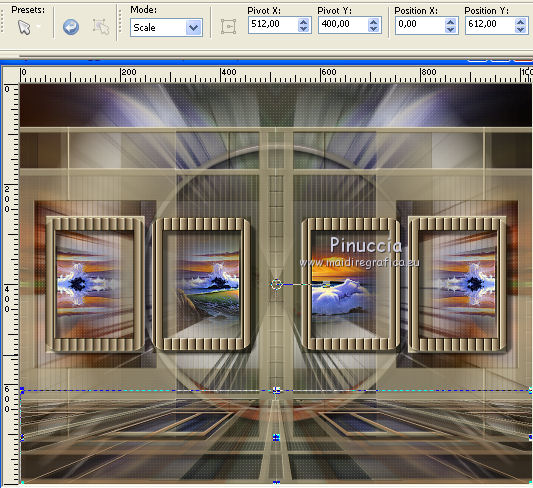
20. Layers>New Raster Layer.
Flood Fill  the layer with your background color #b1a585. the layer with your background color #b1a585.
Layers>New Mask layer>From image
Open the menu under the source window and you'll see all the files open.
Select the mask Narah_Mask_1287.

Layers>Merge>Merge Group.
Effects>Plugins>Mura's Seamless - Emboss at Alpha, default settings
Layers>Duplicate.
Image>Mirror.
Layers>Merge>Merge Down.
21. Effects>Distortion Effects>Pinch.

Layers>Duplicate.
Layers>Merge>Merge Down.
Effects>Plugins>Mura's Seamless - Emboss at Alpha, default settings
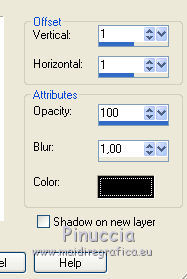
Effects>3D Effects>Drop Shadow, color #000000.
22. Open the tube decoarquivo - Edit>copy.
Go back to your work and go to Edit>Paste as new layer.
Keep the Blend Mode of this layer to Luminance (legacy).
23. Activate the top layer.
Open the tube 5008-luzcristina - Edit>copy.
Go back to your work and go to Edit>Paste as new layer.
Move  the tube to the left side. the tube to the left side.
24. Open the tube bouquet_de_fleurs_tubed_by_thafs - Edit>copy.
Go back to your work and go to Edit>Paste as new layer.
Image>Resize, at your choice, for me 2 times to 80%, resize all layers not checked.
Move  the tube at the bottom right. the tube at the bottom right.
25. Activate the bottom layer Raster 3 - Edit>Copy.
26. Image>Add borders, 2 pixels, symmetric, foreground color.
Image>Add borders, 20 pixels, symmetric, color #ffffff.
Select the white border with your Magic Wand Tool 
Selections>Promote Selection to layer.
Edit>Paste into Selection (the layer Raster 3).
Selections>Select None.
Image>Add borders, 1 pixel, symmetric, foreground color.
Image>Add borders, 30 pixels, symmetric, color #ffffff.
Select the white border with your Magic Wand Tool 
Selections>Promote Selection to layer.
Edit>Paste into Selection (the layer Raster 3 is still in memory).
Selections>Select None.
Effects>Plugins>Carolaine and Sensibility - CS-LDots, same settings.
Selections>Invert.
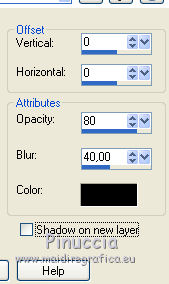
Effects>3D Effects>Drop Shadow, color #000000.
Selections>Select None.
Layers>Merge>Merge All.
Image>Resize, 1024 pixels width, resize all layers checked.
Sign your work on a new layer.
little note about the watermark:
I don't ask to put watermark on the versions made by my translations.
But if you decide to use the watermark supplied by the author, I would appreciate that my work as translator was also respected.
For that, I added my watermark to the material (in english and in french).
25. Layers>Merge>Merge All and save as jpg.
The tubes of this version are by Gabry, Bibiche and Ina
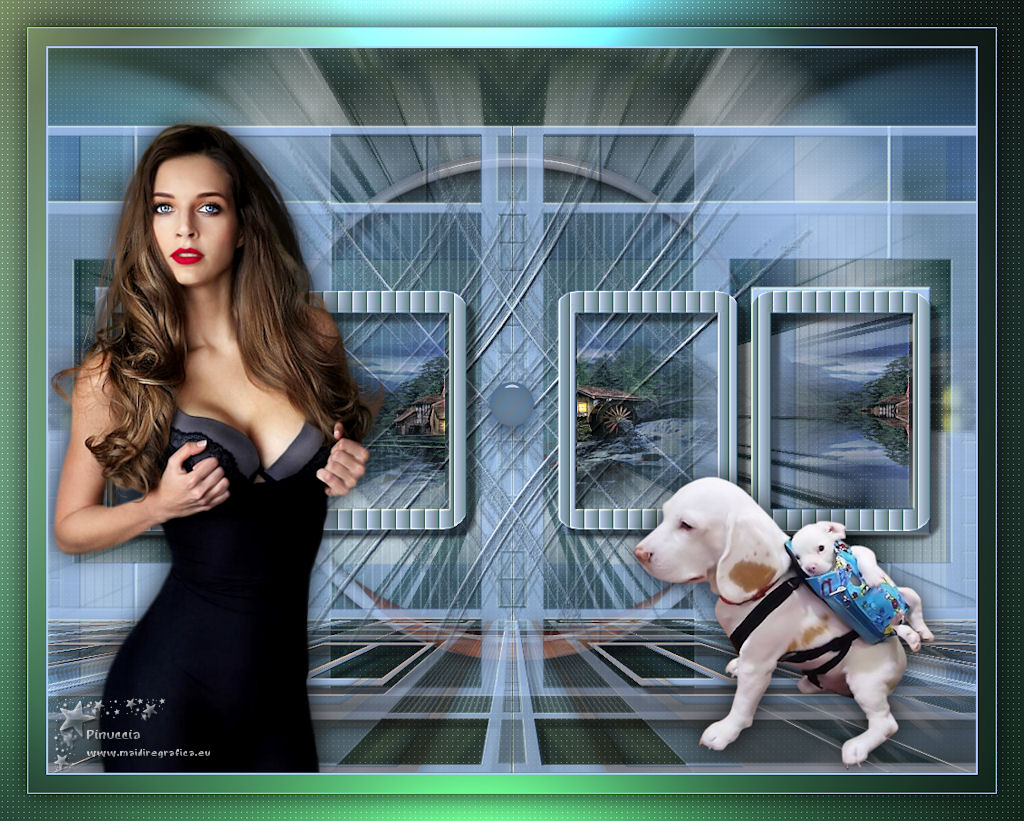
Your versions here

If you have problems or doubts, or you find a not worked link, or only for tell me that you enjoyed this tutorial, write to me.
My mail is in the menu on the top of the page.
6 September 2018
|
 ENGLISH VERSION

 ENGLISH VERSION
