|
TOP ANGELSTAR
 ENGLISH VERSION ENGLISH VERSION
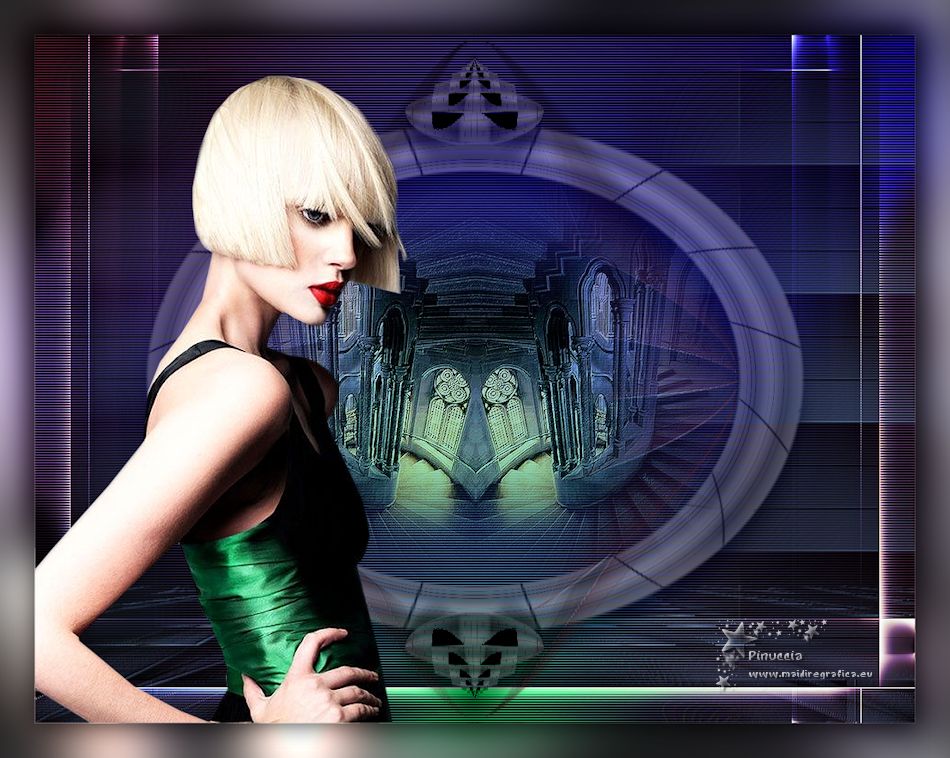
Here you find the original of this tutorial:

This tutorial was created with PSPX8 and translated with PSPX3, but it can also be made using other versions of PSP.
Since version PSP X4, Image>Mirror was replaced with Image>Flip Horizontal,
and Image>Flip with Image>Flip Vertical, there are some variables.
In versions X5 and X6, the functions have been improved by making available the Objects menu.
In the latest version X7 command Image>Mirror and Image>Flip returned, but with new differences.
See my schedule here
French translation here
your versions ici
For this tutorial, you will need:
Material here
For the tubes thanks Luz Cristina (5031-luzcristina/5054-luzcristina)
(you find here the links to the material authors' sites)
Plugins
consult, if necessary, my filter section here
Filters Unlimited 2.0 here
Toadies - Ommadawn, Weaver here
Graphics Plus - Cross Shadow here
Penta.com - VTR here
Mura's Meister - Prespective Tiling here
AAA Frames - Foto Frame/AAA Filters - Custom here
Nik Software - Color Efex Pro here
Filters Toadies and Graphics Plus can be used alone or imported into Filters Unlimited.
(How do, you see here)
If a plugin supplied appears with this icon  it must necessarily be imported into Unlimited it must necessarily be imported into Unlimited

You can change Blend Modes according to your colors.
In the newest versions of PSP, you don't find the foreground/background gradient (Corel_06_029).
You can use the gradients of the older versions.
The Gradient of CorelX here
Copy the preset Preset_Light steampunk in the Presets Folder.
The texture Daze or Corel_15_001 is standard in PSP.
If you don't find it in your PSP, copy the supplied texture in the Textures Folder.
1. Set your foreground color to #292b41
and your background color to #4d709d.
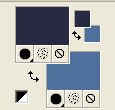
Set your foreground color to a Foreground/Background Gradient, style Sunburst.
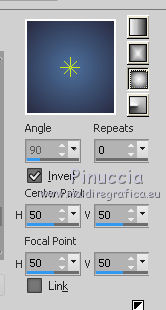
2. Open a new transparent image 1024 x 800 pixels.
Flood Fill  the transparent image with your Gradient. the transparent image with your Gradient.
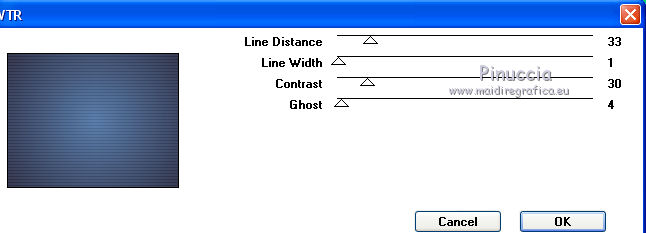
Effects>Plugins>Penta.com - VTR, default settings.
Effects>User Defined Effect - select the preset Emboss 3 and ok.

Layers>Duplicate.
Image>Resize, to 80%, resize all layers not checked.
3. Effects>Plugins>Toadies - Ommadawn, default settings.
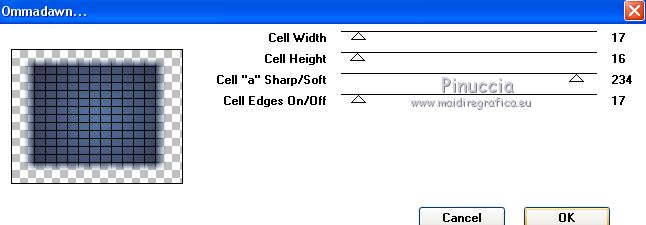
If you don't see the rules: View: Rules
K key on the keyboard to activate the Pick Tool 
mode Perspective 
pull the left top node to the right until 300 pixels
the opposite node will move symmetrically to 720 pixels
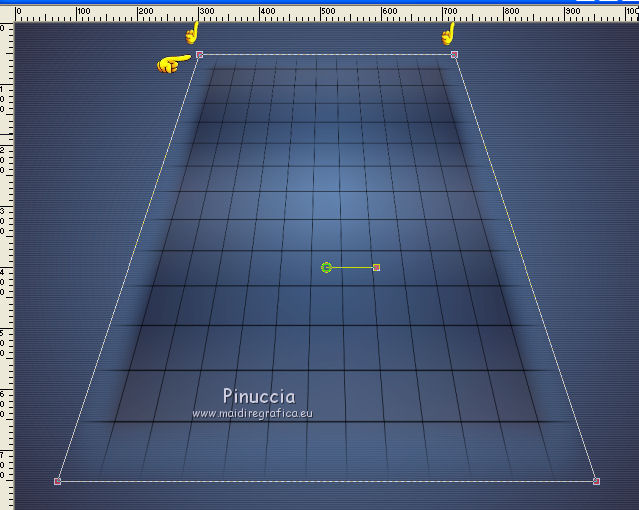
Mode Scale 
pull the central top node down, until 600 pixels
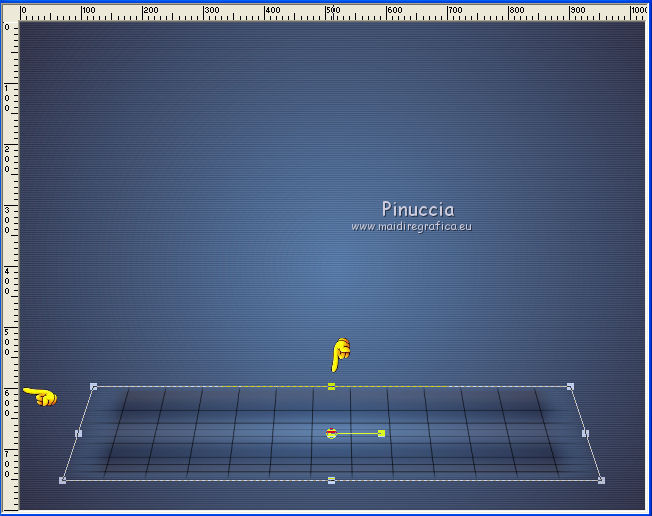
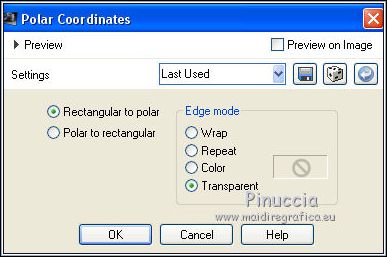
4. Effects>Distortion Effects>Polar Coordinates
5. Layers>Duplicate.
Image>Flip.
Layers>Merge>Merge Down.
Image>Resize, to 80%, resize all layers not checked.
Effects>3D Effects>>Drop Shadow, color #000000.
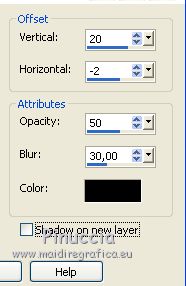
Activate the layer Raster 1.
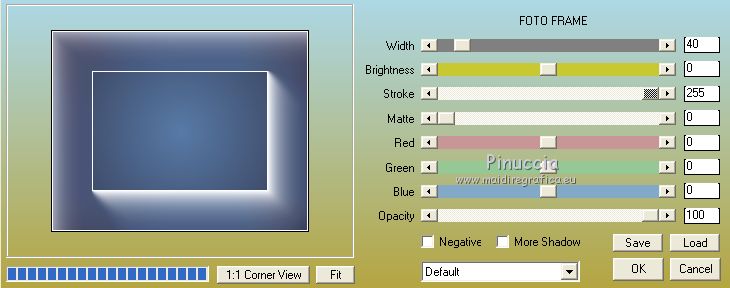
5. Effects>Plugins>AAA Frames - Foto Frame.
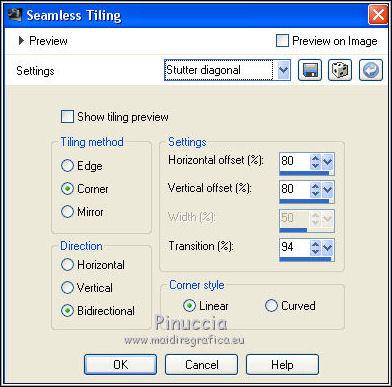
6. Effects>Image Effects>Seamless Tiling, Stutter diagonal
Layers>Duplicate.
Image>Mirror.
Change the Blend Mode of this layer to Overlay.
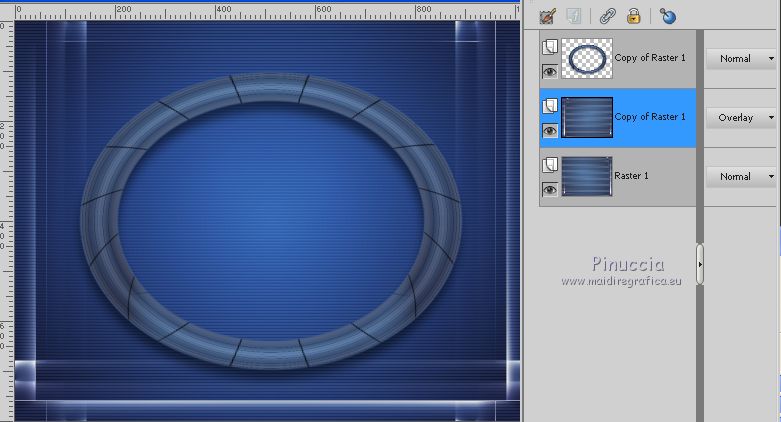
Layers>Merge>Merge Down and the layer will go back to Normal mode.
7. Selection Tool 
(no matter the type of selection, because with the custom selection your always get a rectangle)
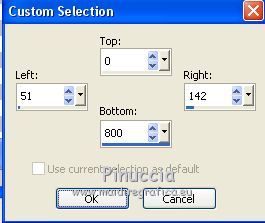
clic on the Custom Selection 
and set the following settings.
Layers>New Raster Layer.
Reduce the opacity of the Flood Fill Tool to 30%
Flood Fill  the layer with your Gradient. the layer with your Gradient.
(don't forget to set again the opacity to 100).
Selections>Select None.
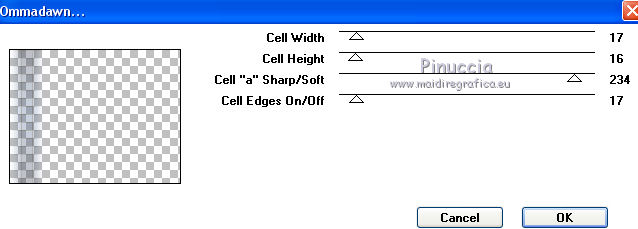
8. Effects>Plugins>Toadies - Ommadawn, default settings.
Layers>Duplicate.
Image>Mirror.
Layers>Merge>Merge Down.
Change the Blend Mode of this layer to Overlay.
Layers>Duplicate.
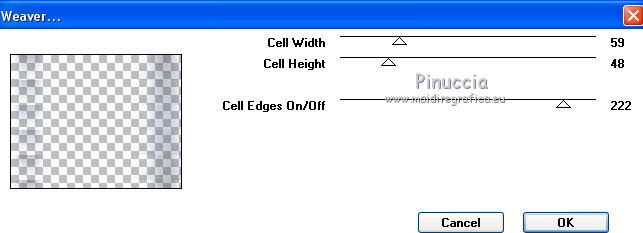
9. Effects>Plugins>Toadies - Weaver, default settings.
Placer le calque en mode Écran.
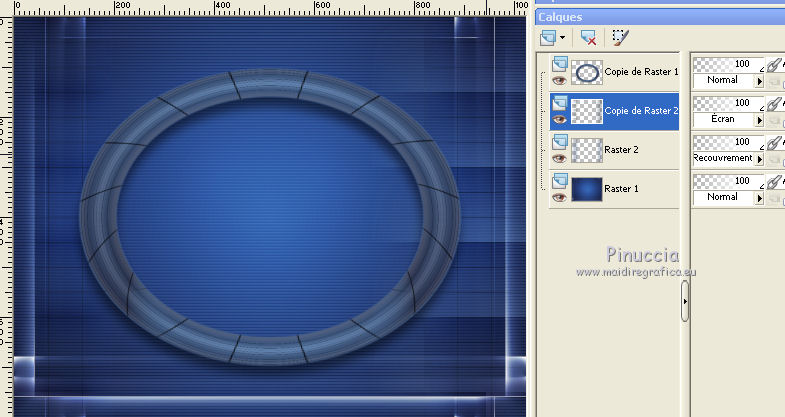
Effects>User Defined Effect - Emboss 3.

Layers>Duplicate.
10. Effects>Plugins>Mura's Meister - Perspective Tiling, default settings.
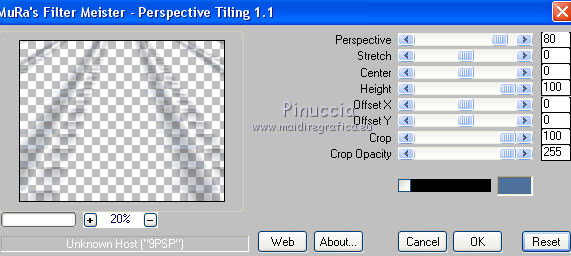
Répéter Effects>Plugins>Mura's Meister - Perspective Tiling.
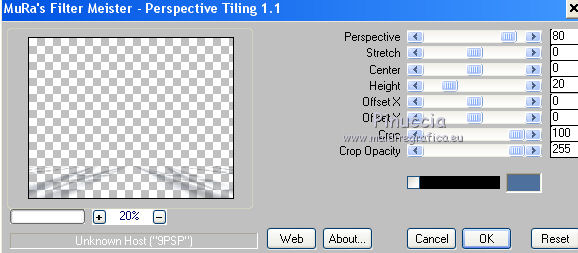
Effects>User Defined Effect - Emboss 3.

Optional: Repeat User Defined Effect.
Change the Blend Mode of this layer to Screen.
11. Activate the layer Copy of Raster 2.
Layers>Duplicate.
Effects>Geometric Effects>Circle.

Set the layer to Normal Mode.
12. Effects>Distortion Effects>Pinch

Effects>User Defined Effect - Emboss 3.

13. Activate the layer Raster 1.
Layers>Duplicate.
Effects>Plugins>Nik Software - Color Efex Pro - Cross Balance
(at your choice: for me)
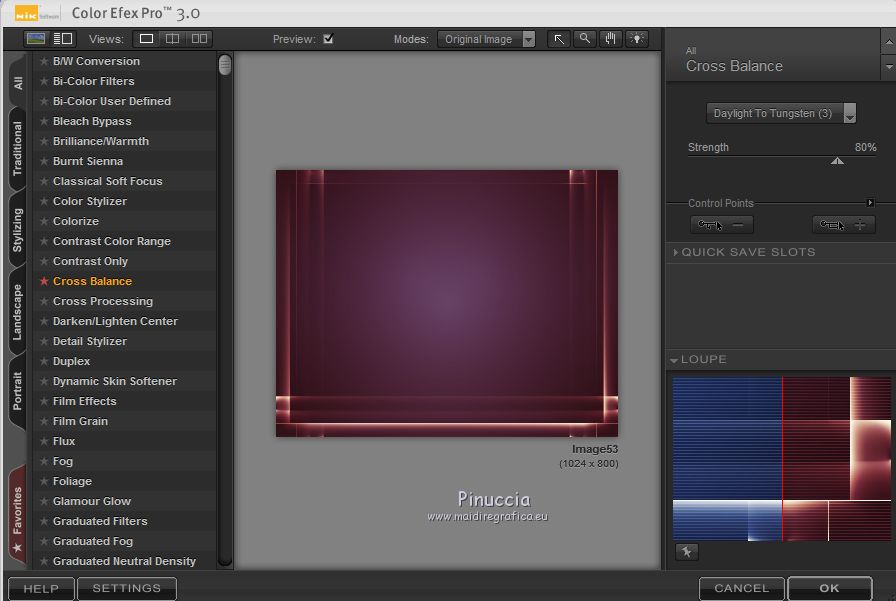
Change the Blend Mode of this layer to Overlay.
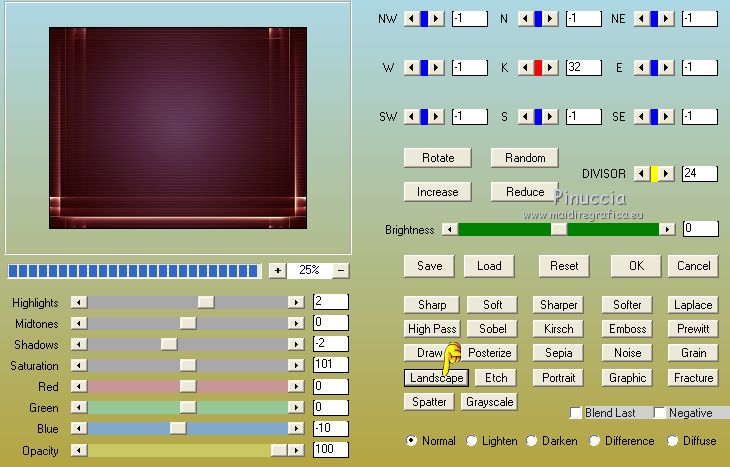
Optional: Effects>Plugins>AAA Filters - Custom - click on Landscape and ok.
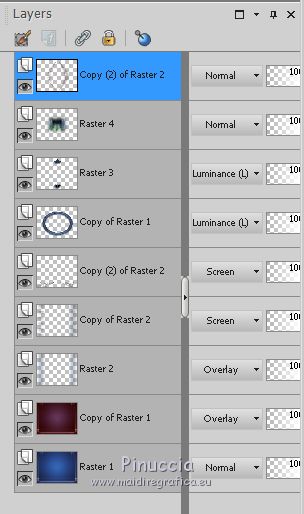
Activate the layer of the transparent circle (Copy 2 of Raster 2)
Effects>Plugins>Nik Software - Color Efex Pro, same settings.
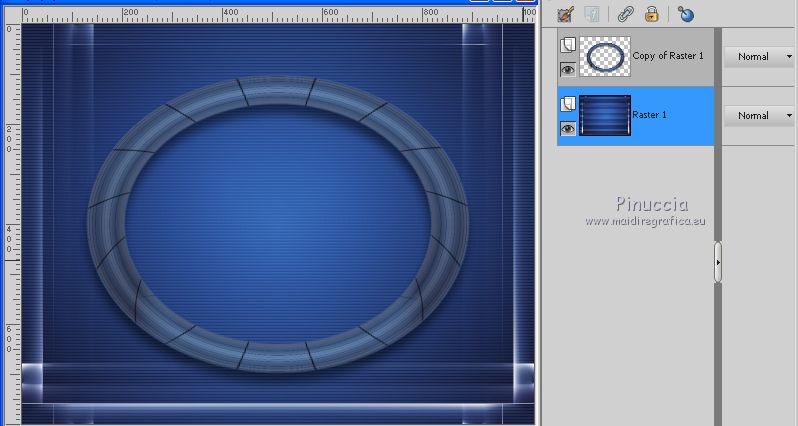
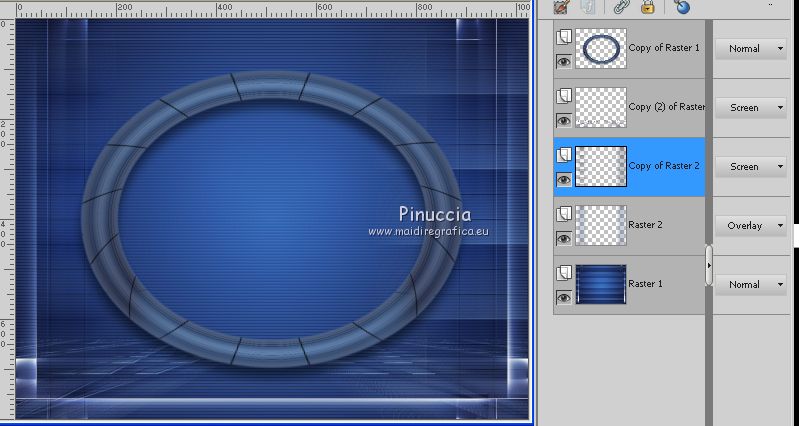
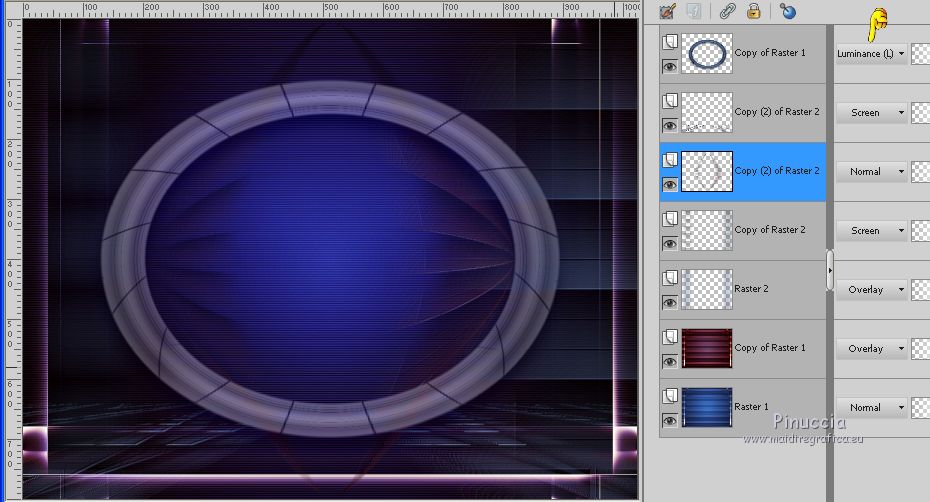
You should have this:
Note that the Blend Mode of the top layer is Luminance (Legacy).
14. Open the tube decolc - Edit>Copy.
Go back to your work and go to Edit>Paste as new layer.
Layers>Arrange>Bring to Top.
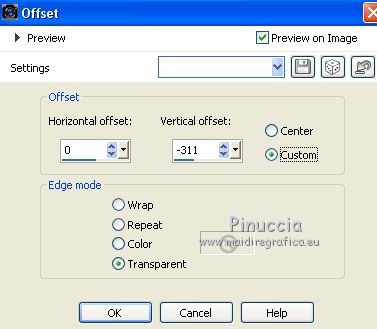
Effects>Image>Effects>Offset.
Layers>Duplicate.
Image>Flip.
Layers>Merge>Merge Down (Raster 3).
Effects>3D Effects>Drop Shadow, same setting still in memory.

15. Open the misted 5054-luzcristina - Edit>Copy.
Go back to your work and go to Edit>Paste as new layer.
Image>Resize, to 80%, resize all layers not checked.
Adjust>Sharpness>Sharpen.
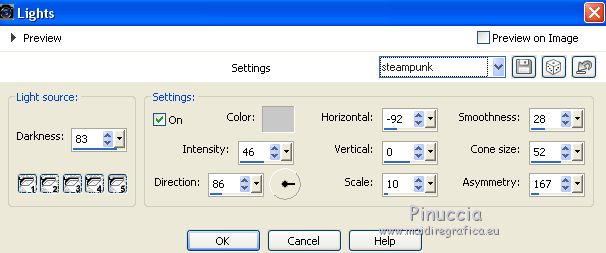
16. Effects>Illumination Effects>Lights
select the preset Steampunk and ok
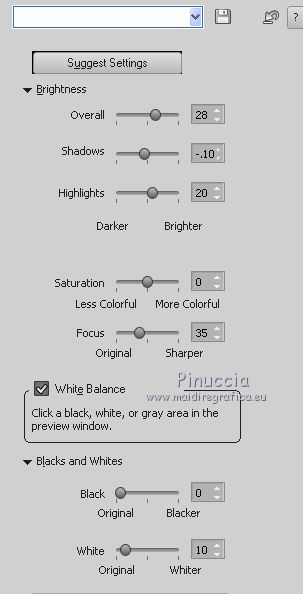
16. Adjust>Smart Photo Fix.
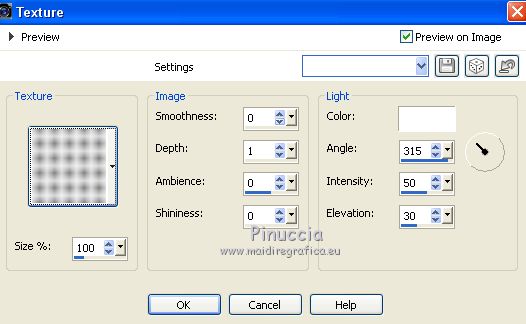
17. Effects>Texture Effects>Texture - select the texture Daze or Corel_15_001.
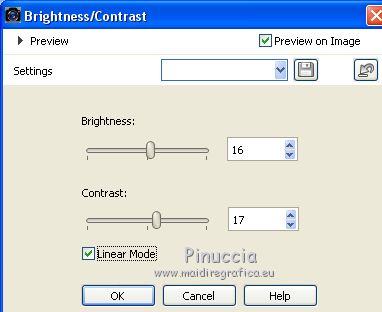
18. Adjust>Brightness and Contrast>Brightness and Contrast.
19. Activate the layer of the transparent circle: Copy 2 of Raster 2.
Layers>Arrange>Bring to Top.
20. Activate the layer Copy of Raster 1.
Effects>Illumination Effects>Lights, preset steampunk.
Adjust>Smart Photo Fix, same settings (the effects don't keep the settings in memory)

Adjust>One Step Photo Fix.
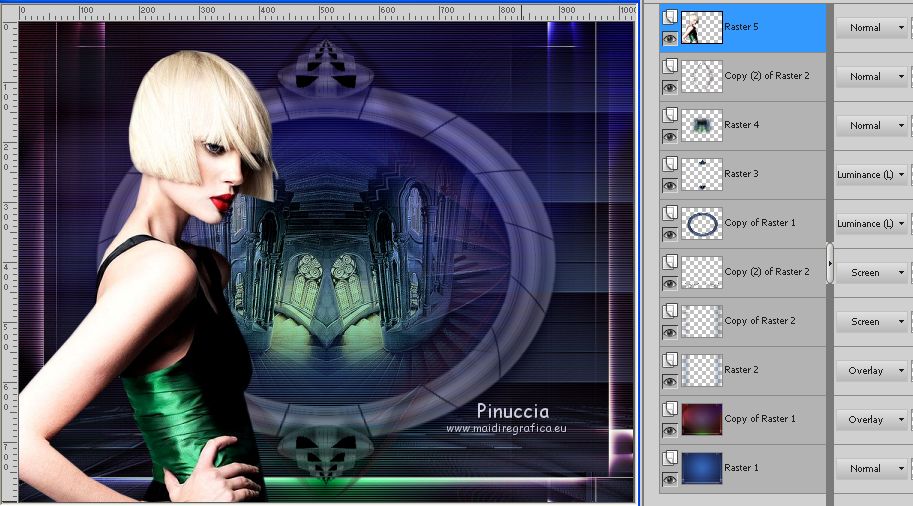
21. Activate the top layer.
Open the tube 5031-luzcristina - Edit>Copy.
Go back to your work and go to Edit>Paste as new layer.
Adjust>Sharpness>Sharpen.
Move  the tube to the left side. the tube to the left side.
22. Image>Add borders, 1 pixel, symmetric, color #ffffff.
Edit>Copy.
Image>Add borders, 40 pixels, symmetric, light color #c0c0c0.
Activate the Magic Wand Tool 
and click on the 40 pixels border to select it.
Edit>Paste into Selection.
Adjust>Blur>Gaussian Blur - radius 30.

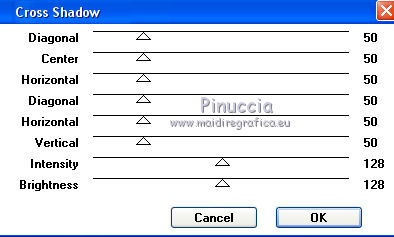
Effects>Plugins>Graphics Plus - Cross Shadow, default settings.
Selections>Invert.
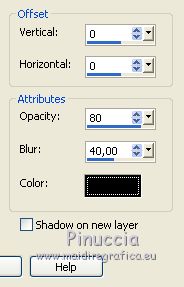
Effects>3D Effects>Drop Shadow, color #000000.
Selections>Select None.
Sign your work on a new layer.
little note about the watermark:
I don't ask to put watermark on the versions made by my translations.
But if you decide to use the watermark supplied by the author, I would appreciate that my work as translator was also respected.
For that, I added my watermark to the material (in english and in french).
23. Layers>Merge>Merge All and save as jpg.
The tube of this version is by Beatriz
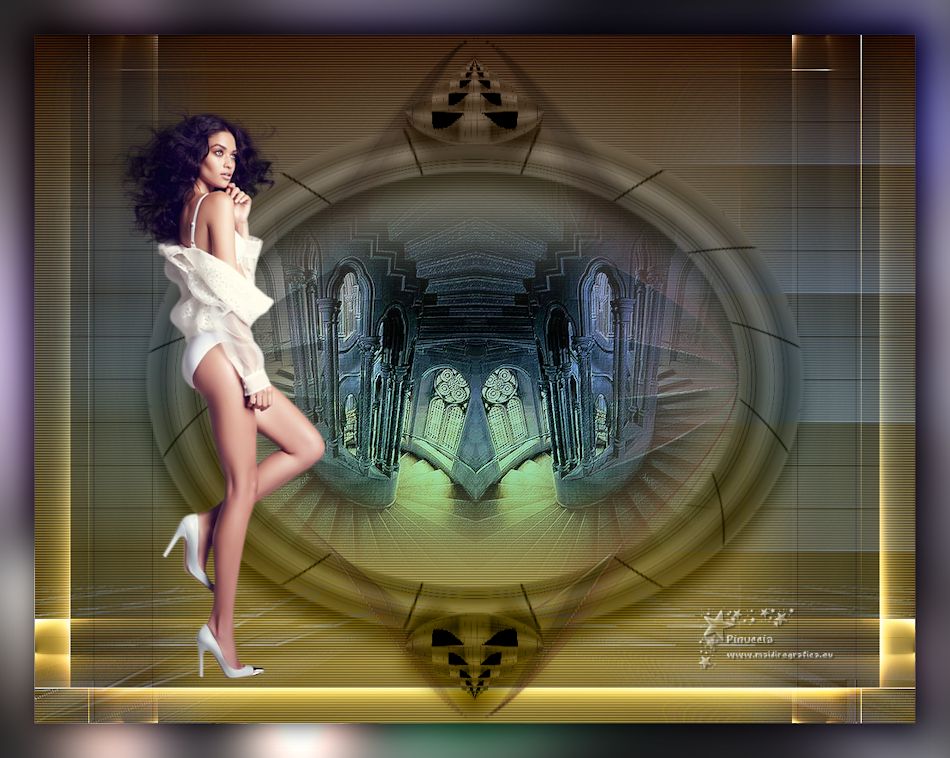
Your versions here

If you have problems or doubts, or you find a not worked link, or only for tell me that you enjoyed this tutorial, write to me.
My mail is in the menu on the top of the page.
29 September 2018
|
 ENGLISH VERSION

 ENGLISH VERSION
