|
TOP JOAQUINA MERCEDES
 ENGLISH VERSION ENGLISH VERSION
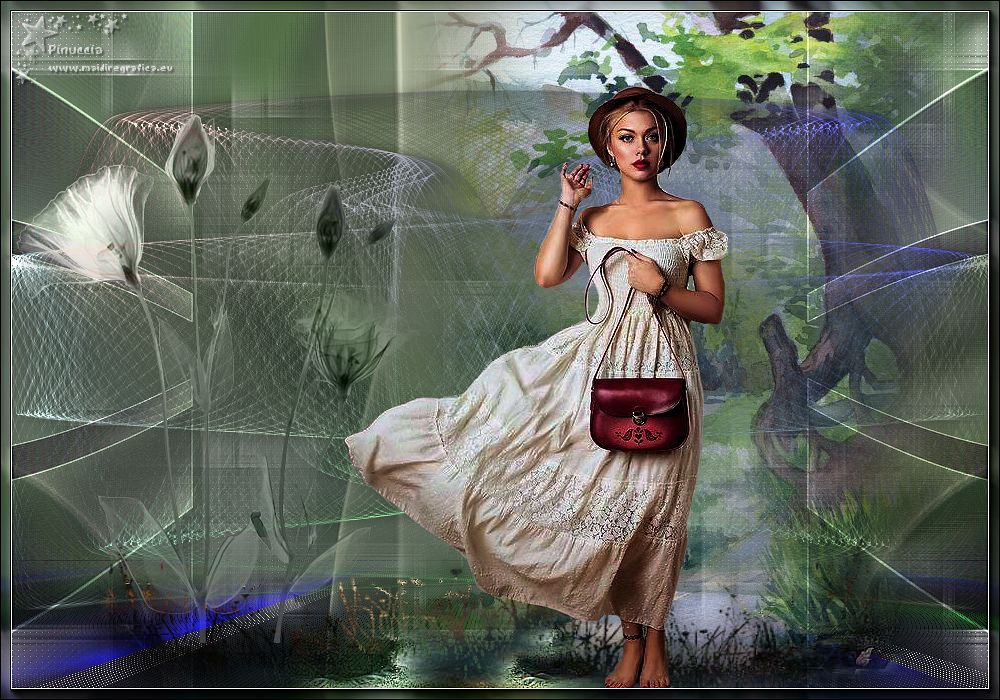
Here you find the original of this tutorial:

This tutorial was created with PSPX8 and translated with PSPX3, but it can also be made using other versions of PSP.
Since version PSP X4, Image>Mirror was replaced with Image>Flip Horizontal,
and Image>Flip with Image>Flip Vertical, there are some variables.
In versions X5 and X6, the functions have been improved by making available the Objects menu.
In the latest version X7 command Image>Mirror and Image>Flip returned, but with new differences.
See my schedule here
French translation here
your versions ici
For this tutorial, you will need:
Material here
Thanks for the tubes:
Mara Pontes (tube3228_mulher_mara_pontes), Jewel (Paysage misted jewel 028)
et Anna.br (anna.br_paisagem-by-rhigel.1_31-07-10 et anna.br_transparent-flower_26-11-10)
(you find here the links to the material authors' sites)
Plugins
consult, if necessary, my filter section here
Filters Unlimited 2.0 here
Toadies - Weaver here
Funhouse - Loom here
Transparency - Eliminate Black here
Mura's Seamless - Emboss at Alpha here
AAA Frames - Foto Frame /AAA Filters - Custom here
Plugin Abstract Curves (dans le matériel)
Dragonfly - Sinedots 2 (dans le matériel)
Filters Toadies, Funhouse, Transparency and Mura's Seamless can be used alone or imported into Filters Unlimited.
(How do, you see here)
If a plugin supplied appears with this icon  it must necessarily be imported into Unlimited it must necessarily be imported into Unlimited

You can change Blend Modes according to your colors.
In the newest versions of PSP, you don't find the foreground/background gradient (Corel_06_029).
You can use the gradients of the older versions.
The Gradient of CorelX here
Copy the preset Preset_Light curves (mara pontes) in the Presets Folder.
Open the mask in PSP and minimized it with the rest of the material.
Set your foreground color to #d0cdcc,
and your background color to #524b55.
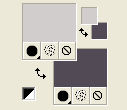
Set your foreground color to a Foreground/Background Gradient, style Linear.
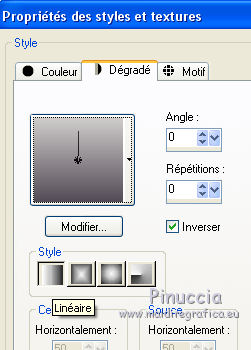
1. Opern a new transparent image 1000 x 700 pixels.
Flood Fill  the transparent image with your gradient. the transparent image with your gradient.
2. Selections>Select All.
Open the tube Paysage misted jewel 028, erase the watermark, and go to Edit>Copy.
Minimize the tube: you'll use it again
Go back to your work and go to Edit>Paste into Selection.
Selections>Select None.
Effects>Image Effects>Seamless Tiling, default settings.

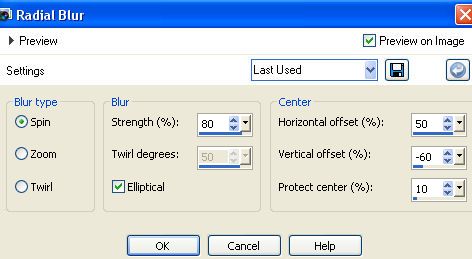
3. Adjust>Blur>Radial Blur.
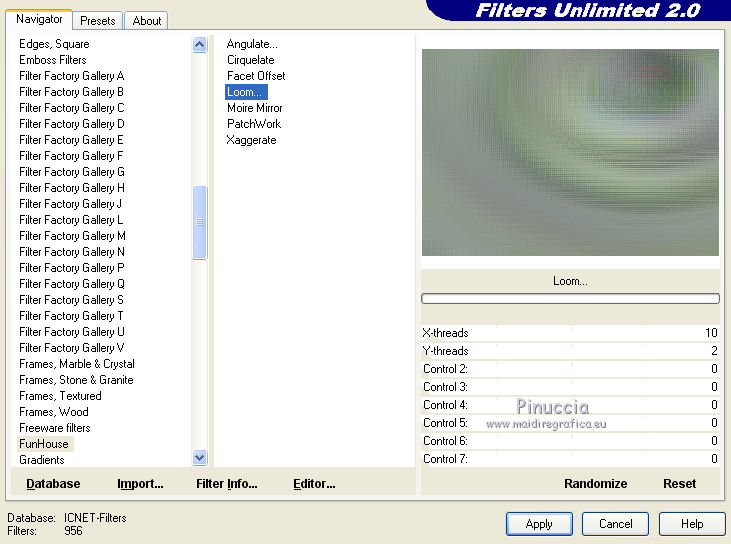
4. Effects>Plugins>Filters Unlimited 2.0 - Funhouse - Loom, default settings.
5. Layers>New Raster Layer.
Set your foreground color to Color.
Flood Fill  the layer with your foreground color #d0cdcc. the layer with your foreground color #d0cdcc.
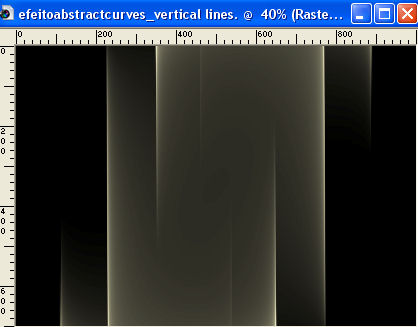
Effects>Plugins>Abstract Curves - AbractCurves
Select: left: Lines&Stripes(19) and right: Vertical lines

if you have problems with the filtre,
copy/paste as new layer the effect that you find in the material)
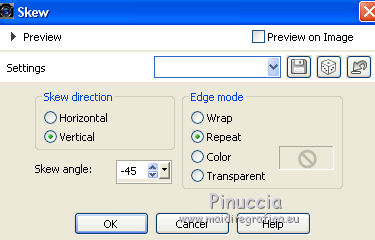
6. Effects>Geometric Effects>Skew.
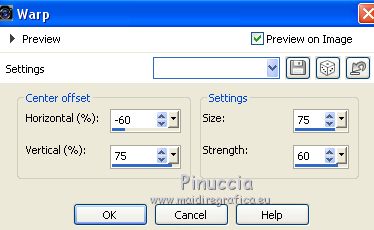
7. Effects>Distortion Effects>Warp.
8. Effects>Distortion Effects>Pinch.

9. Effects>Reflection Effects>Rotating Mirror.
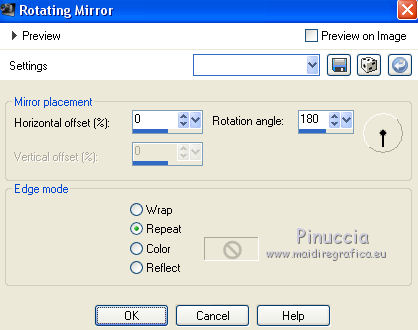
Effects>Plugins>Mura's Seamless - Emboss at Alpha, default settings.
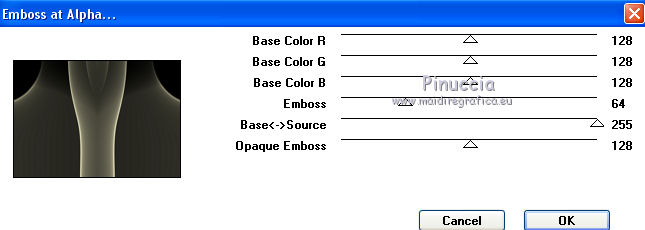
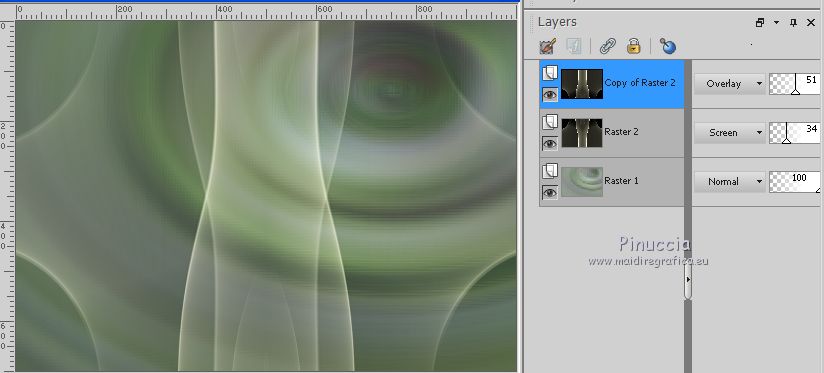
Change the Blend Mode of this layer to Screen and reduce the opacity to 34%.
Layers>Duplicate.
Image>Flip.
Change the Blend Mode of this layer to Overlay and reduce the opacity to 51%.
10. Set your foreground color to #000000.
Layers>New Raster Layer.
Flood Fill  the layer with color #000000. the layer with color #000000.
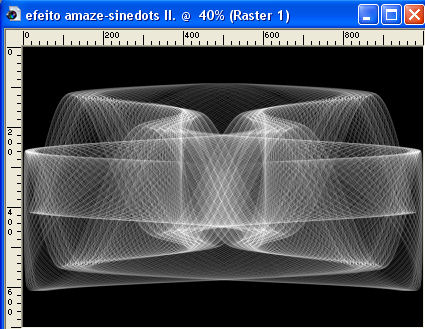
Effects>Plugins>Dragonfly - Sinedots II
select the preset amaze and ok
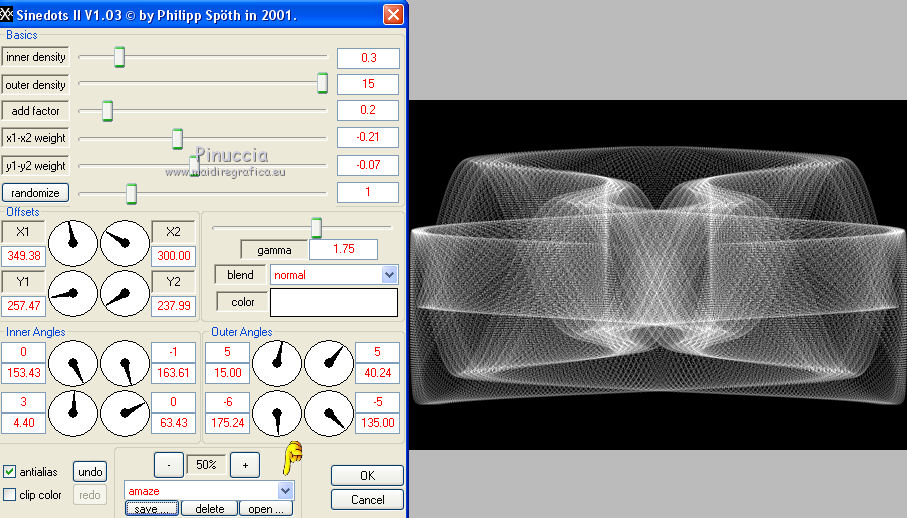
if you are problems with the filtre,
copy/paste as new layer the effect that you find in the material)
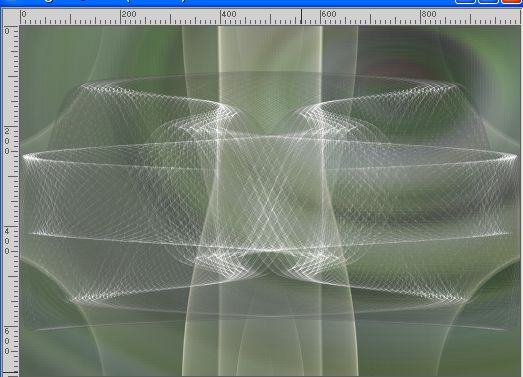
Effects>Plugins>Transparency - Eliminate Black
The plugin works without window; result
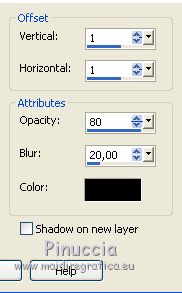
Effects>3D Effects>Drop Shadow, color #000000.
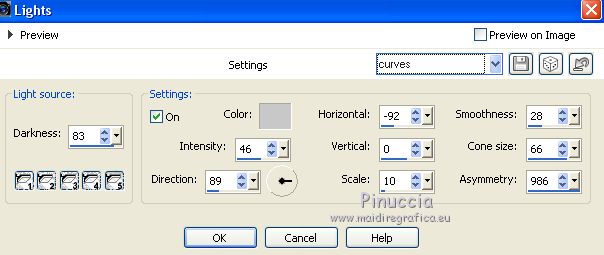
11. Effects>Illumination Effects>Lights.
Select the preset curves and ok.
12. Activate the Selection Tool 
(if you don't see the rules: View>Rules)
and draw a selection as below
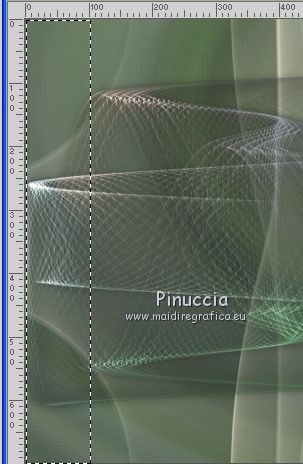
Set again your foreground color to #d0cdcc

Set again your foreground color to Gradient, this time Angle 90
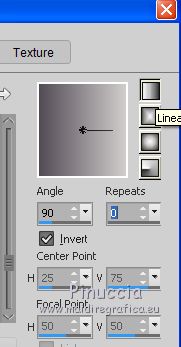
Layers>New Raster Layer.
Flood Fill  the layer with your gradient. the layer with your gradient.
Selections>Select None.
13. Effects>Plugins>Toadies - Weaver, default settings.
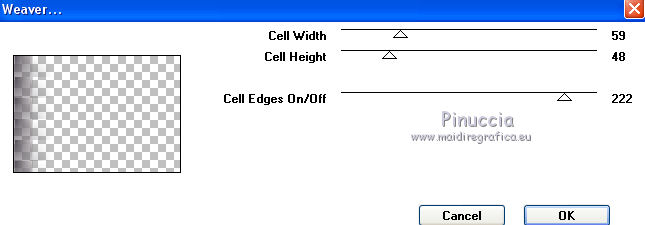
14. Effects>Geometric Effects>Skew, same settings, but Transparent checked.
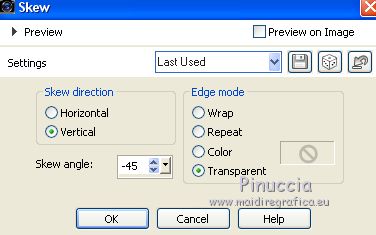
Layers>Duplicate.
Image>Mirror.
Layers>Merge>Merge Down.
Effects>Edge Effects>Enhance More.
Layers>Duplicate.
Image>Flip.
Layers>Merge>Merge Down.
15. Effects>Distortion Effects>Pinch.

Change the Blend mode of this layer to Overlay.
16. Open the tube decolc1 (the Blend Mode of this layer is Screen) and go to Edit>Copy.
Go back to your work and go to Edit>Paste as new layer.
Layers>Arrange>Move Down.
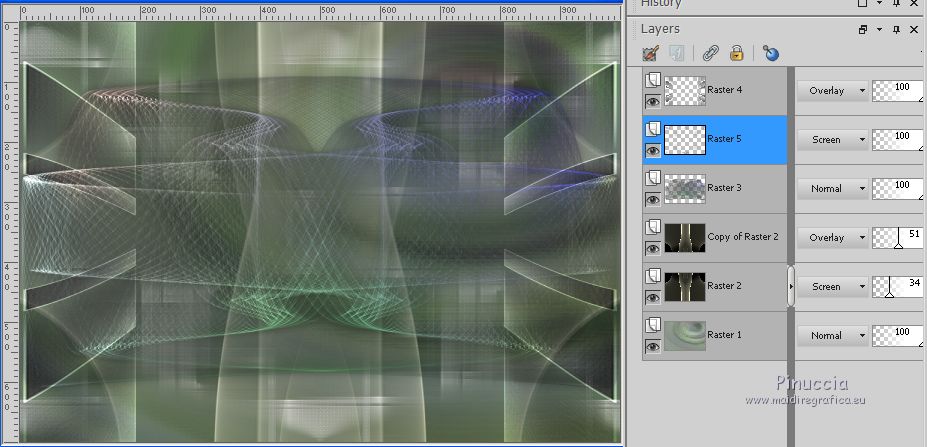
17. Activate the layer Raster 1.
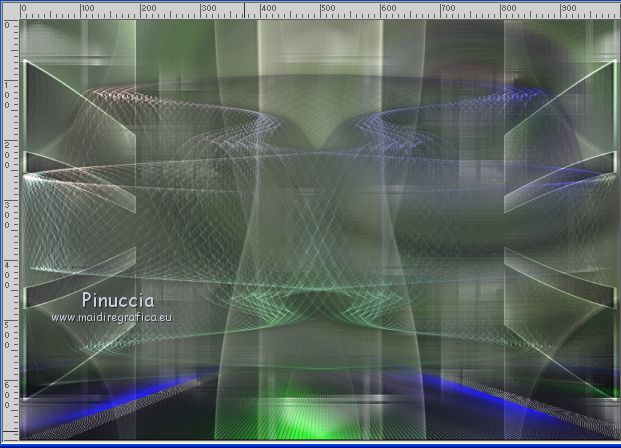
Open deco-perspectivelc and go to Edit>Copy.
Go back to your work and go to Edit>Paste as new layer.
Objects>Align>Bottom
if you are working with a previous version that has not available the menu Objects,
use the Move tool 
18. Open the tube anna.br_paisagem_by_rhigel_31_07_10.
On this tube:
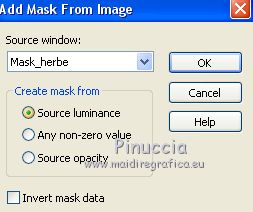
Layers>New Mask layer>From image
Open the menu under the source window and you'll see all the files open.
Select the mask Mask_herbe.
Layers>Merge>Merge Group.
Result
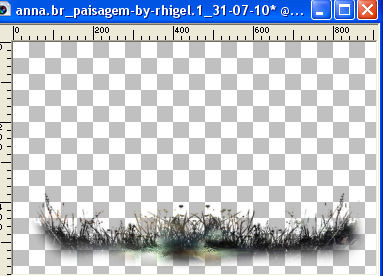
if you use another tube, choose a tube with the same characteristic, to be able to apply the mask
Edit>Copy.
Go back to your work and go to Edit>Paste as new layer.
Layers>Arrange>Bring to Top.
Move  the tube down. the tube down.
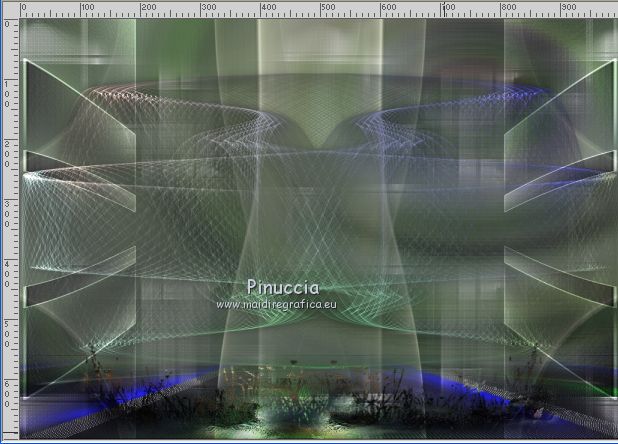
Effects>3D Effects>Drop Shadow, same settings.
19. Open tube anna.br_transparent-flower_26-11-10 - Edit>Copy.
Go back to your work and go to Edit>Paste as new layer.
Move  the tube to the left side. the tube to the left side.
20. Open tube3228_Mulher_mara_pontes - Edit>Copy.
Go back to your work and go to Edit>Paste as new layer.
Move  the tube to the right side. the tube to the right side.
21. Activate the layer Copy of Raster 2.
Activate again the tube Paysage misted jewel 028 - Edit>Copy.
Go back to your work and go to Edit>Paste as new layer.
Image>Mirror.
Objects>Align>Right or Move  the tube to the right side. the tube to the right side.
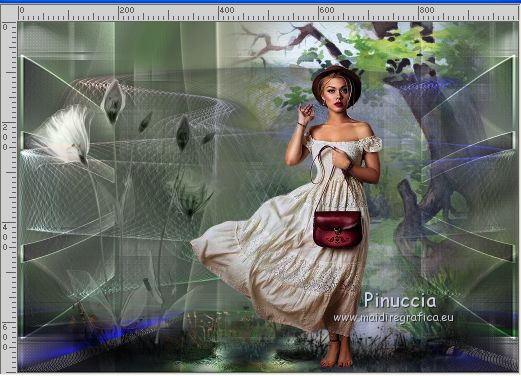
Layers>Merge>Merge All.
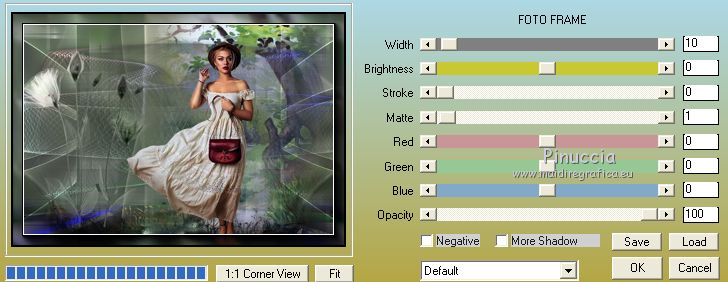
22. Effects>Plugins>AAA Frames - Foto Frame.
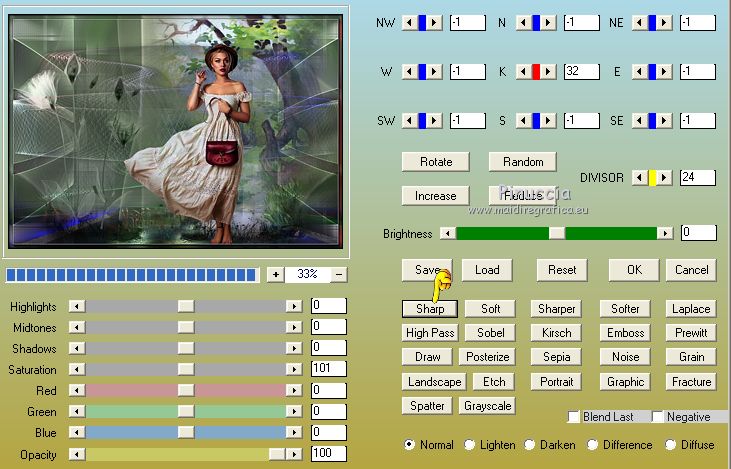
23. (Optional) Effects>Plugins>AAA Filters - Custom - click on Sharp and ok.
24. little note about the watermark:
I don't ask to put watermark on the versions made by my translations.
But if you decide to use the watermark supplied by the author, I would appreciate that my work as translator was also respected.
For that, I added my watermark to the material (in english and in french).
25. Layers>Merge>Merge All and save as jpg.
Your versions here

If you have problems or doubts, or you find a not worked link, or only for tell me that you enjoyed this tutorial, write to me.
My mail is in the menu on the top of the page.
26 July 2018
|
 ENGLISH VERSION

 ENGLISH VERSION
