|
TOP LADY OF GREEN
 ENGLISH VERSION ENGLISH VERSION
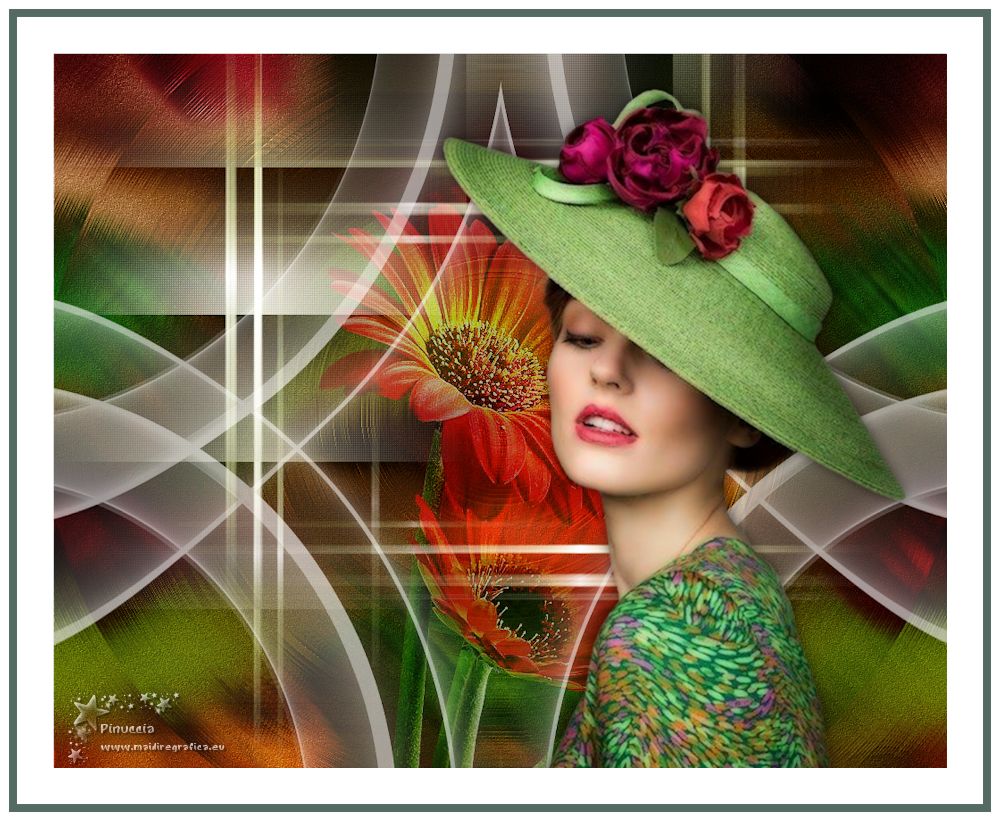
Thanks Lica Cida for your invitation to translate

This tutorial was created with PSPX8 and translated with PSPX3, but it can also be made using other versions of PSP.
Since version PSP X4, Image>Mirror was replaced with Image>Flip Horizontal,
and Image>Flip with Image>Flip Vertical, there are some variables.
In versions X5 and X6, the functions have been improved by making available the Objects menu.
In the latest version X7 command Image>Mirror and Image>Flip returned, but with new differences.
See my schedule here
French translation here
your versions ici
For this tutorial, you will need:
Material here
For the tube thanks
vvs-woman1535 - Gabry-fiori 72-17
(you find here the links to the material authors' sites)
Plugins
consult, if necessary, my filter section here
Filters Unlimited 2.0 here
&<Bkg Designer sf10I> - Circus Maximus (to import in Unlimited) here
Toadies - Weaver here
Abstract Curves here
AAA Filters - Custom here
FM Tile Tools - Blend Emboss here
Richard Rosenman - Solid Border here
Nik Software - Color Efex Pro here
Filters Mura's Seamless et Simple can be used alone or imported into Filters Unlimited.
(How do, you see here)
If a plugin supplied appears with this icon  it must necessarily be imported into Unlimited it must necessarily be imported into Unlimited

You can change Blend Modes according to your colors.
In the newest versions of PSP, you don't find the foreground/background gradient (Corel_06_029).
You can use the gradients of the older versions.
The Gradient of CorelX here
1. Open a new transparent image 1000 x 800 pixels.
Set your foreground color to #987818,
and your background color to #414707.
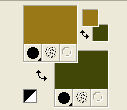
Set your foreground color to a Foreground/Background Gradient, style Linear.
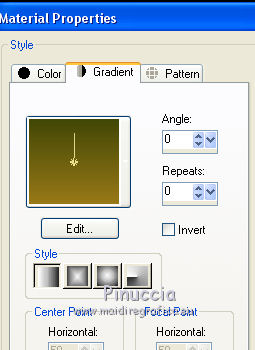
Flood Fill  the transparent image with your Gradient. the transparent image with your Gradient.
2. Selections>Select All.
Open the tube vvs-woman1535 - Edit>Copy.
Minimize the tube: you'll use it later
Go back to your work and go to Edit>Paste into Selection.
Selections>Select None.
Effects>Image Effects>Seamless Tiling, default settings.

Adjust>Blur>Motion Blur
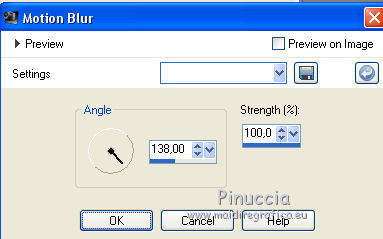
Edit>Repeat Motion Blur.
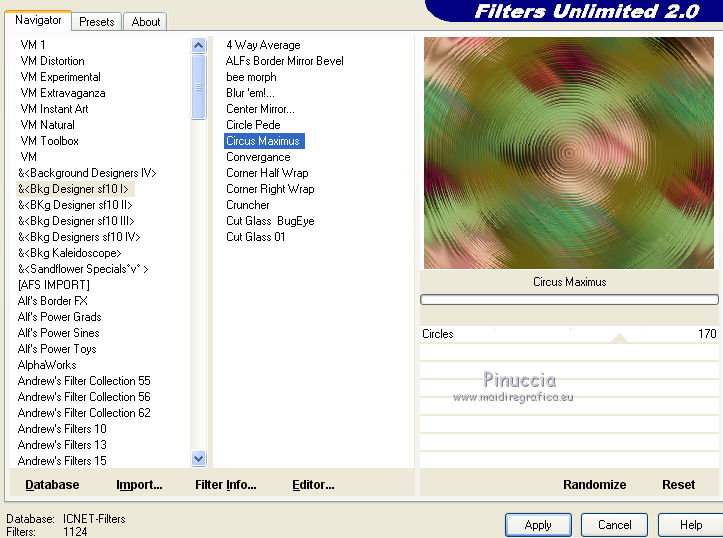
3. Effects>Plugins>Filters Unlimited 2.0 - &<Bkg Designer sf10I> - Circus Maximus
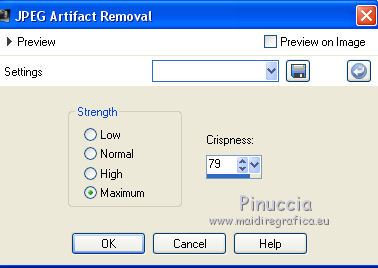
Adjust>Add/Remove Noise/JPEG Artifact Removal.
Effects>Plugins>FM Tile Tools - Blend Emboss, default settings.

Layers>Duplicate.
Image>Mirror.
Change the Blend Mode of this layer to Overlay and reduce the opacity to 50%.
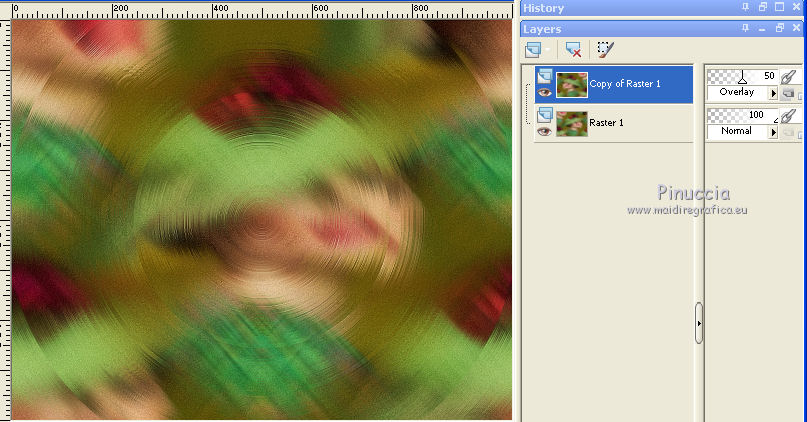
Layers>Merge>Merge Down.
4. Layers>New Raster Layer.
Selections>Select All.
Open the tube decoAlc - Edit>Copy.
Go back to your work and go to Edit>Paste into Selection.
Selections>Select None.
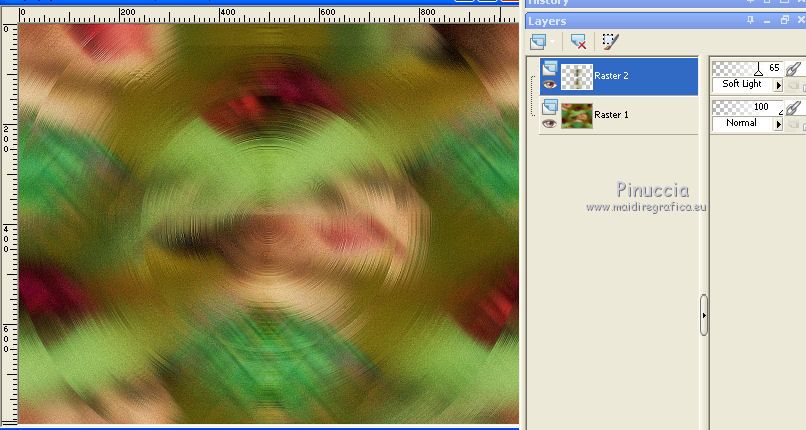
5. Effects>Plugins>Filters Unlimited 2.0 - &<Bkg Designer sf10I> - Circus Maximus, same settings.
Change the Blend Mode of this layer to Soft Light
and reduce the opacity to 65%.
6. Layers>New Raster Layer.
Effects>Plugins>Abstract Curves - Abstract Curves.
Lines&Stripes (19) and select Curtains
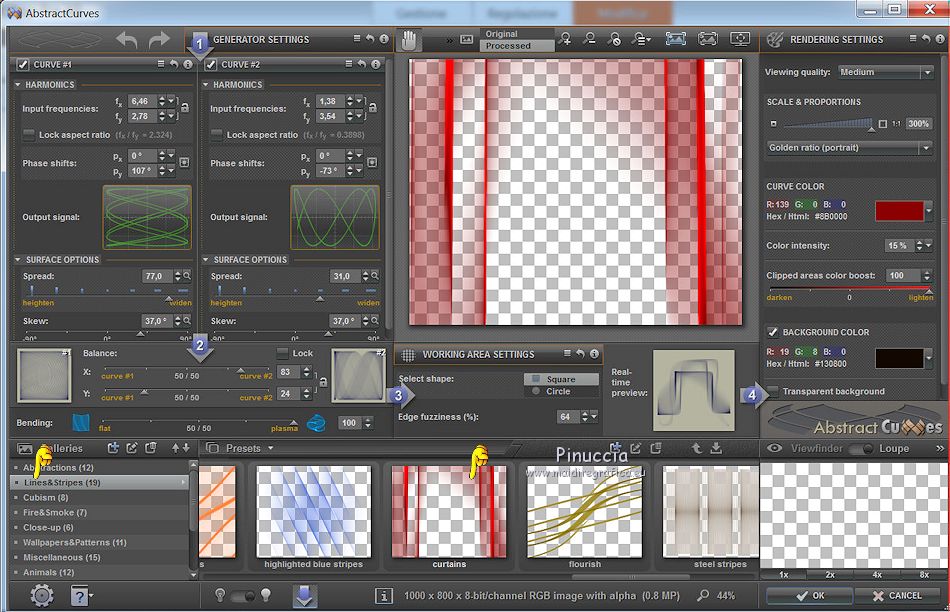
if your have problems with this plugin,
copy/paste the layer "livello abstract curves" that I joined in the material
7. Effects>Texture Effects>Weave.
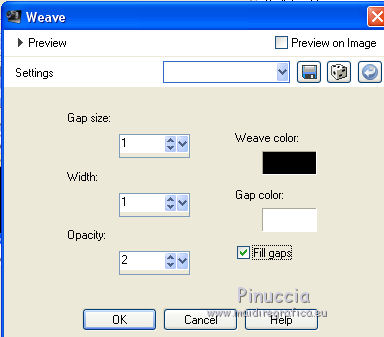
Effects>Edge Effects>Enhance.
8. Open the tube decoBlc - - Edit>Copy.
Go back to your work and go to Edit>Paste as new layer.
Keep the Blend Mode to Screen.
Layers>Arrange>Move Down.
Layers>Duplicate.
9. Effects>Plugins>Toadies - Weaver, default settings.
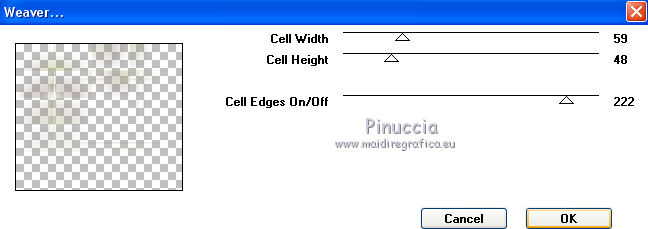
10. Effects>Texture Effects>Weave, same settings

11. Activate the top layer, Raster 3.
Effects>Geometric Effects>Skew.
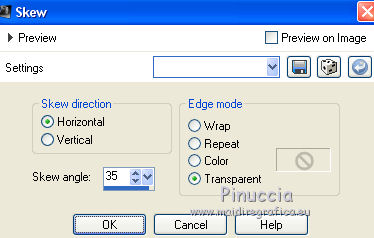
12. Effects>Reflection Effects>Rotating Mirror.
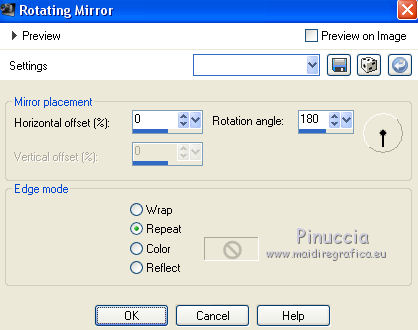
Layers>Duplicate.
Image>Flip.
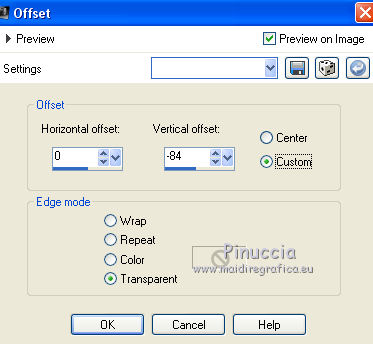
13. Effects>Image Effects>Offset.
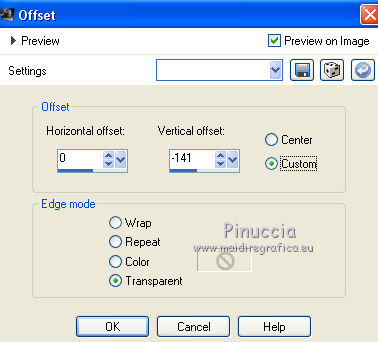
1
Layers>Merge>Merge Down.
14. Adjust>Hue and Saturation>Hue Map
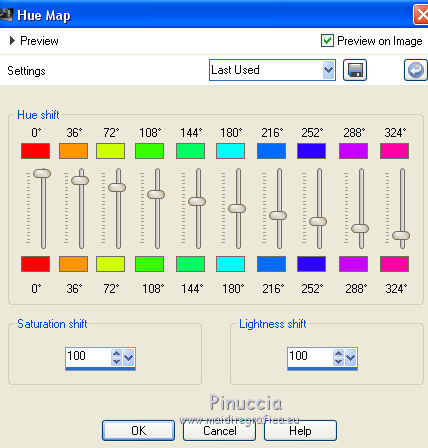
Effects>Distortion Effects>Pinch

Reduce the opacity of this layer to 59
15. Activate the bottom layer, Raster 1.
Layers>Duplicate.
Effects>Plugins>Nik Software - Color Efex Pro - Bi-Color User Defined.
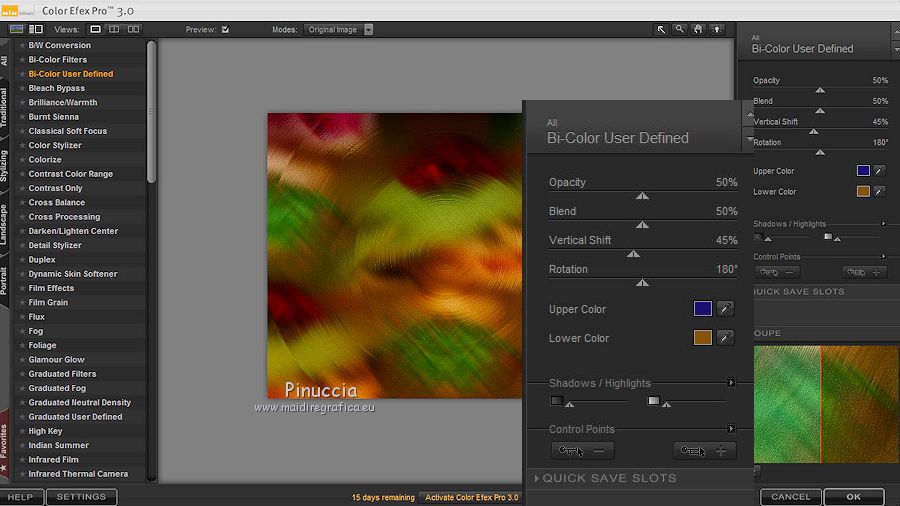
Change the Blend Mode of this layer to Multiply
and reduce the opacity to 93% (or as you like better).
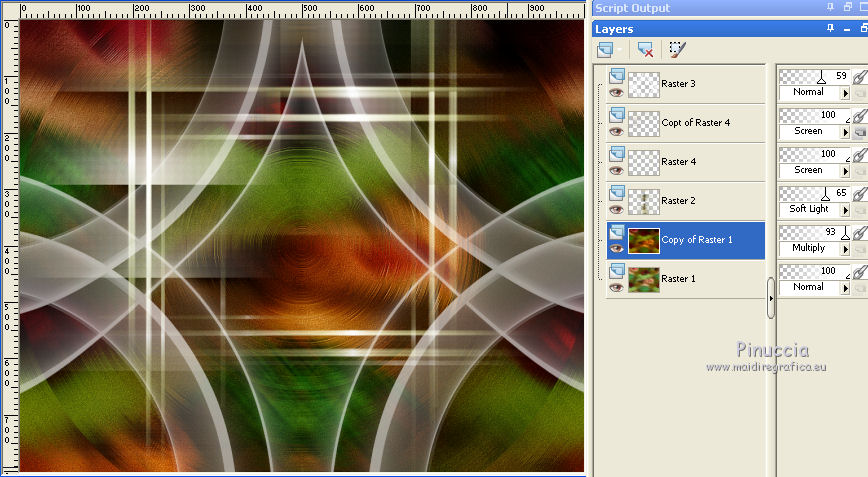
16. Activate the layer Raster 2.
Open the tube Gabry-fiori 72-17 - Edit>Copy.
Go back to your work and go to Edit>Paste as new layer.
Effects>Image Effects>Offset.
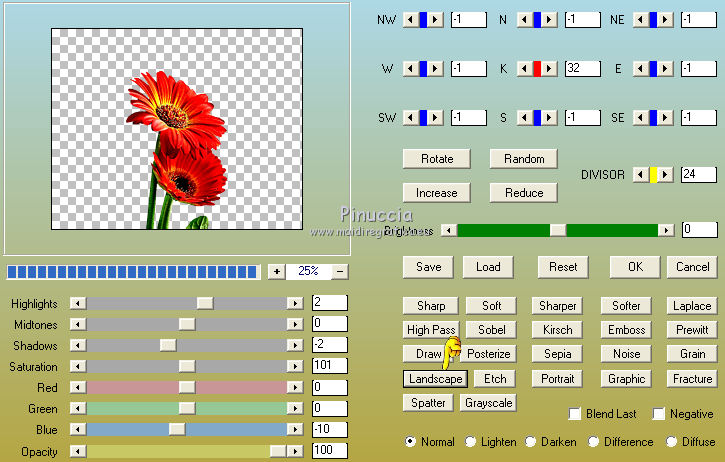
Effects>Plugins>AAA Filters - Custom, click on Landscape and ok
Reduce the opacity of this layer to 55%.
17. Activate the top layer.
Open the tube vvs-woman1535 - Edit>Copy.
Go back to your work and go to Edit>Paste as new layer.
Image>Mirror.
For me: Image>Resize, to 110%, resize all layers not checked.
Move  the tube to the right side. the tube to the right side.
18. Image>Add borders, 50 pixels, symmetric, color #ffffff.
19. Effects>Plugins>Richard Rosenman - Solid Border
color #546b63
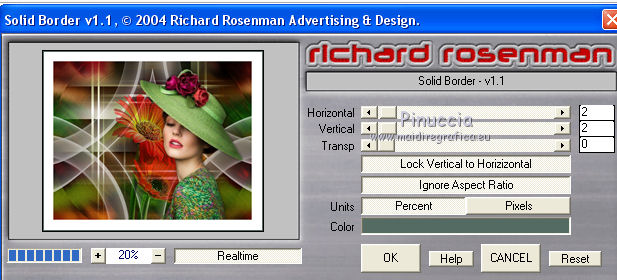
20. Sign your work on a new layer.
little note about the watermark:
I don't ask to put watermark on the versions made by my translations.
But if you decide to use the watermark supplied by the author, I would appreciate that my work as translator was also respected.
For that, I added my watermark to the material (english and french).
21. Image>Add borders, 10 pixels, symmetric, color #ffffff.
Image>Resize, 1000 pixels width, resize all layers not checked.
Save as jpg.
The tube of this version is by Luz Cristina
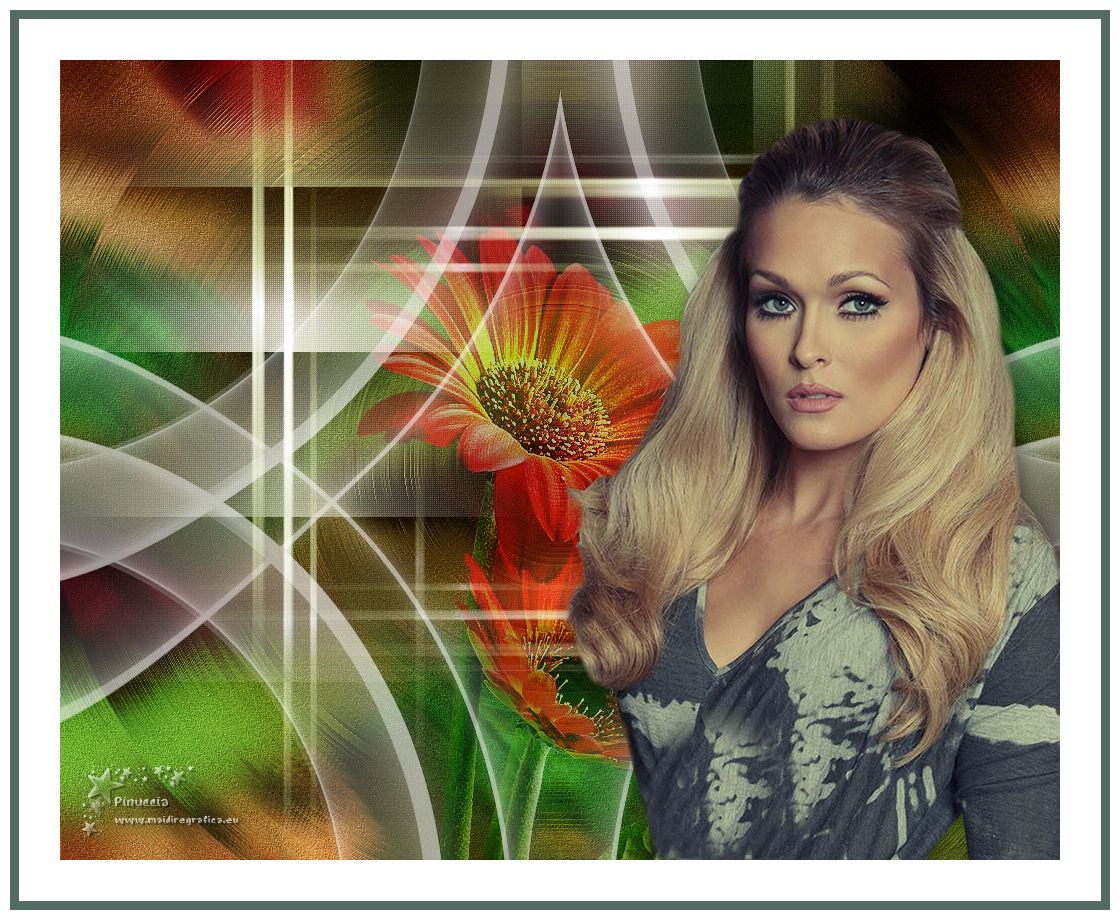
Your versions here

If you have problems or doubts, or you find a not worked link, or only for tell me that you enjoyed this tutorial, write to me.
My mail is in the menu on the top of the page.
16 January 2019
|
 ENGLISH VERSION

 ENGLISH VERSION
