|
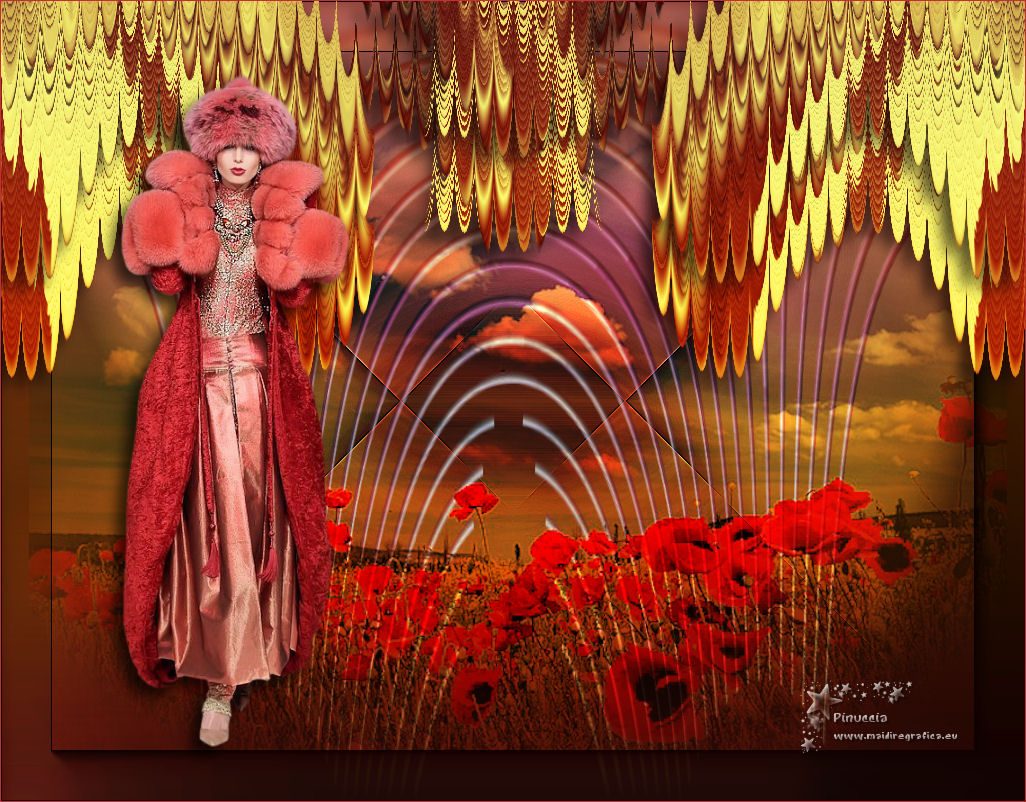
TOP TRANQUILLITY
 ENGLISH VERSION ENGLISH VERSION
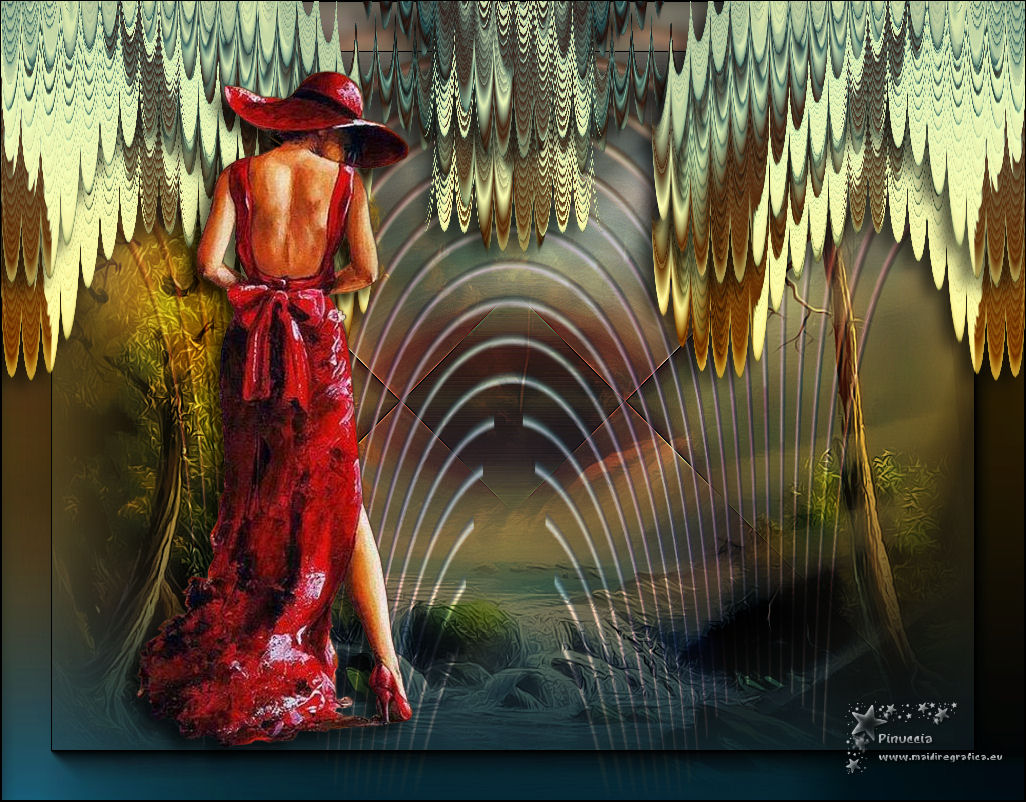
Here you find the original of this tutorial:

This tutorial was created with PSPX8 and translated with PSPX3, but it can also be made using other versions of PSP.
Since version PSP X4, Image>Mirror was replaced with Image>Flip Horizontal,
and Image>Flip with Image>Flip Vertical, there are some variables.
In versions X5 and X6, the functions have been improved by making available the Objects menu.
In the latest version X7 command Image>Mirror and Image>Flip returned, but with new differences.
See my schedule here
French translation here
your versions ici
For this tutorial, you will need:
Material here
For the tube thanks
Jen_Vrouw 934_1-12-2018 and CAL-2691-050118©Wendell Well.
Mask:002 gradientedworisch
(you find here the links to the material authors' sites)
Plugins
consult, if necessary, my filter section here
Filters Unlimited 2.0 here
Mura's Seamless - Shift at Arch here
Mura's Meister - Copies here
Simple - Top Left Mirror - Pizza Slice Mirror here
Nik Software - Color Efex Pro here
Filters Mura's Seamless et Simple can be used alone or imported into Filters Unlimited.
(How do, you see here)
If a plugin supplied appears with this icon  it must necessarily be imported into Unlimited it must necessarily be imported into Unlimited

You can change Blend Modes according to your colors.
In the newest versions of PSP, you don't find the foreground/background gradient (Corel_06_029).
You can use the gradients of the older versions.
The Gradient of CorelX here
Copy the Preset Illumination/Lights_lagata (marapontes) in the Presets Folder.
Open the mask in PSP and minimize it with the rest of the material.
1. Open the image "efeito anexado".
Delete the top layer Raster 2.
Layers>Duplicate.
for who can be interested...
The complete effect is on the Lica Cida website page:
here
We stop at point 8, where we begin this tutorial "Tranquillité".
2. Effects>Plugins>Mura's Seamless - Shift at Arch.
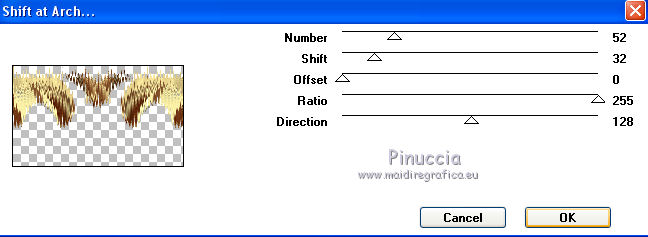
Layers>Arrange>Move Down.
3. Activate the top layer (Raster 1).
Repeat Effects>Plugins>Mura's Seamless - Shift at Arch.

Effects>Image Effects>Offset.
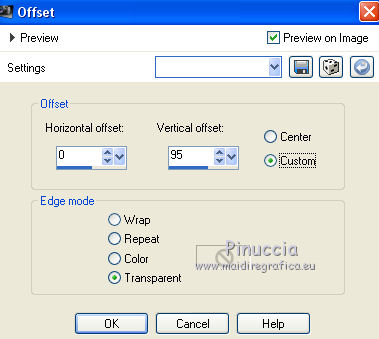
Effects>3D Effects>Drop Shadow, color #000000.
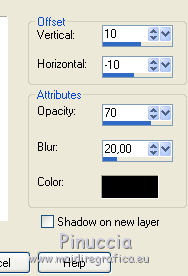
Apply the Drop Shadow Effects on the two layers.
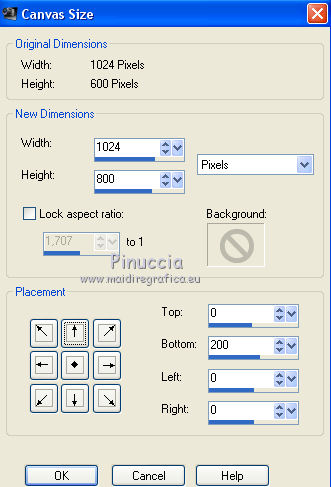
4. Image>Canvas Size - 1024 x 800 pixels.
5. Layers>New Raster Layer.
Layers>Arrange Send to Bottom.
6. Set your foreground color to #d1c589,
and your background color to #4d1b04.
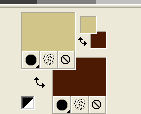
Set your foreground color to a Foreground/Background Gradient, style Linear.
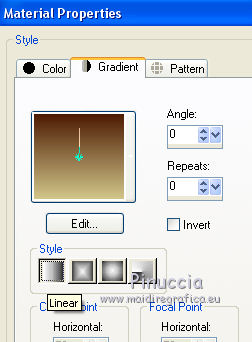
Flood Fill  the layer with your Gradient. the layer with your Gradient.
7. Sélections>Sélectionner tout.
Open the tube Jen_Vrouw 934_ 1-12-2018 and go to Edit>Copy.
Go back to your work and go to Edit>Paste into Selection.
Selections>Select None.
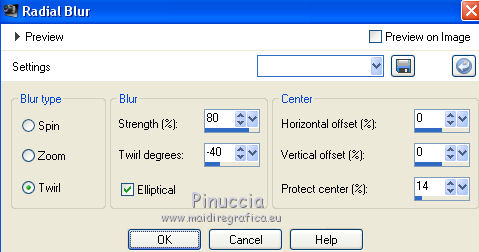
8. Adjust>Blur>Radial Blur.
9. Effects>Plugins>Simple - Pizza Slice Mirror.
Effects>Plugins>Simple - Top Left Mirror.
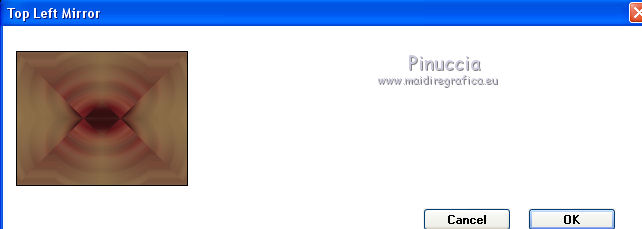
Effects>Edge Effects>Enhance More.
10. Layers>Duplicate.
Effects>Geometric Effects>Perspective Horizontal.
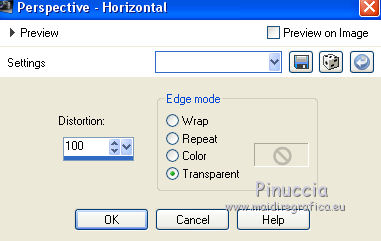
Image>Mirror.
11. Effects>Geometric Effects>Perspective Horizontal.

12. Effects>3D Effets>Inner Bevel.
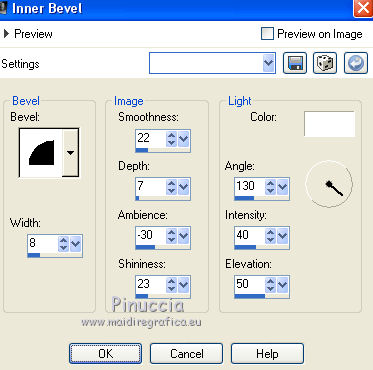
13. Effects>Image Effects>Offset.
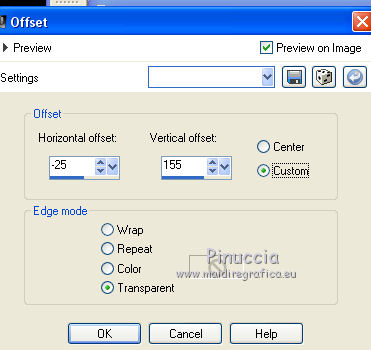
14. Effects>Plugins>Mura's Meister - Copies.
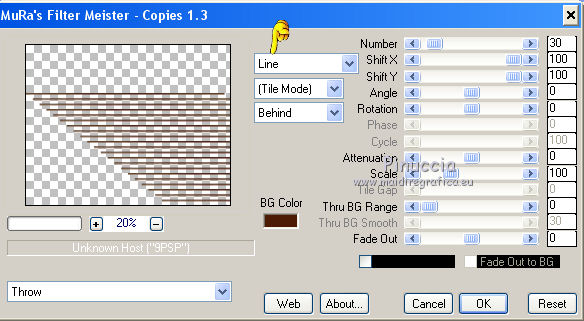
Image>Flip.
Layers>Duplicate.
Image>Mirror.
Layers>Merge>Merge Down.
Image>Flip.
15. Effects>Distortion Effects>Lens Distortion.
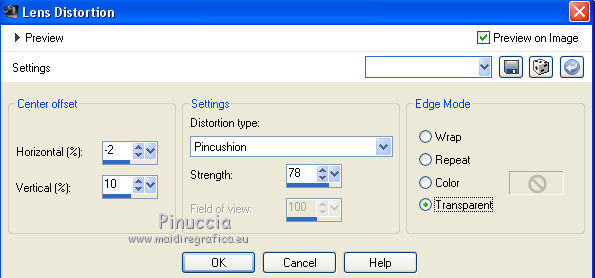
16. Activate the bottom layer Raster 2.
Effects>Illumination Effects>Lights.
Select the preset "lagata" and ok.
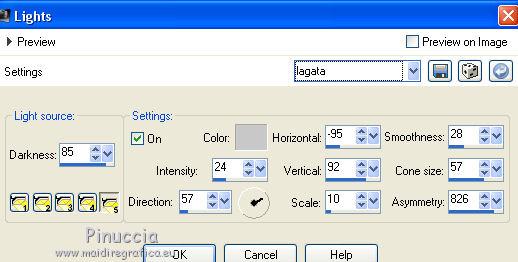
17. Layers>New Mask layer>From image
Open the menu under the source window and you'll see all the files open.
Select the mask 002 gradientedworisch..
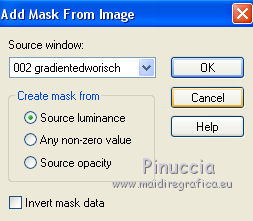
Layers>Merge>Merge Group.
Layers>Duplicate.
18. Effects>Plugins>Nik Software - Color Efex Pro
Bi-Color Filter - à droite Cool Warm-1.
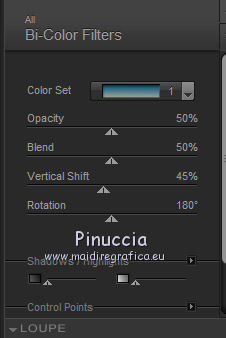
Repeat the Effect Nik Software on the first deux layers (Raster 1 and copy of Raster 1).
19. Layers>New Raster Layer.
Layers>Arrange>Send to Bottom.
Selections>Select All.
Open the image "backfinallc" - Edit>Copy.
Go back to your work and go to Edit>Paste into SElection.
Selections>Select None.
(colorize, according to your color).
20. Activate the layer Copy of Raster 2.
Effects>Distortion Effects>Polar Coordinates.
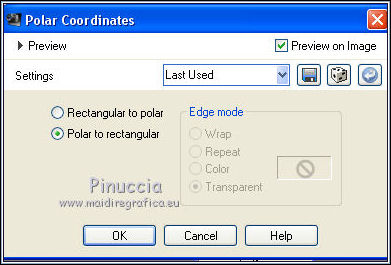
Layers>Merge>Merge Down.
Change the Blend Mode of this layer to Screen.
Layers>New Mask layer>From image
Open the menu under the source window and
Select the mask 002 gradientedworisch..

Layers>Merge>Merge Group.
21. Open the tube CAL-2691-050118©Wendell Well - Edit>Copy.
Go back to your work and go to Edit>Paste as new layer.
Move  the tube a bit down. the tube a bit down.
Change the Blend Mode of this layer to Overlay.
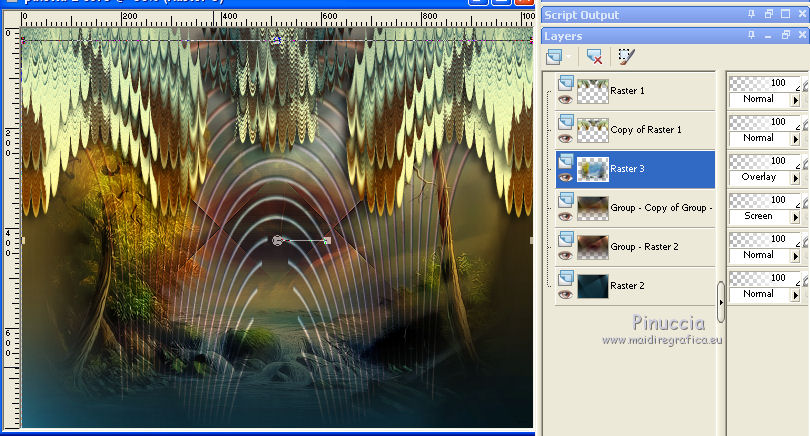
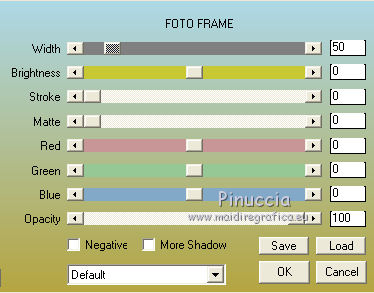
23. On the three bottoms layers:
Effects>Plugins>AAA Frames - Foto Frame.
24. Activate the top layer, Raster 1.
Open again the tube Jen_Vrouw 934_ 1-12-2018 and go to Edit>Copy.
Go back to your work and go to Edit>Paste as new layer.
Move  the tube to the left side. the tube to the left side.
Effects>3D Effects>Drop Shadow, same settings.

25. Signer votre travail sur un nouveau calque.
little note about the watermark:
I don't ask to put watermark on the versions made by my translations.
But if you decide to use the watermark supplied by the author, I would appreciate that my work as translator was also respected.
For that, I added my watermark to the material (english and french).
26. Image>Add borders, 1 pixels, symmetric, color #000000.
Save as jpg.
The tubes of this version are by Isa and Gabry
Your versions here

If you have problems or doubts, or you find a not worked link, or only for tell me that you enjoyed this tutorial, write to me.
My mail is in the menu on the top of the page.
3 January 2019
|
 ENGLISH VERSION

 ENGLISH VERSION
