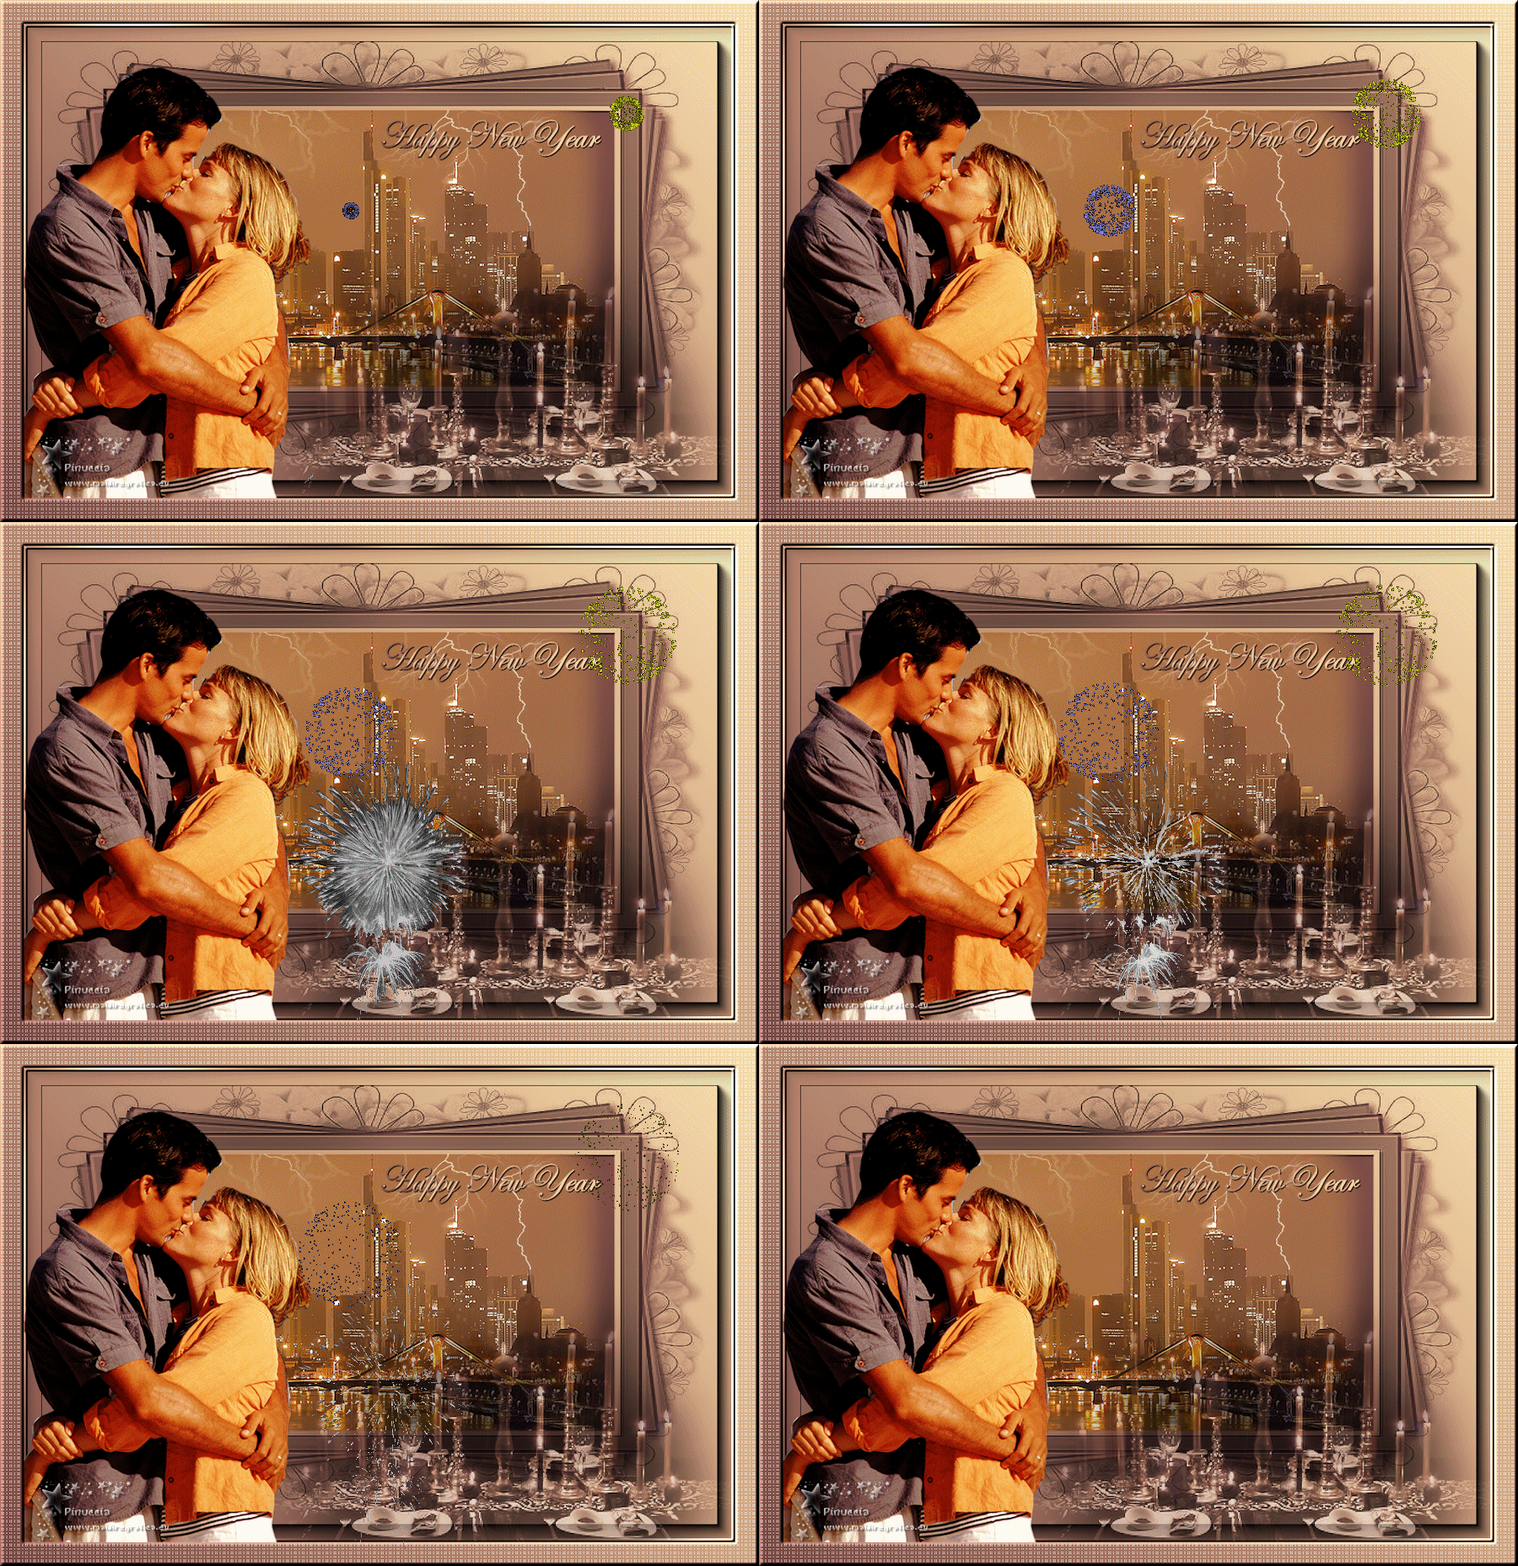
|
VOEUX


The site is closed

This tutorial was written with CorelX12 and translated with CorelX13, but it can also be made using other versions of PSP.
Since version PSP X4, Image>Mirror was replaced with Image>Flip Horizontal,
and Image>Flip with Image>Flip Vertical, there are some variables.
In versions X5 and X6, the functions have been improved by making available the Objects menu.
In the latest version X7 command Image>Mirror and Image>Flip returned, but with new differences.
See my schedule here
A cityscape tube at your choice.
The rest of the material here
For my landscape thanks Farouche
For the deco tube thanks Nikita; the rest of the material is by Lulu.
(The links of the tubemakers here).
Plugins:
consult, if necessary, my filter section here
Filters Unlimited 2.0 here
Graphics Plus - Quick Tile I here
AAA Frames - Foto Frame here
Penta.com - Dot and Cross here
Nik Software - Color Efex Pro here
Filters Graphics Plus and Penta.com can be used alone or imported into Filters Unlimited.
(How do, you see here)
If a plugin supplied appears with this icon  it must necessarily be imported into Unlimited it must necessarily be imported into Unlimited
Animation Shop here

You can change Blend Modes according to your colors.
In the newest versions of PSP, you don't find the foreground/background gradient (Corel_06_029).
You can use the gradients of the older versions.
The Gradient of CorelX here
Copy the Selection in the Selection Folder.
Open the mask in PSP and minimize it with the rest of the material (except the fireworks' animations, that you'll use in Animation Shop)
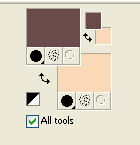
1. Set your foreground color to #6b4a4b,
and your background color to #f8d9b8.
2. Open a new transparent image 900 x 600 pixels.
Flood Fill  l'image transparente avec la couleur d'avant plan. l'image transparente avec la couleur d'avant plan.
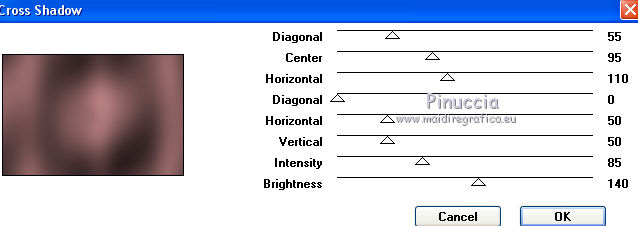
Effects>Plugins>Graphics Plus - Cross Shadow.
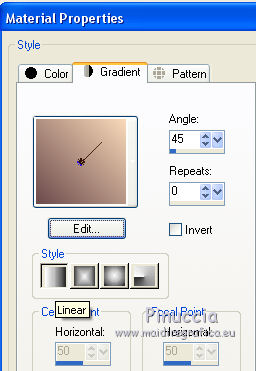
3. Set your foreground color to a Foreground/Background Gradient, style Linear.
Layers>New Raster Layer.
Flood Fill  the layer with your Gradient. the layer with your Gradient.
4. Layers>New Mask layer>From image
Open the menu under the source window and you'll see all the files open.
Select the mask gr_grungeframe5mask.
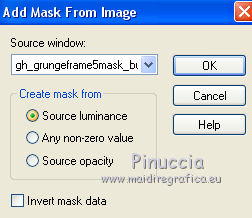
Effects>Edge Effects>Enhance.
Layers>Merge>Merge Group.
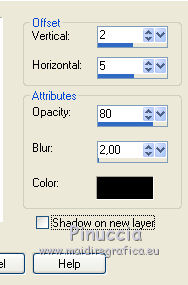
Effects>3D Effects>Drop Shadow, color black.
5. Selections>Load/Save Selection>Load Selection From Disk.
Look for and load the selection voeux1_lulu.
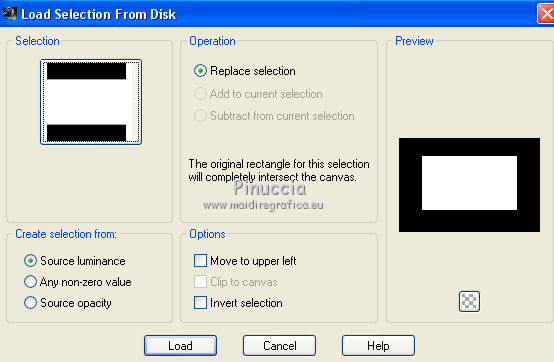
Open your city tube and go to Edit>Copy.
Go back to your work and go to Edit>Paste as new layer.
Place  the tube in the middle. the tube in the middle.
Selections>Invert.
Press CANC on the keyboard 
Selections>Select None.
Adjust>Sharpness>Sharpen.
6. Layers>Merge>Merge visible.
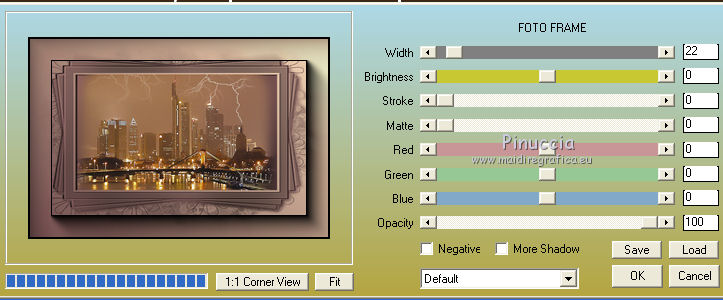
Effects>Plugins>AAA Frames - Foto Frame.
7. Layers>New Raster Layer.
Flood Fill  the layer with your Gradient. the layer with your Gradient.
Selections>Select All.
Selections>Modify>Contract - 5 pixels.
Press CANC on the keyboad.
Selections>Invert.
Effects>Plugins>Graphics Plus same settings.
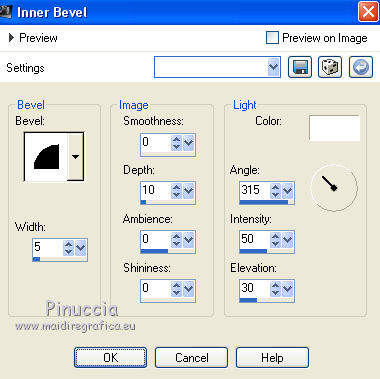
Effects>3D Effects>Inner Bevel.
8. Open the tube couple_lulu and go to Edit>Copy.
Go back to your work and go to Edit>Paste as new layer.
Move  it to the left side. it to the left side.
Adjust>Sharpness>Sharpen.
9. Open the tube 12283242432 and go to Edit>Copy.
Go back to your work and go to Edit>Paste as new layer.
Move it  at the upper. at the upper.
Reduce the opacity of this layer to 70.
Adjust>Sharpness>Sharpen.
Layers>Merge>Merge visible.
10. Activate the Text Tool  , ,
choose a font and right Bonne Année, or what you want.
Layers>Convert to Raster Layer.
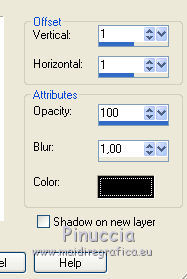
Effects>3D Effects>Drop Shadow, color black.
11. Image>Add borders - 30 pixels, symmetric, foreground color.
Activate your Magic Wand Tool 
and click on this border to select it.
Flood Fill  the selection with your Gradient. the selection with your Gradient.
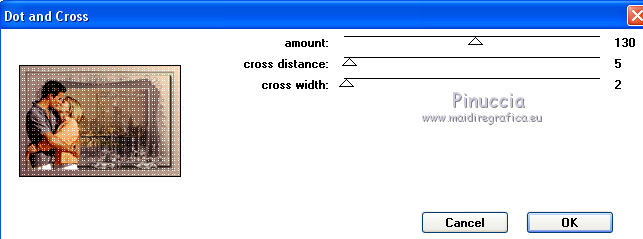
Effects>Plugins>Penta.com - Dot and cross.
Effects>3D Effects>Inner Bevel, same settings.

Selections>Select None.
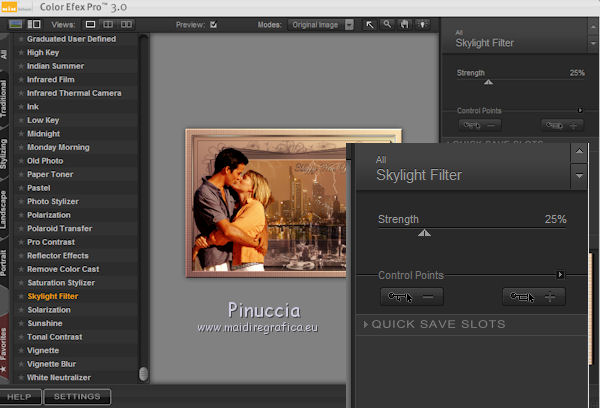
12. Effects>Plugins>Nik Software - Color Efex Pro - Skylight Filter.
Image>Resize, 900 pixes width, resize all layers checked.
Sign your work and save as jpg.
13. If you want to do the animation, go on
Animation
Edit>Copy (your work).
Open Animation Shop and go to Edit>Paste>Paste as new animation.
Edit>Duplicate and repeat until you'll have an animation composed by 10 frames.
Click on the first frame to select it and go to Edit>Select All.
14. Add the fireworks animations at your choice.
Don't worry if every animation is composed by a different number of frames.
Open the firework 3.
Edit>Select All.
Edit>Copy.
Go back to your work and Edit>Paste>Paste in the selected frame.
15. Open the firework 7.
Edit>Select All.
Edit>Copy.
Go back to your work and Edit>Paste>Paste in the selected frame.
16. Open the firework 6.
Edit>Select All.
Edit>Copy.
Go back to your work and Edit>Paste>Paste in the selected frame.
17. Check the animation clicking on View animation 
and save as gif.
Your versions

If you have problems or doubts, or you find a not worked link,
or only for tell me that you enjoyed this tutorial, write to me.
3 January 2018
|

