|
EMILIETA


Thanks Luz Cristina for your invitation to translate your tutorials into english

This tutorial was translated with PSPX9 but it can also be made using other versions of PSP.
Since version PSP X4, Image>Mirror was replaced with Image>Flip Horizontal,
and Image>Flip with Image>Flip Vertical, there are some variables.
In versions X5 and X6, the functions have been improved by making available the Objects menu.
In the latest version X7 command Image>Mirror and Image>Flip returned, but with new differences.
See my schedule here
 French Translation here French Translation here
 Your versions here Your versions here

For this tutorial, you will need:

For the tube thanks Luz Cristina and Maryse
(The links of the tubemakers here).

consult, if necessary, my filter section here
Redfield - Fractalius ici
FM Tile Tools - Saturation Emboss, Blend Emboss ici
Alien Skin Eye Candy 5 Impact - Extrude ici
Flaming Pear - Flexify 2 ici
Mura's Meister - Perspective Tiling ici
AAA Frames - Foto Frame ici

You can change Blend Modes according to your colors.

Copy the preset Emboss 3 in the Presets Folder.
Open the masks in PSP and minimize them with the rest of the material.
1. Open a new transparent image 1000 x 900 pixels.
2. Selections>Select All.
Open the jpg image Imagem JPG 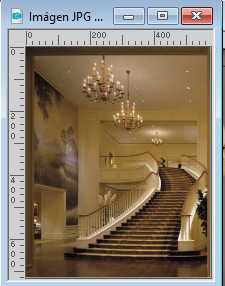
Edit>Copy.
Go back to your work and go to Edit>Paste into Selection.
Selections>Select None.
3. Effects>Image Effects>Seamless Tiling, default settings.

4. Effects>Plugins>Redfield - Fractalius
select the preset Shaggy and ok

for the tutorial I used the version 1.03 of this filter,
if you use the newer versions, you may have a different result
5. Effects>User Defined Filter - select the preset Emboss 3 and ok.

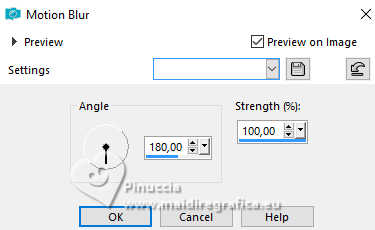
6. Adjust>Blur>Motion Blur - 3 times with these settings.
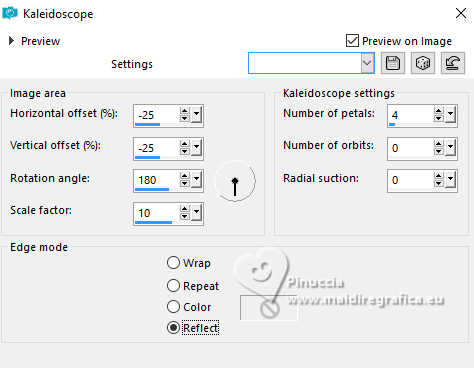
7. Effects>Reflection Effects>Kaleidoscope.
8. Layers>Duplicate - 2 times, to have 3 equal layers.
Stay on the top layer Copy (2) of Raster 1.
9. K key to activate your Pick Tool 
in mode Scale  , ,
pull the top central knot down until 450 pixels,
and the bottom central knot up until 750 pixels.

10. Activate your Erase Tool  with these settings with these settings

hold down the mouse button and drag from left to right without moving it


11. Effects>Plugins>Alien Skin Eye Candy 5 Impact - Extrude.

12. Adjust>Blur>Motion Blur, same settings.

13. Effects>Plugins>FM Tile Tools - Blend Emboss, default settings.

14. Effects>3D Effects>Drop Shadow, color black.
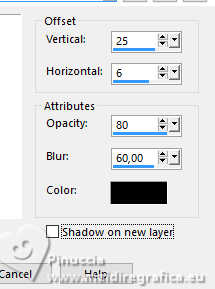
15. Layers>Duplicate.
Image>Mirror>Mirror vertical (Image>Flip).
16. Effects>Plugins>Flaming Pear - Flexify 2.

17. Image>Mirror>Mirror vertical (Image>Flip).
18. Effects>Image Effects>Offset.
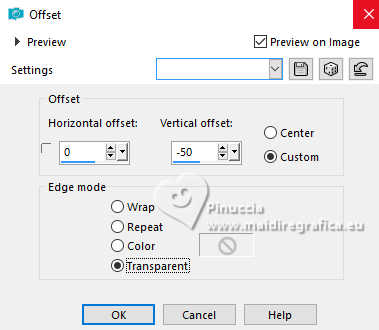
19. Effects>Image Effects>Seamless Tiling, default settings.

20. Effects>Geometric Effects>Pentagon.
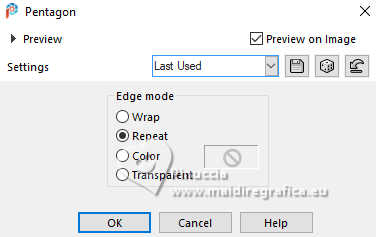
21. Effects>Image Effects>Offset.
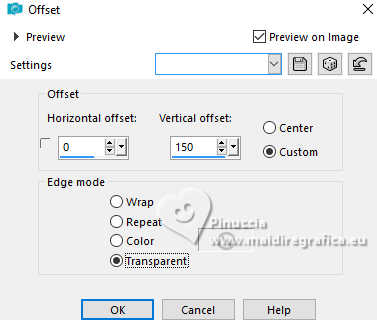
22. Layers>New Mask layer>From image
Open the menu under the source window and you'll see all the files open.
Select the mask Marge-topfade.
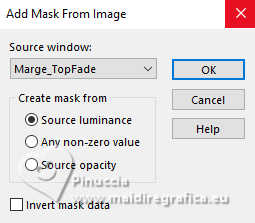
Layers>Merge>Merge Group.
If you don't see any differences after applying the mask,
and if you want to follow my example, I applied the mask before the Offset Effect.

23. Effects>3D Effects>Drop Shadow, same settings.

24. Effects>Plugins>FM Tile Tools - Saturation Emboss, default settings.

25. Close the two top layer.
Activate the layer Copy of Raster 1.

26. Effects>Plugins>Mura's Meister - Perspective Tiling.

27. Activate again the jpg image.
On this image apply 3 times the mask 20-21:
Layers>New Mask layer>From image
Open the menu under the source window
and select the mask 20-21.
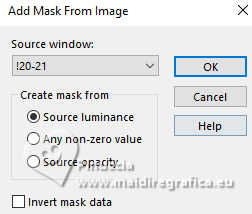
Layers>Duplicate - 2 times to apply the mask 3 times.
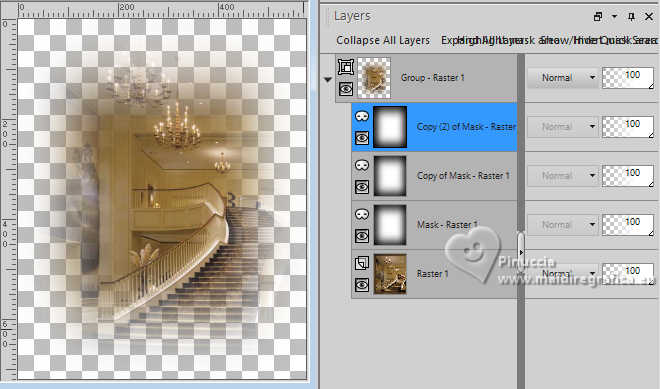
Layers>Merge>Merge Group.
Edit>Copy.
28. Go back to your work and go to Edit>Paste as new layer.
Move  the image to the right. the image to the right.
29. Layers>Duplicate.
Image>Mirror>Mirror horizontal.
Layers>Merge>Merge Down.
Change the Blend Mode of this layer to Hard Light.
30. Image>Resize, to 80%, resize all layers not checked.
Place  correctly the image. correctly the image.
31. Open the closed layers and activate the layer copy (2) of Raster 1.
Effects>Distortion Effects>Pinch.
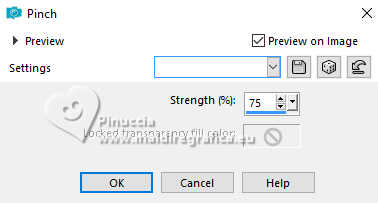
32. Effects>Image Effects>Offset.
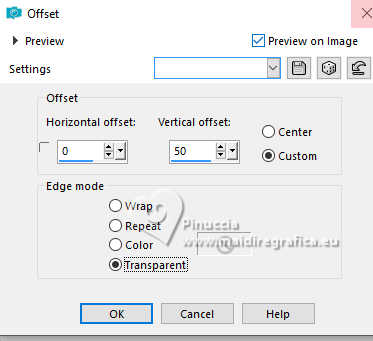
33. Layers>Merge>Merge visible.
34. Effects>Plugins>AAA Frames - Foto Frame.

35. Open the woman's tube 4632-luzcristina 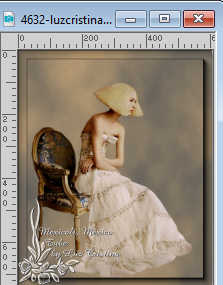
Edit>Copy.
Go back to your work and go to Edit>Paste as new layer.
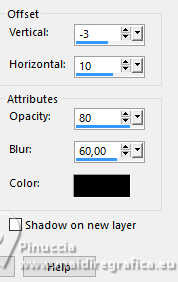
36. Effects>3D Effects>Drop Shadow.
37. Open the tube MR_Lavender 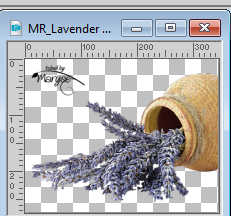
Erase the watermark and go to Edit>Copy.
Go back to your work and go to Edit>Paste as new layer.
Image>Resize, to 80%, resize all layers not checked.
Change the Blend Mode of this layer to Luminance (legacy) and reduce the opacity to 80%.
Move  the tube at the bottom right. the tube at the bottom right.
Effects>3D Effects>Drop Shadow, same settings.
38. Sign your work.
Layers>Merge>Merge All and save as jpg.


If you have problems or doubts, or you find a not worked link,
or only for tell me that you enjoyed this tutorial, write to me.
20 August 2025
|


