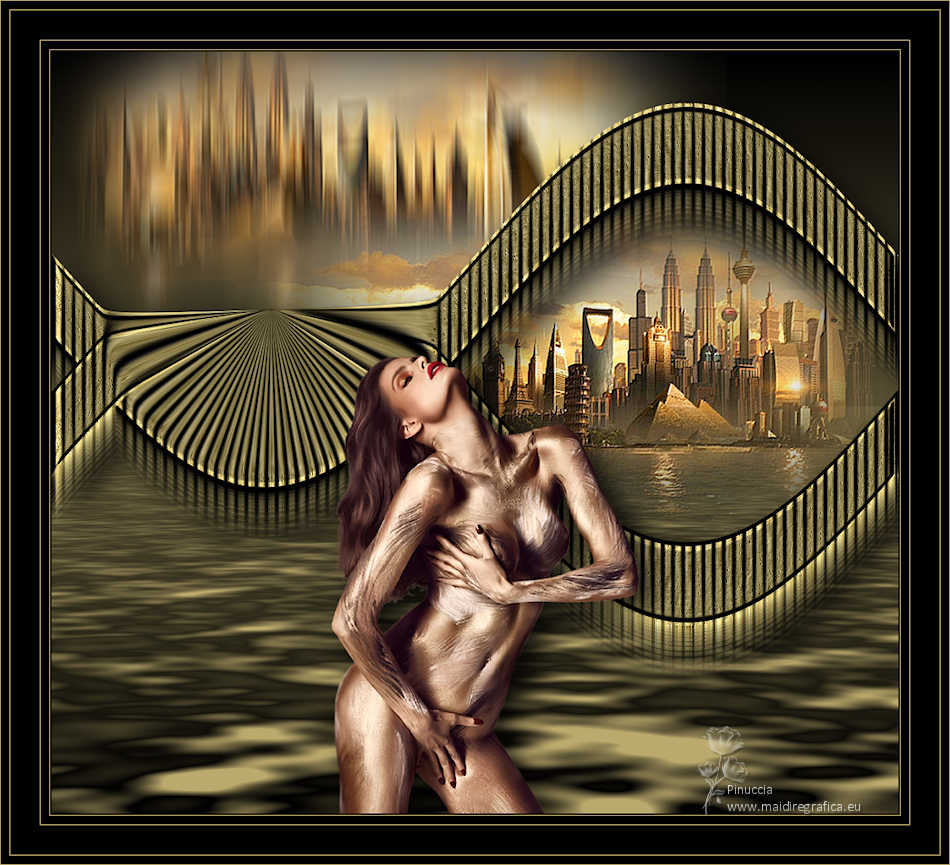
|
DESEOS


Thanks Luz Cristina for your invitation to translate your tutorials into english

This tutorial, created with PSP2022, was translated with PspX7, but it can also be made using other versions of PSP.
Since version PSP X4, Image>Mirror was replaced with Image>Flip Horizontal,
and Image>Flip with Image>Flip Vertical, there are some variables.
In versions X5 and X6, the functions have been improved by making available the Objects menu.
In the latest version X7 command Image>Mirror and Image>Flip returned, but with new differences.
See my schedule here
 French Translation here French Translation here
 Your versions here Your versions here

For this tutorial, you will need:

Material by Luz Cristina.
(The links of the tubemakers here).
*It is forbidden to remove the watermark from the supplied tubes, distribute or modify them,
in order to respect the work of the authors

consult, if necessary, my filter section here
Mura's Meister - Copies ici
Flaming Pear - Flood ici

You can change Blend Modes according to your colors.
In the newest versions of PSP, you don't find the foreground/background gradient (Corel_06_029).
You can use the gradients of the older versions.
The Gradient of CorelX here

1. Open a new transparent image 1000 x 100 pixels.
2. Set your foreground color to #000000,
and your background color to #bbaa6d.
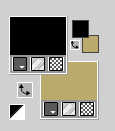
Flood Fill  the trasparent image with your foreground color. the trasparent image with your foreground color.
3. Layers>New Raster Layer.
Flood Fill  the layer with your background color. the layer with your background color.
4. Activate your Erase Tool  with these settings. with these settings.

Move your Tool from left to right, as below.

5. Effects>Texture Effects>Straw Wall
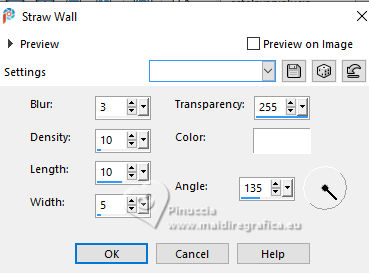
6. Layers>Merge>Merge visible.
7. Effects>3D Effects>Inner Bevel.
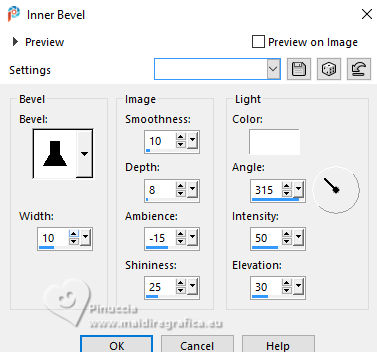
8. Image>Canvas Size.
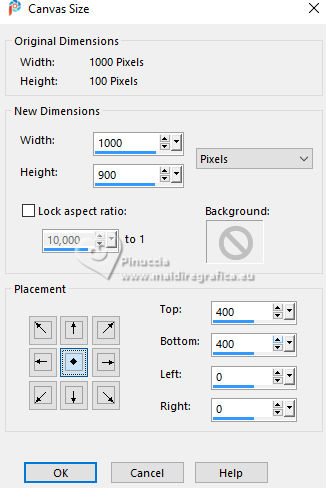
9. Effects>Distortion Effects>Wave.
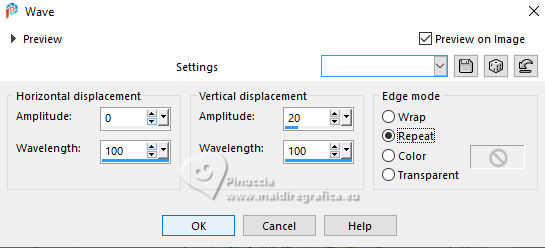
10. Effects>Image Effects>Offset.
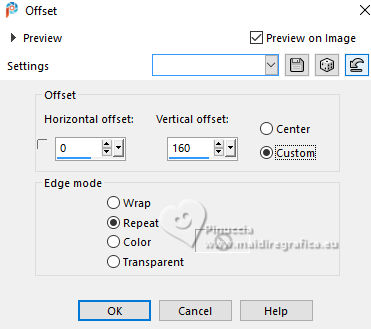
11. Layers>Duplicate.
Image>Mirror>Mirror vertical (Image>Flip).
Effects>Image Effects>Offset, same settings.
12. Layers>Merge>Merge visible.
Image>Mirror>Mirror horizontal (Image>Mirror).
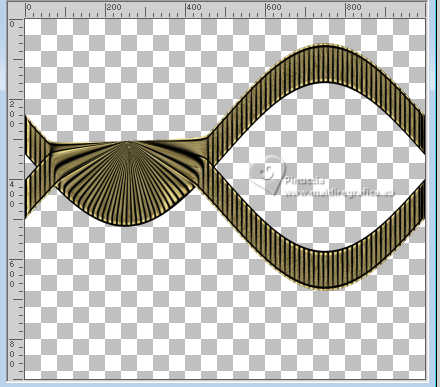
13. Activate your Warp Brush Tool 

If you don't see the rules: View>Rules,
place your tool to 250 pixels width x 300 pixes hight
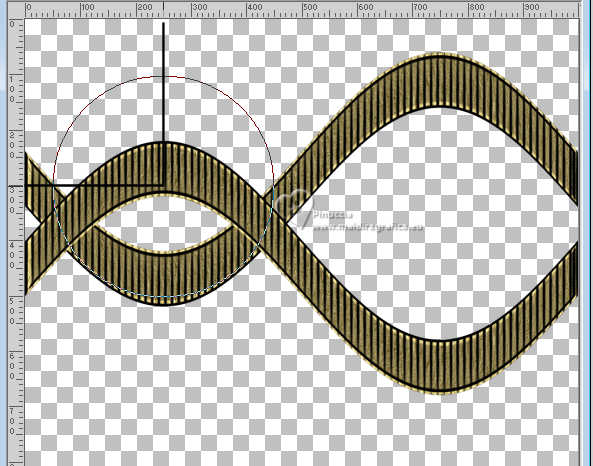
Once you're in position,
press and hold the left mouse button, without moving it,
until the tool stops by itself.
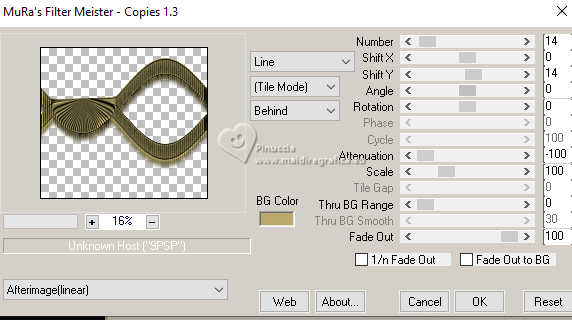
14. Effects>Plugins>Mura's Meister - Copies.
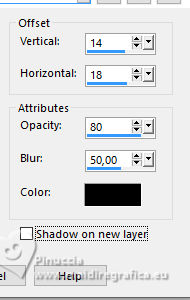
15. Effects>3D Effects>Drop Shadow, color black.
16. Layers>New Raster Layer.
Layers>Arrange>Move Down.
Set your foreground color to a Foreground/Background Gradient, style Linear.
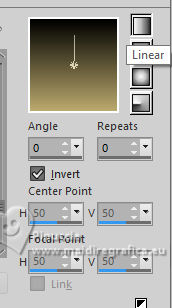
Flood Fill  the layer with your Gradient. the layer with your Gradient.
17. Effects>Plugins>Flaming Pear - Flood - light color #bbaa6d.

18. Open the misted 2136-luzcristinaG 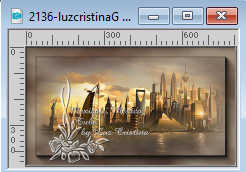
Edit>Copy.
Go back to your work and go to Edit>Paste as new layer.
Move  the tube to the right. the tube to the right.
19. Activate your top layer.
Open the tube de la femme 6810-luzcristinaG 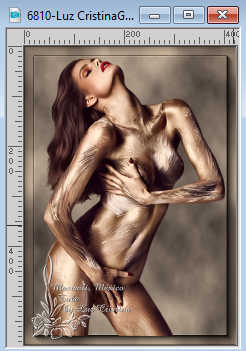
Edit>Copy.
Go back to your work and go to Edit>Paste as new layer.
Place  correctly the tube in the center. correctly the tube in the center.
Effects>3D Effects>Drop Shadow, same settings.
20. Activate the layer of your misted, Raster 2.
Layers>Duplicate.
Layers>Arrange>Move Down.
Image>Mirror>Mirror horizontal (Image>Mirror).
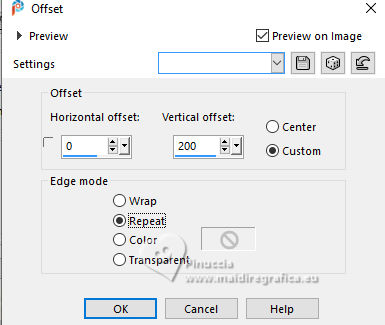
21. Effects>Image Effects>Offset.
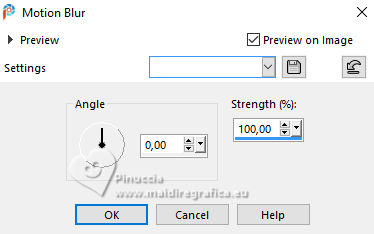
22. Adjust>Blur>Motion Blur.
23. Image>Add Borders, 2 pixels, symmetric, color black.
Image>Add Borders, 1 pixel, symmetric, light color.
Image>Add Borders, 10 pixels, symmetric, color black.
Image>Add Borders, 1 pixel, symmetric, light color.
Image>Add Borders, 35 pixels, symmetric, color black.
Image>Add Borders, 1 pixel, symmetric, light color.
Image>Add Borders, 10 pixels, symmetric, color black.
Image>Add borders, 1 pixel, symmetric, light color.
24. Image>Resize, 84% or to your liking, resize all layers checked.
Sign your work and save as jpg.
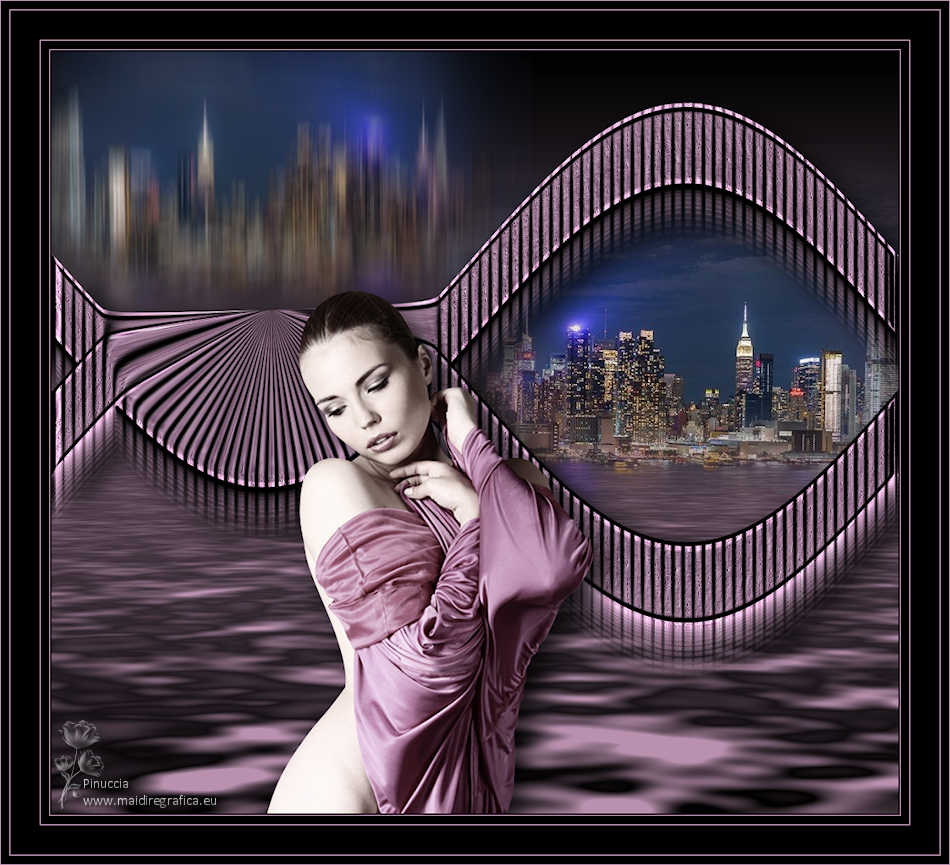
For the tube of this version thanks; the misted is mine.


If you have problems or doubts, or you find a not worked link,
or only for tell me that you enjoyed this tutorial, write to me.
15 February 2024

|

