|
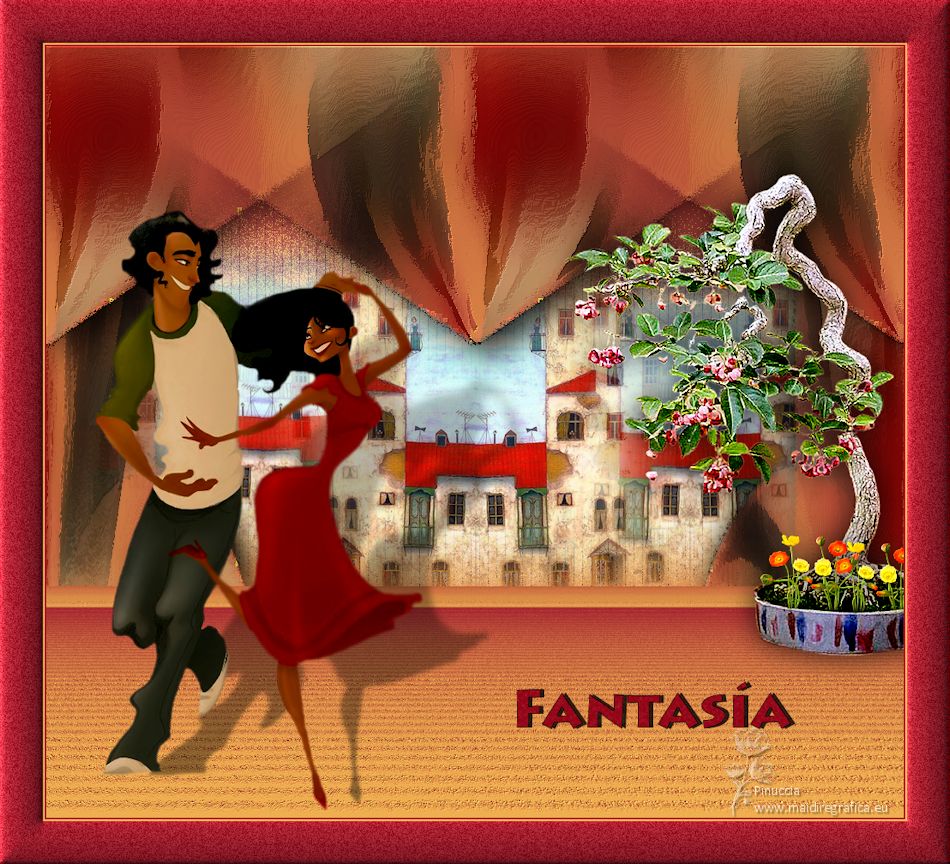
FANTASIA

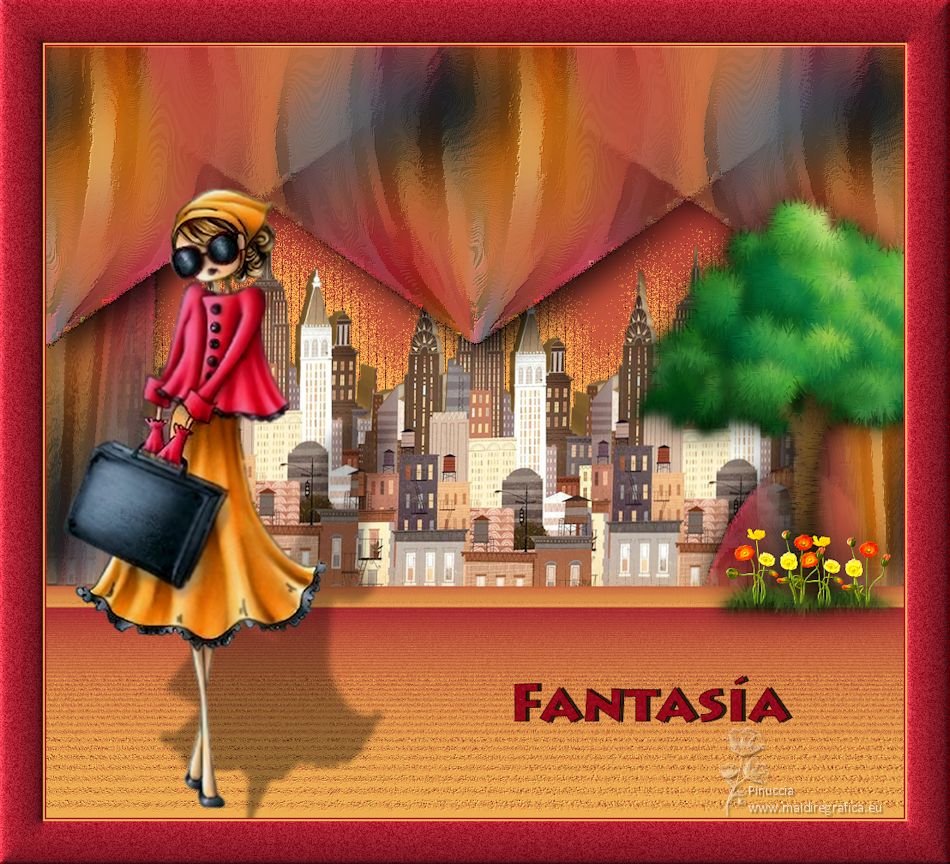
Thanks Luz Cristina for your invitation to translate your tutorials into english

This tutorial, created with PSP9, was translated with Psp2020, but it can also be made using other versions of PSP.
Since version PSP X4, Image>Mirror was replaced with Image>Flip Horizontal,
and Image>Flip with Image>Flip Vertical, there are some variables.
In versions X5 and X6, the functions have been improved by making available the Objects menu.
In the latest version X7 command Image>Mirror and Image>Flip returned, but with new differences.
See my schedule here
 French Translation here French Translation here
 Your versions here Your versions here

For this tutorial, you will need:

(The links of the tubemakers here).
*It is forbidden to remove the watermark from the supplied tubes, distribute or modify them,
in order to respect the work of the authors

consult, if necessary, my filter section here
Artistiques - Pinceau à sec here
FM Tile Tools - Blend Emboss Emboss here
AP Lines - Lines SilverLining here
Mura's Meister - Copies here
Mura's Meister - Perspective Tiling here
Mura's Meister - Pole Transform here
Alien Skin Eye Candy 5 Impact - Extrude, Perspective Shadow here

You can change Blend Modes according to your colors.
In the newest versions of PSP, you don't find the foreground/background gradient (Corel_06_029).
You can use the gradients of the older versions.
The Gradient of CorelX here

Open the mask in PSP and minimize it with the rest of the material.
1. Open a new transparent image 1000 x 700 pixels.
2. Set your foreground color to #fbb652,
and your background color to #aa1e2f.
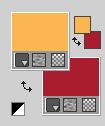
Set your foreground color to a Foreground/Background Gradient, style Linear.
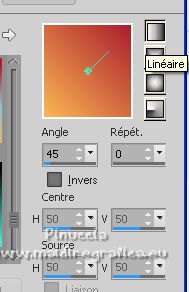
Flood Fill  l'image transparente du dégradé. l'image transparente du dégradé.
3. Selections>Select All.
Open the woman's tube Tube-Luz Cristina 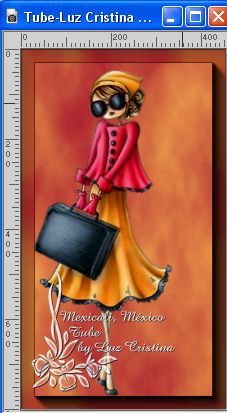
Edit>Copy.
Minimize the tube.
Go back to your work and go to Edit>Paste into Selection.
Selections>Select None.
4. Effects>Image Effects>Seamless Tiling, default settings.

5. Effects>Geometric Effects>Perspective Vertical.
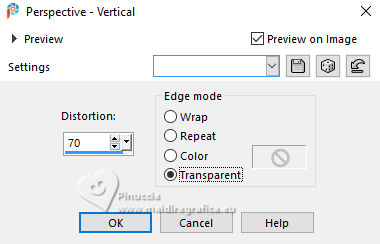
6. Image>Mirror>Mirror Vertical (Image>Flip).
Répéter Effects>Geometric Effects>Perspective Vertical.
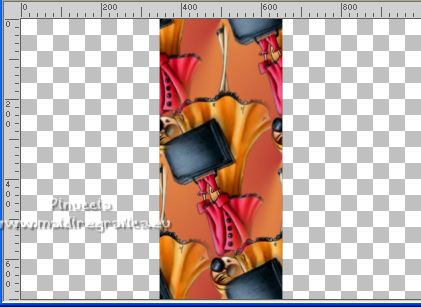
7. Selections>Select All.
Selections>Float.
Selections>Defloat.
8. Adjust>Blur>Radial Blur.
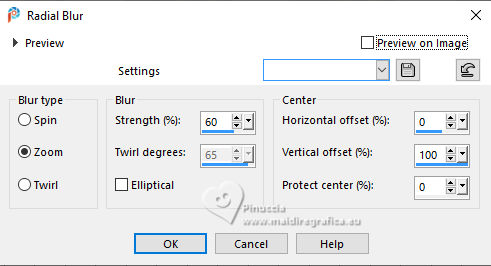
Selections>Select None.
9. Effects>Plugins>Mura's Meister - Pole Transform.
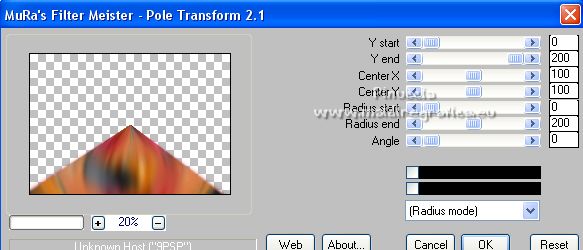
10. Image>Mirror>Mirror Vertical (Image>Flip).
11. Effects>Image Effects>Seamless Tiling.

12. Effects>Texture Effects>Mosaic Antique
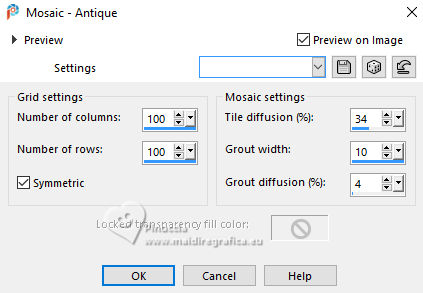
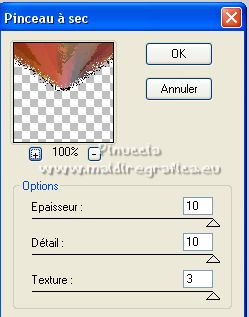
13. Effects>Plugins>Artistiques - Pinceau à sec
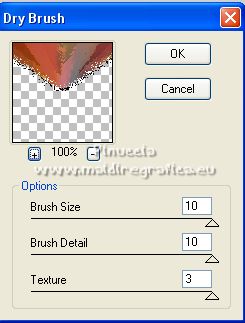
If you use the english version the result doesn't change:
Effects>Plugins>Artistic - Dry Brush
14. Effects>Plugins>FM Tile Tools - Blend Emboss, default settings.

Effects>3D Effects>Drop Shadow.
Layers>Duplicate.
15. Effects>Distortion Effects>Polar Coordinates.
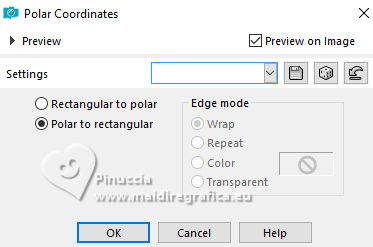
Layers>Arrange>Move Down.
16. Layers>New Mask layer>From image
Open the menu under the source window and you'll see all the files open.
Select the mask masck fadesuave.
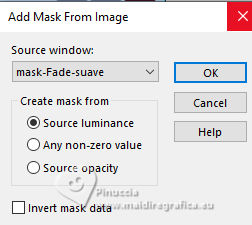
Layers>Duplicate, to apply the mask 2 times.
Layers>Merge>Merge Group.
17. Open the tube Tube-LuzCristinaG 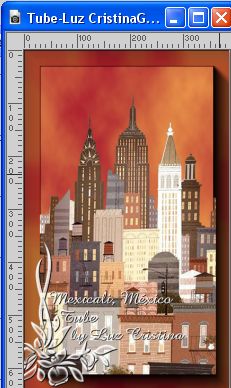
Edit>Copy.
Go back to your work and go to Edit>Paste as new layer.
Image>Resize, to 82%, resize all layers not checked.
18. Effects>Image Effects>Offset.
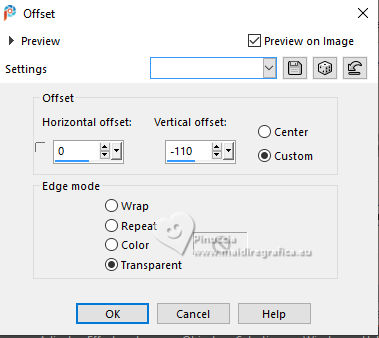
19. Effects>Plugins>Alien Skin Eye Candy 5 Impact - Extrude
foreground color.
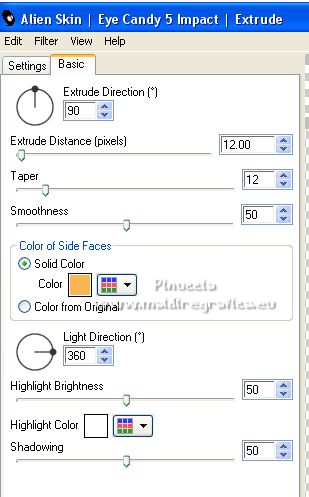
Skip this step if you are using a misted.
20. Effects>Plugins>Mura's Meister - Copies.
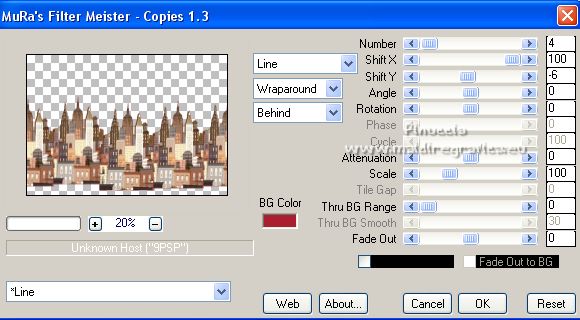
21. Layers>Arrange>Move Down.
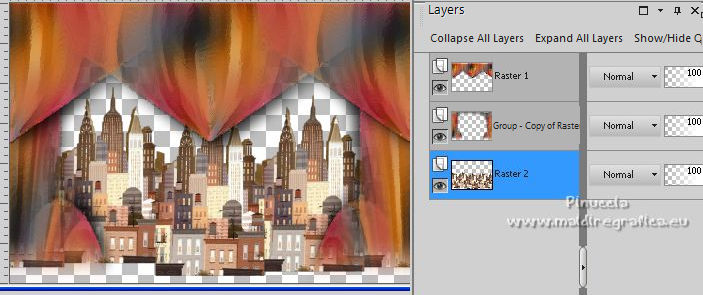
22. Layers>New Mask layer>From image
Open the menu under the source window
and select the mask masck fadesuave (only one time).

Layers>Merge>Merge Group.
23. Effects>3D Effects>Drop Shadow, foreground color,
shadow on new layer checked.
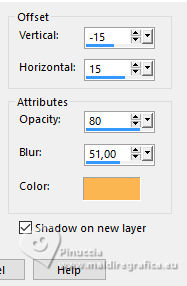
24. On the shadow's layer:
Effects>Plugins>AP Lines - Lines SilverLining.
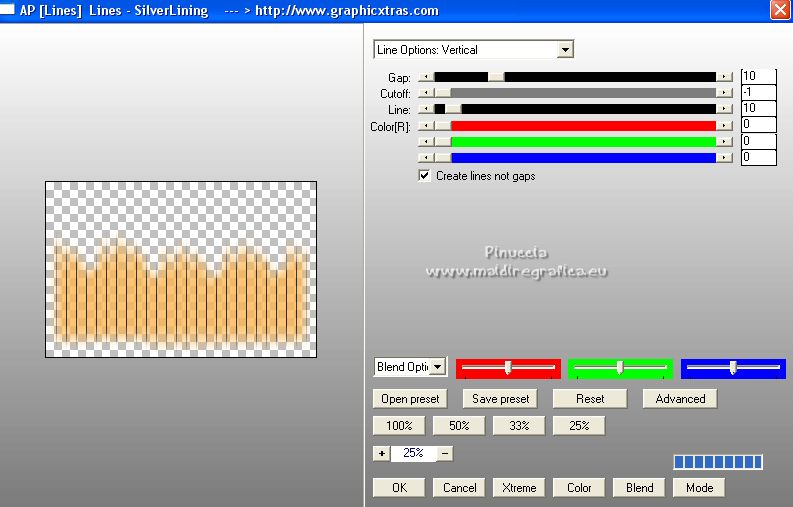
Change the Blend Mode of this layer to Dissolve, or to your liking.
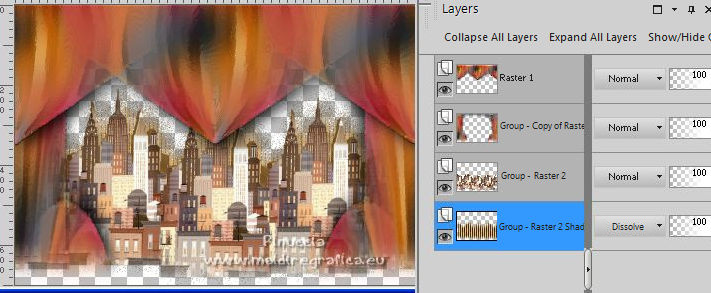
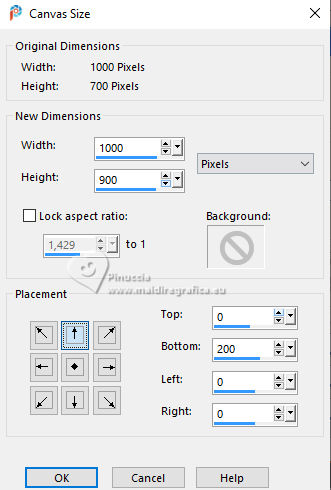
25. Image>Canvas Size - 1000 x 900 pixels
26. Layers>New Raster Layer.
Layers>Arrange>Send to Bottom.
27. Change the settings of your Gradient, angle 0
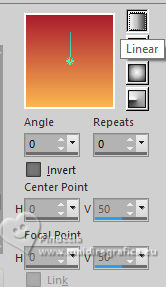
Flood Fill  the layer with your gradient. the layer with your gradient.
28. Layers>Duplicate.
Effects>Texture Effects>Mosaic Glass
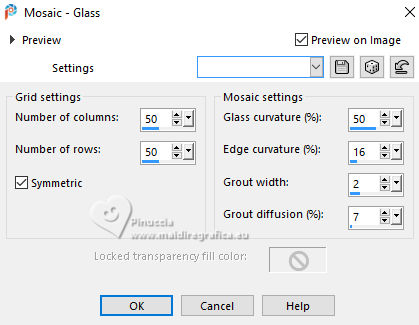
29. Effects>Texture Effects>Mosaic Antique, same settings.

30. Effects>Plugins>FM Tile Tools - Blend Emboss, default settings.
31. Effects>Plugins>Mura's Meister - Perspective Tiling.
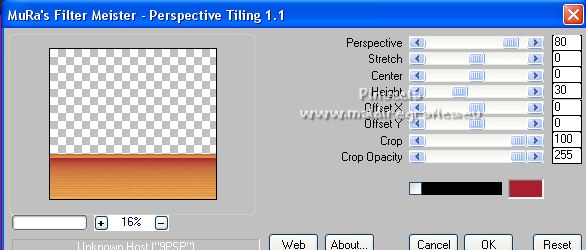
32. Layers>Arrange>Move up - 3 times.
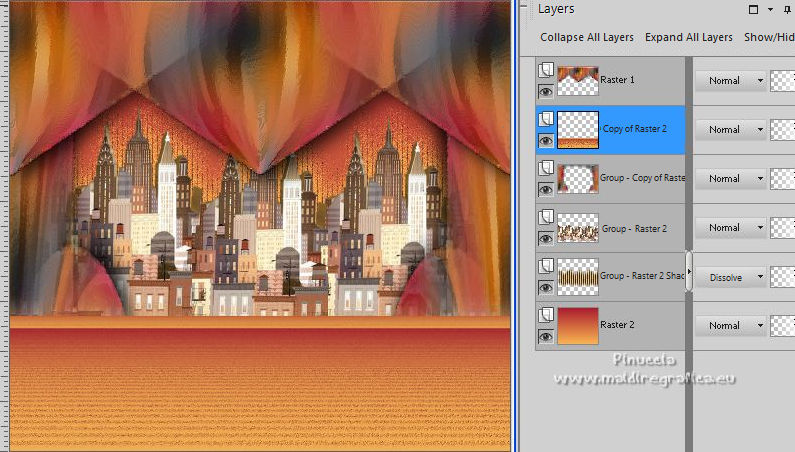
33. Activate your top layer, Raster 1.
Activate again your woman's tube and go to Edit>Copy.
Go back to your work and go to Edit>Paste as new layer.
Move  the tube to the left side, or to your liking. the tube to the left side, or to your liking.
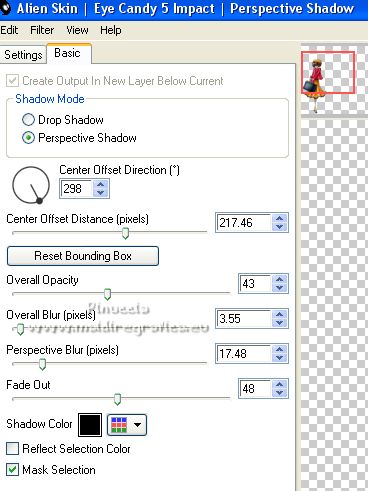
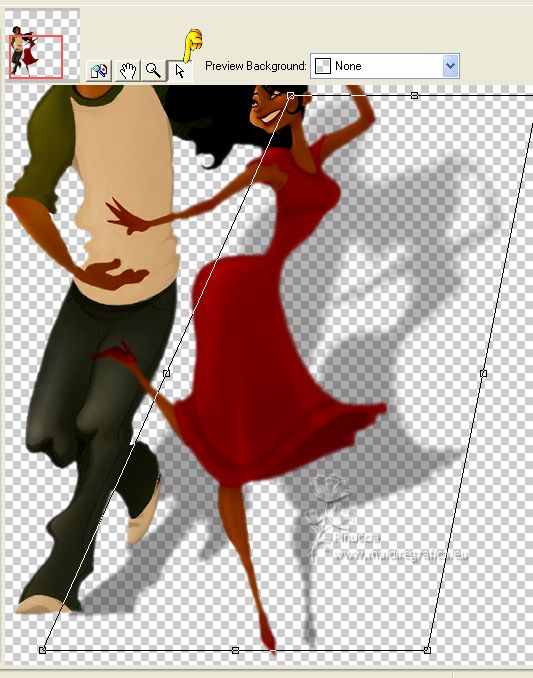
34. Effects>Plugins>Alien Skin Eye Candy 5 Impact - Perspective Shadow.

if you use another tube, you can adjust the shadow, using the tool's grid..
35. Open the tube 5415-luzcristina 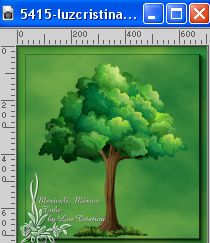
Edit>Copy.
Go back to your work and go to Edit>Paste as new layer.
For my example: Image>Resize, to 75%, resize all layers not checked.
Move  the tube at the upper right, or to your liking. the tube at the upper right, or to your liking.
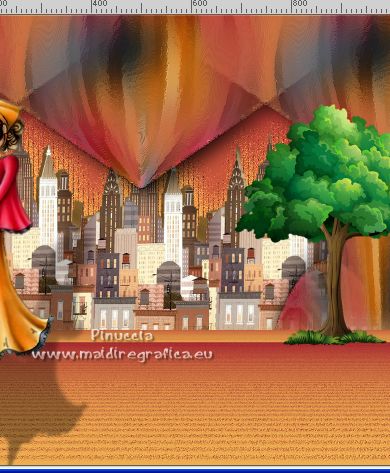
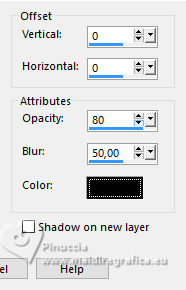
36. Effects>3D Effects>Drop Shadow.
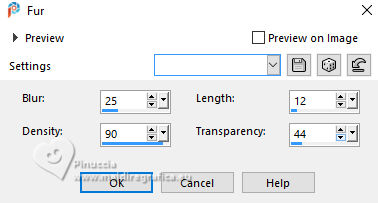
37. Effects>Texture Effects>Fur.
38. Open the tube Tube flores 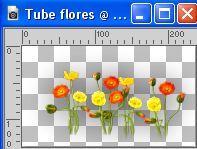
Edit>Copy.
Go back to your work and go to Edit>Paste as new layer.
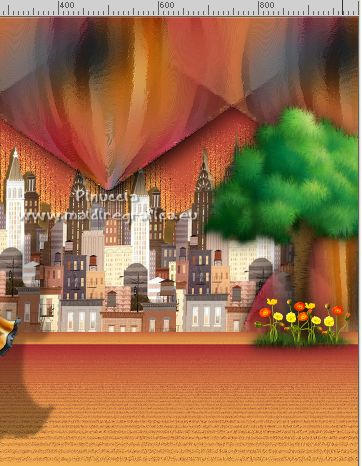
Place  correctly the tube on the tree. correctly the tube on the tree.
39. Open texto 
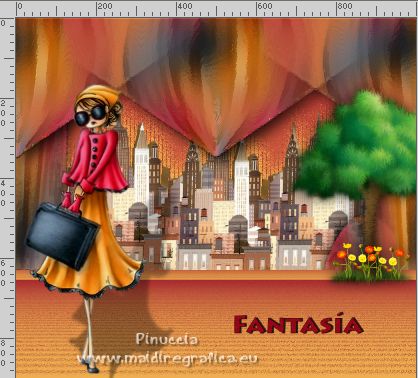
Edit>Copy.
Go back to your work and go to Edit>Paste as new layer.
Move  the text to the right. the text to the right.
39. Image>Add Borders, 3 pixels, symmetric, dark color.
Image>Add Borders, 2 pixels, symmetric, light color.
Image>Add Borders, 50 pixels, symmetric, dark color.
Activate your Magic Wand Tool 
and click in the last border to select it.
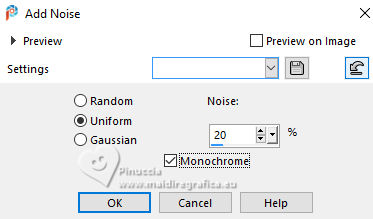
Adjust>Add/Remove Noise>Add Noise.
optional: for my example, I added:
Effects>3D Effects>Inner Bevel.
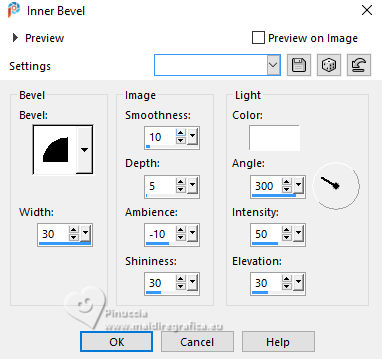
Selections>Select None.
40. Image>Resize, to 86%, resize all layers checked.
Sign your work and save as jpg.
For the tubes of this version thanks Luz Cristina

If you have problems or doubts, or you find a not worked link,
or only for tell me that you enjoyed this tutorial, write to me.
15 Janvier 2025

|

