|
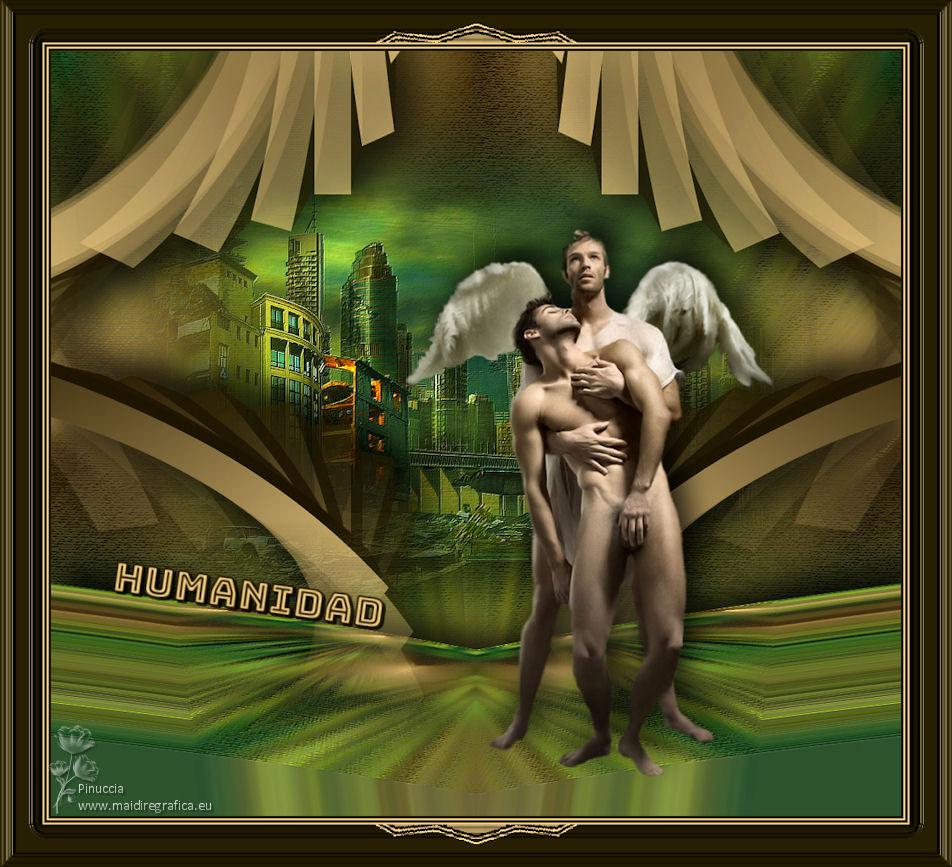
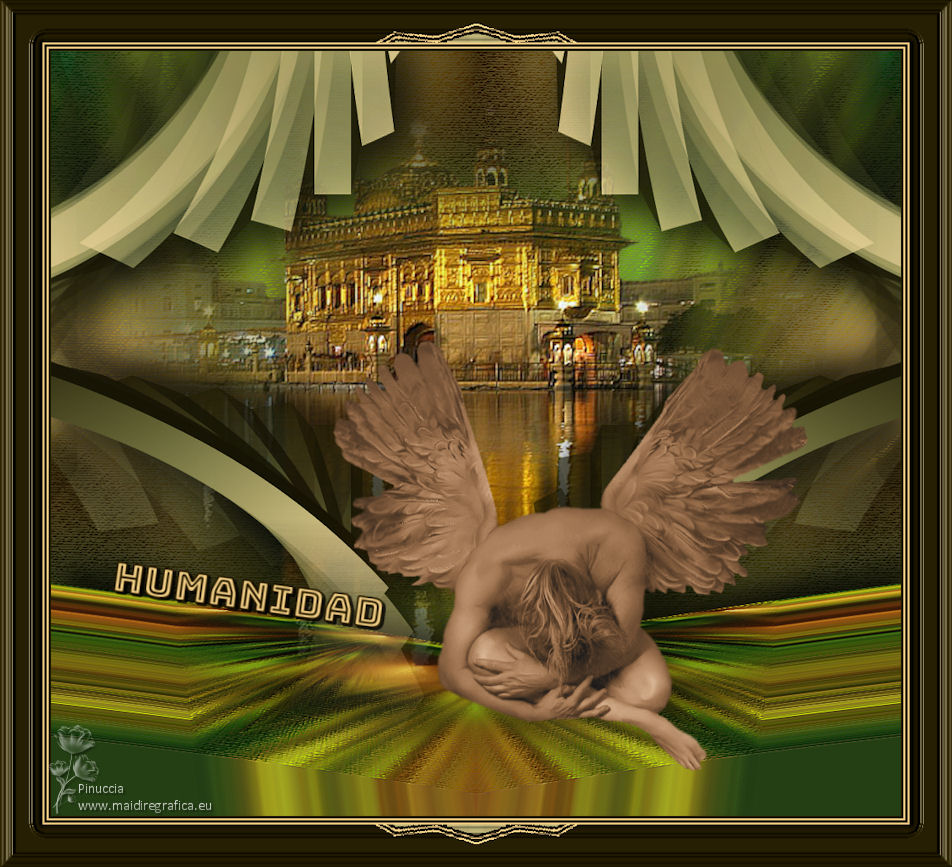
HUMANIDAD


Thanks Luz Cristina for your invitation to translate your tutorials into english

This tutorial, created with PSP9, was translated with PspX9, but it can also be made using other versions of PSP.
Since version PSP X4, Image>Mirror was replaced with Image>Flip Horizontal,
and Image>Flip with Image>Flip Vertical, there are some variables.
In versions X5 and X6, the functions have been improved by making available the Objects menu.
In the latest version X7 command Image>Mirror and Image>Flip returned, but with new differences.
See my schedule here
 French Translation here French Translation here
 Your versions here Your versions here

For this tutorial, you will need:

For the tubes thanks Luz Cristina.
(The links of the tubemakers here).

consult, if necessary, my filter section here
Filters Unlimited 2.0 ici
Alien Skin Eye Candy 5 Impact - Extrude ici
Mura's Meister - Copies ici
Mura's Meister - Perspective Tiling ici
Artistic - Rough Pastel ici
VM Distortion - Kaleidoscope ici
FM Tile Tools - Blend Emboss ici
Filters VM Distortion can be used alone or imported into Filters Unlimited.
(How do, you see here)
If a plugin supplied appears with this icon  it must necessarily be imported into Unlimited it must necessarily be imported into Unlimited

You can change Blend Modes according to your colors.
In the newest versions of PSP, you don't find the foreground/background gradient (Corel_06_029).
You can use the gradients of the older versions.
The Gradient of CorelX here

Open the mask in PSP and minimize it with the rest of the material.
1. Open a new transparent image 1000 x 900 pixels.
2. Set your foreground color to #f2cf87,
and your background color to #221b00.
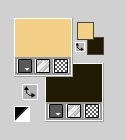
Set your foreground color to a Foreground/Background Gradient, style Sunburst.
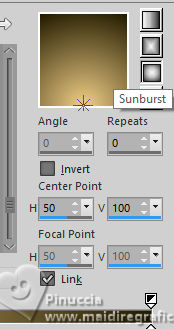
Flood Fill  the transparent image with your Gradient. the transparent image with your Gradient.
3. Layers>New Raster Layer.
Activate your Selection Tool 
(no matter the type of selection, because with the custom selection your always get a rectangle)
clic on the Custom Selection 
and set the following settings.
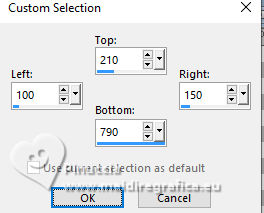
Flood Fill  the layer with your Gradient. the layer with your Gradient.
Selections>Select None.
4. Effects>Plugins>Alien Skin Eye Candy 5 Impact - Extrude.
Solid color and Highlight Color: background color #f2cf87
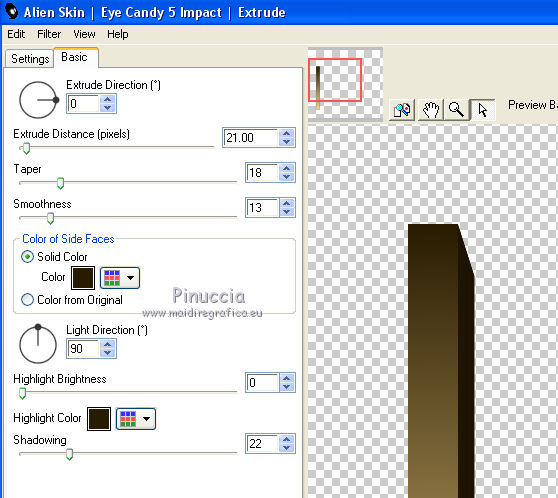
5. Effects>Plugins>Mura's Meister - Copies.
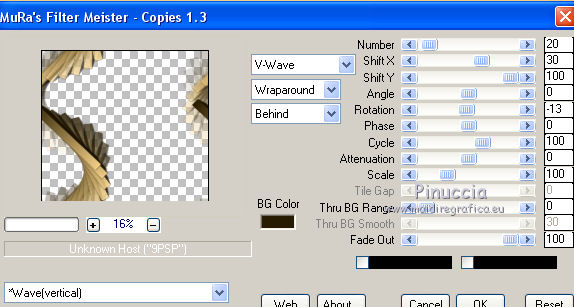
6. Effects>Reflection Effects>Rotating Mirror.

7. Effects>Distortion Effects>Pinch.
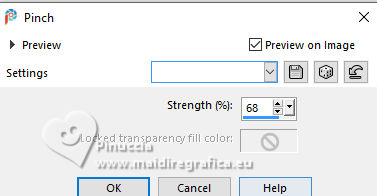
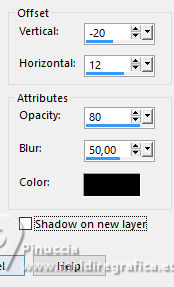
8. Effects>3D Effects>Drop Shadow.
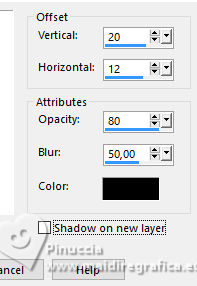
Repeat Drop Shadow, vertical -20.
9. Layers>New Mask layer>From image
Open the menu under the source window and you'll see all the files open.
Select the mask Marge-top fade.
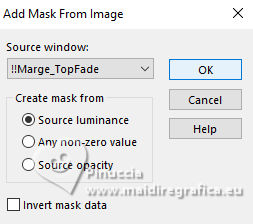
Layers>Duplicate, to apply the mask 2 times
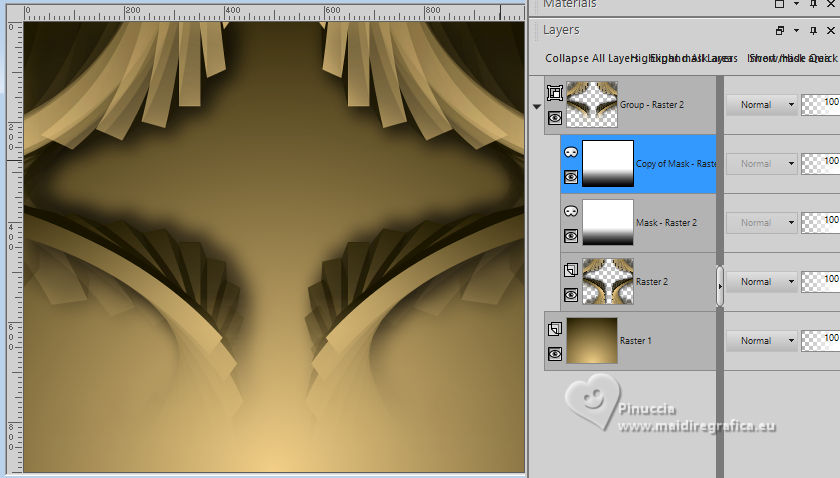
Layers>Merge>Merge Group.
10. Activate the layer Raster 1.
Layers>Duplicate.
Selections>Select All.
Open the misted 6774-Luz Cristina 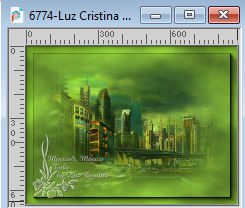
Edit>Copy.
Go back to your work and go to Edit>Paste into Selection.
Selections>Select None.
11. Effects>Image Effects>Seamless Tiling, default settings.

12. Adjust>Blur>Radial Blur.
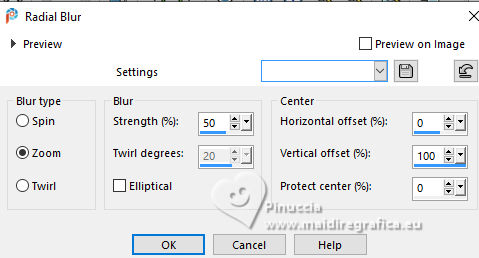
13. Effects>Reflection Effects>Rotating Mirror.

14. Effects>Plugins>Artistics - Rough Pastel
If you use the french version of this filter (the result doesn't change):
Effects>Plugins>Artistiques - Pastels
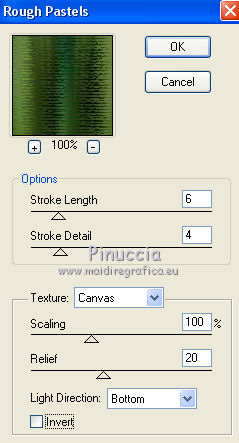 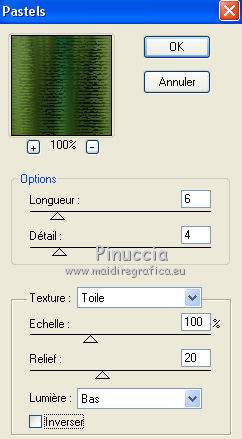
Repeat this Effect another time.
15. Layers>Duplicate.
Image>Mirror>Mirror Vertical (Image>Flip).
16. Effects>Plugins>Mura's Meister - Perspective Tiling.
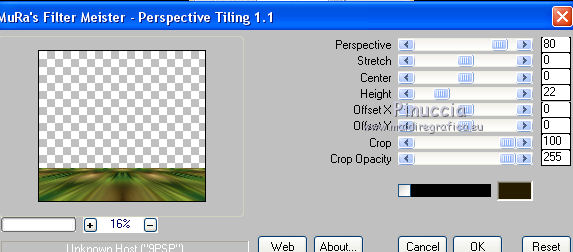
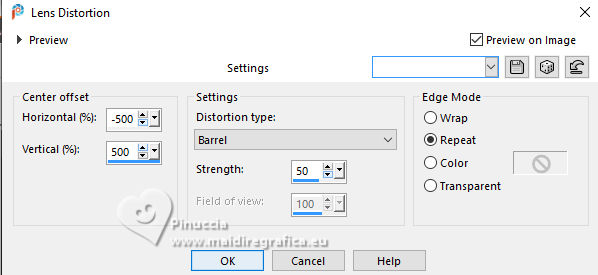
17. Effects>Distortion Effects>Lens Distortion.
18. Effects>Reflection Effects>Rotating Mirror.

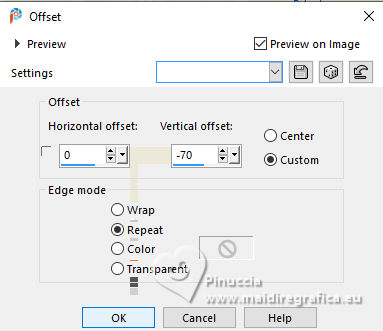
19. Effects>Image Effects>Offset.
20. Effects>Plugins>FM Tile Tools - Blend Emboss, default settings.

21. Effects>3D Effects>Drop Shadow.

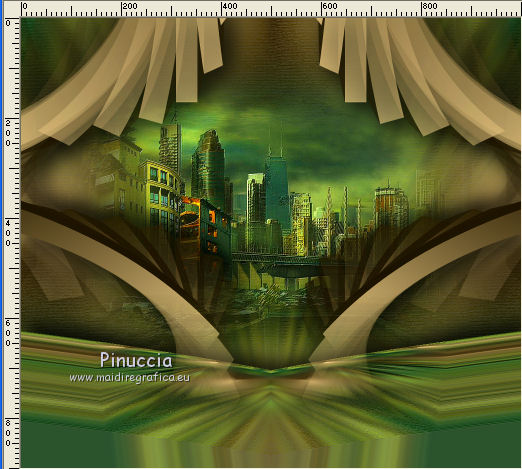
22. Edit>Paste as new layer (the misted is still in memory).
Move  the tube a little higher. the tube a little higher.
23. Activate your top layer.
Open the angel's tube postre2-luzcristina 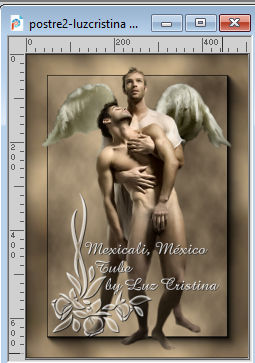
Edit>Copy.
Go back to your work and go to Edit>Paste as new layer.
Move  the tube to the right side. the tube to the right side.
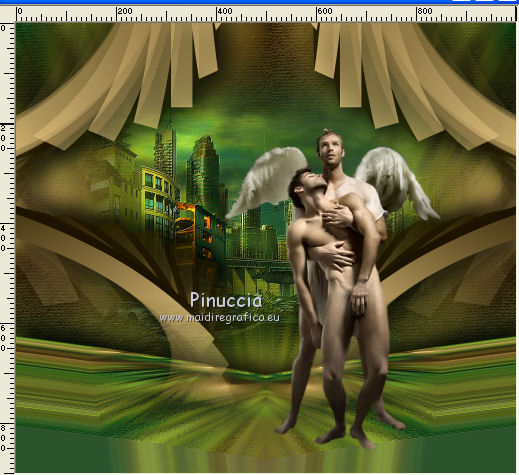
Effects>3D Effects>Drop Shadow, same settings.
24. Open the texte TagHutexto 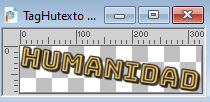
Edit>Copy.
Go back to your work and go to Edit>Paste as new layer.
Move  the text to the left side. the text to the left side.
25. Image>Add Borders, 3 pixels, symmetric, dark color.
Image>Add Borders, 2 pixels, symmetric, light color.
Image>Add Borders, 3 pixels, symmetric, dark color.
Image>Add Borders, 2 pixels, symmetric, light color.
Image>Add Borders, 50 pixels, symmetric, dark color.
26. Activate your Magic Wand Tool 
and click in the last border to select it.
Effects>Plugins>VM Distortion - Kaleidoscope.
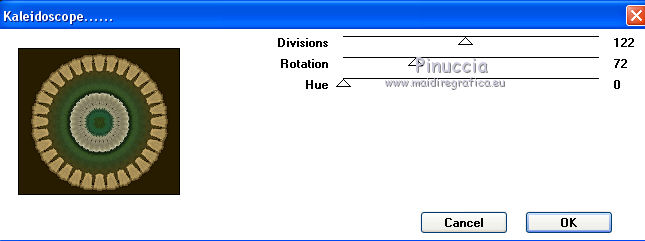
27. Effects>3D Effects>Inner Bevel.
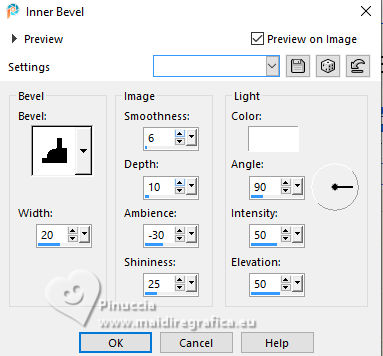
28. Effects>Reflection Effects>Rotating Mirror.

Selections>Select None.
29. Image>Resize, to 85%, resize all layers checked.
Sign your work on a new layer.
30. Layers>Merge>Merge All and save as jpg.
Version with tubes by Luz Cristina
 Vos versioni ici Vos versioni ici

If you have problems or doubts, or you find a not worked link,
or only for tell me that you enjoyed this tutorial, write to me.
19 June 2025

|

