|
MERCHE

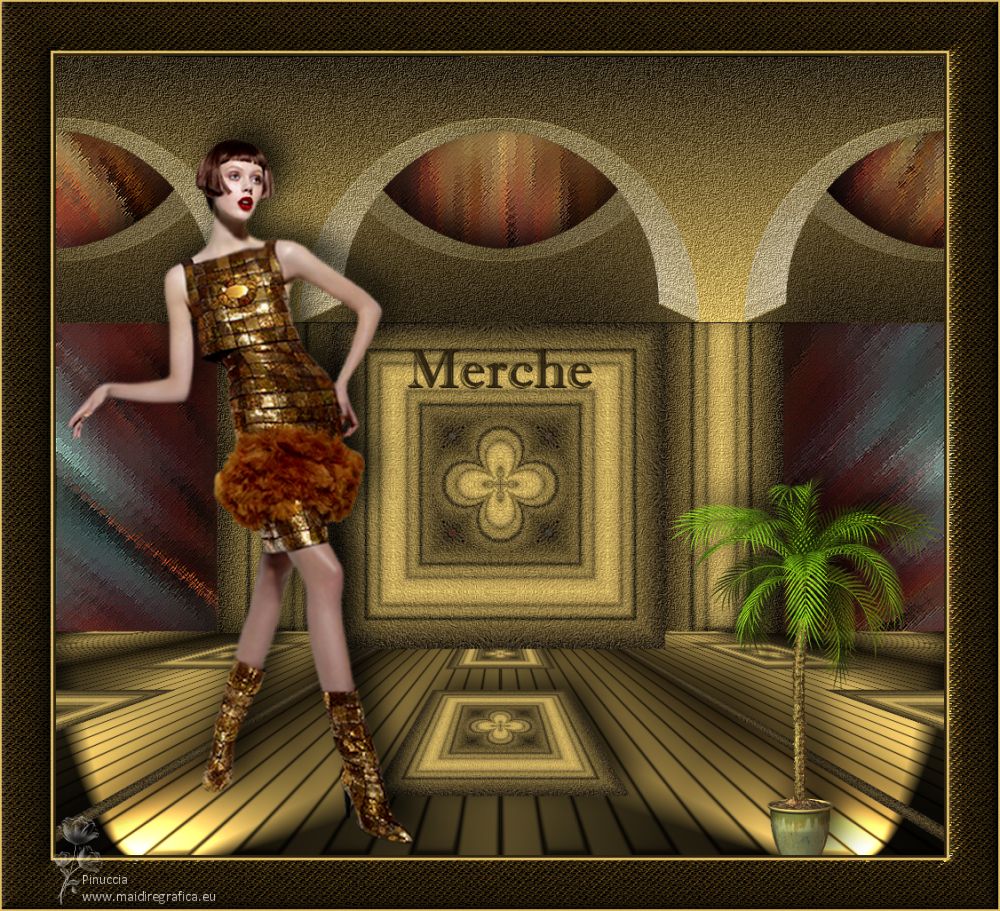
Thanks Luz Cristina for your invitation to translate your tutorials into english

This tutorial, created with PSP9, was translated with Psp2020, but it can also be made using other versions of PSP.
Since version PSP X4, Image>Mirror was replaced with Image>Flip Horizontal,
and Image>Flip with Image>Flip Vertical, there are some variables.
In versions X5 and X6, the functions have been improved by making available the Objects menu.
In the latest version X7 command Image>Mirror and Image>Flip returned, but with new differences.
See my schedule here
 French Translation here French Translation here
 Your versions here Your versions here

For this tutorial, you will need:

(The links of the tubemakers here).
*It is forbidden to remove the watermark from the supplied tubes, distribute or modify them,
in order to respect the work of the authors
consulter, si nécessaire, ma section de filtre here
Filters Unlimited here
Alien Skin Eye Candy 5 Impact - Extrude here
FM Tile Tools - Blend Emboss here
Mura's Meister - Copies, Perspective Tiling, Tone here
Neology - Digital Weaver here
Mehdi 2 - Flat Median here
Brush Strokes - Crosshatch here
Artistic - Rough Pastels here
Filters Neology Toolbox can be used alone or imported into Filters Unlimited.
(How do, you see here)
If a plugin supplied appears with this icon  it must necessarily be imported into Unlimited it must necessarily be imported into Unlimited

You can change Blend Modes according to your colors.
In the newest versions of PSP, you don't find the foreground/background gradient (Corel_06_029).
You can use the gradients of the older versions.
The Gradient of CorelX here

1. Open a new transparent image 1000 x 300 pixels.
2. Set your foreground color to #dfbe66,
and your background color to #2e2411.
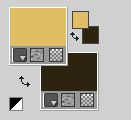
Set your foreground color to a Foreground/Background Gradient, style Linear.
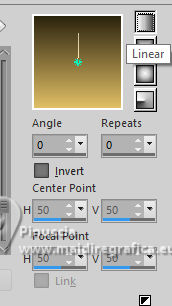
Flood Fill  the transparent image with your gradient. the transparent image with your gradient.
3. Selections>Load/Save Selection>Load Selection from Disk.
Look for and load the selection Medio cir. de Luz C.
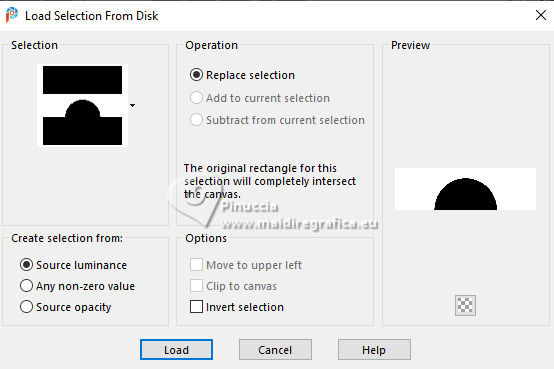
Press CANC on the keyboard 

Selections>Select None.
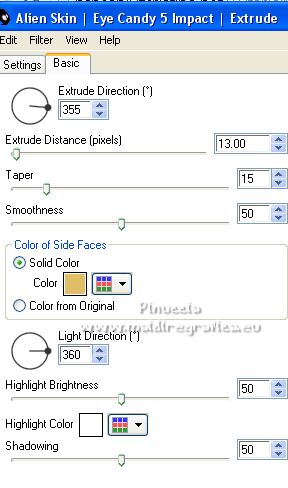
4. Effects>Plugins>Alien Skin Eye Candy 5 Impact - Extrude.
Solid Color: foreground color; Highlight Color #ffffff.
5. Effects>Reflection Effects>Rotating Mirror.

6. Effects>Image Effects>Seamless Tiling.

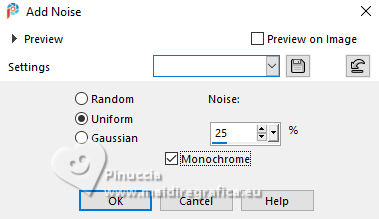
7. Adjust>Add/Remove Noise>Add Noise.
8. Effects>Plugins>FM Tile Tools - Blend Emboss, default settings.

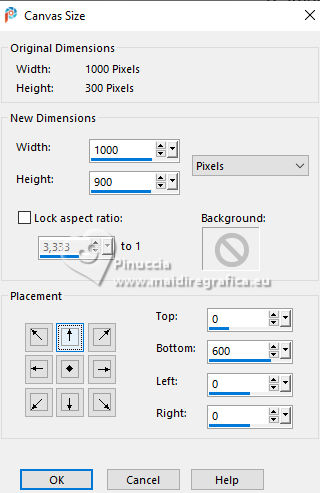
9. Image>Canvas Size - 1000 x 900 pixels.
10. Effects>Plugins>Mura's Meister - Copies.
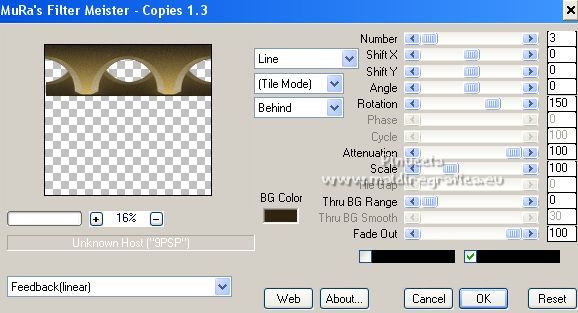
11. Effects>3D Effects>Drop Shadow.
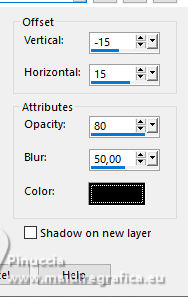
12. Layers>New Raster Layer.
Selection Tool 
(no matter the type of selection, because with the custom selection your always get a rectangle)
clic on the Custom Selection 
and set the following settings.
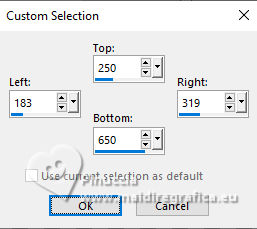
13. Change the settings of your Gradient.
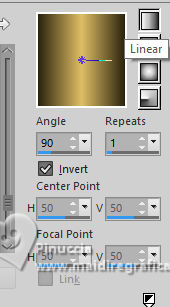
Flood Fill  the selection with your Gradient. the selection with your Gradient.
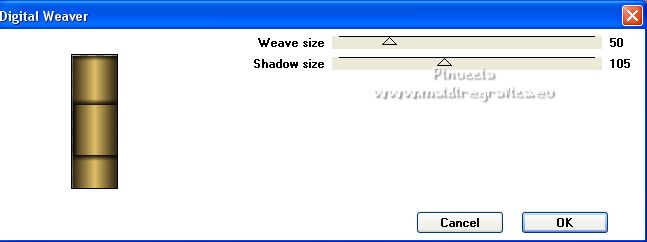
14. Effects>Plugins>Neology - Digital Weaver, default settings.
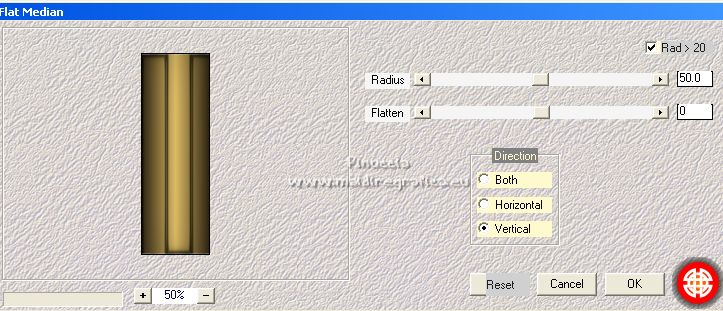
15. Effects>Plugins>Mehdi 2 - Flat Median.
16. Adjust>Add/Remove Noise>Add Noise, same settings.

Selections>Select None.
17. Layers>Arrange>Move Down.
18. Layers>Duplicate.
Image>Mirror>Mirror Horizontal.
Layers>Merge>Merge Down.
19. Effects>Image Effects>Seamless Tiling, same settings.

20. Effects>Plugins>FM Tile Tools - Blend Emboss, default settings.

21. Layers>New Raster Layer.
Layers>Arrange>Send to Bottom.
Flood Fill  the layer with your Gradient. the layer with your Gradient.
22. Layers>Duplicate.
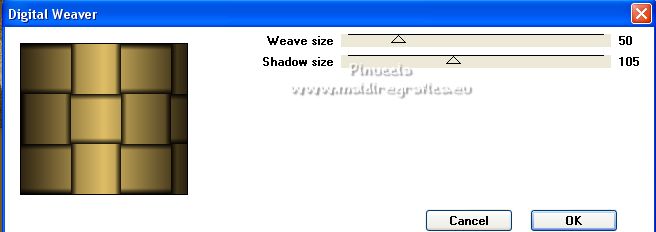
Effects>Plugins>Neology - Digital Weaver, default settings.
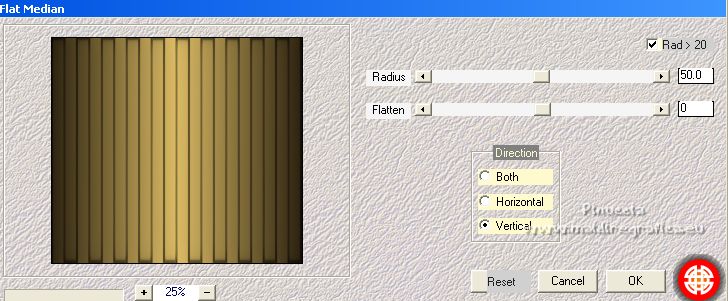
23. Effects>Plugins>Mehdi 2 - Flat Median, same settings.
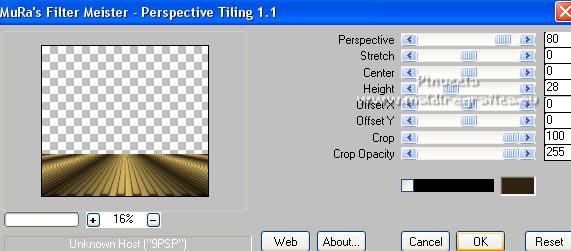
24. Effects>Plugins>Mura's Meister - Perspective Tiling.
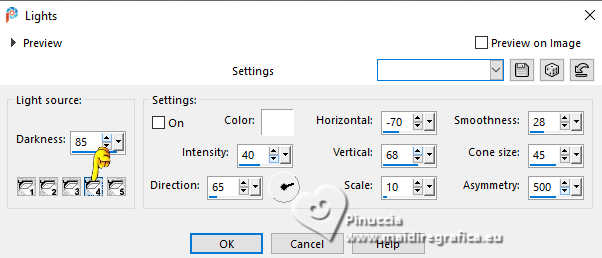
25. Effects>Illumination Effects>Lights.
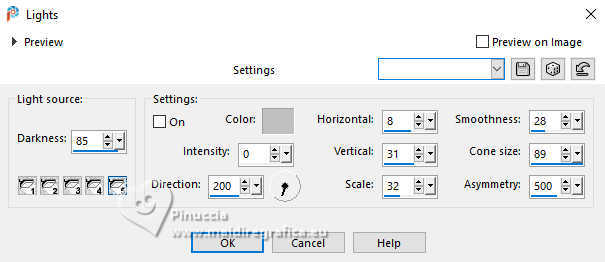
the tutorial shows only the light 5, color #c0c0c0
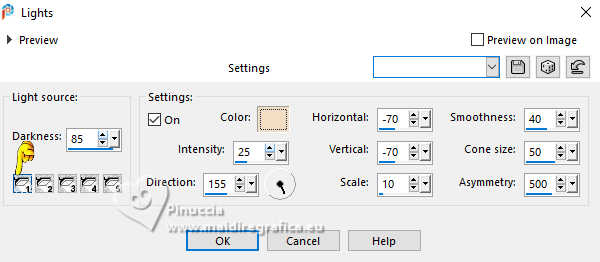
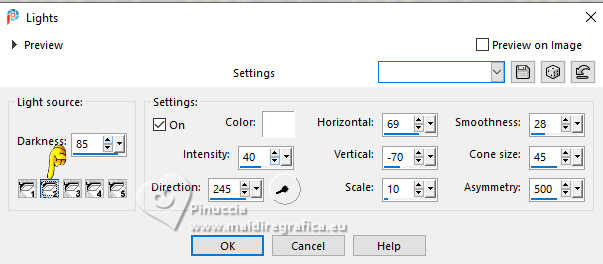
if you don't like your result, here below the settings of the other lights
light 1 color #f3ddc5
light 2 color #ffffff
light 3 color #ffffff
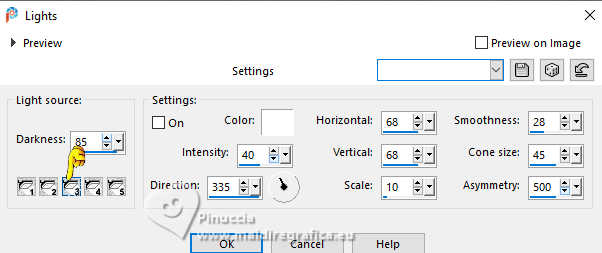
light 4
26. Image>Mirror>Mirror Horizontal.
Effects>Reflection Effects>Rotating Mirror, same settings.
27. Activate the layer Raster 2.
Layers>Duplicate.
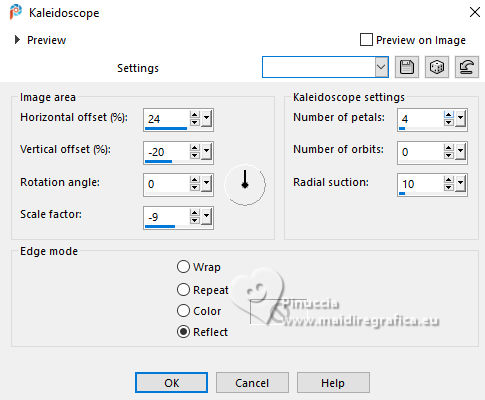
28. Effects>Reflection Effects>Kaleidoscope.
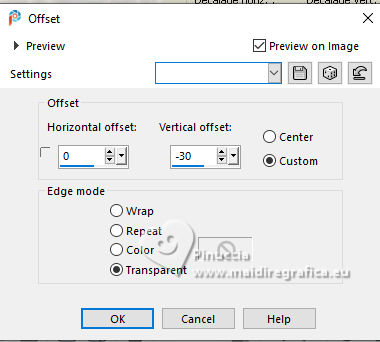
29. Effects>Image Effects>Offset.
30. Image>Resize, to 108%, resize all layers not checked.
31. Layers>Duplicate.
Effects>Plugins>Mura's Meister - Perspective Tiling, same settings.
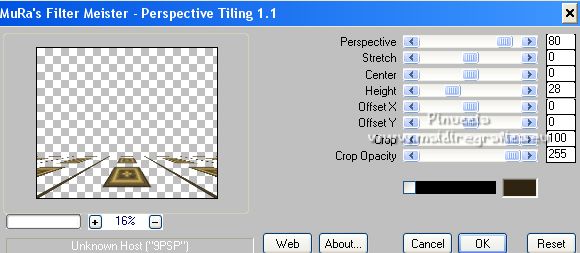
32. Effects>3D Effects>Drop Shadow, at your choise; I used the settings in memory
Layers>Arrange>Move Down.
33. Activate the layer Raster 3.
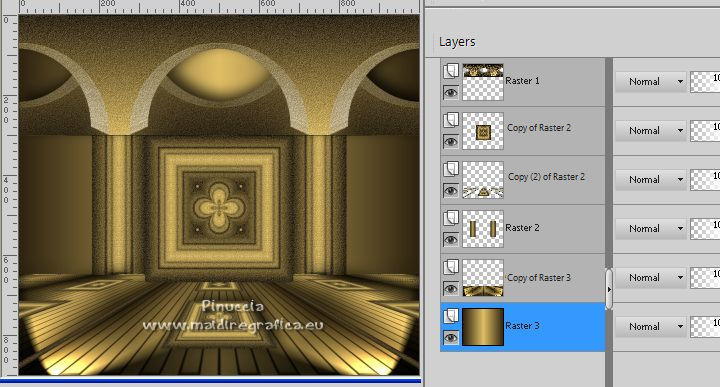
Open the fractal cheCimfractal2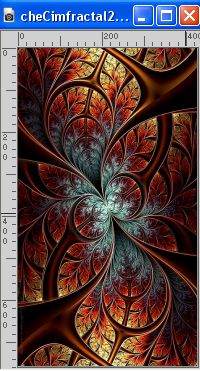
Edit>Copy.
Go back to your work and go to Edit>Paste as new layer.
34. Effects>Image Effects>Seamless Tiling, same settings.
35. Adjust>Blur>Radial Blur.
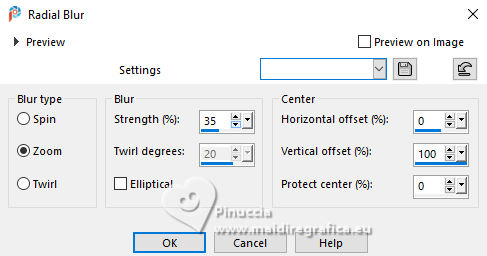
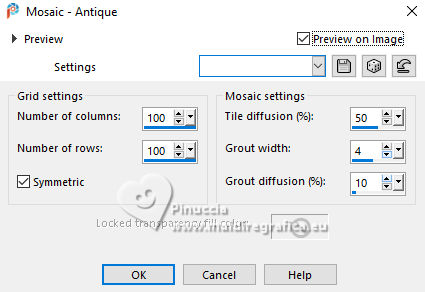
36. Effects>Texture Effects>Mosaic Antique
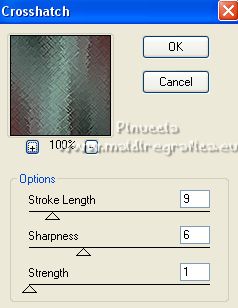
37. Effects>Plugins>Brush Strokes - Crosshatch.
38. Effects>Plugins>FM Tile Tools - Blend Emboss, default settings.
39. Activate your top layer.
Open your woman's tube 6222-Luz Cristina 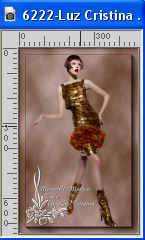
Edit>Copy.
Go back to your work and go to Edit>Paste as new layer.
Image>Resize, to 115%, resize all layers not checked.
Move  the tube to the left the tube to the left
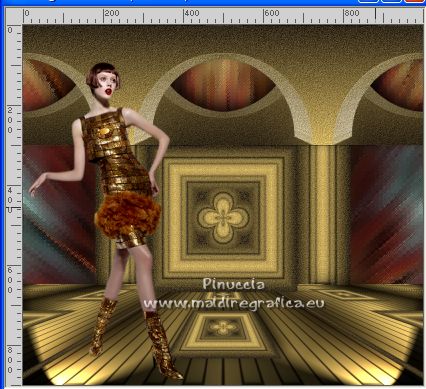
Effects>3D Effects>Drop Shadow, at your choice, for me the settings in memory.

40. Open le déco R11-Garden PotPlant 2014-145 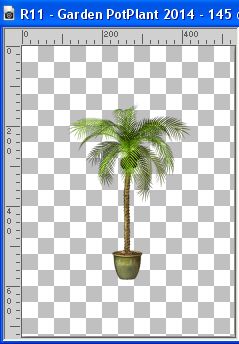
Edit>Copy.
Go back to your work and go to Edit>Paste as new layer.
Move  the tube at the bottom right. the tube at the bottom right.
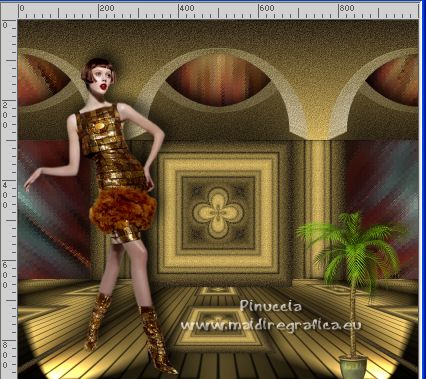
Effects>3D Effects>Drop Shadow, at your choice, for me the settings in memory.
41. Open the text texto 
Edit>Copy.
Go back to your work and go to Edit>Paste as new layer.
Place  the text in the center. the text in the center.
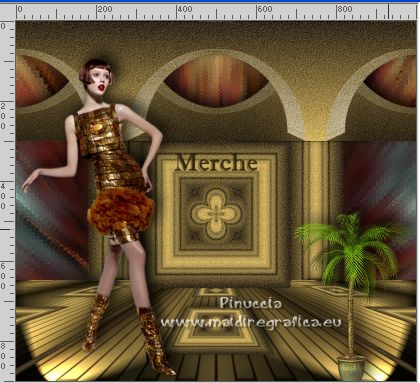
40. Image>Add Borders, 3 pixels, symmetric, dark color.
Image>Add Borders, 2 pixels, symmetric, light color.
Image>Add Borders, 55 pixels, symmetric, dark color.
Activate your Magic Wand Tool 
et click in the last border to select it.
41. Effects>Plugins>Mura's Meister - Tone, default settings.
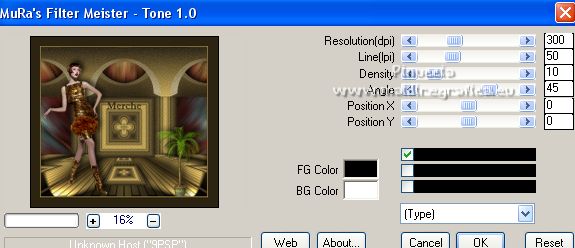
42. Effects>Plugins>Artistic - Rough Pastels.
if you use the french version of this filter (the result doesn't change)
Effects>Plugins>Artistiques>Pastels
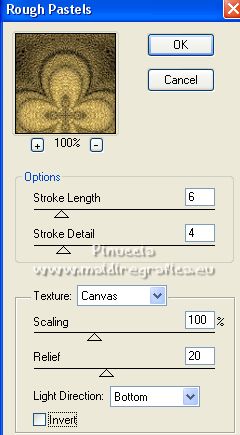 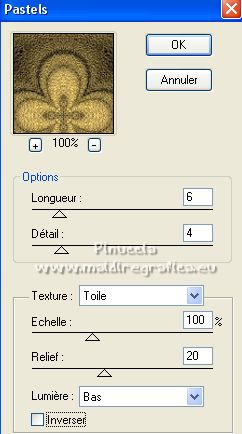
Adjust>Sharpness>Sharpen.
43. Effects>3D Effects>Inner Bevel.
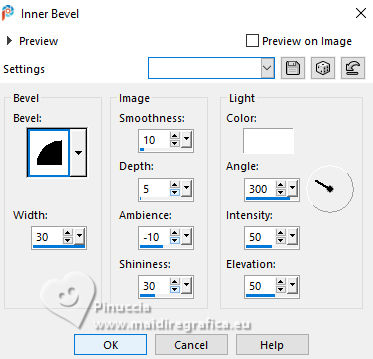
Selections>Select None.
Image>Add Borders, 2 pixels, symmetric, light color.
Image>Resize, 88%, resize all layers checked.
44. Sign your work and save as jpg.
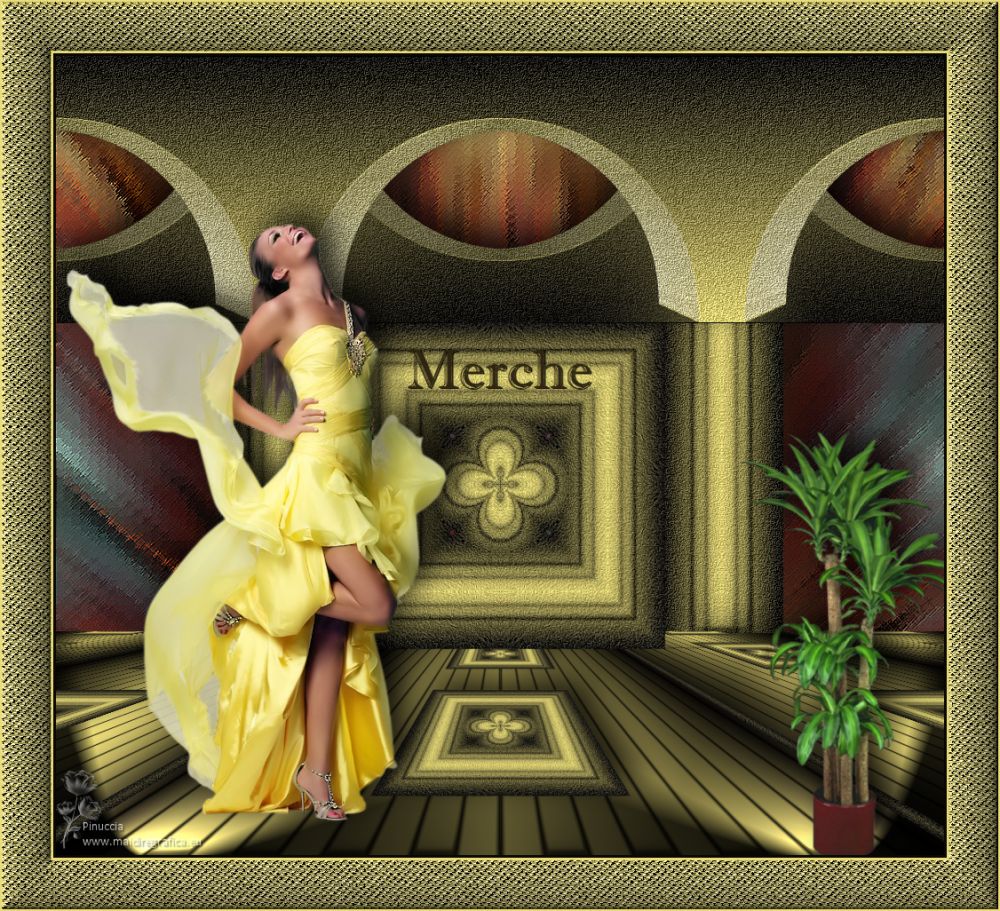
For the tubes of this version thanks Beatriz and Luz Cristina

If you have problems or doubts, or you find a not worked link,
or only for tell me that you enjoyed this tutorial, write to me.
15 Janvier 2023

|

