|
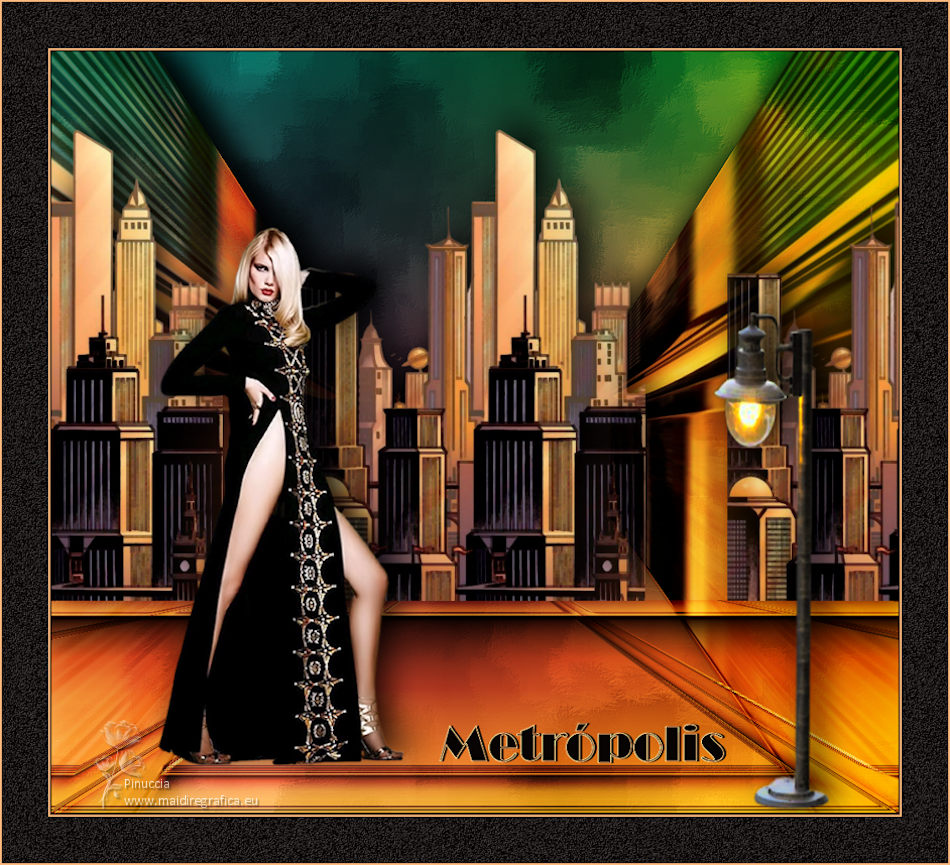
TUTORIAL METROPOLIS


Thanks Luz Cristina for your invitation to translate your tutorials into english

This tutorial, created with PSP2022, was translated with PspX7, but it can also be made using other versions of PSP.
Since version PSP X4, Image>Mirror was replaced with Image>Flip Horizontal,
and Image>Flip with Image>Flip Vertical, there are some variables.
In versions X5 and X6, the functions have been improved by making available the Objects menu.
In the latest version X7 command Image>Mirror and Image>Flip returned, but with new differences.
See my schedule here
 French Translation here French Translation here
 Your versions here Your versions here

For this tutorial, you will need:

Tubes by Luz Cristina .
(The links of the tubemakers here).
*It is forbidden to remove the watermark from the supplied tubes, distribute or modify them,
in order to respect the work of the authors

consult, if necessary, my filter section here
Filters Unlimited 2.0 here
Filter Factory Gallery S - itsa Edge thing here
Filter Factory Gallery M - Ambrosia here
FM Tile Tools - Saturation Emboss, Blend Emboss here
Flaming Pear - Flexify 2 here
Mura's Meister - Perspective Tiling here
AAA Frames - Foto Frame here
Filters Factory Gallery can be used alone or imported into Filters Unlimited.
(How do, you see here)
If a plugin supplied appears with this icon  it must necessarily be imported into Unlimited it must necessarily be imported into Unlimited

You can change Blend Modes according to your colors.
In the newest versions of PSP, you don't find the foreground/background gradient (Corel_06_029).
You can use the gradients of the older versions.
The Gradient of CorelX here

1. Open a new transparent image 1000 x 900 pixels.
2. Set your foreground color to #f9b77d,
and your background color to #080403.
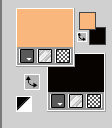
Set your foreground color to a Foreground/Background Gradient, style Linear.
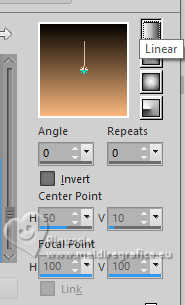
Flood Fill  the transparent image with your Gradient. the transparent image with your Gradient.
3. Layers>Duplicate.
Effects>Plugins>AAA Frames - Foto Frame.
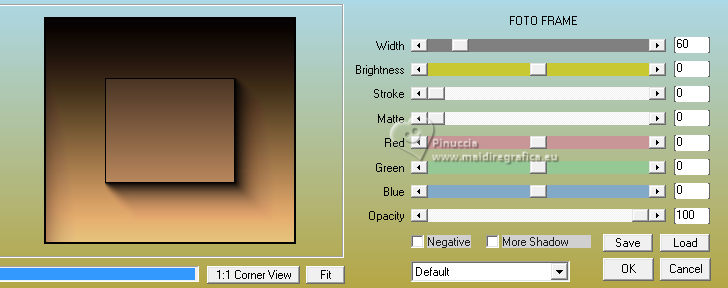
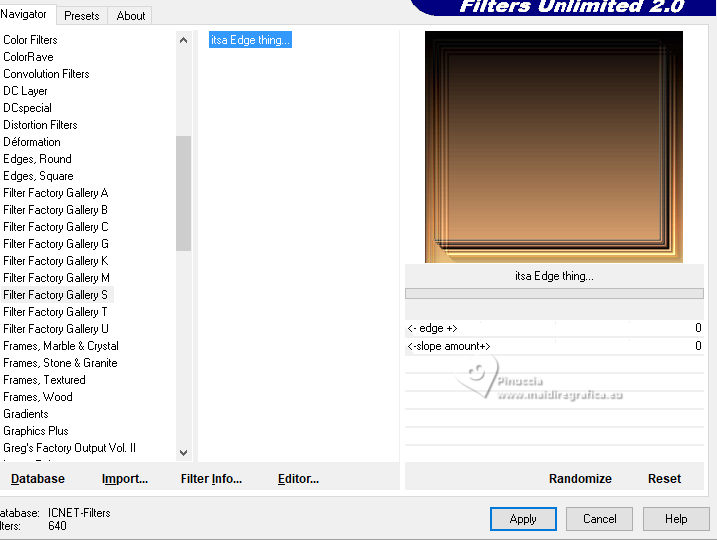
4. Effects>Plugins>Filters Unlimited 2.0 - Filter Factory Gallery S - Itsa edge thing, default settings
5. Effects>Plugins>Mura's Meister - Perspective Tiling.

Change the Blend Mode of this layer to Hard Light.
6. Activate the layer Raster 1.
Layers>Duplicate.
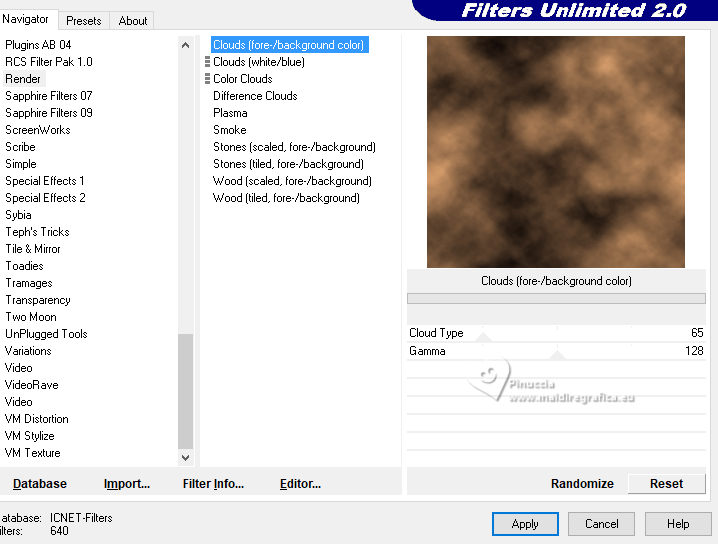
7. Effects>Plugins>Filters Unlimited 2.0 - Render, default settings.
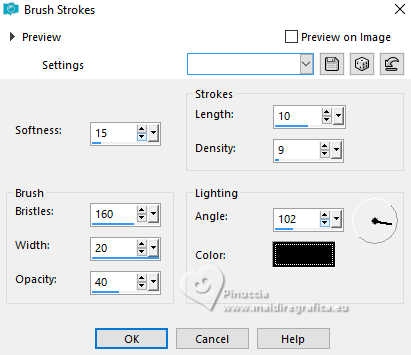
8. Effects>Art Media Effects>Brush Strokes.
9. Effects>Plugins>FM Tile Tools - Blend Emboss, default settings.

Change the Blend Mode of this layer to Hard Light.

10. Activate the layer Raster 1.
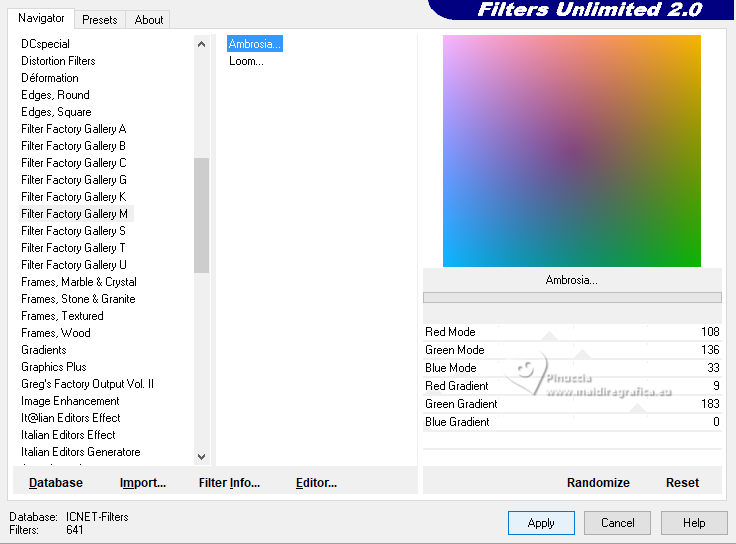
Effects>Plugins>Filters Unlimited 2.0 - Filter Factory Gallery M - Ambrosia, default settings
Image>Mirror>Mirror Vertical (Image>Flip).
11. Activate your top Layer, Copy of Raster 1.
Open the tube Tube-luz-cristina 
Edit>Copy.
Go back to your work and go to Edit>Paste as new layer.
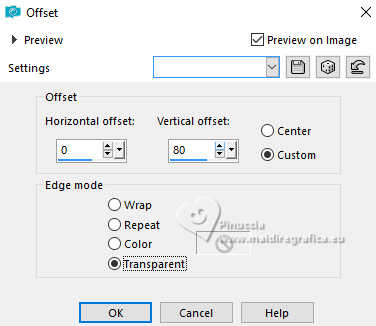
12. Effects>Image Effects>Offset.
13. Effects>Image Effects>Seamless Tiling.

14. Layers>Duplicate.
Image>Arrange>Move Down - 2 times.
Change the Blend Mode of this layer to Hard Light.
15. Effects>Plugins>Flaming Pear - Flexify 2.
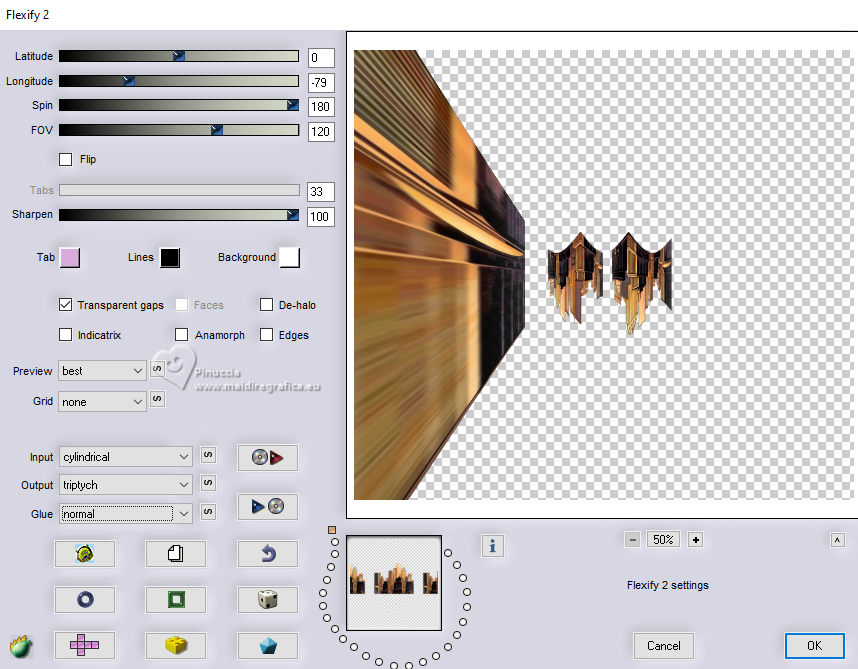
Result

Note by Luz Cristina:
In your version you can erase the central part, according to your tube.
Your can also colorize my house's tube.
The shape Flexify gives it was based on the shape of my tube,
I don't know what shape it gives you using another tube.

18. Effects>Reflection Effects>Rotating Mirror.

19. Effects>Plugins>FM Tile Tools - Blend Emboss, default settings.

Adjust>Sharpness>Sharpen.
20. Activate the layer with the sky, Copy of Raster 1.
Adjust>Brightness and Contrast>Brightness and Contrast.
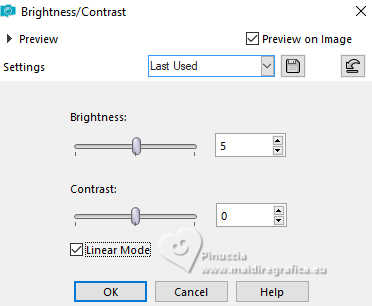
if the sky is too dark as mine:
Adjust>Brightness and Contrast>Brightness and Contrast.
21. On the layers of the houses and of Flexify Filter.
Effects>3D Effects>Drop shadow, at your choice; for me.

22. Open the tube 6114-luzcristina 
Edit>Copy.
Go back to your work and go to Edit>Paste as new layer.
I resized to 90%.
Move  the tube to the right. the tube to the right.
Effects>3D Effects>Drop shadow, same settings.
23. Open the woman's tube 7664-Luz Cristina 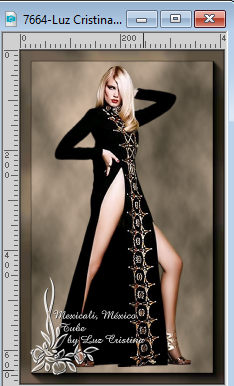
Edit>Copy.
Go back to your work and go to Edit>Paste as new layer.
I resized to 105%.
Move  the tube to the left. the tube to the left.
Effects>3D Effects>Drop Shadow, same settings.
24. Open the text texto 
Edit>Copy.
Go back to your work and go to Edit>Paste as new layer.
Move  the tube to your liking. the tube to your liking.
The text has its drop shadow.
25. Your tag and the layers.
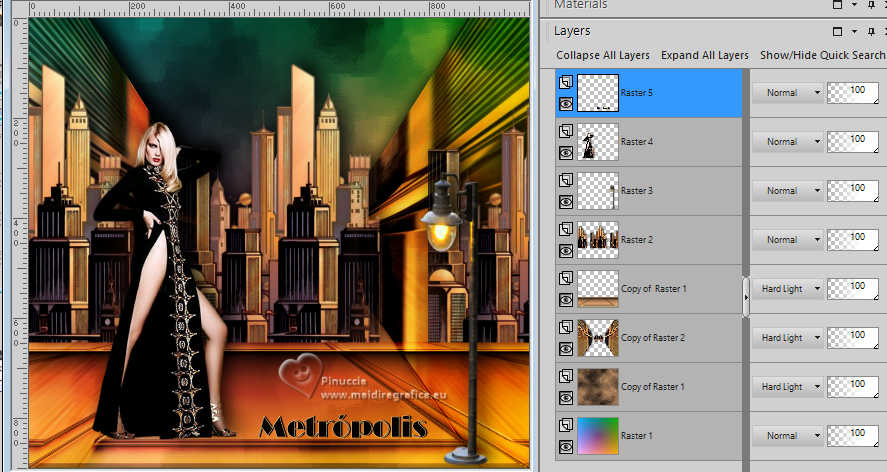
26. Image>Add Borders, 2 pixels, symmetric, dark color.
Image>Add Borders, 2 pixels, symmetric, light color.
Image>Add Borders, 55 pixels, symmetric, dark color.
27. Activate your Magic Wand Tool 
and click in the last border to select it.
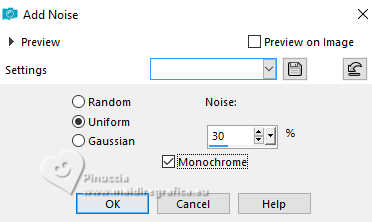
28. Adjust>Add/Remove Noise>Add Noise.
29. Effects>Plugins>FM Tile Tools - Blend Emboss, default settings.

Selections>Select None.
30. Image>Add Borders, 2 pixels, symmetric, light color.
Image>Resize, to 84%, resize all layers not checked.
Sign your work and save as jpg.


If you have problems or doubts, or you find a not worked link,
or only for tell me that you enjoyed this tutorial, write to me.
20 March 2025

|

