|
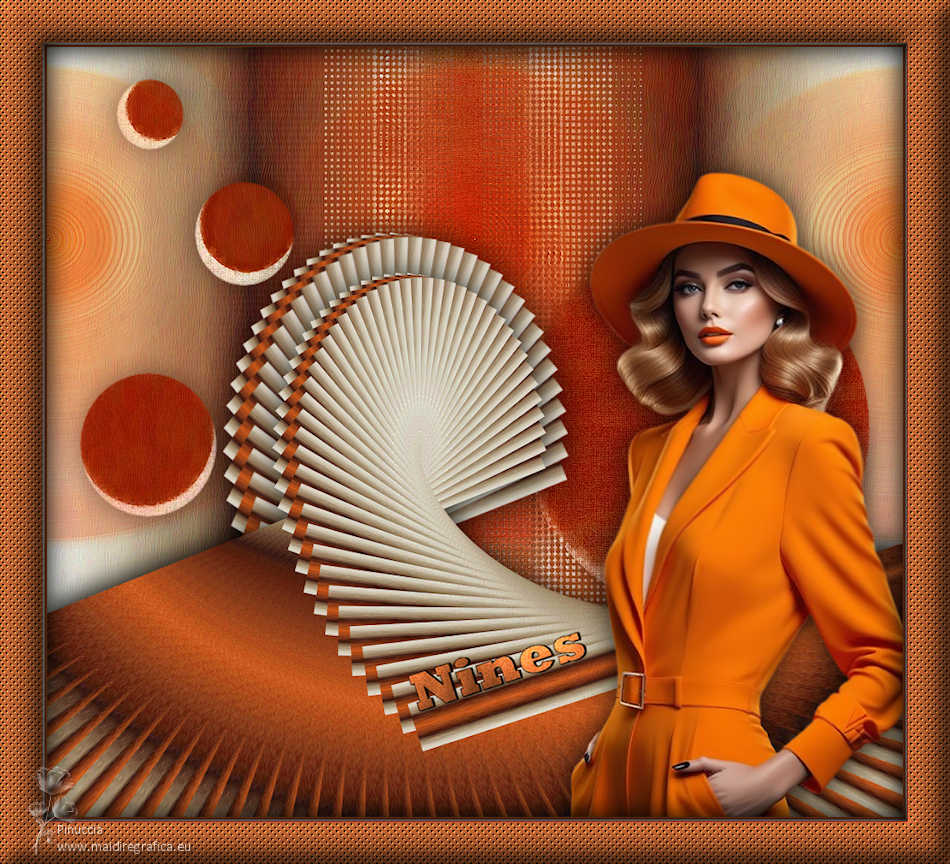
NINES


Thanks Luz Cristina for your invitation to translate your tutorials into english

This tutorial, created with PSP2022, was translated with PspX7, but it can also be made using other versions of PSP.
Since version PSP X4, Image>Mirror was replaced with Image>Flip Horizontal,
and Image>Flip with Image>Flip Vertical, there are some variables.
In versions X5 and X6, the functions have been improved by making available the Objects menu.
In the latest version X7 command Image>Mirror and Image>Flip returned, but with new differences.
See my schedule here
 French Translation here French Translation here
 Your versions here Your versions here

For this tutorial, you will need:

Material by Luz Cristina.
(The links of the tubemakers here).
*It is forbidden to remove the watermark from the supplied tubes, distribute or modify them,
in order to respect the work of the authors

consult, if necessary, my filter section here
Virtual Painter 4 here
Mura's Meister - Copies here
Mura's Meister - Tone here
FM Tile Tools - Blend Emboss here

You can change Blend Modes according to your colors.

Copy the Gradient in the Gradients Folder.
Open the mask in PSP and minimize it with the rest of the material.
1. Open a new transparent image 1000 x 900 pixels.
2. Set your foreground color to Gradient and select the gradient Gradiente_metallic_rose, style Linear.
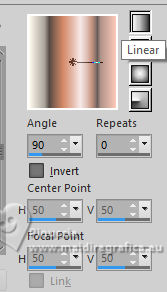
Flood Fill  the trasparent image with your Gradient. the trasparent image with your Gradient.
3. Effects>Reflection Effects>Rotating Mirror.

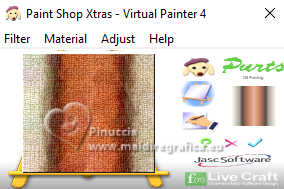
4. Effects>Plugins>Virtual Painter 4
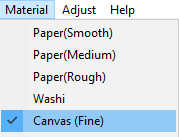
Filter: oil painting - Material - Canvas fine
5. Effects>Plugins>FM Tile Tools - Blend Emboss, default settings.

6. Layers>Duplicate.
7. Effects>Reflection Effects>Kaleidoscope.
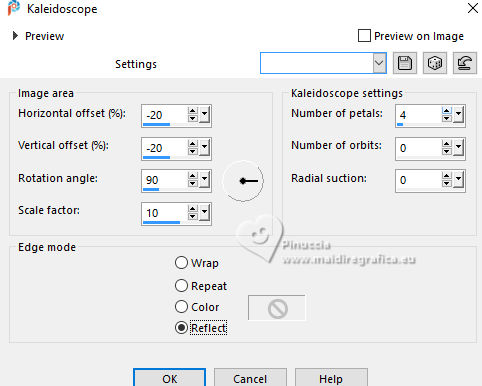
8. Effects>Geometric Effects>Perspective Horizontal
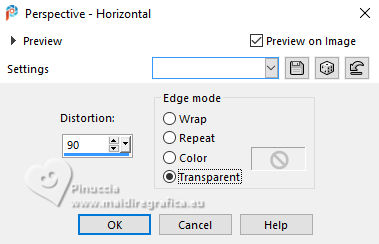
9. Image>Mirror>Mirror horizontal (Image>Mirror).
Repeat Effects>Geometric Effects>Perspective Horizontal, same settings.
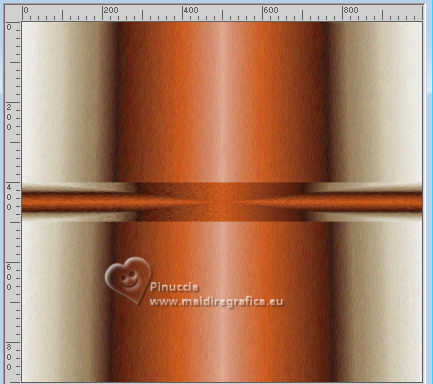
10. Effects>Distortion Effects>Pinch

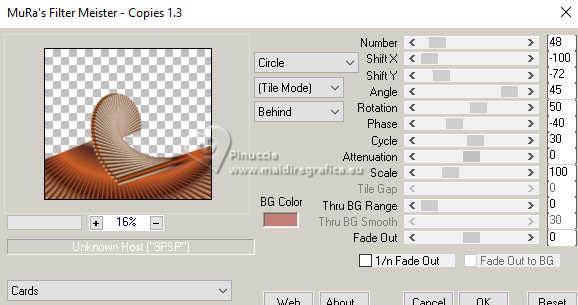
11. Effects>Plugins>Mura's Meister - Copies.
12. Effects>3D Effects>Drop Shadow.
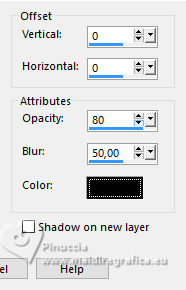
13. Layers>Duplicate.
Layers>Arrange>Move Down.
14. Effects>Geometric Effects>Spherize.
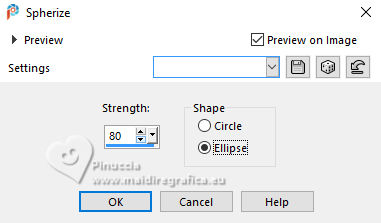
15. Set your foreground color to #aa572a 
Layers>New Raster Layer.
Flood Fill  the layer with you foreground color. the layer with you foreground color.
Layers>Arrange>Move Down.
16. Layers>New Mask layer>From image
Open the menu under the source window and you'll see all the files open.
Select the mask Masck.
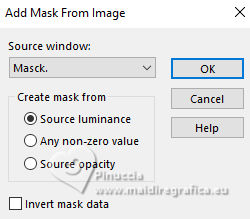
Layers>Merge>Merge Group.
17. Effects>Plugins>Virtual Painter 4, same settings.
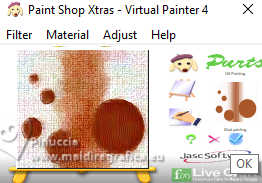
18. Effects>Image Effects>Offset.
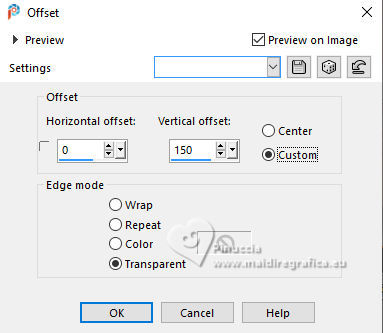
19. Effects>3D Effects>Drop Shadow

20. Selection Tool 
(no matter the type of selection, because with the custom selection your always get a rectangle)
clic on the Custom Selection 
and set the following settings.
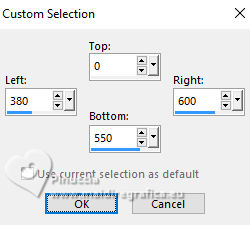
21. Edit>Copy.
Selections>Select None.
Edit>Paste as new layer.
22. Effects>Image Effects>Offset, same settings.

23. Adjust>Blur>Radial Blur.
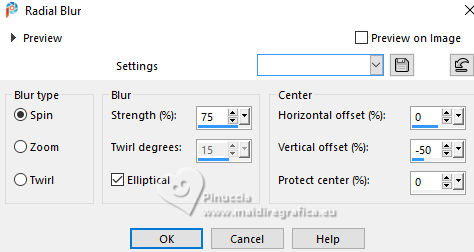
24. Effects>Image Effects>Seamless Tiling .

25. Change the Blend Mode of this layer to Hard Light.
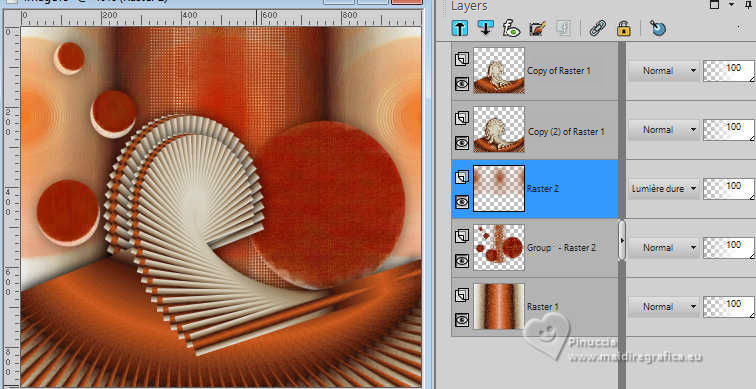
26. Effects>Edge Effects>Enhance.
27. Activate your top layer.
Open the tube 8496-LuzCristina 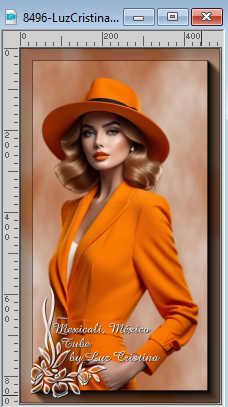
Edit>Copy.
Go back to your work and go to Edit>Paste as new layer.
Move  the tube to the right. the tube to the right.
Effects>3D Effects>Drop Shadow, at your choice.
28. Open the text Texto 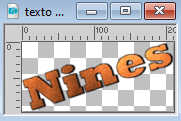
Edit>Copy.
Go back to your work and go to Edit>Paste as new layer.
Move  the text to your liking. the text to your liking.
29. Image>Add Borders, 3 pixels, symmetric, foreground color #aa572a.
Image>Add Borders, 2 pixels, symmetric, color #d8d7d1.
Image>Add Borders, 50 pixels, symmetric, foreground color #aa572a.
Activate your Magic Wand Tool
and click in the last border to select it.
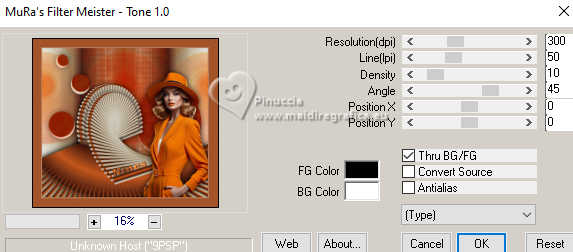
30. Effects>Plugins>Mura's Meister - Tone.
31. Effects>Plugins>FM Tile Tools - Blend Emboss, default settings.

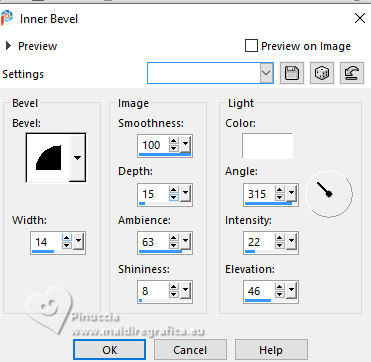
32. Effects>3D Effects>Inner Bevel.
33. Effects>3D Effects>Drop Shadow.
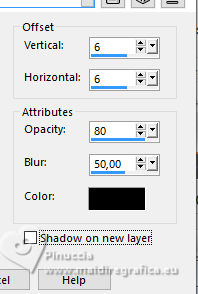
Repeat Drop Shadow, vertical and horizontal -6.
Selections>Select None.
33. Image>Resize, 85%, resize all layers checked.
Sign your work and save as jpg.
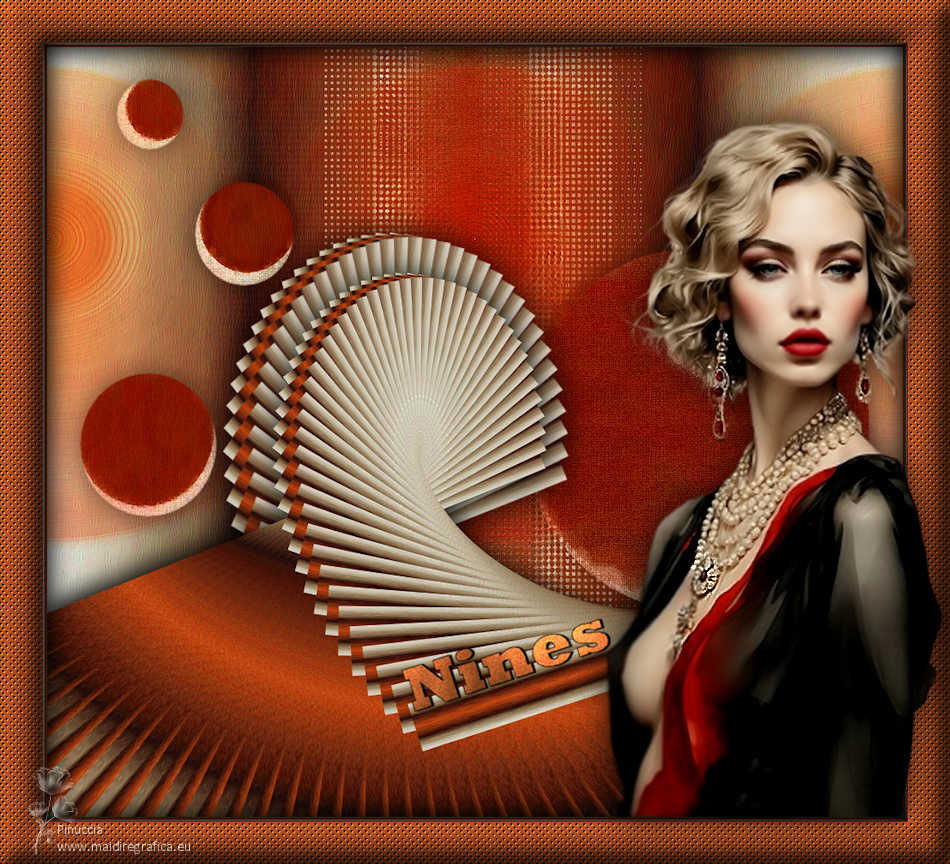
Versions with tubes by Luz Cristina



If you have problems or doubts, or you find a not worked link,
or only for tell me that you enjoyed this tutorial, write to me.
15 February 2024

|

