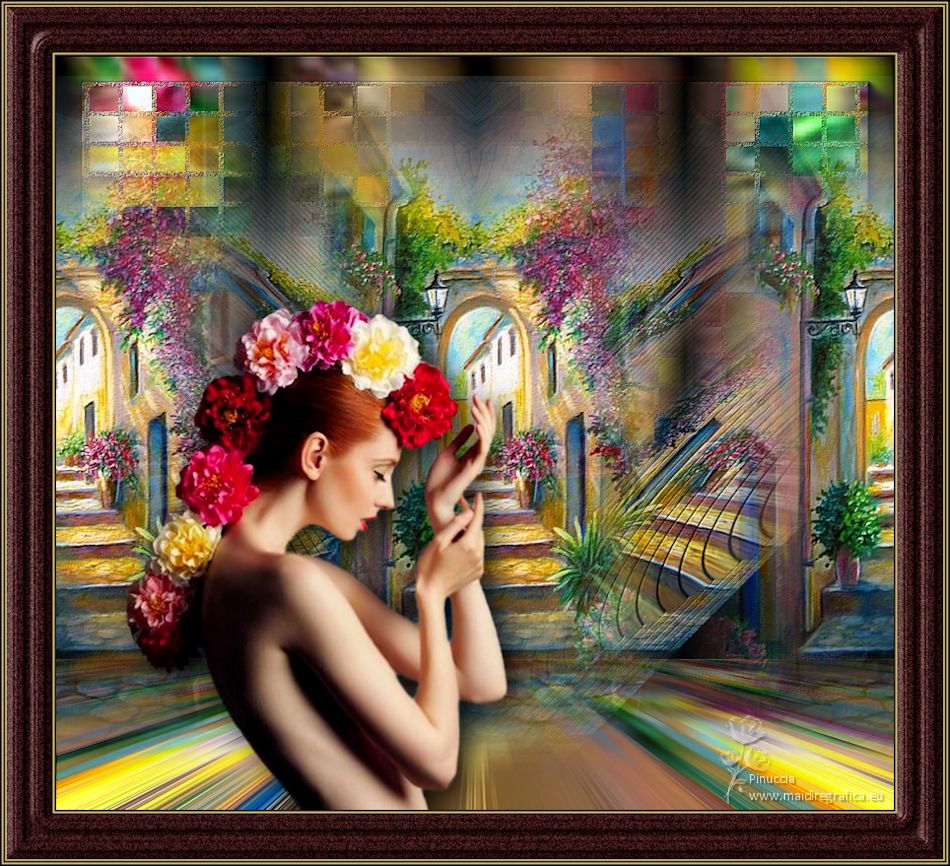
|
TUTORIAL PARAISO


Thanks Luz Cristina for your invitation to translate your tutorials into english

This tutorial, created with PSP9, was translated with Psp2020, but it can also be made using other versions of PSP.
Since version PSP X4, Image>Mirror was replaced with Image>Flip Horizontal,
and Image>Flip with Image>Flip Vertical, there are some variables.
In versions X5 and X6, the functions have been improved by making available the Objects menu.
In the latest version X7 command Image>Mirror and Image>Flip returned, but with new differences.
See my schedule here
 French Translation here French Translation here
 Your versions here Your versions here

For this tutorial, you will need:

Tubes by Luz Cristina .
(The links of the tubemakers here).
*It is forbidden to remove the watermark from the supplied tubes, distribute or modify them,
in order to respect the work of the authors

consult, if necessary, my filter section here
Filters Unlimited 2.0 here
FM Tile Tools - Saturation Emboss here
Mura's Meister - Perspective Tiling here
AAA Frames - Foto Frame here
AP [Lines] - Lines SilverLining here

You can change Blend Modes according to your colors.
In the newest versions of PSP, you don't find the foreground/background gradient (Corel_06_029).
You can use the gradients of the older versions.
The Gradient of CorelX here

1. Open a new transparent image 1000 x 900 pixels.
2. Set your foreground color to #c6b275,
and your background color to #1d0000.
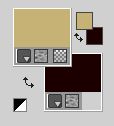
Set your foreground color to a Foreground/Background Gradient, style Linear.
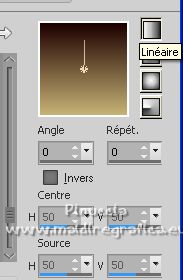
Flood Fill  the transparent image with your Gradient. the transparent image with your Gradient.
3. Selections>Select All.
Open the misted Misted-Luz Cristina 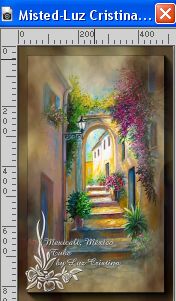
Edit>Copy.
Go back to your work and go to Edit>Paste into Selection.
Selections>Select None.
4. Effects>Image Effects>Seamless Tiling, default settings.

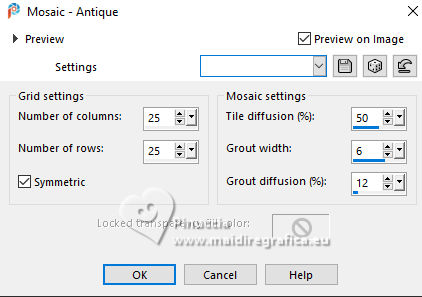
5. Effects>Texture Effects>Mosaic Antique
6. Layers>Duplicate.
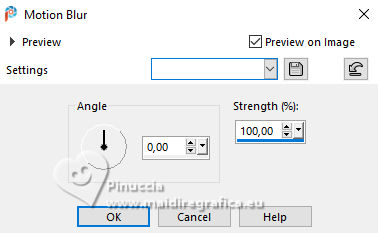
7. Adjust>Blur>Motion Blur - 2 times.
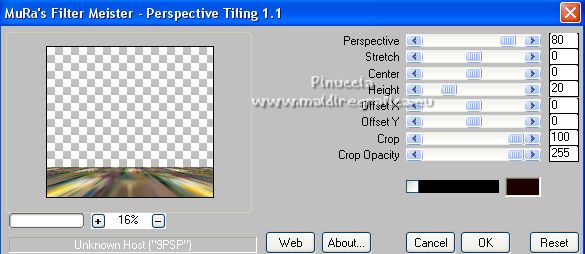
8. Effects>Plugins>Mura's Meister - Perspective Tiling.
9. Activate the layer Raster 1.
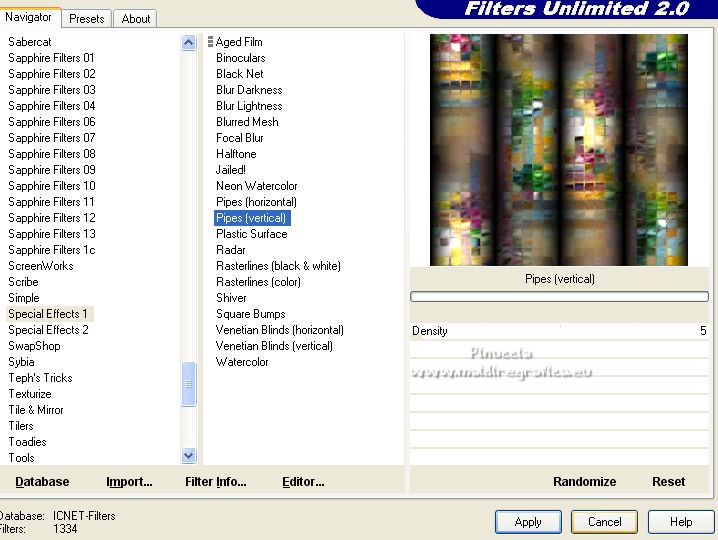
Effects>Plugins>Filters Unlimited 2.0 - Special Effects 1 - Pipes (vertical).
10. Effects>Plugins>AAA Frames - Foto Frame.
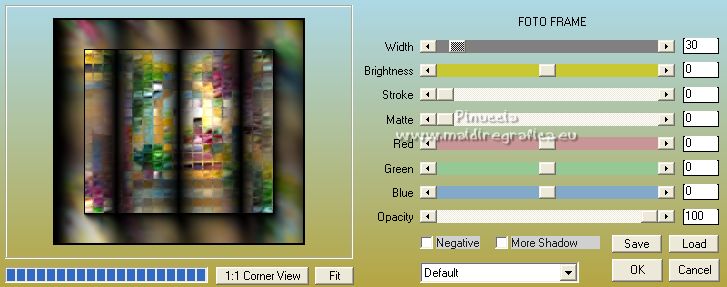
11. Effects>Plugins>FM Tile Tools - Saturation Emboss, default settings.

12. Activate the layer above of the copy.
Repeat Effects>Plugins>FM Tile Tools - Saturation Emboss, default settings.
13. Edit>Paste as new layer (the misted is still in memory).
14. Effects>Image Effects>Seamless Tiling.

15. Layers>Duplicate.
16. Effects>Plugins>AP [Lines] - Lines SilverLining.
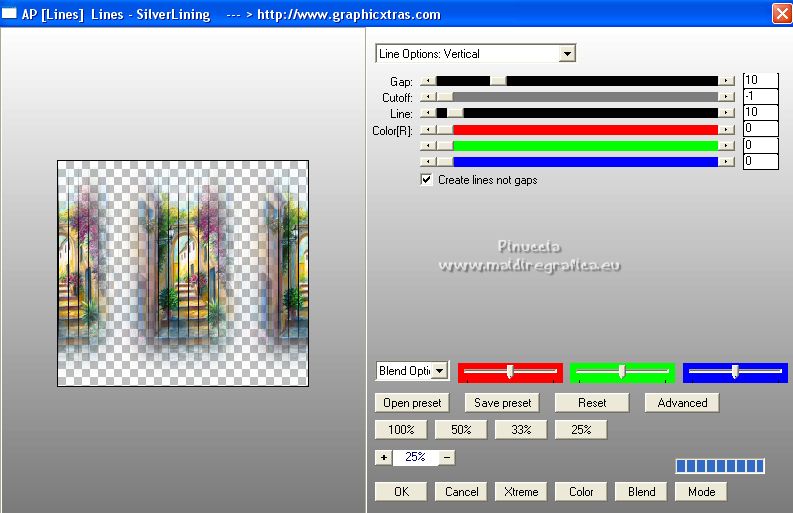
17. Layers>Arrange>Move Down.
18. Effects>Geometric Effects>Spherize.
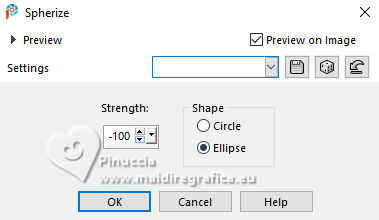
19. Effects>Geometric Effects>Skew.
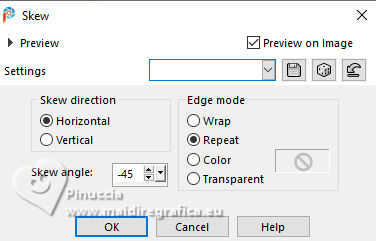
20. Effects>Reflection Effects>Rotating Mirror.

21. Effects>Plugins>FM Tile Tools - Blend Emboss, default settings.

22. Activate your top layer.
Open the woman's tube 7744-Luz Cristina 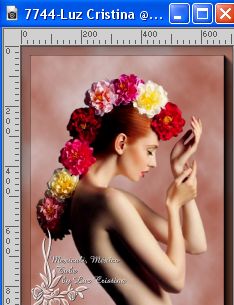
Edit>Copy.
Go back to your work and go to Edit>Paste as new layer.
Place  correctly the tube. correctly the tube.
Effects>3D Effects>Drop Shadow.

23. Image>Add Borders, 2 pixels, symmetric, dark color.
Image>Add Borders, 2 pixels, symmetric, light color.
Image>Add Borders, 55 pixels, symmetric, dark color.
Image>Add Borders, 2 pixels, symmetric, light color.
Image>Add Borders, 2 pixels, symmetric, dark color.
Image>Add Borders, 2 pixels, symmetric, light color.
Image>Add Borders, 2 pixels, symmetric, dark color.
24. Activate your Magic Wand Tool 
and click on the 55 pixels border to select it.
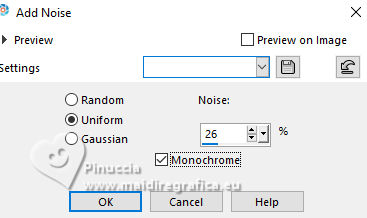
25. Adjust>Add/Remove Noise>Add Noise.
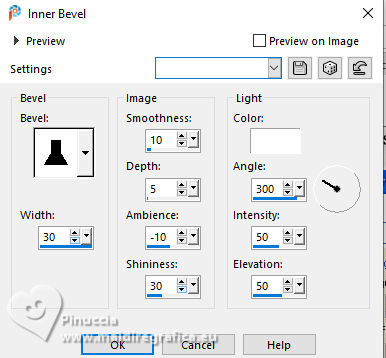
26. Effects>3D Effects>Inner Bevel.
Selections>Select None.
27. Image>Resize, to 85%, resize all layers checked.
If you want, modify your Blend Modes to your liking.
28. Sign your work on a new layer.
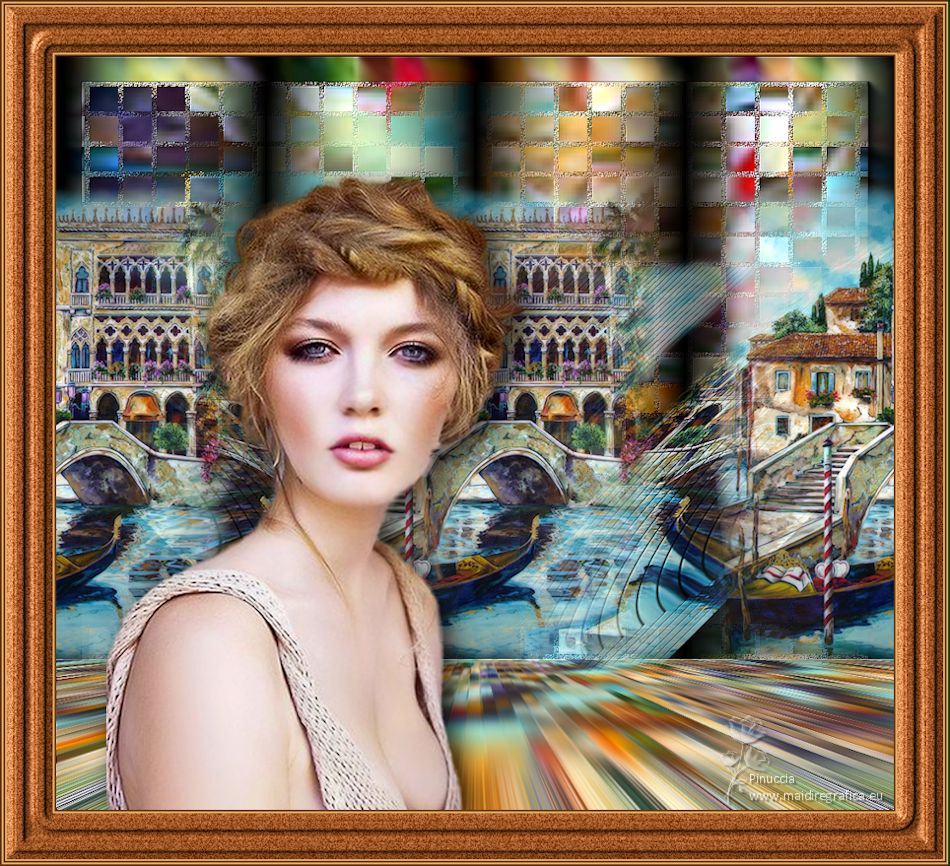
Layers>Merge>Merge All and save as jpg.
Pour les tubes de cette version merci Luz Cristina et DaisyWeb


If you have problems or doubts, or you find a not worked link,
or only for tell me that you enjoyed this tutorial, write to me.
25 March 2025

|

