|
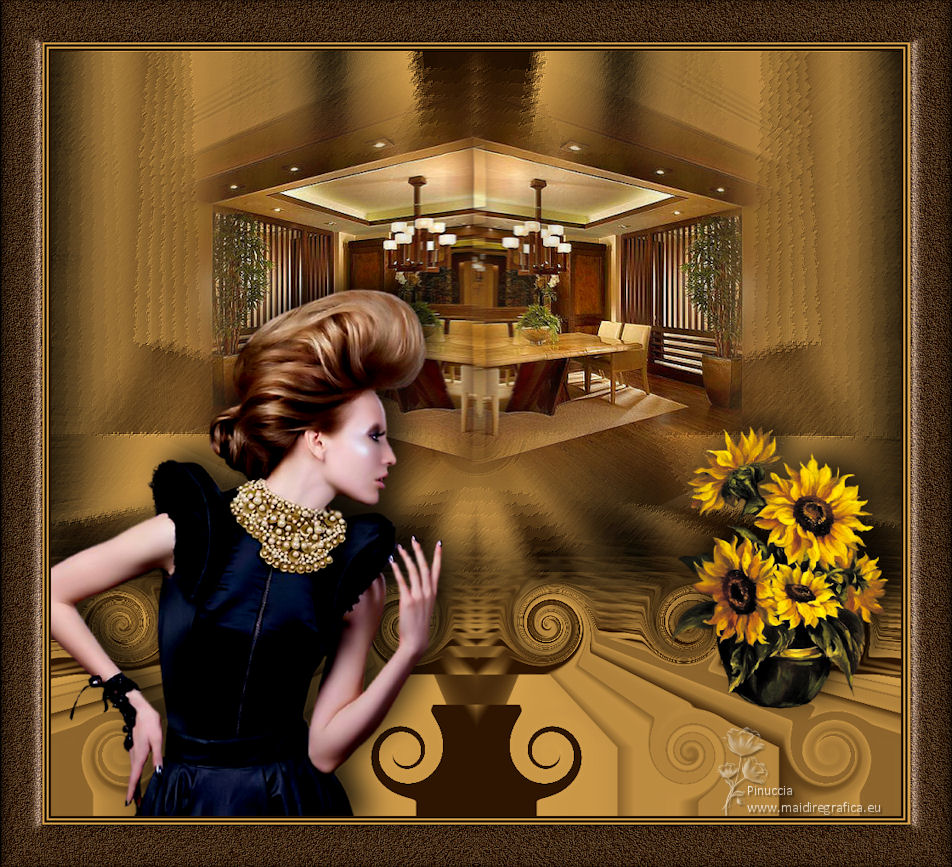
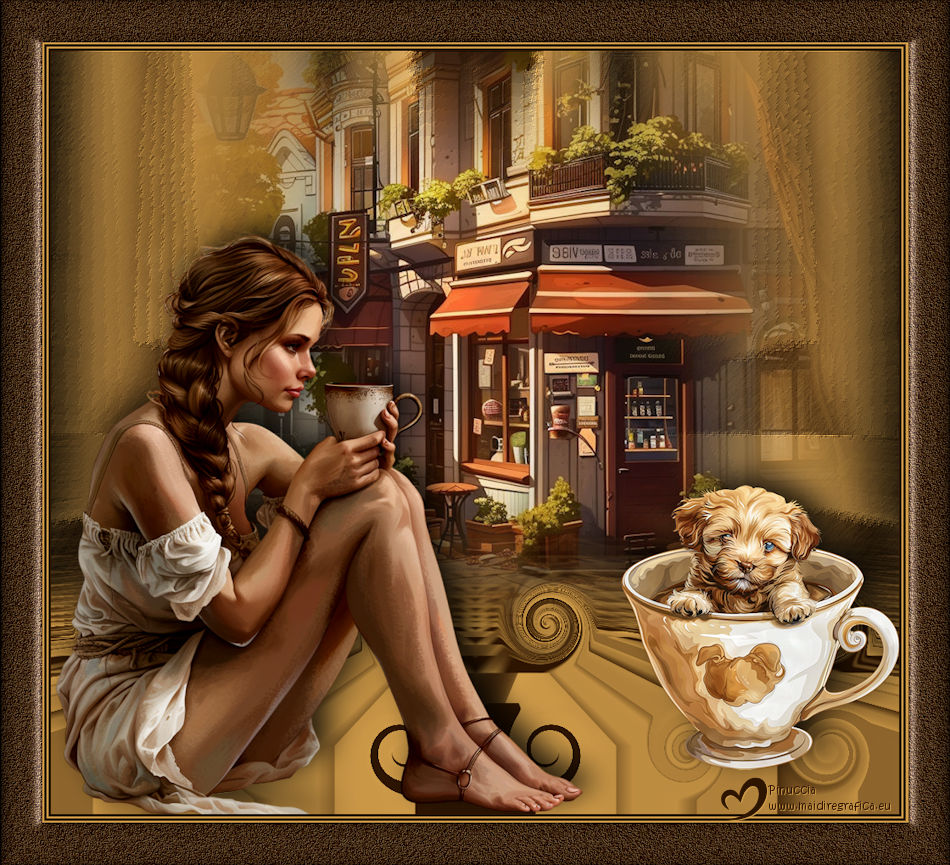
TAG CAPUCHINO


Thanks Luz Cristina for your invitation to translate your tutorials into english

This tutorial, created with PSP9, was translated with PspX9, but it can also be made using other versions of PSP.
Since version PSP X4, Image>Mirror was replaced with Image>Flip Horizontal,
and Image>Flip with Image>Flip Vertical, there are some variables.
In versions X5 and X6, the functions have been improved by making available the Objects menu.
In the latest version X7 command Image>Mirror and Image>Flip returned, but with new differences.
See my schedule here
 French Translation here French Translation here
 Your versions here Your versions here

For this tutorial, you will need:

Tube by Luz Cristina.
(The links of the tubemakers here).

consult, if necessary, my filter section here
Filters Unlimited 2.0 here
Mura's Meister - Perspective Tiling here
Mura's Meister - Copies here
Simple - Diamonds here
Mura's Seamless - Stripe of cylinder here
Brush Strokes - Sprayed Strokes here
Filter Factory Gallery D - Dimensia here
FM Tile Tools - Blend Emboss here
Filters Simple, Mura's Seamless et Factory Gallery can be used alone or imported into Filters Unlimited.
(How do, you see here)
If a plugin supplied appears with this icon  it must necessarily be imported into Unlimited it must necessarily be imported into Unlimited

You can change Blend Modes according to your colors.
In the newest versions of PSP, you don't find the foreground/background gradient (Corel_06_029).
You can use the gradients of the older versions.
The Gradient of CorelX here

Open the mask in PSP and minimize it with the rest of the material.
1. Open a new transparent image 1000 x 900 pixels.
2. Set your foreground color to #d29e4b,
and your background color to #2e1602.

Set your foreground color to a Foreground/Background Gradient, style Linear.
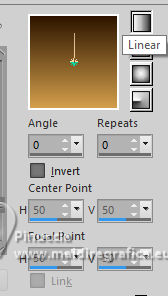
Flood Fill  the transparent image with your Gradient. the transparent image with your Gradient.
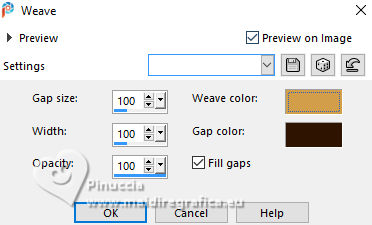
3. Effects>Texture Effects>Weave
weave color: foreground color
gap color: background color
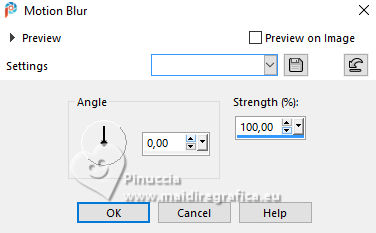
4. Adjust>Blur>Motion Blur.
5. Effects>Plugins>Simple - Diamonds.
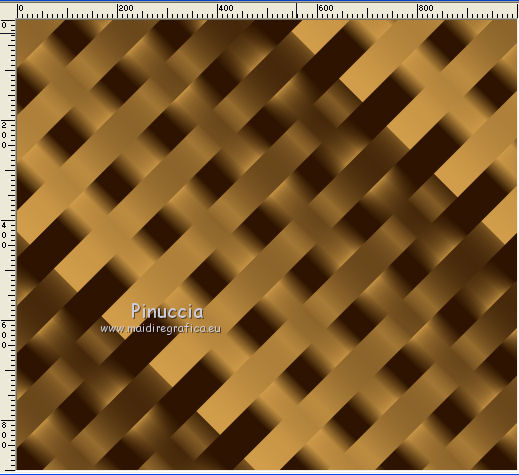
6. Effects>Geometric Effects>Skew.
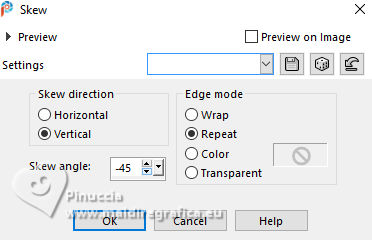
7. Image>Mirror>Mirror Horizontal.
8. Effects>Reflection Effects>Rotating Mirror.

9. Layers>Duplicate.
Image>Mirror>Mirror Vertical (Image>Flip).
10. Effects>Plugins>Mura's Meister - Perspective Tiling.
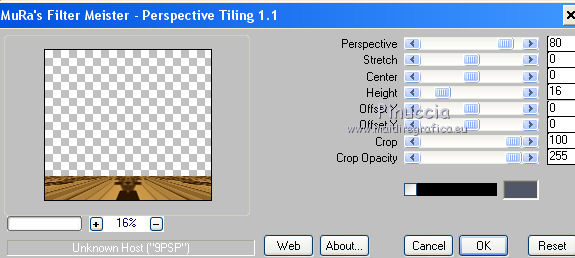
11. Effects>Image Effects>Offset.
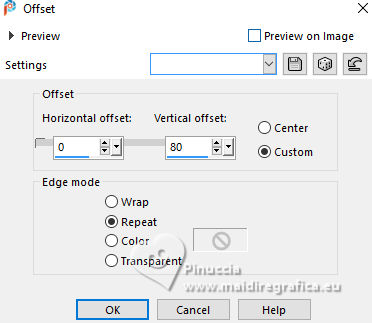
12. Effects>Plugins>Mura's Meister - Copies.
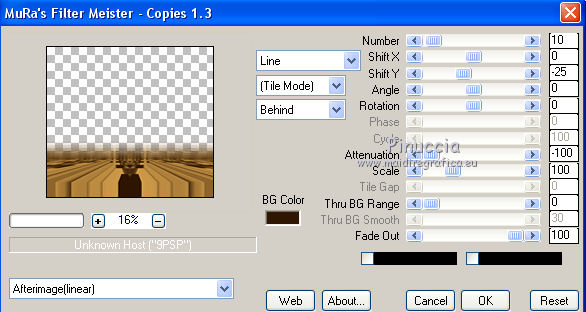
13. Effects>Distortion Effects de distorsion>Spirales.
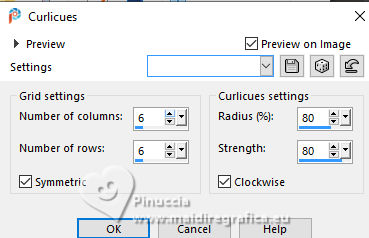
14. Effects>Reflection Effects>Rotating Mirror.

15. Effects>3D Effects>Drop Shadow, color black.
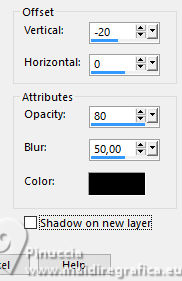
16. Activate the layer Raster 1.
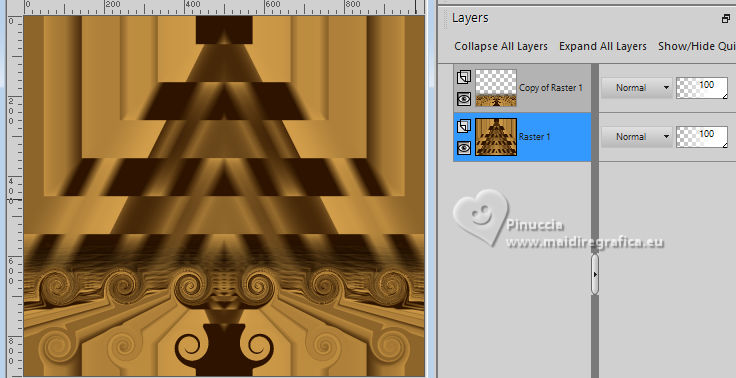
Effects>Plugins>Mura's Seamless - Stripe of cylinder.
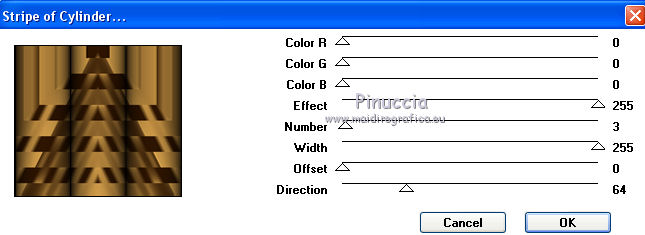
17. Effects>Plugins>Brush Strokes - Sprayed Strokes.
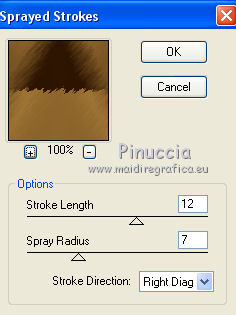
18. Effects>Plugins>Filters Unlimited 2.0 - Filter Factory Gallery D - Dimensia.
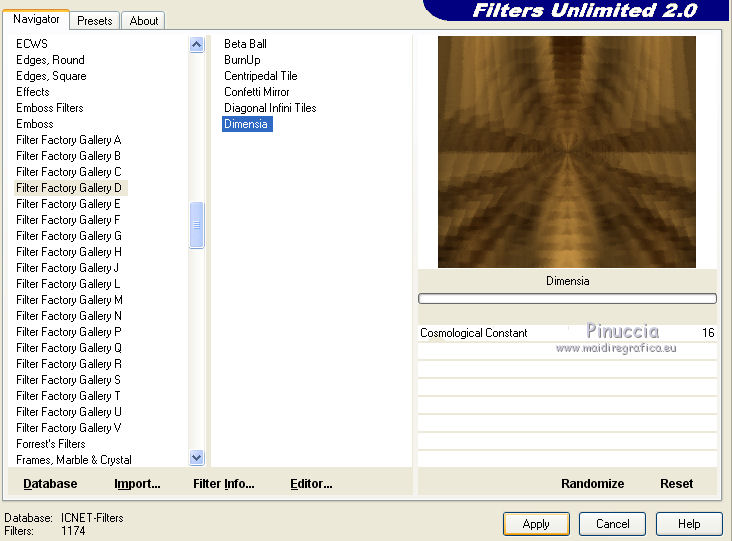
19. Effects>Plugins>FM Tile Tools - Blend Emboss.

20. Adjust>Brightness and Contrast>Clarify

In newer versions of PSP, you no longer find this effect.
You can use another effect from the Adjust menu or skip this step.
For my translation I used: Adjust>Hue and Saturation>Vibrancy
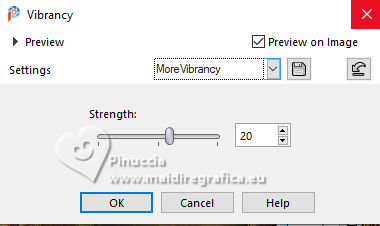
21. Adjust>Sharpness>Sharpen (optional).
22. Open the misted agCapuMisted 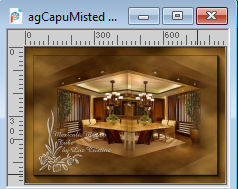
Edit>Copy.
Go back to your work and go to Edit>Paste as new layer.
Move  the tube a little higher. the tube a little higher.
23. Open your woman's tube 6831-Luz Cristina 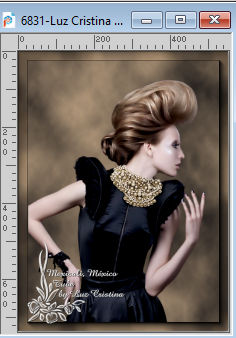
Edit>Copy.
Go back to your work and go to Edit>Paste as new layer.
Layers>Arrange>Bring to Top.
Move  the tube at the bottom left. the tube at the bottom left.
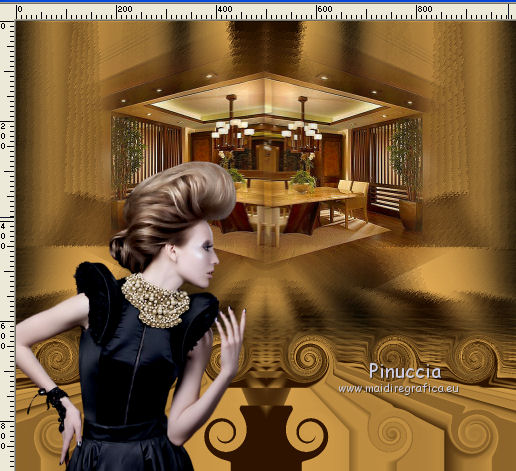
24. The woman is very pale; we put a little color on her skin:
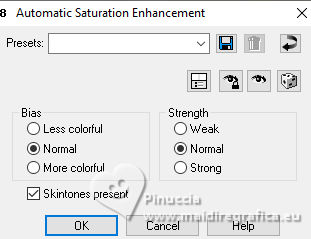
Adjust>Hue and Saturation>Automatic Saturation Enhancement.
***
You can find this command up to Jasc Paint Shop Pro 9.
In later versions, you can find the command this way:
View>Customize
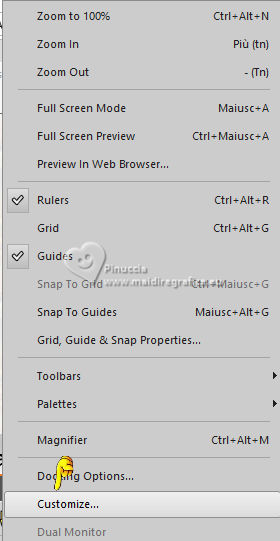
You can select Adjust, but selecting All Commands is easier,
because the commands are in alphabetical order.
Search for Automatic Saturation Enhancement
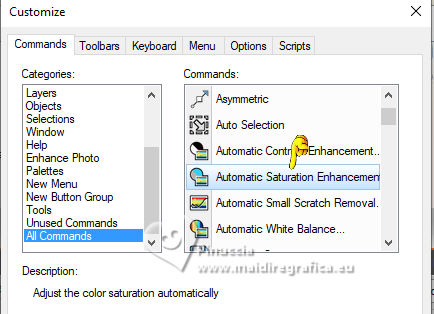
Hold down the left mouse button and drag the text to the toolbar.
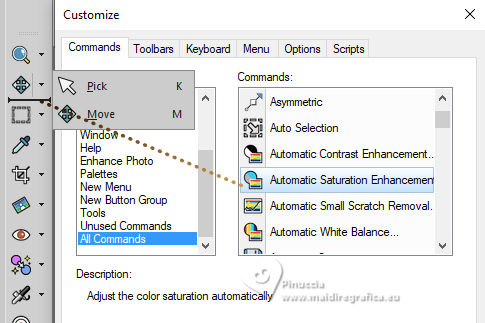
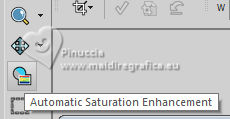
And here is the command for future uses
***
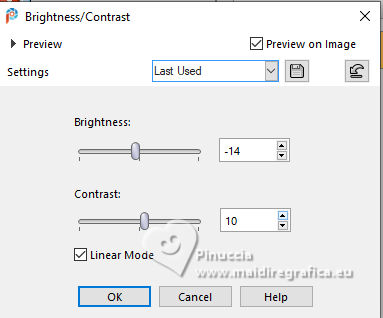
25. Adjust>Brightness and Contrast>Brightness and Contrast.
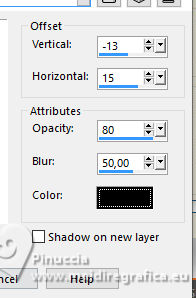
26. Effects>3D Effects>Drop Shadow.
27. Open the flowers tube 5893-luzcristina 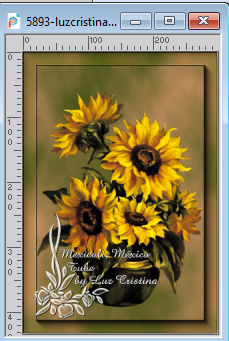
Edit>Copy.
Go back to your work and go to Edit>Paste as new layer.
Move  the tube to the right. the tube to the right.
Effects>3D Effects>Drop Shadow, same settings.
28. Image>Add Borders, 3 pixels, symmetric, dark color.
Image>Add Borders, 2 pixels, symmetric, light color.
Image>Add Borders, 3 pixels, symmetric, dark color.
Image>Add Borders, 2 pixels, symmetric, light color.
Image>Add Borders, 50 pixels, symmetric, dark color.
Activate your Magic Wand Tool 
and click in the last border to select it.
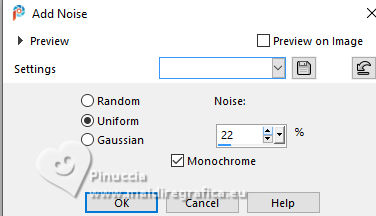
Adjust>Add/Remove Noise>Add Noise.
29. Effects>Plugins>FM Tile Tools - Blend Emboss, default settings.

30. Effects>3D Effects>Inner Bevel.
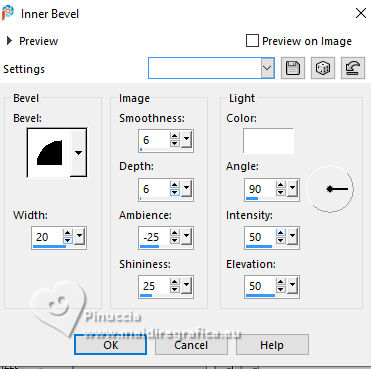
31. Effects>Reflection Effects>Rotating Mirror.

Selections>Select None.
32. Image>Resize, 85%, resize all layers checked.
Sign your work on a new layer.
Layers>Merge>Merge All and save as jpg.
The tubes of this version are by Blaque Heart Designz. Thanks

If you have problems or doubts, or you find a not worked link,
or only for tell me that you enjoyed this tutorial, write to me.
19 May 2025

|

