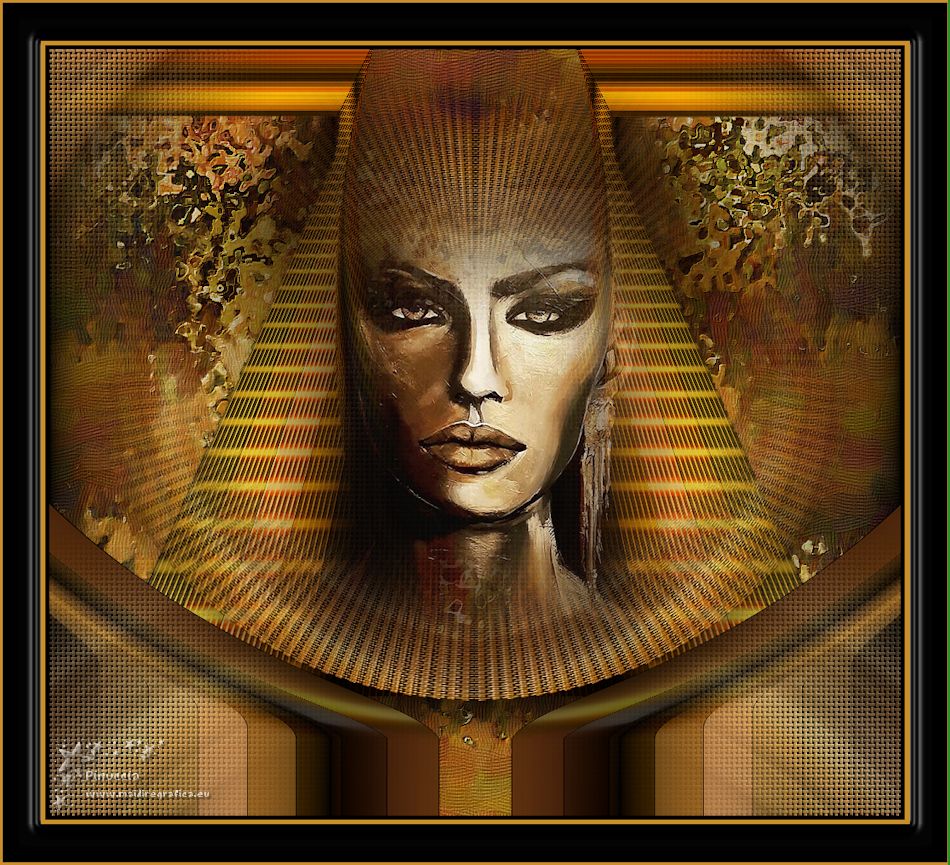
|
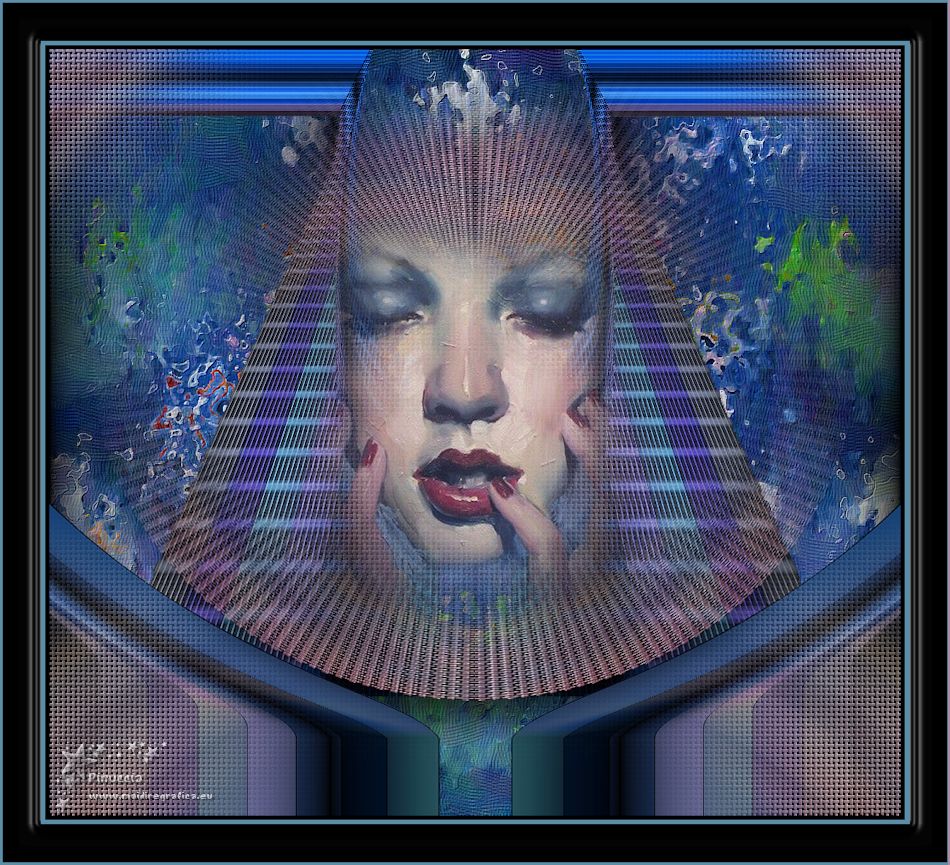
TOP ANNUNNAKI


Thanks Luz Cristina for your invitation to translate your tutorials into english

This tutorial, created with PSP2022, was translated with PspX7, but it can also be made using other versions of PSP.
Since version PSP X4, Image>Mirror was replaced with Image>Flip Horizontal,
and Image>Flip with Image>Flip Vertical, there are some variables.
In versions X5 and X6, the functions have been improved by making available the Objects menu.
In the latest version X7 command Image>Mirror and Image>Flip returned, but with new differences.
See my schedule here
 French Translation here French Translation here
 Your versions here Your versions here

For this tutorial, you will need:

Thanks for the tube Luz Cristina.
(The links of the tubemakers here).

consult, if necessary, my filter section here
Filters Unlimited 2.0 here
Mura's Seamless - Stripe of Cylinder here
FM Tile Tools - Saturation Emboss, Blend Emboss here
Mehdi - Melt 1.1 here
Mehdi 2 - Flat Median here
Virtual Painter 4 here
Toadies - Plain Mosaic Blur here
Filters Mura's Seamless and Toadies can be used alone or imported into Filters Unlimited.
(How do, you see here)
If a plugin supplied appears with this icon  it must necessarily be imported into Unlimited it must necessarily be imported into Unlimited

You can change Blend Modes according to your colors.

1. Open a new transparent image 1000 x 900 pixels.
2. Selections>Select All.
Open the jpg image pAnunimagenjpg 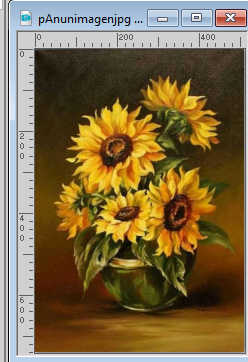
Edit>Copy.
Go back to your work and go to Edit>Paste into Selection.
Selections>Select None.
3. Effets>Effet d'image>Mosaïque sans jointures, default settings.

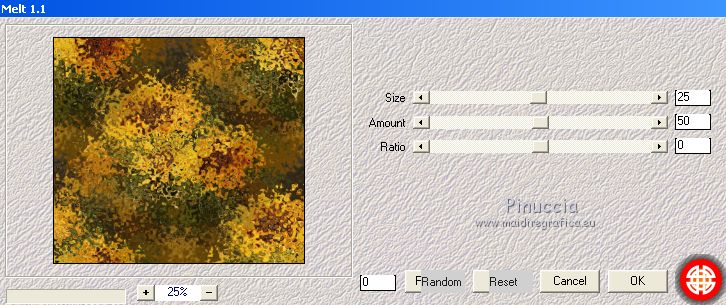
4. Effects>Plugins>Mehdi - Melt 1.1, default settings.
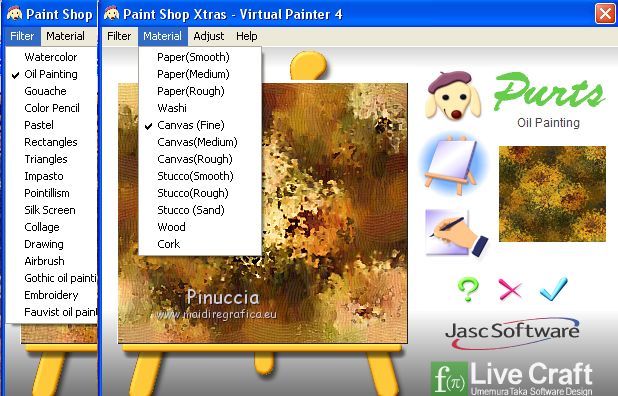
5. Effects>Plugins>Virtual Painter 4 - Virtual Painter 4
Filter: Oil painting - Material: Canvas Fine
6. Effects>Plugins>FM Tile Tools - Blend Emboss, default settings.

7. Effects>Plugins>Mura's Seamless - Stripe of Cylinder, default settings.
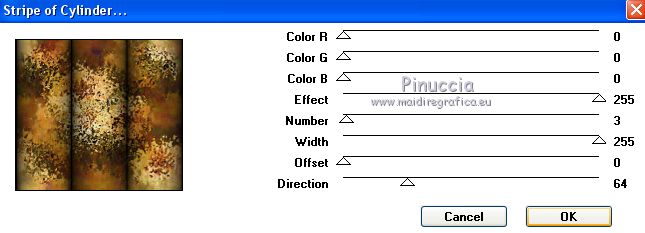
8. Layers>Duplicate.
Effects>Plugins>Toadies - Plain Mosaic Blur

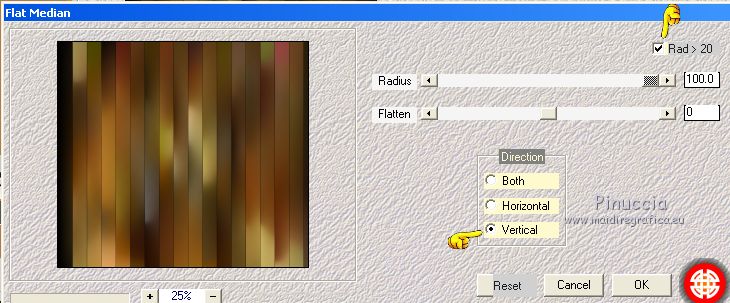
9. Effects>Plugins>Mehdi 2 - Flat Median.
10. Effects>Reflection Effects>Rotating Mirror.

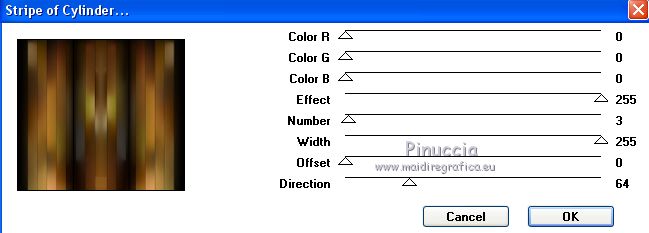
11. Effects>Plugins>Mura's Seamless - Stripe of Cylinder, same settings.
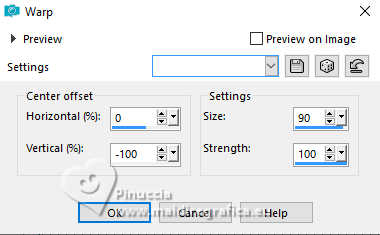
12. Effects>Distortion Effects>Warp.
13. Activate your Magic Wand Tool 
and click in the center of the figure to select it.
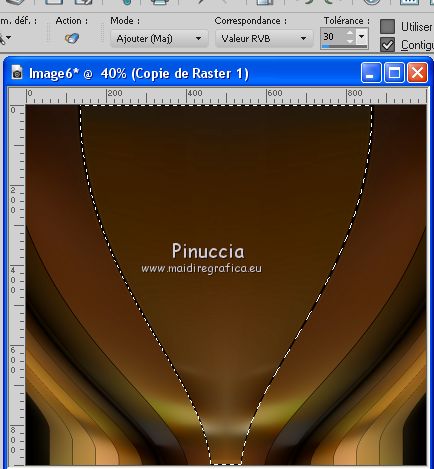
adjust the tolerance to your liking
(I did 30, but it depends on the image used and the colors;
For my second version, I lowered it to 10)
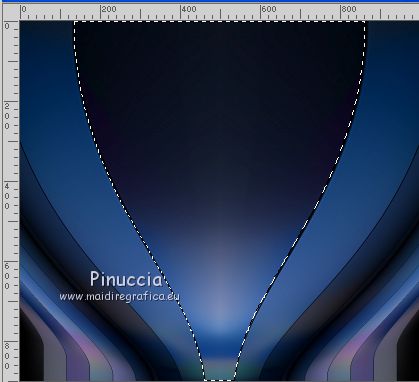
Press CANC on the keyboard 

Selections>Select None.
14. Effects>Distortion Effects>Warp, same settings.

15. Effects>Image Effects>Offset.
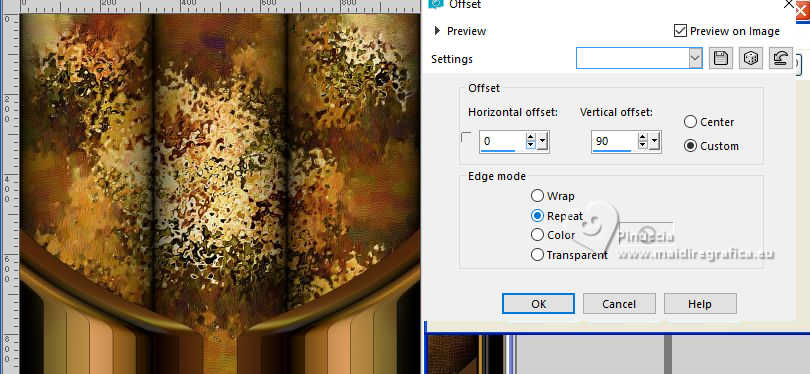
16. Layers>Duplicate.
Effects>Artistic Effects>Halftone.
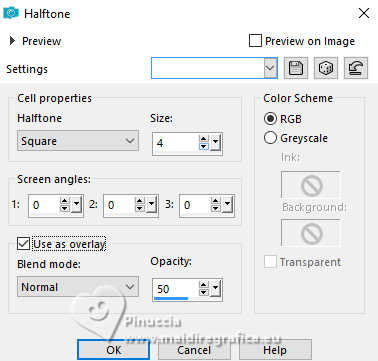
17. Effects>Geometric Effects>Spherize.
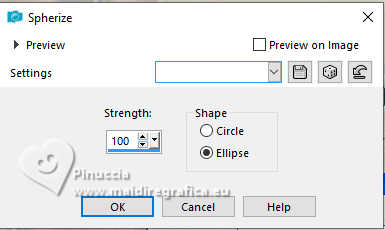
18. Image>Mirror>Mirror Vertical (Image>Flip).
19. Effects>Geometric Effects>Perspective vertical.
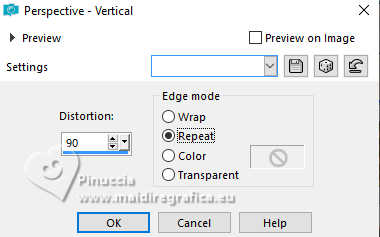
20. Activate again your Magic Wand Tool 
and click in the black zones to select them.
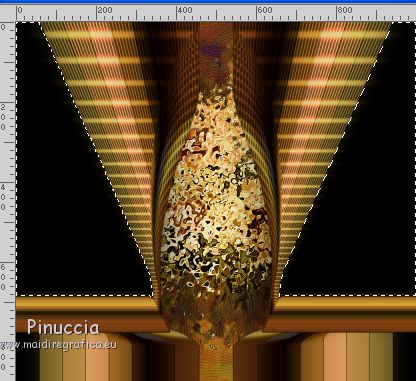
Press CANC on the keyboard.
Selections>Select None.
21. Image>Mirror>Mirror Vertical (Image>Flip).
Layers>Arrange>Move Down.
22. Effects>Image Effects>Offset
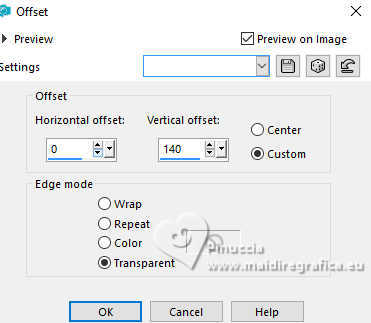
23. Effects>Plugins>FM Tile Tools - Saturation Emboss, default settings.

24. Ouvrir the tube 5443-luzcristina 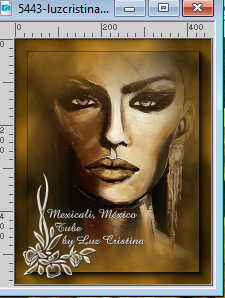
Edit>Copy.
Go back to your work and go to Edit>Paste as new layer.
Layers>Arrange>Bring to Top.
25. Layers>Duplicate.
26. Adjust>Blur>Radial Blur.
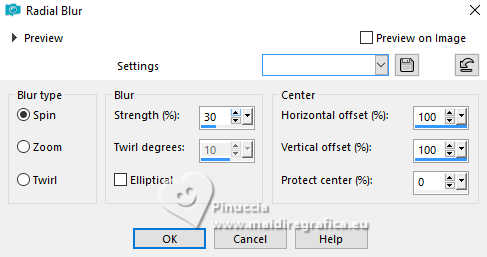
27. Effects>Image Effects>Seamless Tiling, default settings.

28. Effects>Texture Effects>Weave
both colors: black
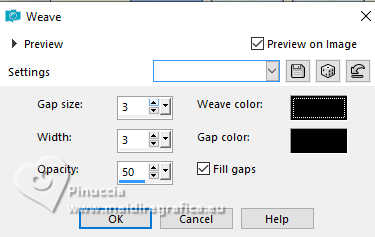
29. Effects>Plugins>FM Tile Tools - Saturation Emboss, default settings.

30. Layers>Arrange>Move Down.
31. Effects>Reflection Effects>Rotating Mirror, same settings.

32. Layers>Duplicate.
33. Effects>Distortion Effects>Polar Coordinates.
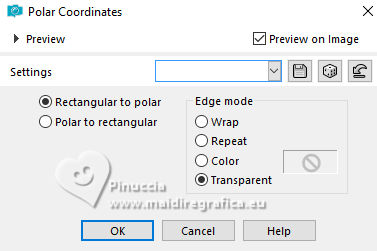
34. Image>Resize, to 90%, resize all layer not checked.
35. Image>Mirror>Mirror Vertical (Image>Flip).
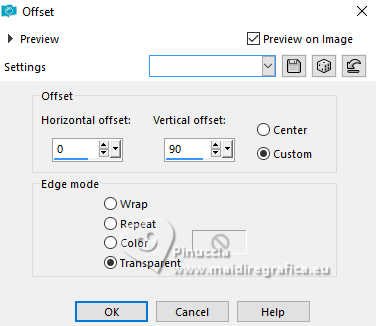
36. Effects>Image Effects>Offset.
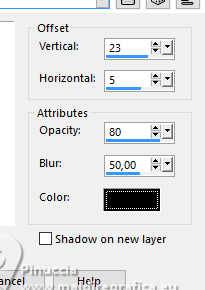
37. Effects>3D Effects>Drop Shadow.
38. Effects>Plugins>FM Tile Tools - Saturation Emboss, default settings.

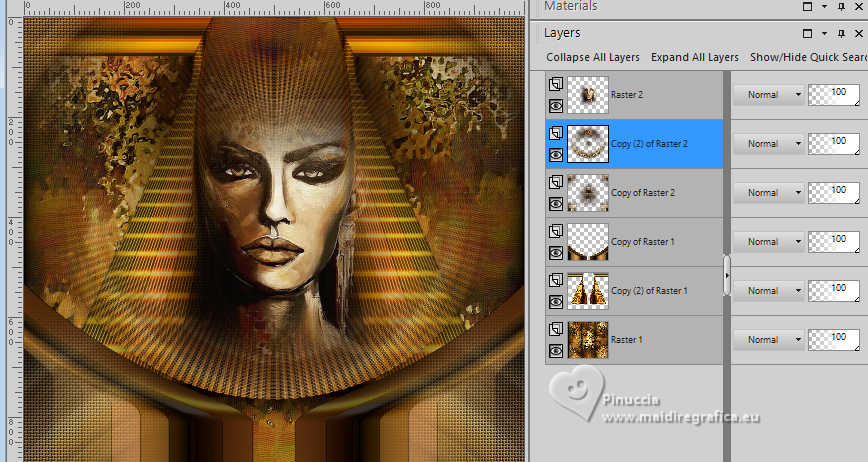
39. Apply a Drop Shadow on the layers
and change the Blend Modes to your liking.
I changed nothing.
40. Image>Add Borders, 5 pixels, symmetric, color black.
Image>Add Borders, 5 pixels, symmetric, color #ca8f2b.
Image>Add Borders, 45 pixels, symmetric, color black.
Activate your Magic Wand Tool  , tolerance 0. , tolerance 0.
and click in the last border to select it.
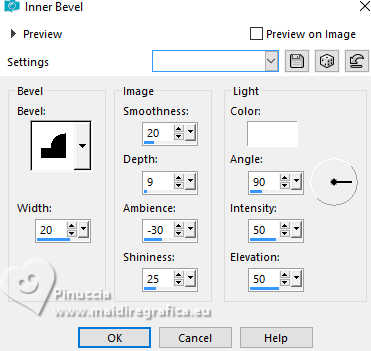
41. Effects>3D Effects>Inner Bevel.
42. Effects>Reflection Effects>Rotating Mirror, same settings.

Selections>Select None.
43. Image>Add Borders, 3 pixels, symmetric, color #ca8f2b.
44. Image>Resize, to 84%, resize all layer checked.
45. Sign your work and save as jpg.


If you have problems or doubts, or you find a not worked link,
or only for tell me that you enjoyed this tutorial, write to me.
20 July 2025
|

